Old to New: Long Sleeve Top Refashion

I have been collecting long sleeve shirts for a long time hoping to make this video. Whether by rifling through my own closet, or finding some great pieces at thrift stores, this video will feature all the pieces I’ve collected. Join me so I can show you how I refashion shirts.
Tools and materials:
- Sewing machine
- Fabric scissors
- Bias binding
- Clippers
- Thread (for the machine)
- Drawstrings or shoelaces
- Needle
- Thread
- Ribbon
- Clear elastic
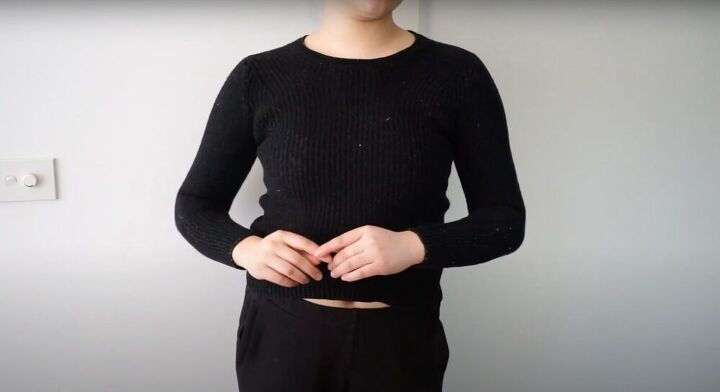
Bring it back
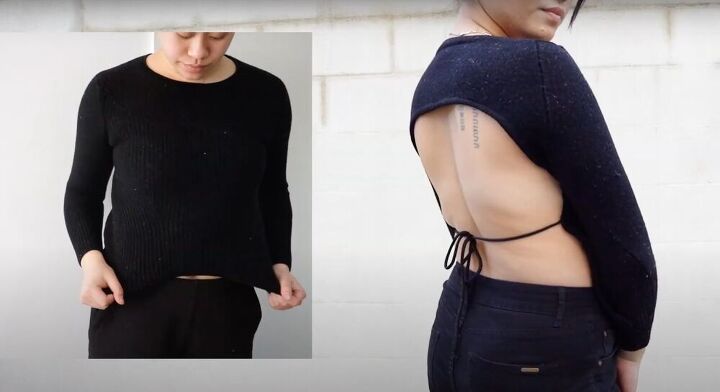
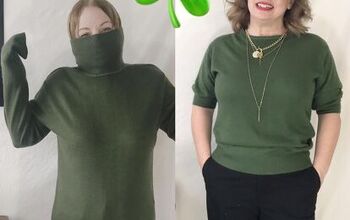
I think anyone who has ever owned a knitted sweater knows the common issue that occurs - they shrink! Your belly is showing, the arms are too tight and the shirt no longer resembles the cute piece you purchased.
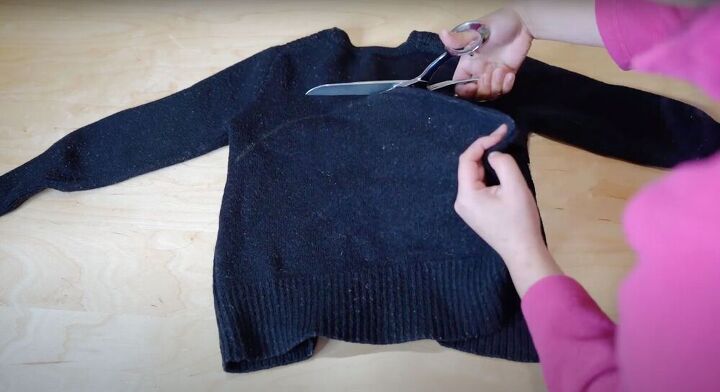
For this sweater, I’m hoping to make a backless design. To do this, simply draw in a new design line and then cut the back off. Add some bias binding to the raw edges. Next, create a cut-out design to apply to both front shoulders (I went with an almond shape). Draw your design shape onto a paper, pin the paper to your sweater and use it as a pattern to trace and cut your shoulders. Finish with more bias binding and by hand sewing string to the side of the backs. Make sure the strings are sewed evenly on each side and then tie a bow!
Bunch the sides
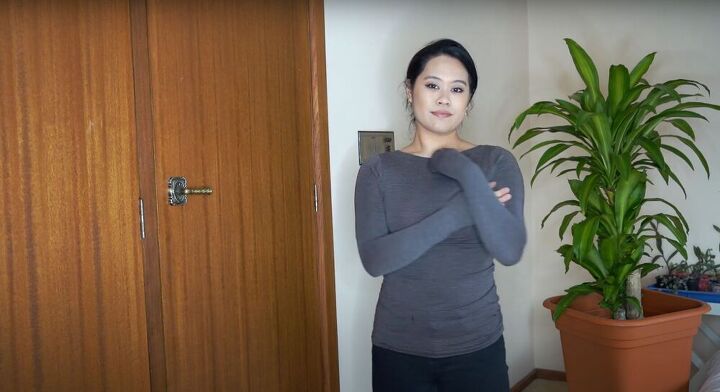
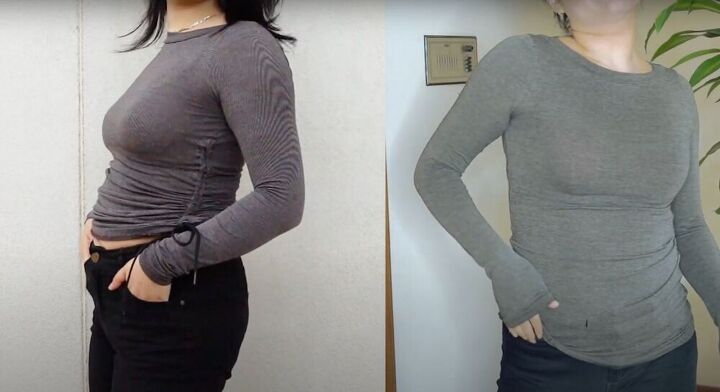
The second top I’m working with is one I stole from my mother’s closet. It’s fitted, a great color, and easy to match! That said, it is extra-long and something needs to change.

Turn the top inside out and then grab your ribbon and stretch it from the bottom corner until the bust area. (Keep in mind, remember to fold the bottom of the ribbon to account for hemming). Cut out two pieces of ribbon that are that length. Pin the ribbon down, over the side seam so that the center of the ribbon is directly over the middle of the ribbon. Sew the ribbon down in three lines, one on each side and one down the middle. This will create two tunnels. Once that’s done feed your shoelaces through the tunnels using a small safety pin. Hand sew the laces to the top. Repeat on the other side.

Crop it!
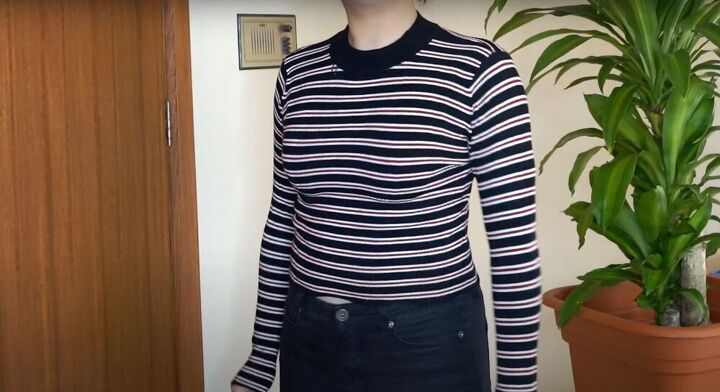
Here we have another top I stole from my mother. It’s jersey material and super comfortable. The sleeves have buttons on the side, adding some fun extra detail, and to top it all off, the shirt is a turtle neck!
To update this piece, I started by drawing an asymmetrical line between my chest and neck. This is in order to create a new neckline. Do this while wearing the shirt and then take it off to connect the line to the back. Fix up your line, make sure it’s straight and then cut it out. Once that’s done, grab some scissors and give the top a little crop (to make the shirt a little sexier). Next, sew down all the raw edges. To do this, double fold the hem about two inches and sew.
Cut it out
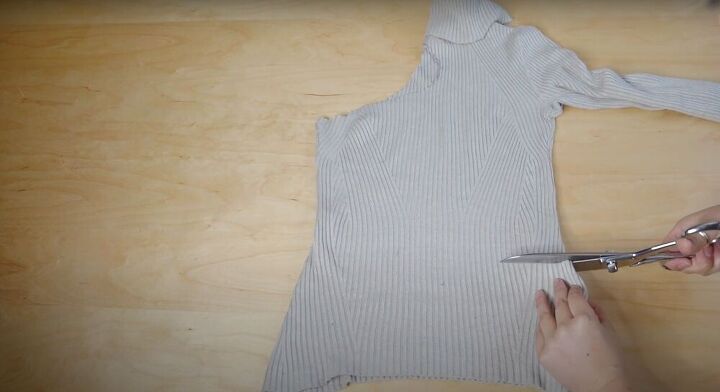
This one is just a basic long-sleeved tee. It’s a pretty plain top, basic even, so I want to do something to liven it up. To do so I’m going to turn the top into a one shoulder and then add a cutout.
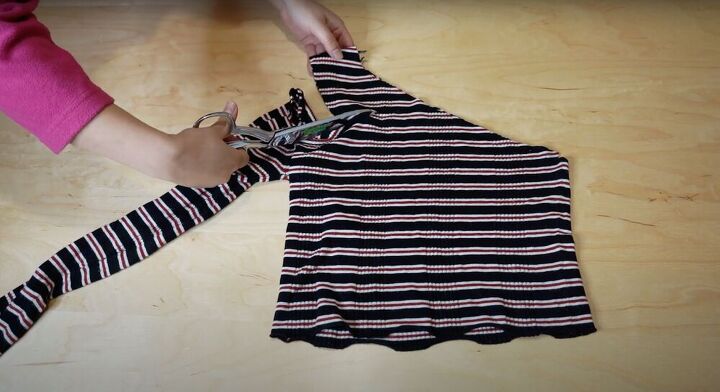
Cut from the bottom of one armpit to the edges of the neckline on the opposite side. Next, make your cut out on the remaining shoulder. Once that’s done, cut off the bottom of the shirt to crop it a bit and give it a bit of an edgier look. Sew down the raw edges. Finally, use a clear elastic to connect the sleeve and the neckline (where the cut out was). This will keep the sleeve in place. Hand sew it down and you’re done!


This DIY shirt refashion teaches you how to take old pieces and bring them new life. Whether it’s a piece from the back of your closet or something in a thrift store that you believe has potential, these easy changes can bring your closet a whole new feel!
The author may collect a small share of sales from the links on this page.


Comments
Join the conversation