T-shirt Weaving Tutorial: Create a Cute Dragonfly and Butterfly Top

Grab a t-shirt and some scissors and follow along with this tutorial for making a stunning butterfly and dragon pattern t-shirt.
I’ll show you the t-shirt cutting and weaving techniques, so you can’t go wrong!
Are you ready to be amazed? Let’s start!
Tools and materials:
- T-shirt
- Scissors
- Cardboard

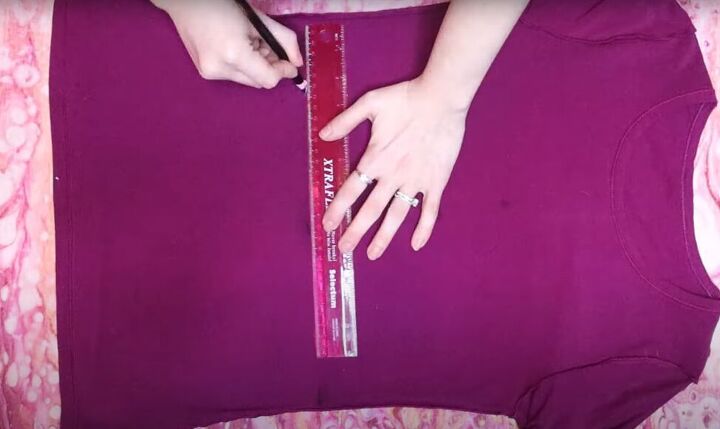
1. Mark the sizing
With your t-shirt inside-out, mark where the bottom of your pattern should be.
Consider whether you might want to tuck in your shirt, when determining the pattern placement.

Mark the lowest point of your neckline, and the top point of your pattern.
2. Trim the t-shirt
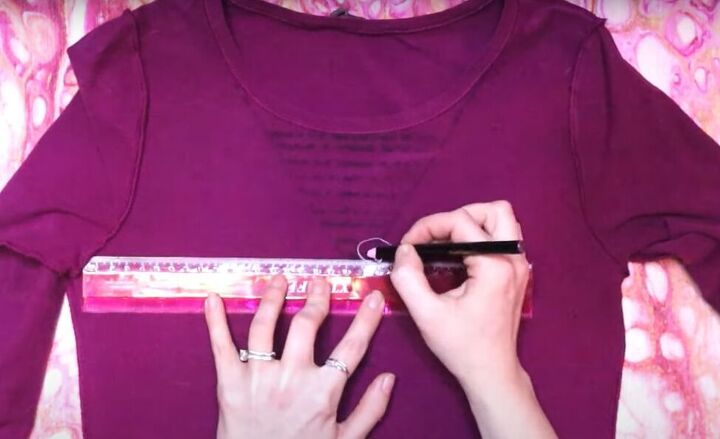
Lay your t-shirt flat and draw a horizontal line where you want the bottom of your pattern to be.
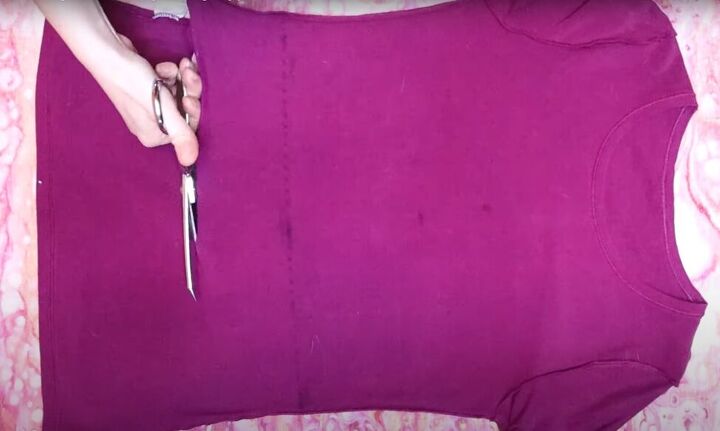
Trim your t-shirt below the pattern to leave enough fabric for tucking it in.
From your leftover fabric, cut a thin strip that you will use later.
3. Draw the neckline
Draw diagonal lines from the bottom neckline mark to the top of the collar.
Draw horizontal lines across the neckline, half an inch apart.
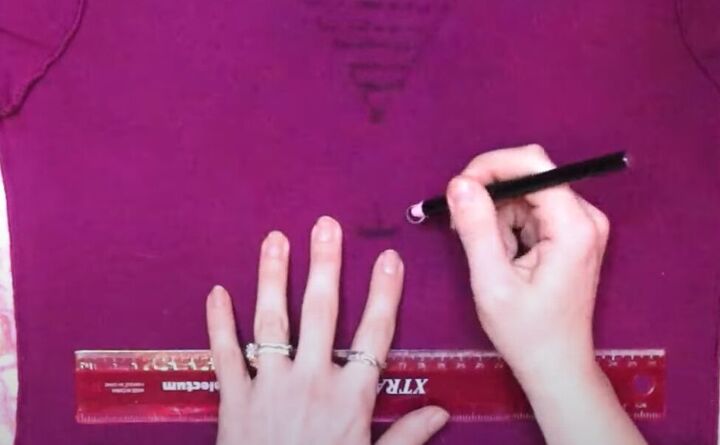
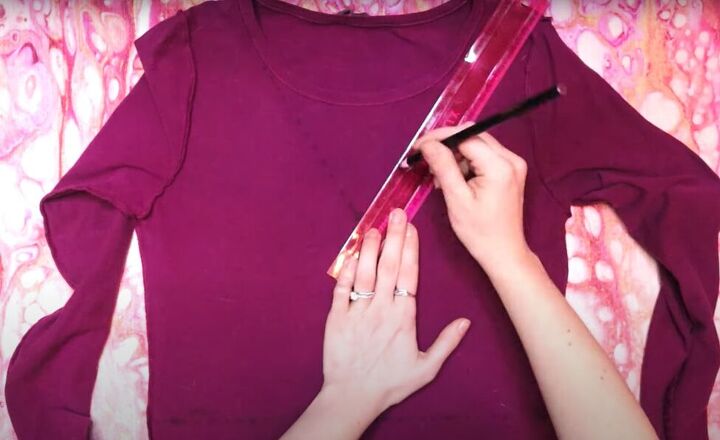
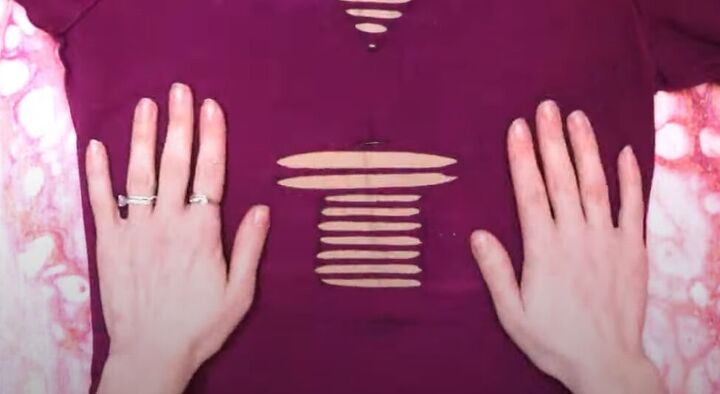
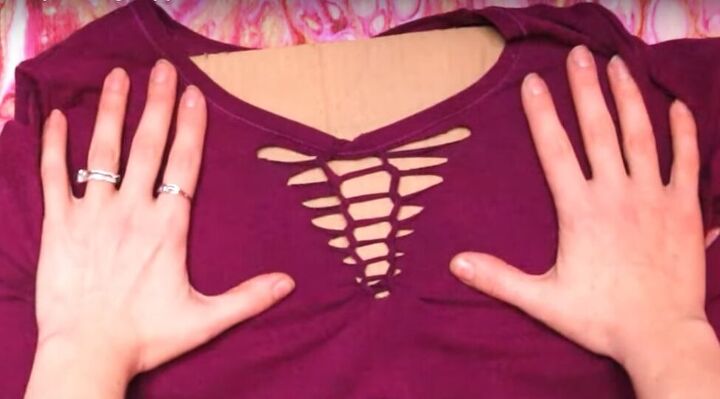
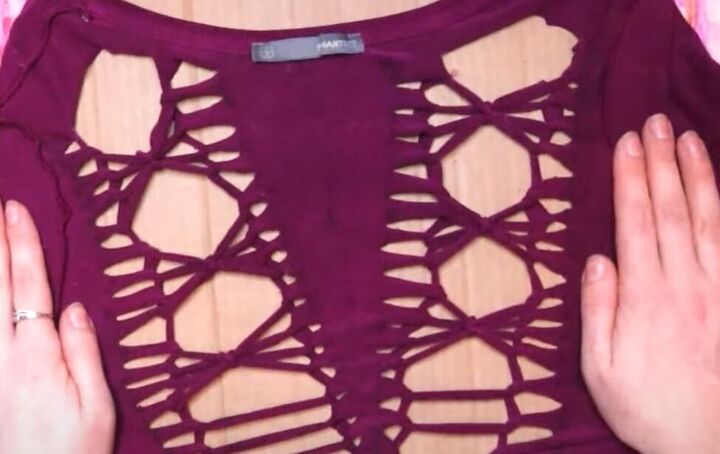
4. Mark the dragonfly
Extend the mark you made for the top of your pattern to a half-inch wide horizontal line.
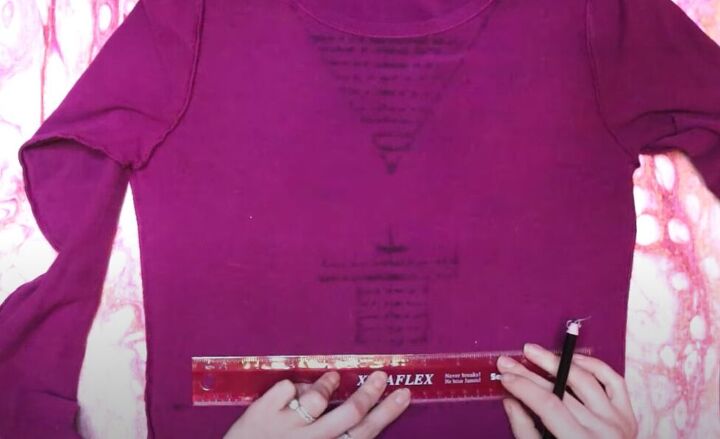
Draw centered horizontal lines below that mark, at half-inch intervals.
Make the top two lines 4 inches wide, and the rest of them 2 inches wide. Stop about 1½ inches above the bottom pattern mark.
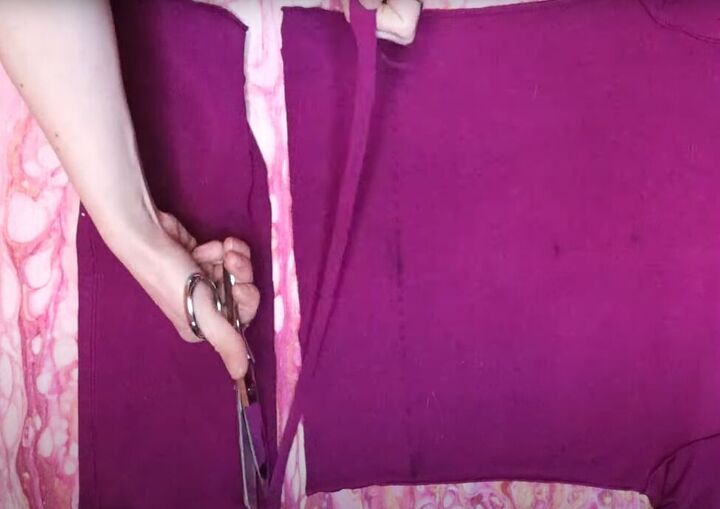
5. Cut the pattern
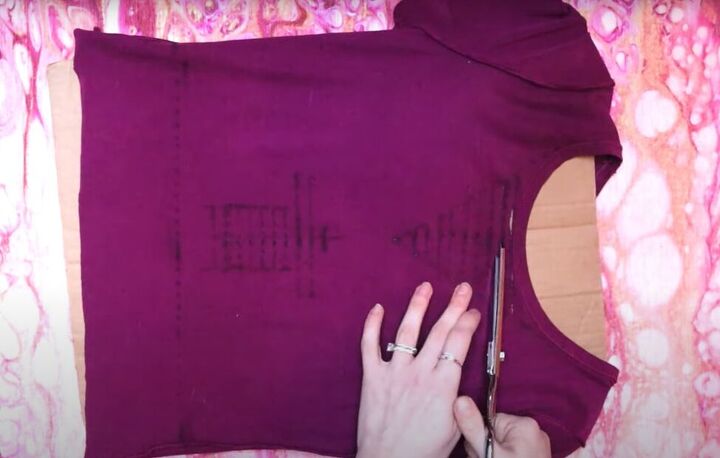
Put cardboard inside your shirt to make cutting easier.
Remember to do this every time you are going to cut the fabric! Cut along all the horizontal lines in your neckline.
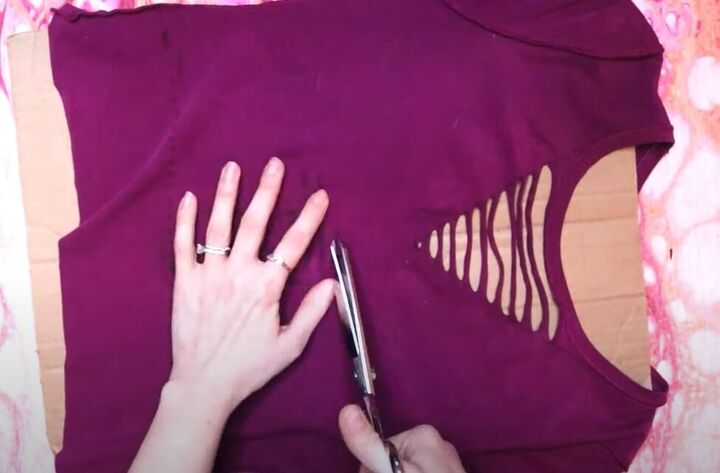
Cut a very small hole at the bottom point of your neckline and then give the t-shirt a little stretch.
Cut all your dragonfly lines, ending with a small hole at the bottom of the pattern, and give the fabric a stretch again.
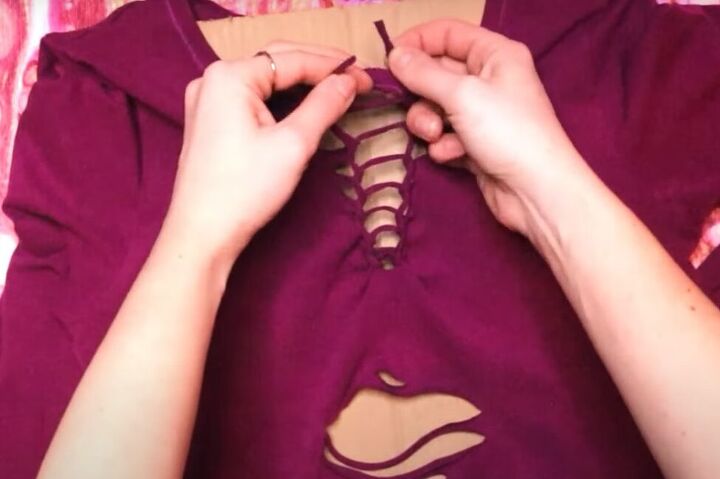
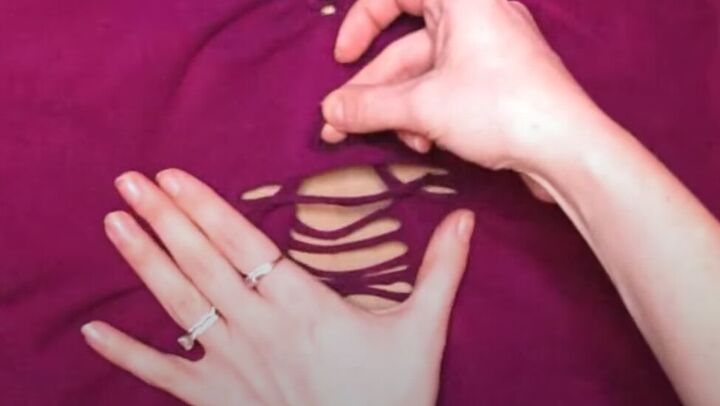
6. Weave the neckline
Turn your t-shirt right-side out, and start weaving at the bottom of the neckline.
Grab the bottom strip and pull it under and up through the bottom hole, creating a loop.
Pull the next strip under and up through the loop.
Repeat pulling each strip under and up through the previous loop.
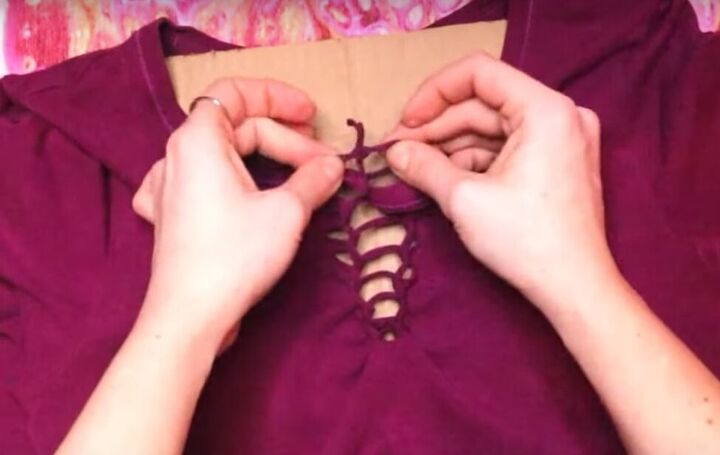
Cut the final loop in the middle, bring the ends under the collar, and tie the ends back together on the inside of the shirt.
Trim the excess fabric from the ends of the tie and your neckline weaving is done.

7. Weave the dragonfly
For the dragonfly pattern, start weaving at the top and work your way down. This will be a different weaving technique from the neckline.
Start with the second 4-inch strip.
Pull it under the 4-inch strip above it, and then up through the very top hole of the pattern, creating a loop.
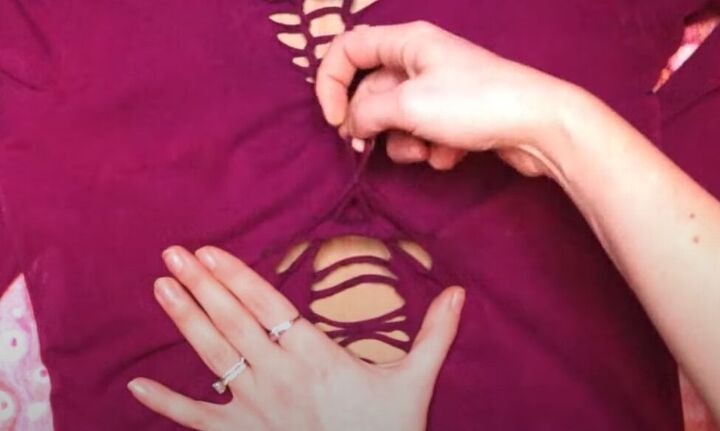
Twist the loop in your fingers. While holding on to the twisted loop, grab the 4-inch strip, pull it through the loop and twist your new loop.
Repeat with each strip, moving down the pattern and remembering to twist it into a loop before doing the next one.
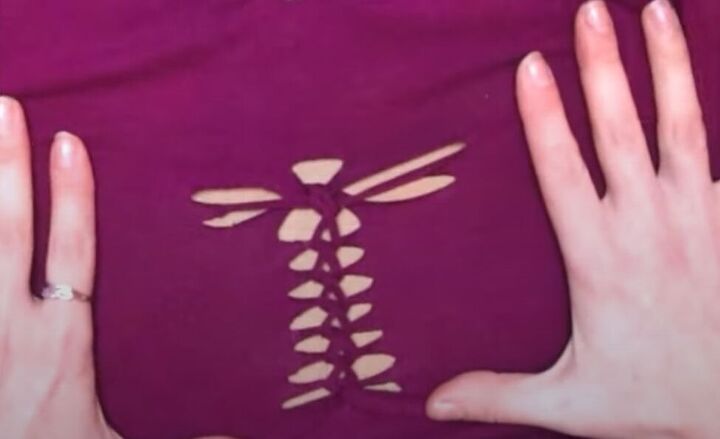
Cut the bottom loop in half and tie it back together through the bottom hole.
Trim the ends and stretch the fabric to reveal the dragonfly!
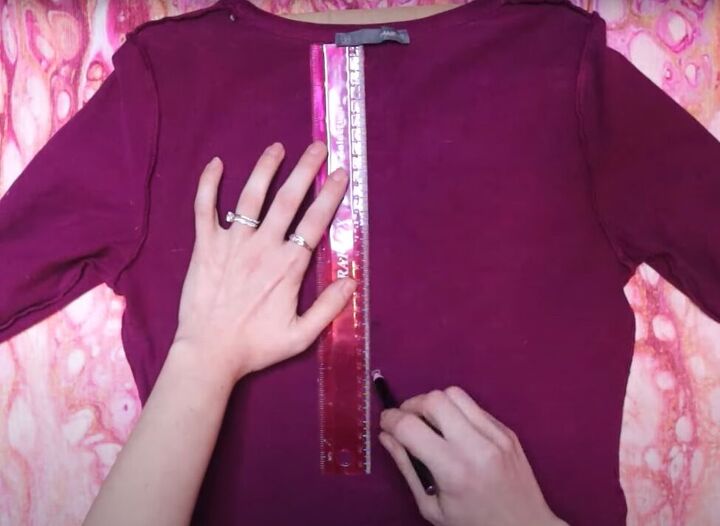
8. Make a butterfly on the back
With your t-shirt inside out, follow the video from 4:20 to 6:03 to draw the butterfly pattern on the back of the t-shirt.

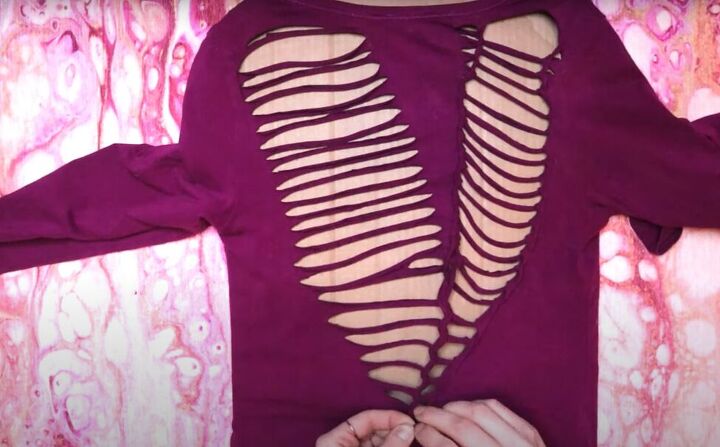
Cut all the lines, adding a small slit at the top of both sides of the V and a small hole at the bottom point.
9. Weave the butterfly
With the t-shirt right-side out, weave one side of the V-shape using the same method you did for the neckline, but this time going from the top to the bottom.
Cut the bottom strip and tie it together through the bottom hole on the inside of the shirt.
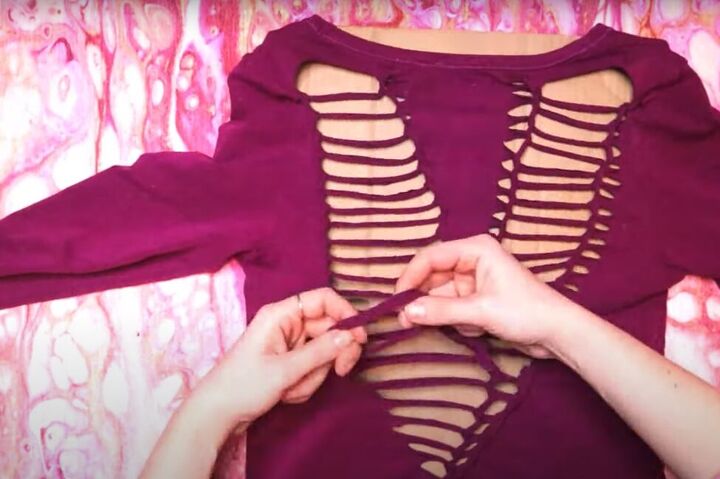
Repeat on the other side of the V-shape.
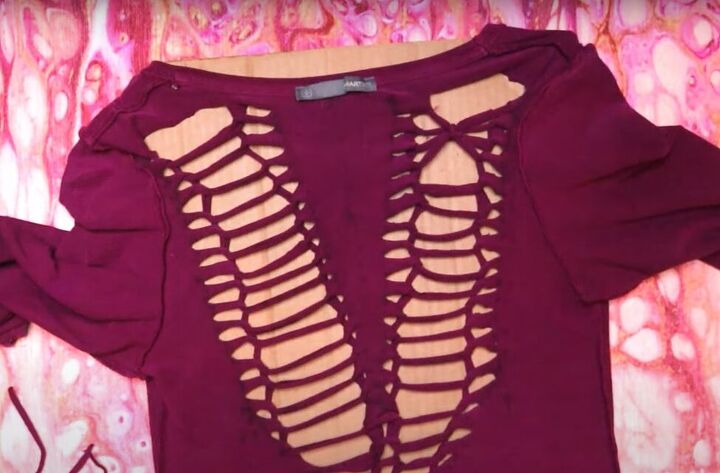
Cut your spare strip of fabric from earlier into 6 equal pieces.
Turn your shirt inside out again.
Using one small strip, tie the top four strips on one side of the V together and trim the ends of the knot.
Repeat with the next four strips, and the next four after that, so you have three tied sections.
Repeat on the other side of the V.
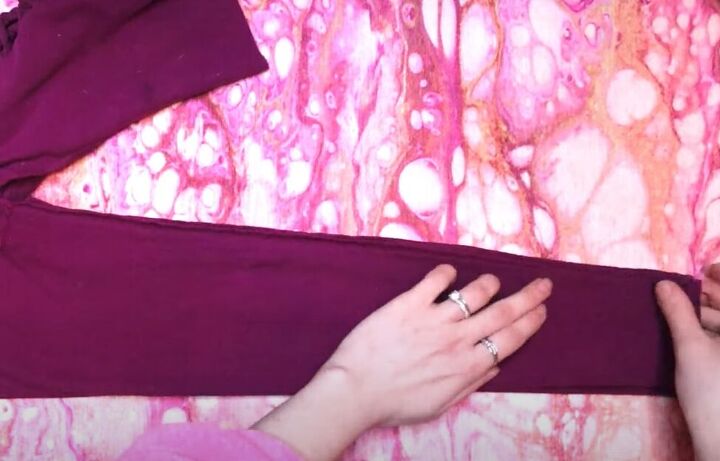
10. Weave the sleeves
With your shirt inside-out, lay both sleeves flat, one on top of the other.
Follow the video from 7:57 to 9:55 to follow the drawing, cutting, and weaving of the sleeves, to make three dragonflies on each sleeve.

T-shirt weaving: Cute woven top
Here is the finished woven t-shirt from all angles. You can see how beautiful it is!
Check out the dragonflies on the front and sleeves, and that stunning butterfly on the back!
Give this a try with an old t-shirt of your own, and then leave a comment to let me know how it turned out.
For more DIY fashion content, check out my Thrift Flipping Tutorial: How to DIY Cute Crop Top and Cardigan Sets.
The author may collect a small share of sales from the links on this page.


Comments
Join the conversation