How to DIY a Gorgeous Poncho Top With Only One Piece of Fabric

Today, I'm making a very quick and straightforward agbada or poncho top from a single piece of fabric with no side seams.
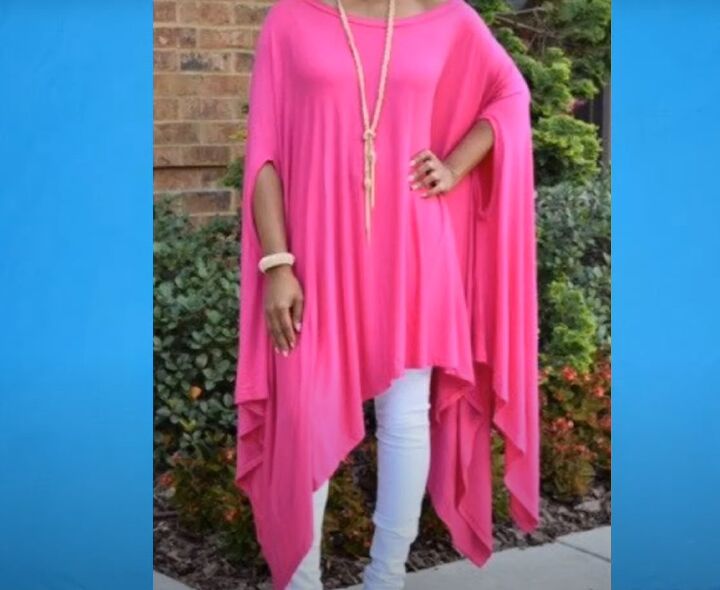
Poncho tops are very flattering to wear, especially in a silky fabric. I used a very stretchy material for mine and as you will see, I adjusted the pattern accordingly.
If your fabric is firmer or has little stretch to it, cut your neckline and armhole bigger than I made mine.
Best fabric scissors!
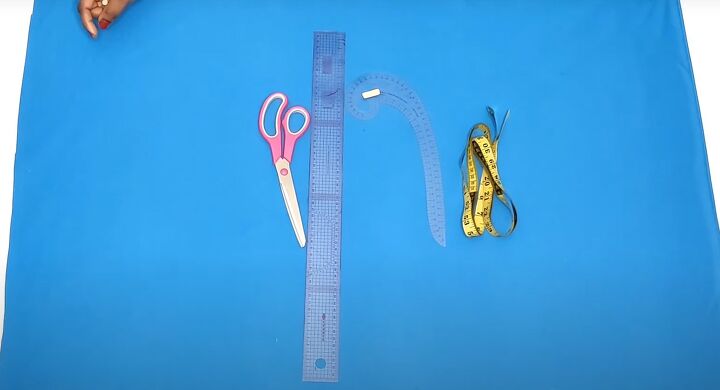
Tools and materials:
- 2.25 yards (2 m) of 60 inch lycra fabric
- Scissors
- Ruler
- French curve
- Chalk
- Tape measure
- Sewing machine
1. Take measurements
You will need to measure from the base of your neck at center back down your arm to the point where you want the poncho to end.
Also, measure across your shoulders, around your armhole and the length from your neck to the shortest part of this poncho style top.
For reference, my sleeve length is 28 inches, my shoulder width is 17 inches and my armhole is 19 inches.
2. Pattern drafting
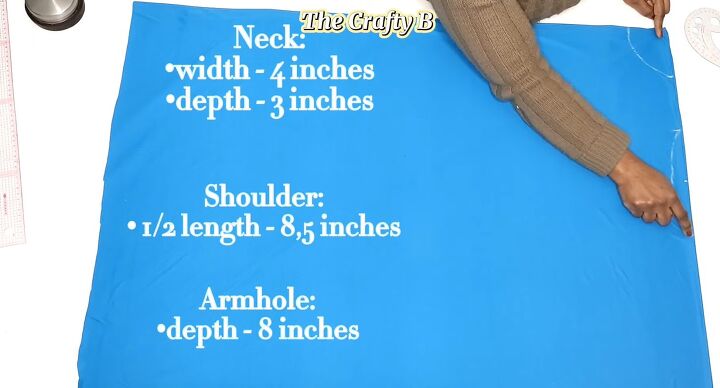
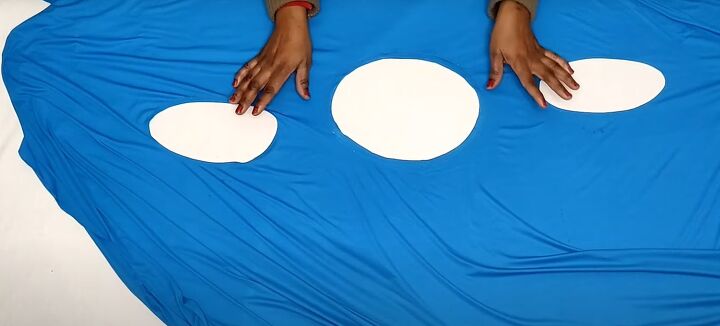
Fold your material in half widthwise and in half lengthwise, so you're cutting through 4 layers at once. Lay your fabric out with the folded edges towards you and on your left.
Measure from the corner nearest to you down the folded edge at the side and mark the length of your sleeve plus 1 inch hemming allowance.
Along this same line, make a mark at half your shoulder width (8.5 inches for me).
Also on this edge, mark 3 inches down for your neck width. Measure 4 inches across the other folded edge for the neck depth. Join the two neck marks using a French curve.
From the shoulder point, mark half your armhole depth. I reduced this from 9.5 inches to 8 inches because of the stretchiness of my fabric. I drew a curve, 1 inch deep at the center, between these two points.
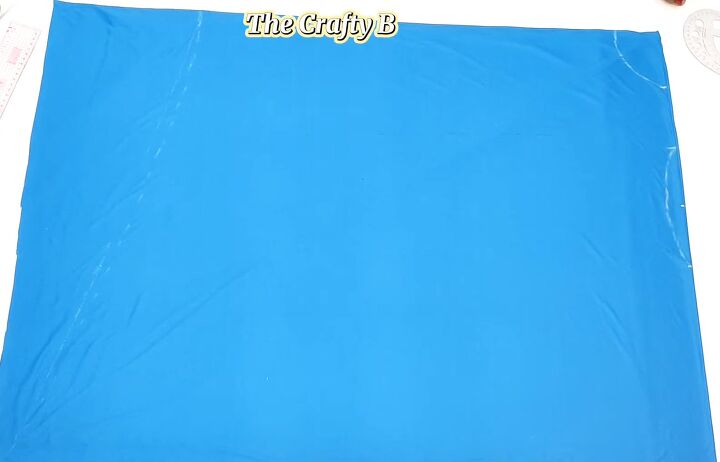
3. Mark the front and back length
I wanted to make my poncho top shorter at the center front and back and longer at the sides.
So, I measured 30 inches plus 1 inch hemming allowance along the edge nearest to me.
I connected that point, with a slight curve, to the corner furthest from me.
4. Cut out the fabric
Cut around the chalk lines and cut off the selvedges, straightening the fabric if necessary.
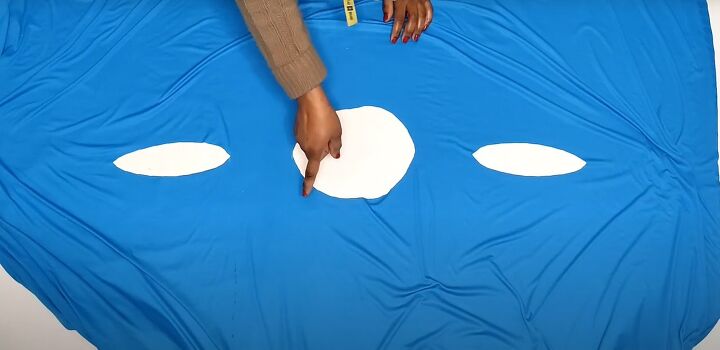
This is what it looks like when you open the fabric after cutting.
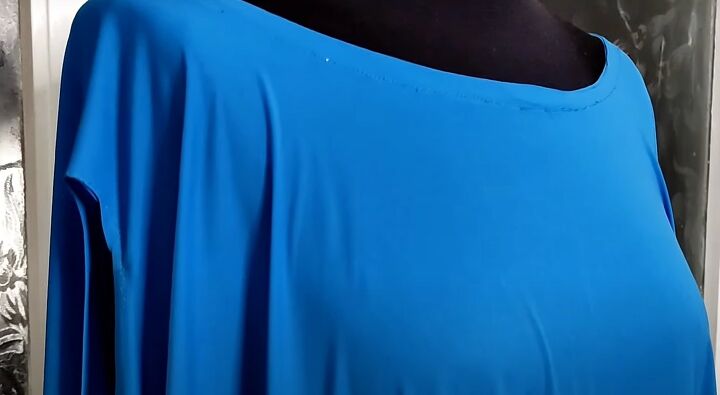
5. Finishing
Use the leftover fabric to make bias strips to bind the neckline and armholes. You can see the binding round the neck and armholes here.
I didn't hem my poncho in the end because this fabric doesn't fray, but you may want to make a narrow rolled hem around the raw edges.
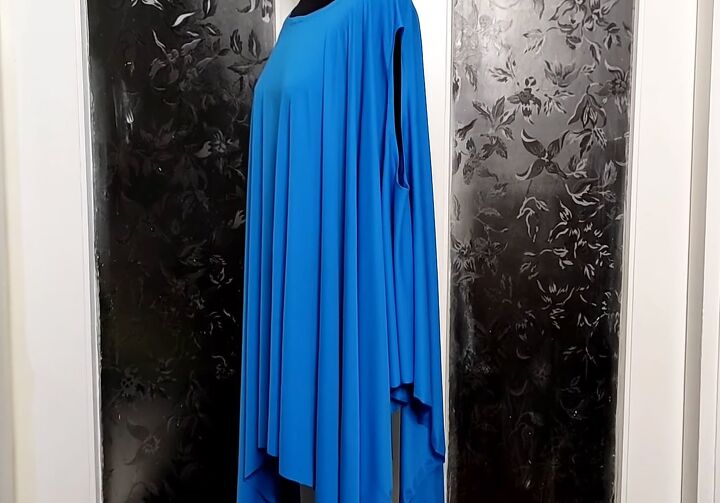
DIY poncho top
As you can see from the finished poncho style top, this flows beautifully and looks great on.
The weight and stretchiness of this fabric mean that the armhole and neckline are much larger than they looked as if they would be when I was drafting them.
I hope you enjoyed seeing how to sew a poncho and that my tutorial has given you lots of ideas. I'd love to know if you made this - leave me a comment below.
The author may collect a small share of sales from the links on this page.


Comments
Join the conversation
You could even add a hole between each side arm hole and the neck, but a little lower and only on the front. Then thread a tie belt through and around your waist or higher for an empire style. It leaves the back loose, but the front a bit more “form accentuating”.