How to Make a Fierce DIY Witcher Jacket Worthy of Geralt of Rivia

In this tutorial, I’m going to show you how to make a Witcher jacket. If you don’t know, The Witcher is a series of fantasy novels, which have been adapted into comic books, video games, and a recent Netflix series - the story follows witcher Geralt of Rivia, a mutated monster hunter.
He makes for a perfect Halloween costume, especially if you have long blonde hair, like me! If you’ve been wanting to make a Witcher costume or The Witcher leather jacket, this tutorial is made for you! Let’s get started.
Tools and materials:
- Leather or vegan leather jacket
- Leather or vegan leather “fabric”
- Marking pencil - white
- Studs
- Stud prong press
- Scissors
- Measuring tape
- Dinner plate
- Witcher medallion downloaded and printed
- Embroidery needle (80/12 size)
- Embroidery threads in silver/grey (numbers 168 and 169)
- Leather glue
- Brush for the glue
- Seam ripper
- Needle and thread (thread should match your jacket lining)
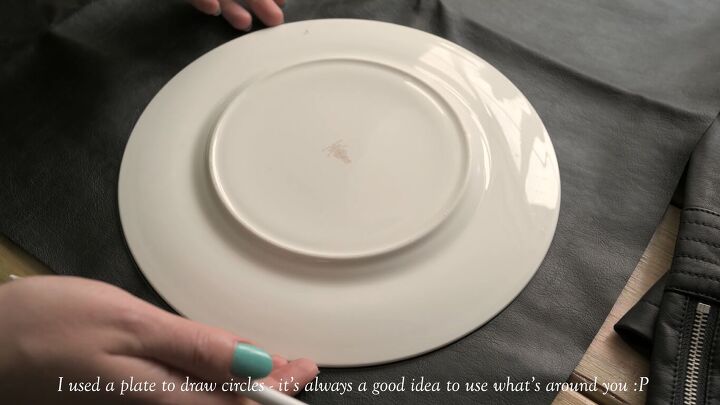
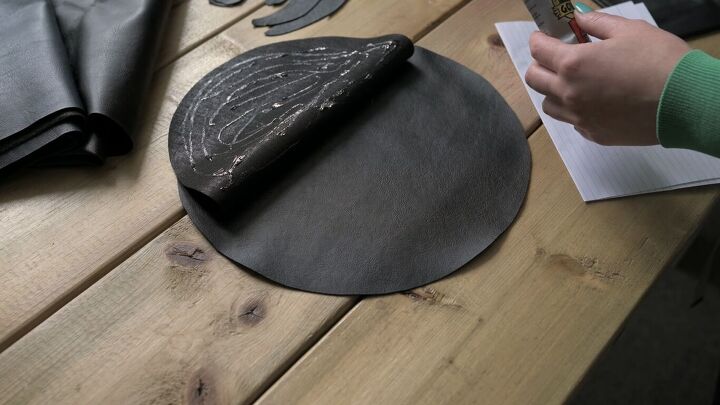
1. Cut the leather circles
Lay the leather fabric on a flat surface. Use a large dinner plate and a white pencil to trace two circles. One circle should be larger than the other but both should be equidistant all around. Use a measuring tape to make sure they are perfectly even.
Cut the circles out and lay them to the side.
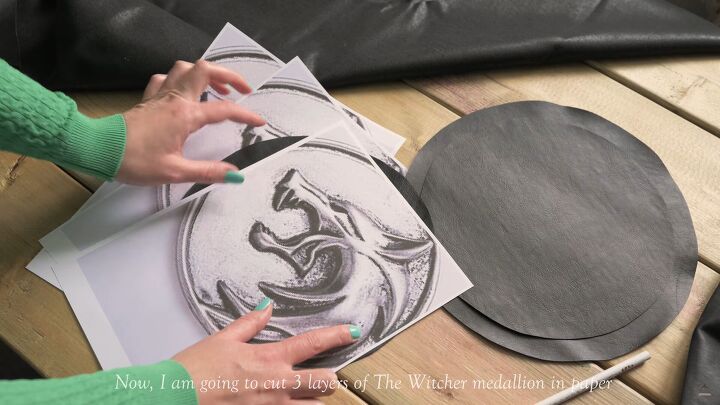
2. Print The Witcher medallion
Download The Witcher wolf medallion from the Internet in a size that fits your jacket. Print 3 copies on 3 separate sheets of paper.
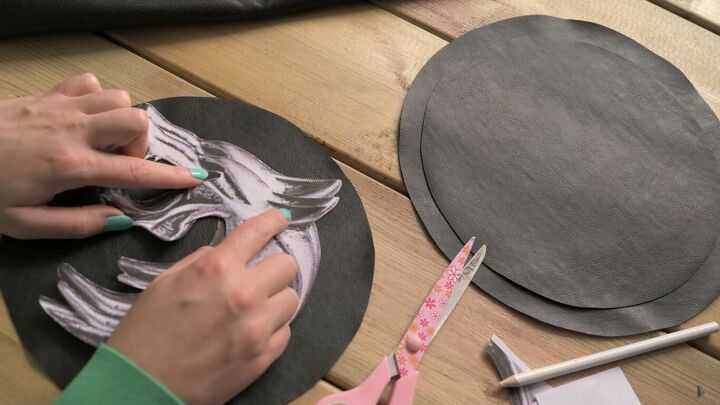
3. Cut the leather wolf medallion
Cut out the wolf from the first 2 sheets of paper. On the 3rd paper, just cut out the ears at the top.
Trace the wolf pattern onto the rest of the leather fabric.
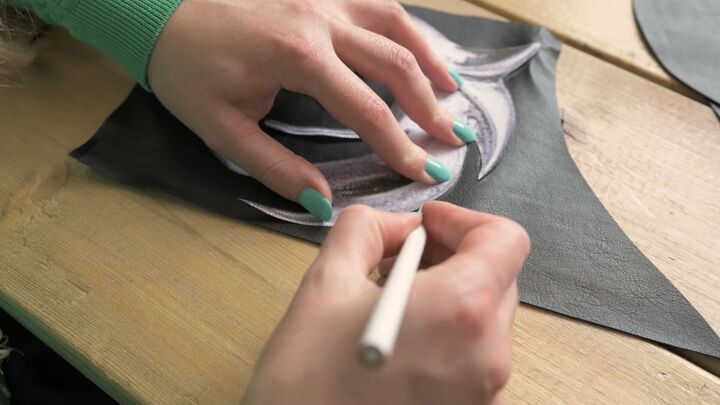
Cut them out. If there are any white pencil marks, clean them off with a soft rag.
4. Glue the motif in place
First, lay the 3 patterns on top of the 2 circles to check placement. They should be slightly staggered to give a 3D effect. Remove once you’ve determined the perfect look.
Glue the smaller leather circle to the larger leather circle by applying leather glue with a brush to ensure a smooth finish.
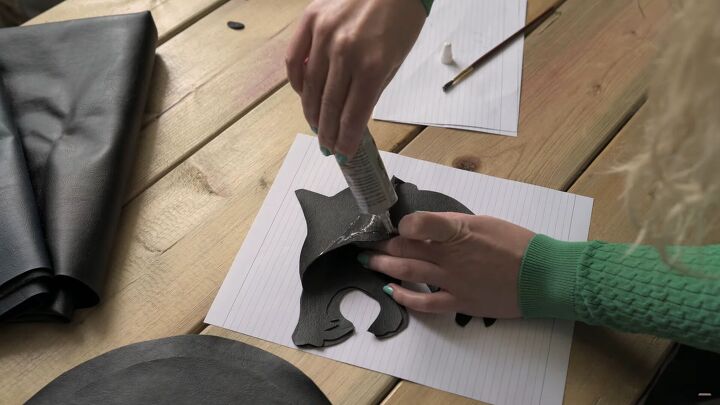
Glue the top wolf to the bottom wolf in the slightly staggered position. For now, set the wolf applique aside.
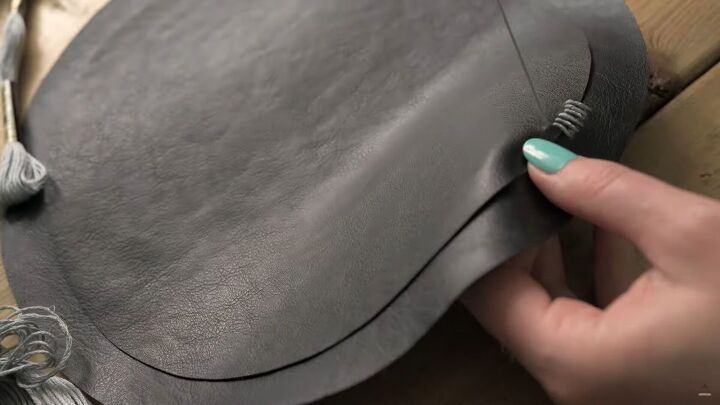
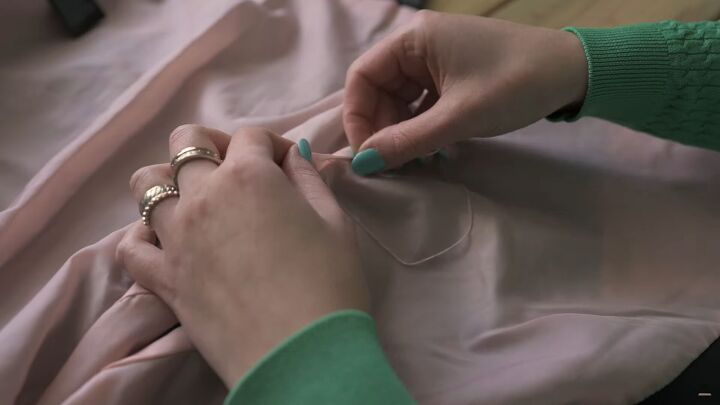
5. Sew the pieces together with embroidery
Use an 80/12 embroidery needle that is able to go through leather with the grey and silver embroidery thread. Use a regular stitch (up and down) to stitch the smaller circle to the larger circle.

Sew the applique with a running stitch around the edges and a regular stitch around the eyes, ears, and mouth.
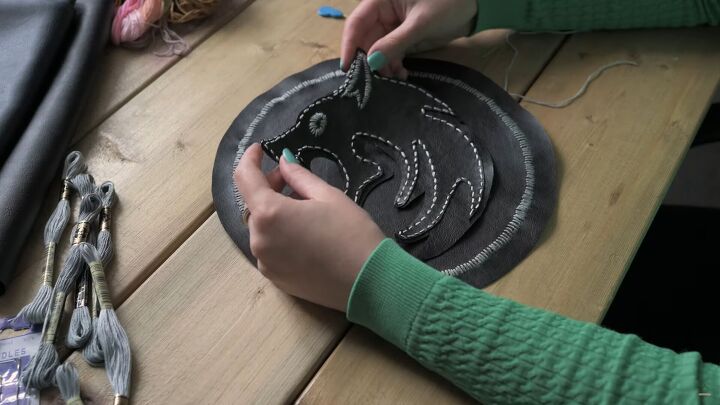
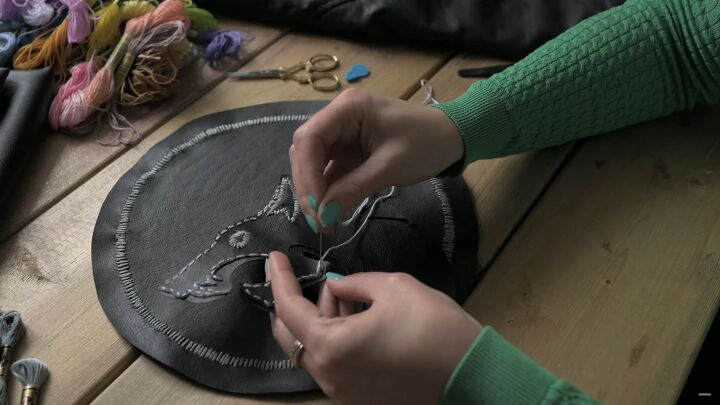
6. Sew the wolf medallion
Attach the wolf medallion onto the smaller leather circle using a tight regular embroidery stitch.
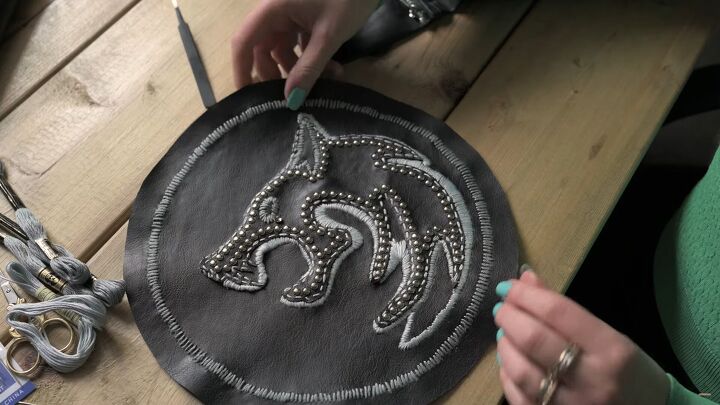
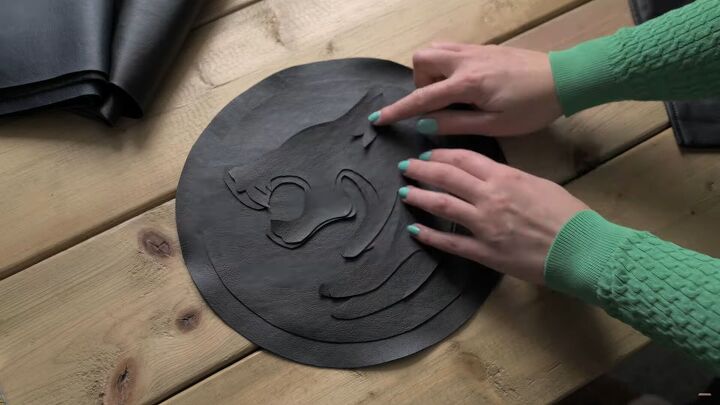
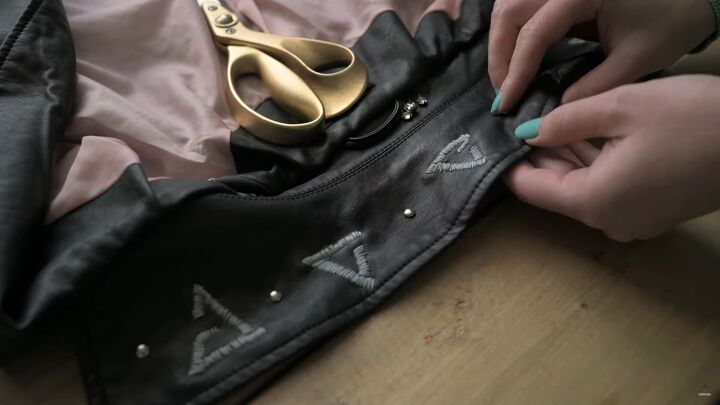
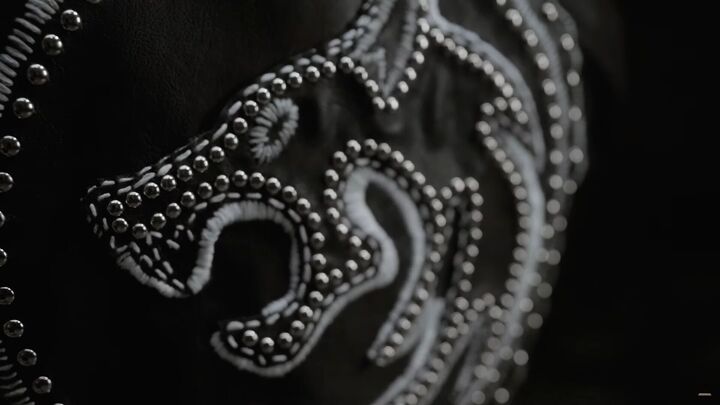
7. Add studs
Add studs to the applique.
Close the back with a stud prong press if needed. Follow the outline.
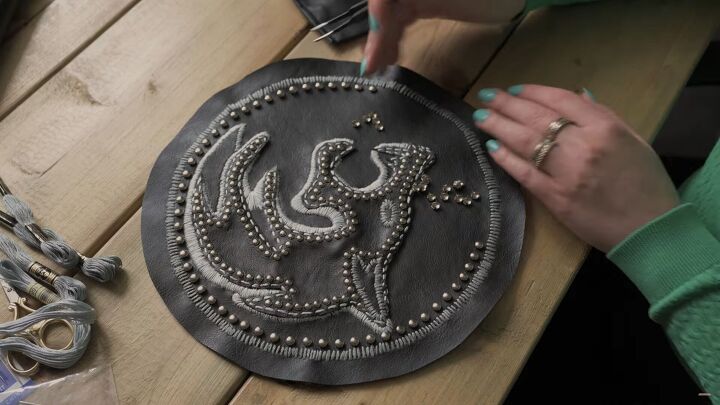
Add studs to the inner circle.
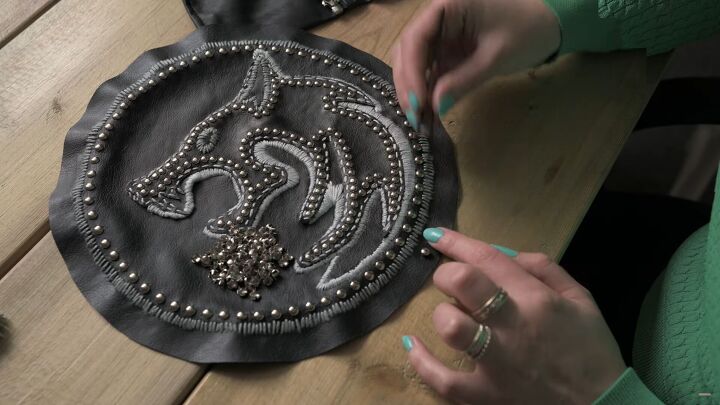
Once those are done, add studs to the outer circle.
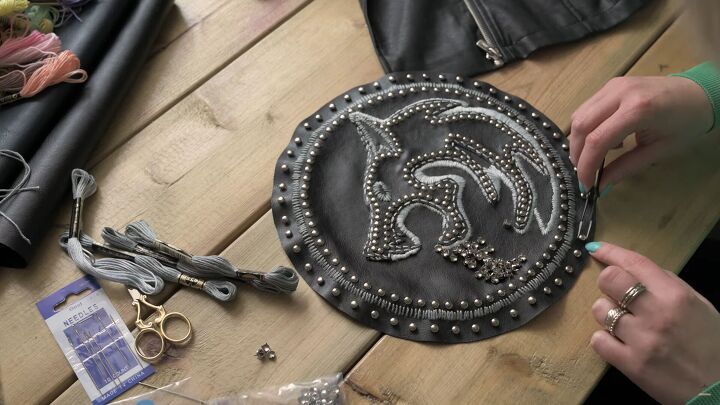
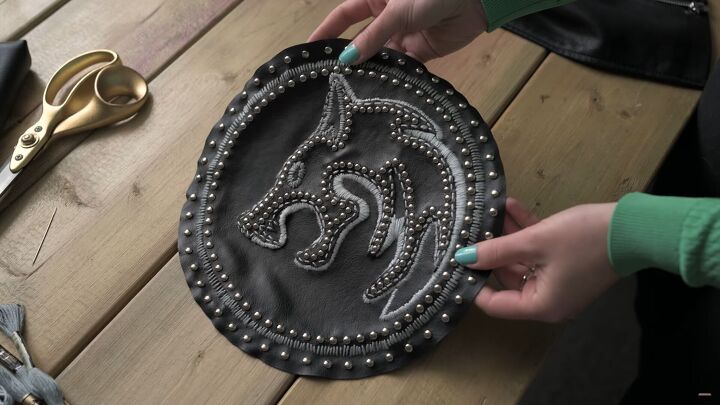
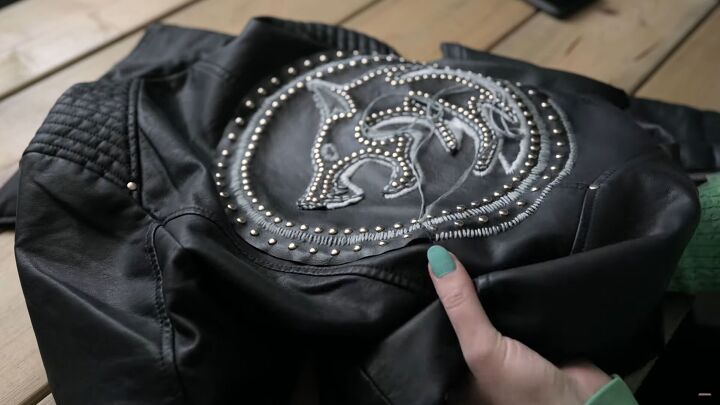
The applique should look like this when done.
8. Glue the applique to the jacket
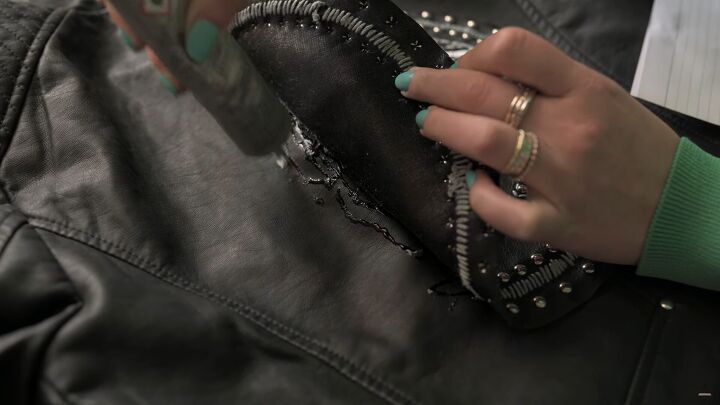
Lay the jacket so the back is facing you. Apply glue directly to the back of the applique.
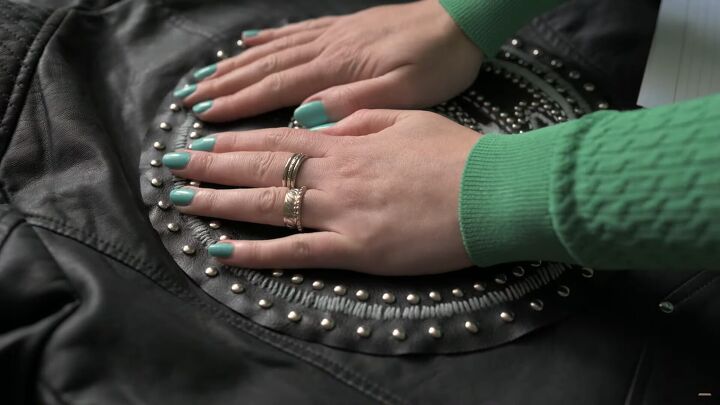
Press it down in the center of the circle so it adheres properly.
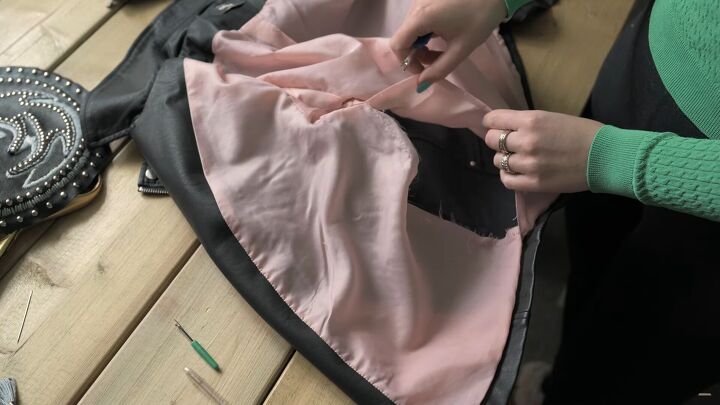
9. Sew the applique to the jacket
Open the leather jacket. Use a seam ripper to open the lining so you can get to the back of the jacket directly.
Use the grey or silver embroidery thread in a regular stitch on the outer edge of the circle all the way around. This is the hardest part because you have to push aside the lining. Make sure you are only sewing the leather circle applique to the back of the leather jacket!
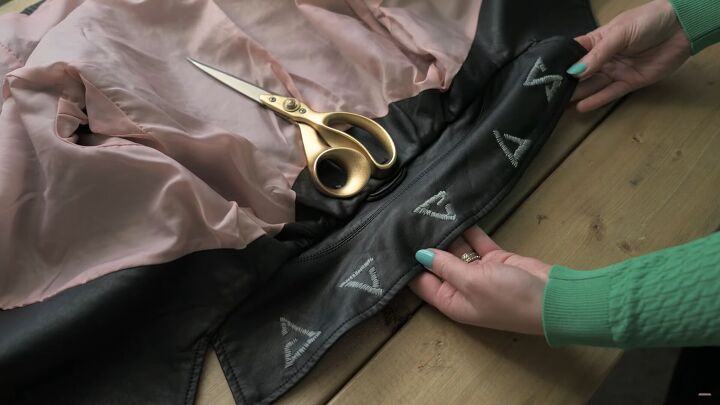
10. Embroider runes on the collar
Print rune patterns from the Internet. Trace them onto the jacket collar, then use the embroidery thread in a regular stitch.
11. Sew up the lining
Hand sew the lining with matching thread to close it back up.
12. Add studs to the collar
I simply add a stud in between each rune.
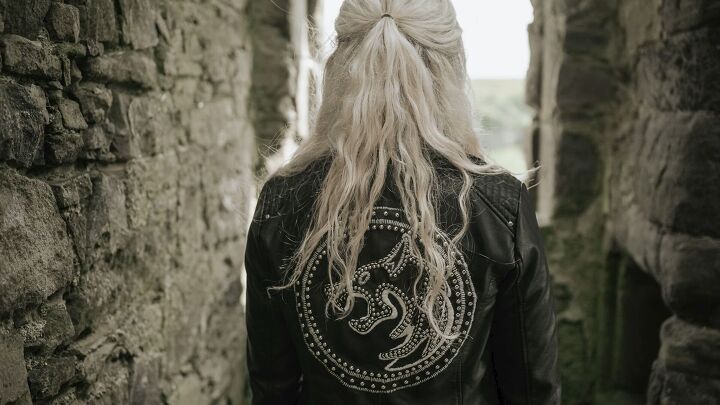
Witcher jacket tutorial
This Witcher jacket took me over 15 hours to make, but I think the results were well worth it. The DIY Witcher costume looks so impressive. Please let me know what you think in the comments! I love hearing from you.
The author may collect a small share of sales from the links on this page.


Comments
Join the conversation
YUP!
That looks amazing and I am going to give it a try and I am so excited about it!!!