Make Bangle Bracelets

Make easy bangle bracelets. This tutorial is one of my favorite go to bracelets to make a quick gift for someone. I love stacking these bracelets in different colors and types of beads because they really just add a pop of color to any outfit.
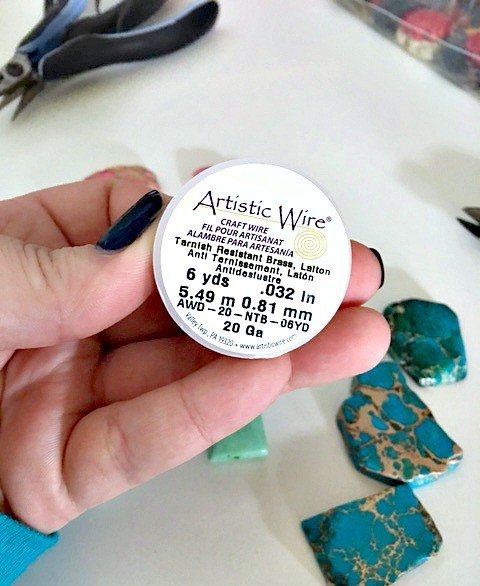
To get started you don’t need much, just a few simple supplies and materials. 1) Wire – I like to use gold colored brass jewelry wire in 20 gauge. This wire is perfect because it is very easy to manage with just your hands. You can buy this just about at any local craft store and even some major box stores like Walmart carry it. Click here to purchase the exact wire I use.
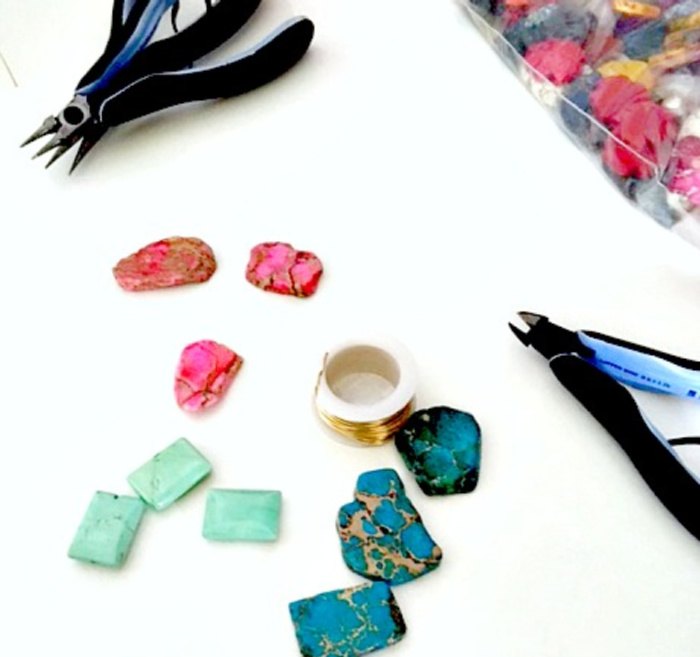
2) Wire Cutters – these can be any pair of wire cutters you may have lying around. They are better if they are flush cut wire cutters, but it is no big deal if the ones you have aren’t. I just find that the flush angle cutters make a cleaner cut when cutting the wire to the desired length. I use Lindstrom Wire Cutters because they have ergonomic handles. I make a lot of jewelry for family, friends, myself, and my online website, therefore I invested in a professional pair. I have linked a basic pair here that will do the job, but if you plan to make jewelry in the long run, consider buying an ergonomic pair.
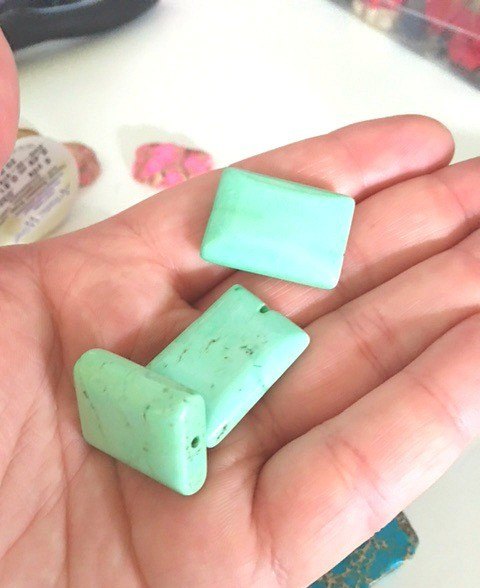
3) Beads – your best bet for making these bracelets is beads that are long or oval in shape and have a flat side to them. As you can see pictured. There are many places to find beads, local craft stores, or art shows. I even like to look through some of my older jewelry I don’t wear anymore to be inspired in my new jewelry projects. For this project you will want to find at least three beads for the bracelet. Some people use four beads per bracelet, but I find that if you use three fairly decent sized beads, it creates that designer look best. You can also string on 3 or 4 smaller beads in a row to represent the space of one larger bead. The creative aspect and design comes from your bead choice, possibilities are endless.
So to start the bracelet, you will want to cut approximately 3 feet of wire. You can measure this, I typically like to keep it easy and practically just eyeball 3 feet every time.
Next you will want to coil the three feet of wire into the circle shape creating the base of you bracelet bangle. Most people start by wrapping the wire around a glass or empty soup can to get a standard bracelet size. Depending on the persons wrist you will want to size your wraps according to the size needed.
Next you will want to coil the three feet of wire into the circle shape creating the base of you bracelet bangle. Most people start by wrapping the wire around a glass or empty soup can to get a standard bracelet size. Depending on the persons wrist you will want to size your wraps according to the size needed.
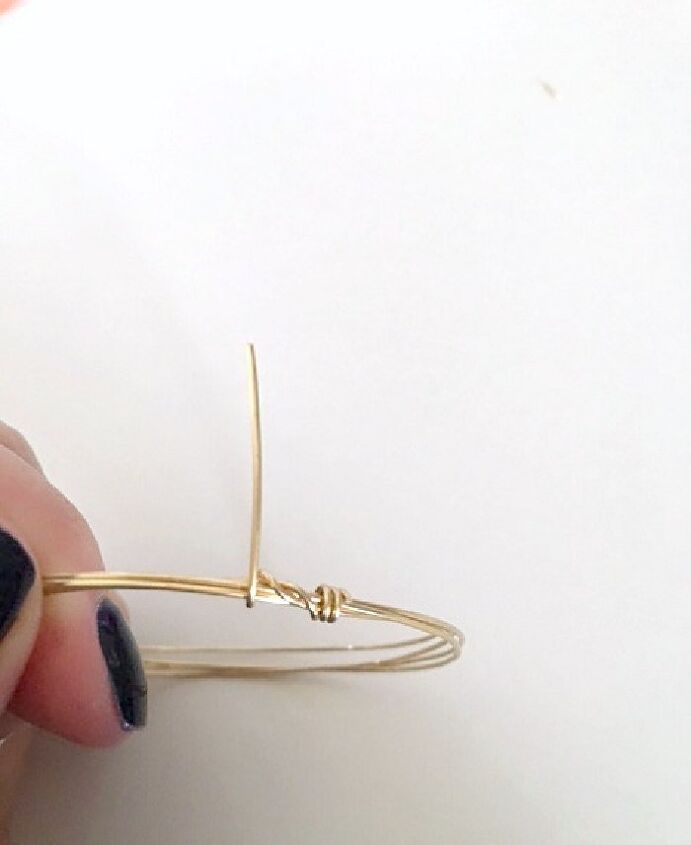
Next you will want the two tails of the wire to cross each other and meet at the same spot of the wrapped wire. You will take each tail and wrap it around the base of your bangle bracelet and cut the remaining tail off at the top.
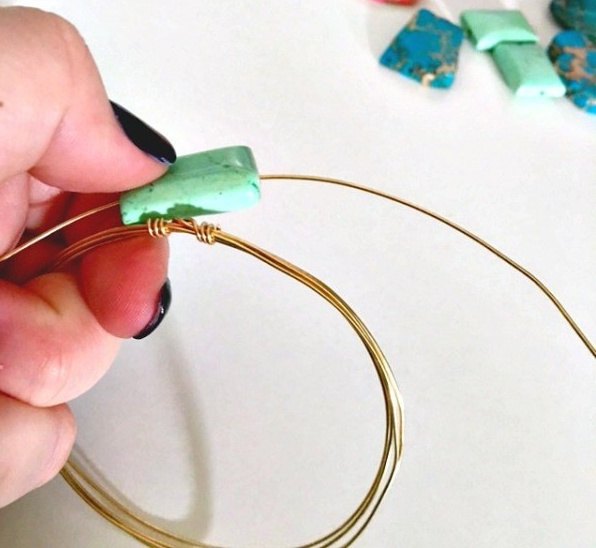
Then you want to cut another 12 inch piece of wire to string your first bead onto the wire. Again, I don’t really measure the 12 inches, I just eyeball the length. String your first bead onto the wire. Place the bead with the wire running through it over the top of the wraps you just did on the bangle.
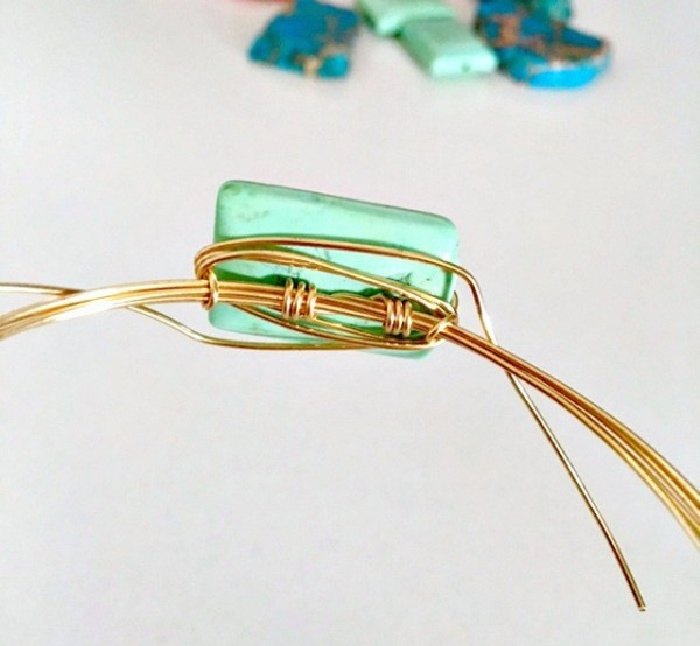
Next, you will wrap each tail of the 12 inch piece around the bangle part of your bracelet. There is no need to use pliers, just use your fingers. You will first wrap around the bead itself under the bead as pictured below 3-4 times, leaving about 2 inches of tail on each side as shown. Pull tight, but not too tight. Your wire should work with you and not come undone, and stay fairly close to its shape as you bend it.
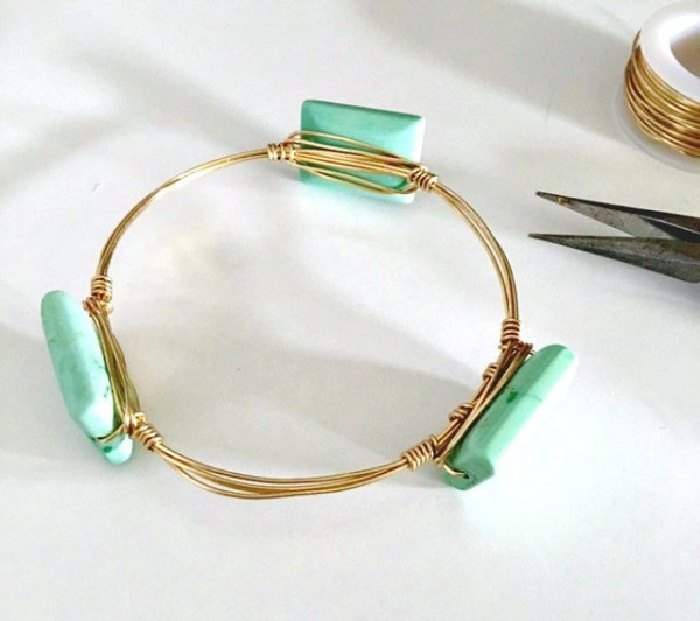
Then you will wrap each tail around the bangle just as you did in the first step to securing your bracelet. Make sure you cut the wire, with your last wrap, cutting it on top. If you cut the wire under the bangle, the edge is likely to scratch your skin or over time lift up and un-wrap due to heavy wear and use. Cutting the tail on top will prevent this. It does take some practice to get nice tight wraps, but by your second or third bead you will improve. Lastly, you will complete the bracelet by wrapping the two other beads onto the bangle. Be sure to space them accordingly.
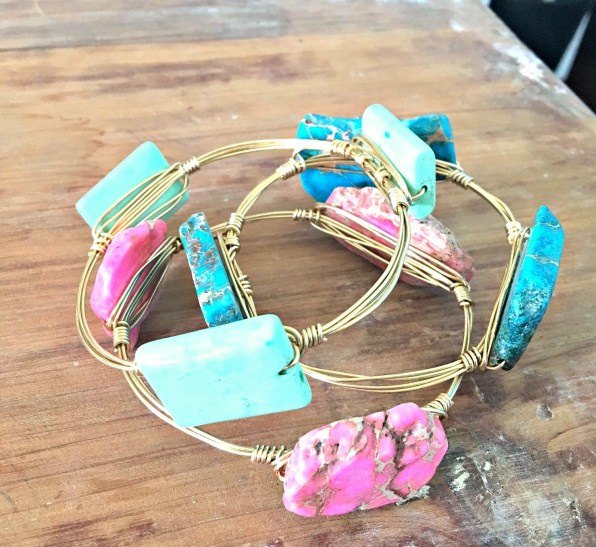
Pair up the bracelet with a few other colored beaded bangle bracelets. These are great to mix and match and to give as gifts or even create to perfectly with any outfit. Check out my post and blog for more DIY projects.
The author may collect a small share of sales from the links on this page.


Comments
Join the conversation