Get Your Hands on This DIY Handbag

I had been searching for the perfect handbag! I wanted something functional for everyday use with a balanced blend of minimalist and modern style. My handbag is one of my favorite companions. I knew I had to have something big enough to fit all the essentials when leaving the house. I decided to make three different styled purses because a girl can never have too many handbags. Watch my tutorial below to find out how to DIY your own handbag.
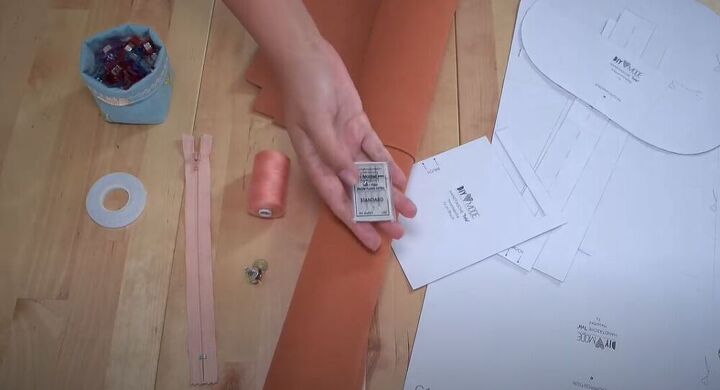
Tools and Materials:
- Handbag patterns from DIYMODE Etsy shop
- Fabric
- Sewing machine
- Magnetic button
- Zipper
- Sewing clips
- Wonder tape
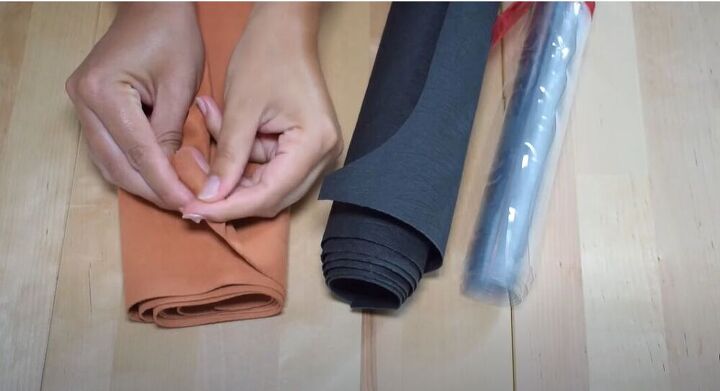
I want to show you the three materials I used to make my purses. The first one is a suede imitation fabric. I not only love the feel of this fabric but I think it’s a great neutral color for a purse as well. The second material I chose is black craftex. You can never go wrong with black! It practically matches everything and that’s why I love this fabric. The last material I chose to use is vinyl fabric. Transparent purses are all the rage and I couldn’t wait to make my own. The best thing about these materials is that they are all strong enough for a handbag, look alike on both sides, and won’t fray at the edges.
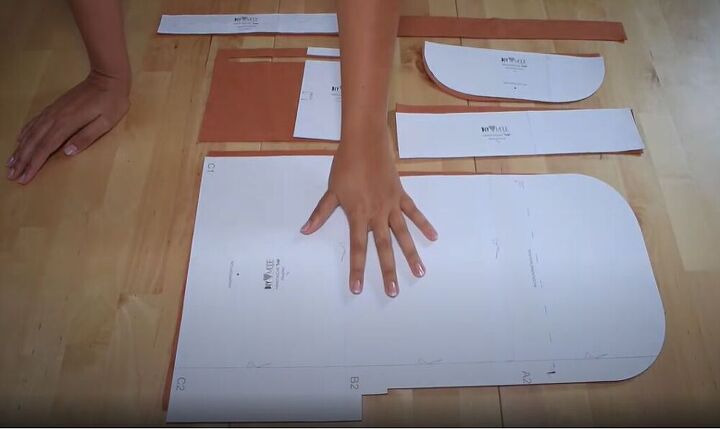
Now that you’ve conquered the hardest part, finding the material, it’s time to start creating! Using your patterns from my Etsy shop, DIYMODE, you can start making your bag.
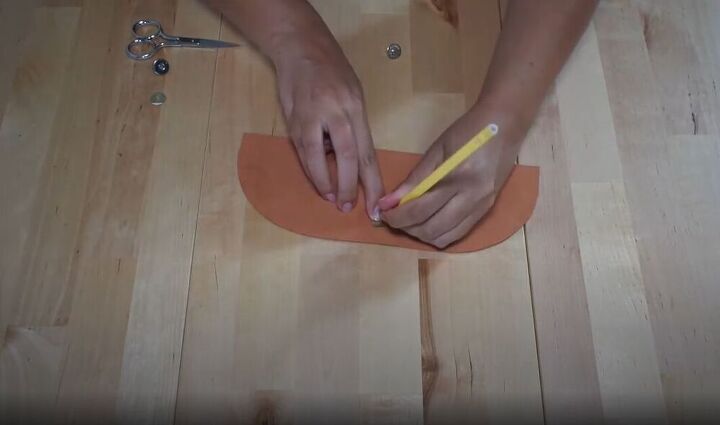
The flap pattern is a great indicator of where the button needs to be placed. Once you have made your mark on the fabric, create a small incision and insert your top half of the button on the curved side of the fabric. Make sure that your fabric is facing the right side up for this step!
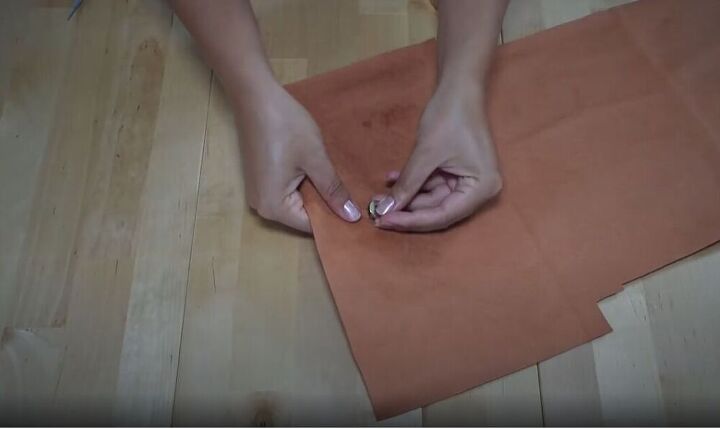
Once your top button is in and ready, place your bottom half of the button on the main part of the fabric marked on the pattern. The fabric needs to be right side up for this button as well.
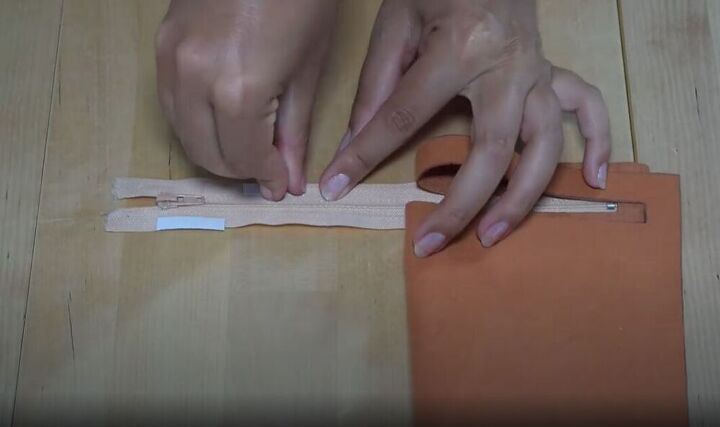
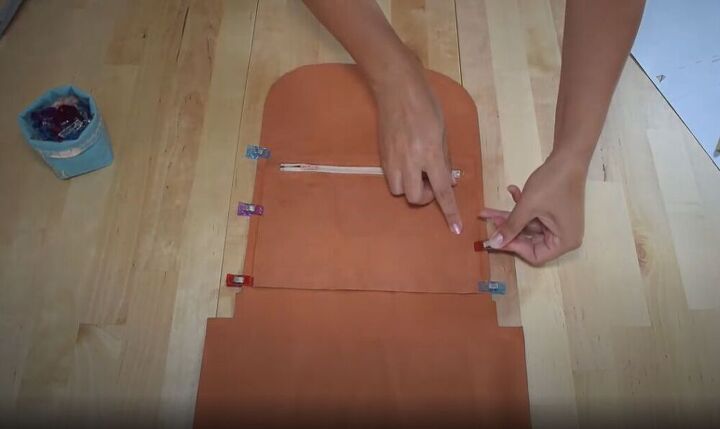
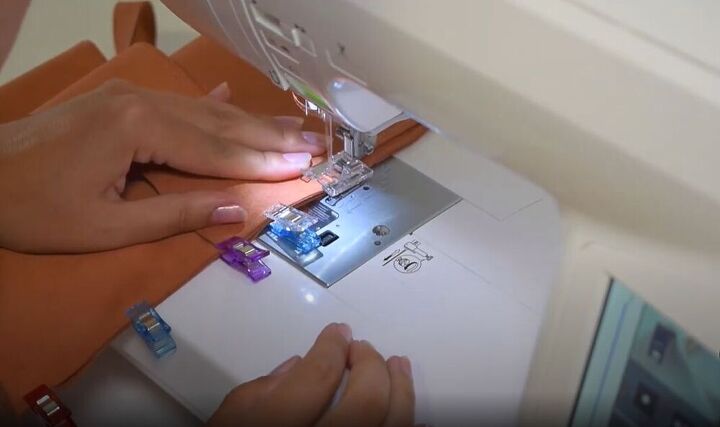
Your button is ready so now it’s time to attach the zipper. I love to use wonder tape before I start sewing so that my zipper is held securely in place.
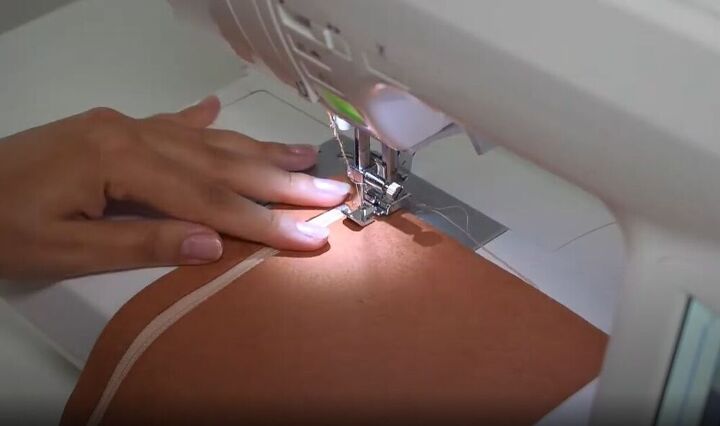
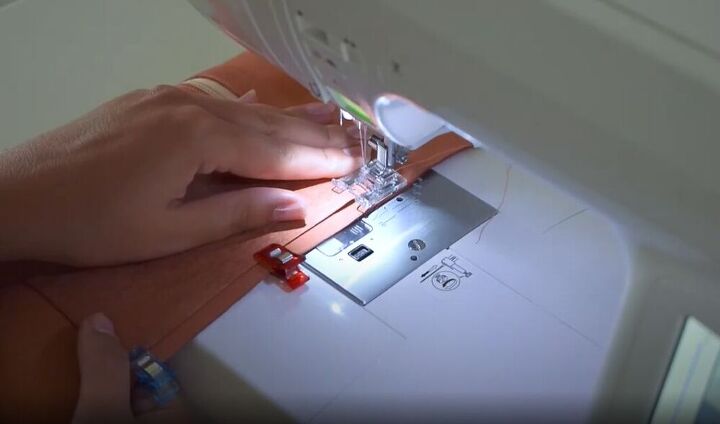
Now you are ready to sew on that zipper! Remember to add a zipper foot to your sewing machine and then you can etch stitch the zipper. Don’t forget to backstitch at the end for a beautiful finish. I love that I chose a zipper color that matches my handbag fabric! You can use color to add a fun contrast or create an interesting color palette for your handbag.
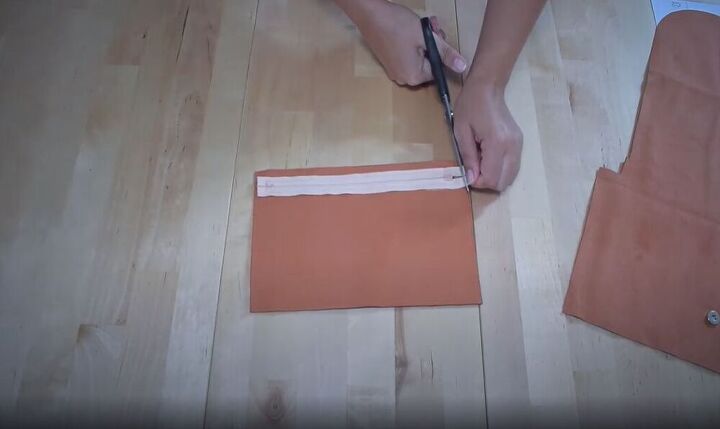
If there is any extra fabric standing out from the zipper, chop it right off!
Using the main pattern piece, find where to attach the inside pocket and create small markings on the fabric. Once you have your markings start clipping the inside pocket into place. I love purses with an inside pocket because it keeps my keys and other valuables safe. Feel free to attach the pocket to the outside of the bag if you prefer that look.
Attach the extra pocket by etching all around. Don’t forget to backstitch, to secure the seam!
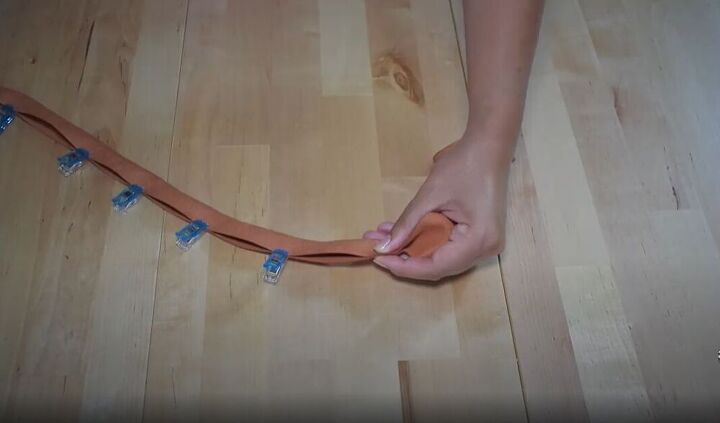
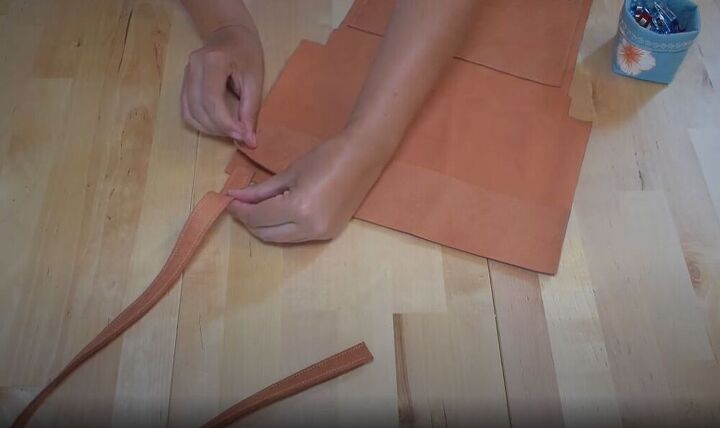
A small tip about the strap: If you have chosen a stable material you can fold the strap in half width-wise, but if your fabric is a little on the soft side, use the original pattern width. I used a stable material so I decided to fold my strap. If you are using a softer material, you can skip this step!
Sew the strap on the open side. Personally, I love the look of a strap with two seams so I sewed the folded edge as well, but you can choose not to add this small detail.
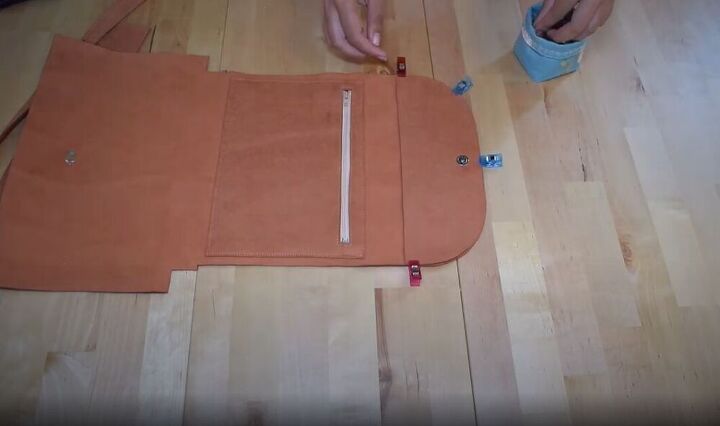
For this next step, attach the flap facing on the inside of the purse using clips to hold it in place.

Add in another two clips at the point where the extra fabric starts after the inside pocket. This step is crucial because it ensures you don’t see where the flap facing starts on the outside of your stunning new bag.
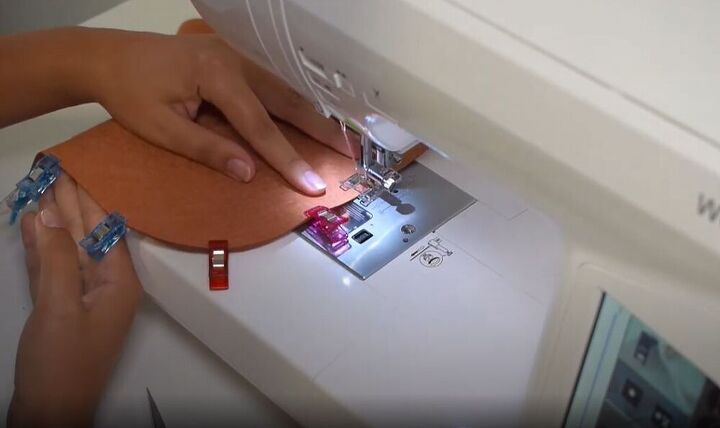
Now you can go ahead and add a stitch on the outside of the fabric. Start at the point of your inner pocket and work your way around to the last clip. Secure the seam by backstitching the end and the beginning. It’s so important to secure your sewing so that you end up with a long-lasting, durable bag.
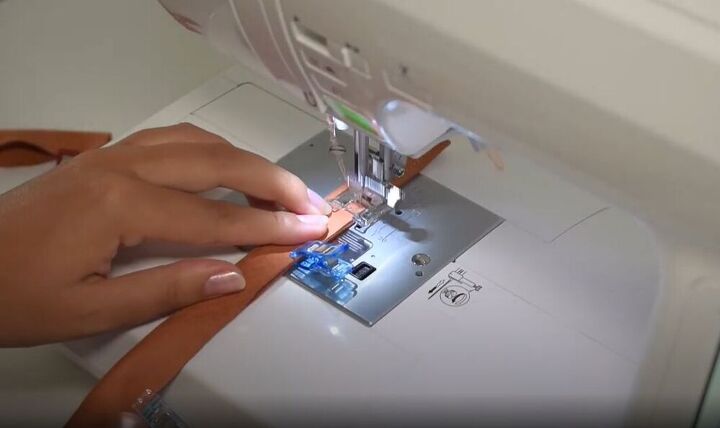
I am a perfectionist, and seeing the bottom part of the button sticking out on the inside of the bag is a no go! Use the extra piece of fabric to cover the bottom half of the bag. Make sure your strap is not twisted and clip it in about a centimeter deep under the fabric piece. Leave around three to five mm of space at the edge. Now you’re ready to sew the strap onto the main part of the bag!
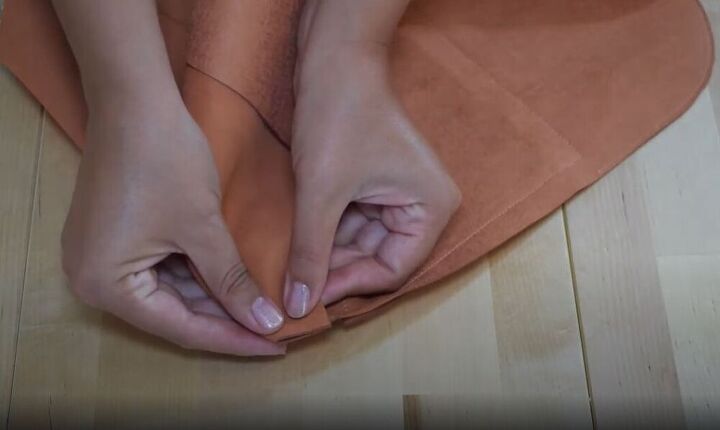
Your bag is coming together and to get a perfect shape when the button is closed, fold the two short pieces located in the middle of the main piece. You can then sew them right side facing up, with a simple etch stitch. Don’t forget my favorite, the backstitch!
You’ve finally made it! The last step is sewing the sides of the bag together. Sew from the bottom and stop where the strap peeks out. Sew the second side together in the same way. Don’t forget the all-important backstitch to finish off this step!
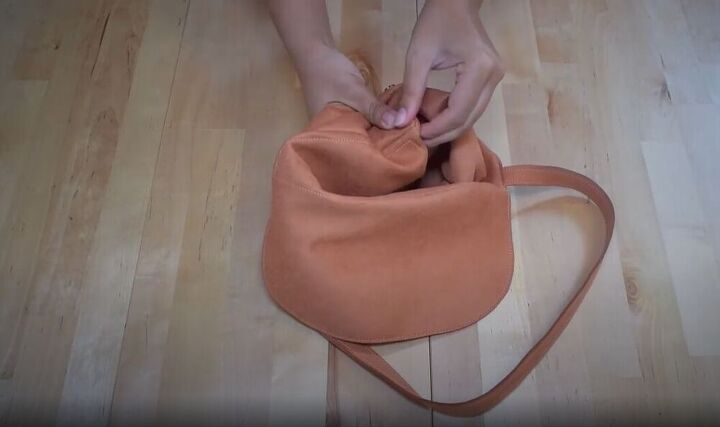
Carefully turn the back so that the right side is facing outwards and get ready for the first glimpse at your new favorite purse!

I never leave my house without my new handbag at my side! Which fabric do you like best for this DIY creation? Let me know in the comments below!
The author may collect a small share of sales from the links on this page.


Comments
Join the conversation
I love the neutral color of the tan the best.
WELL DONE!!! Thank you for sharing your process. I would also like to tell you you have beautiful hands and the Mehndi is gorgeous. Did you do it yourself?