Learn How to Create a Buttonhole With This Simple Tutorial

I love teaching different sewing techniques, and creating buttonholes is one that everyone should know. I’m going to be putting out some tutorials soon that involve buttonholes, so I wanted to first make sure it’s something you all know how to create. In this tutorial, I will demonstrate two different techniques for creating buttonholes and will explain how to adapt them to your machine.
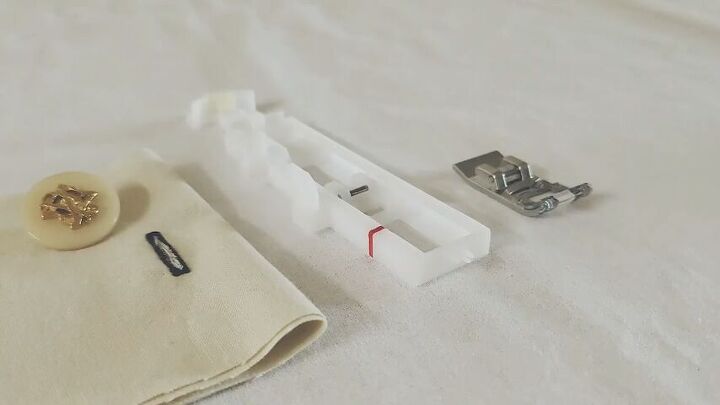
Tools and Materials:
- Fabric
- Interfacing
- Marker
- Button
- Buttonhole presser foot
- Seam ripper
- Clipper
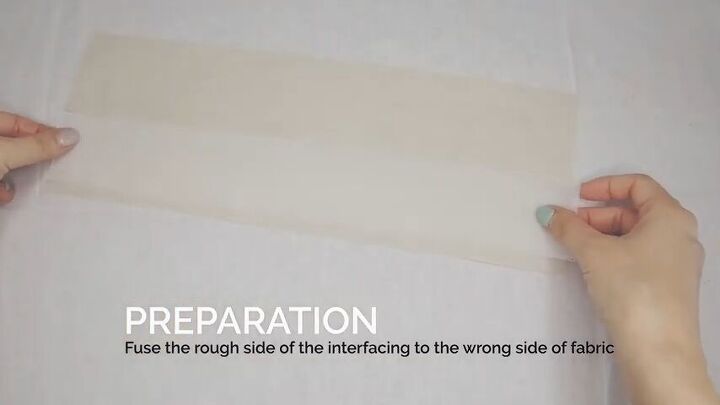
Take a piece of fabric and some interfacing and fuse the rough side of the interfacing to the wrong side of the fabric. This prevents the buttonhole from stretching out and stabilizes the fabric during stitching.
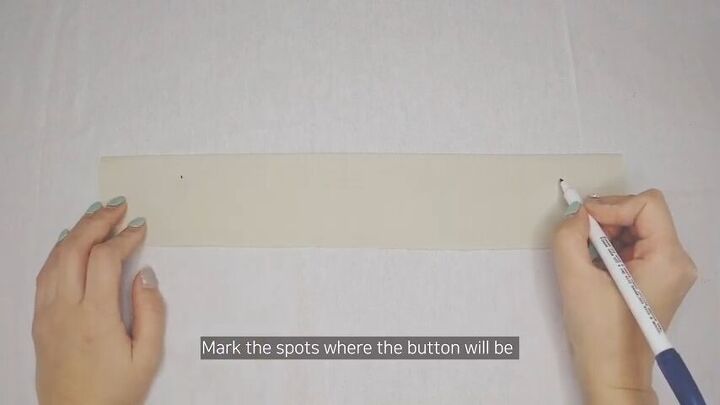
Using a marker, mark the spots on the fabric where you’re going to be making your buttons. For this tutorial we will be making 4 different ones.
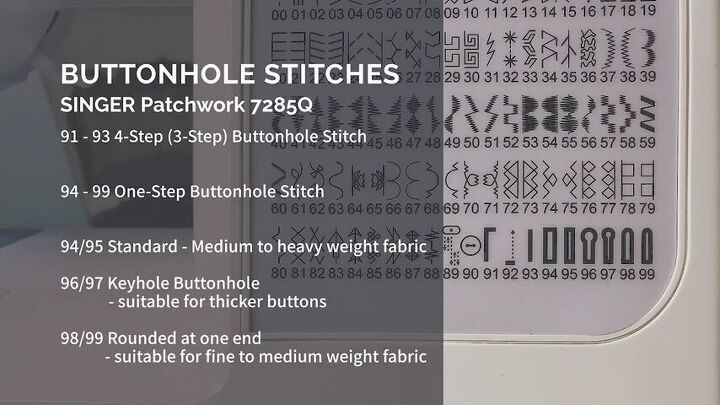
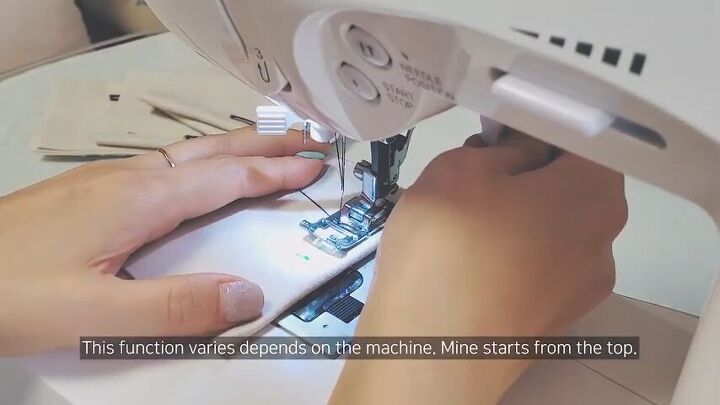
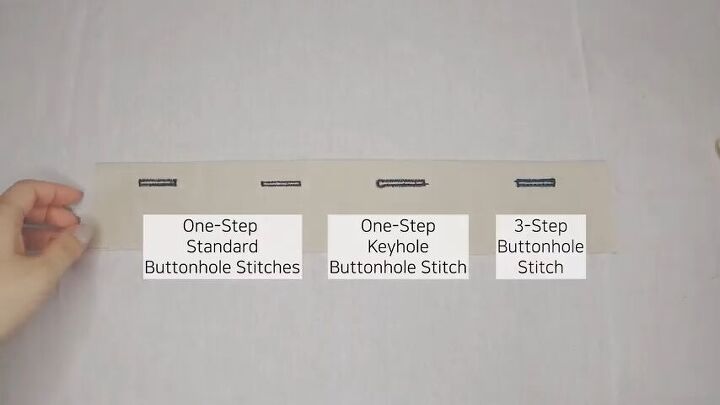
The first technique we’re going to learn is the one-step stitch. With the kind of sewing machine I’ll be using for this tutorial, you can choose the different settings according to numbers. So it’s important to know the different settings.
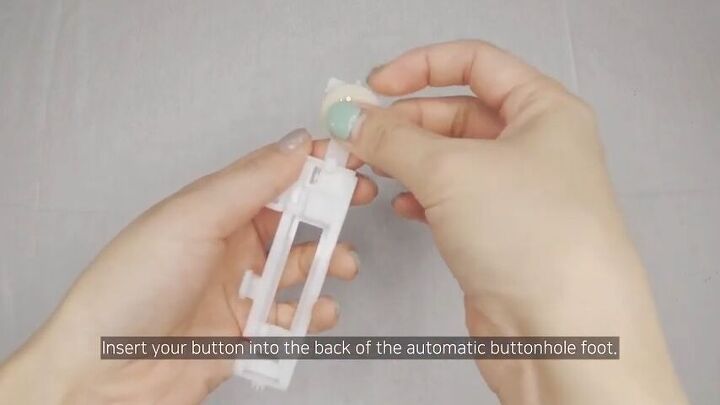
Take your buttonhole presser foot and insert your button into the back of it. The buttonhole foot has a sensor that will make the right size buttonhole according to the size of the button you insert in it.
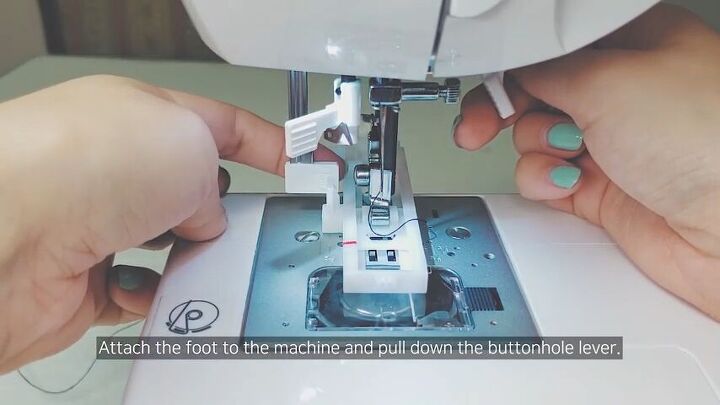
You are now going to replace your machine’s presser foot with the buttonhole foot. You no longer need the button to be in the buttonhole foot, so go ahead and set it aside. Once you’ve attached the foot, you can pull down the buttonhole lever.
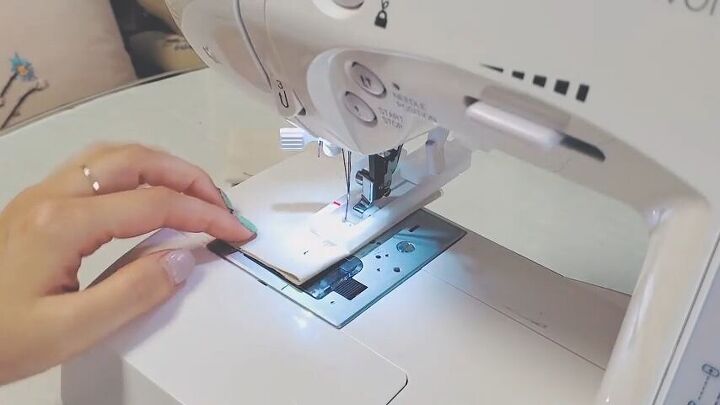
Set your machine to the standard buttonhole stitch, which for me is number 94. Then insert your fabric and start the machine, either with a foot controller or a start/stop button. Your machine will then automatically sew all four sides of the buttonhole and stop on its own. You can then do the same thing on setting number 95, which will create a smaller and thinner buttonhole. Then try it in setting number 96, which will create a keyhole buttonhole for heavier weight fabrics and thicker buttons.
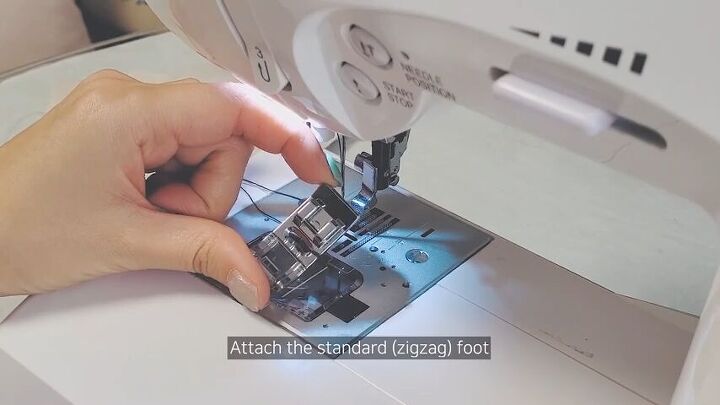
Now we are moving on to the three-step buttonhole, for which we’ll be using a standard foot, also known as a zigzag foot. So the first thing you’re going to do is attach the foot to the machine.
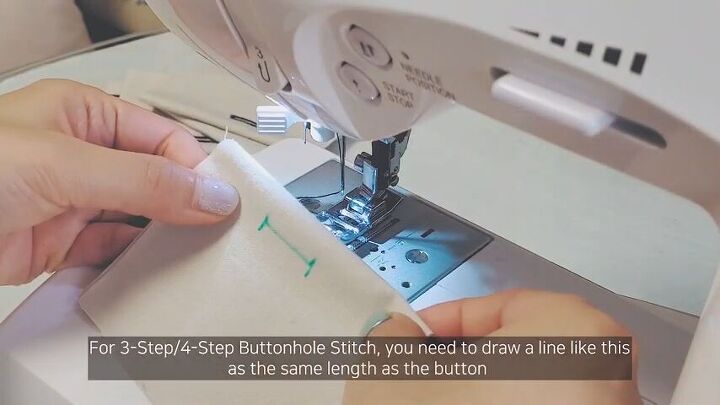
For this type of buttonhole, you’ll need to draw a button line on your fabric in the length of the button.
For the three-step buttonholes we need to use different settings on the machine. So we’re going to start with number 91 which creates the top and left side of the buttonhole. Insert your fabric, set the machine, and sew that part of the buttonhole, controlling the stitch length to the bottom mark.
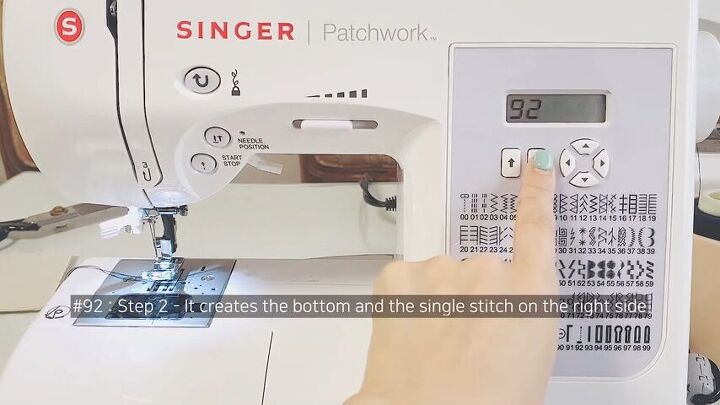
Set your machine to number 92, which creates the bottom and the single stitch on the right side of the buttonhole. Insert the fabric and sew, controlling the stitch length to the top of your mark.
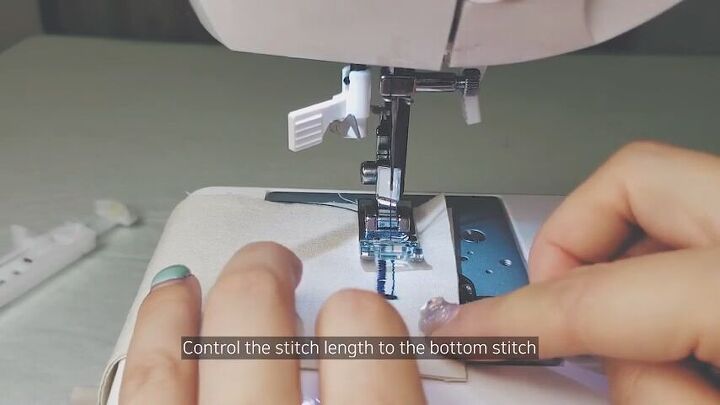
Switch your machine to number 93, and finish off your material, controlling the stitch length to the bottom stitch. This creates a zigzag stitch on the right side of the buttonhole.
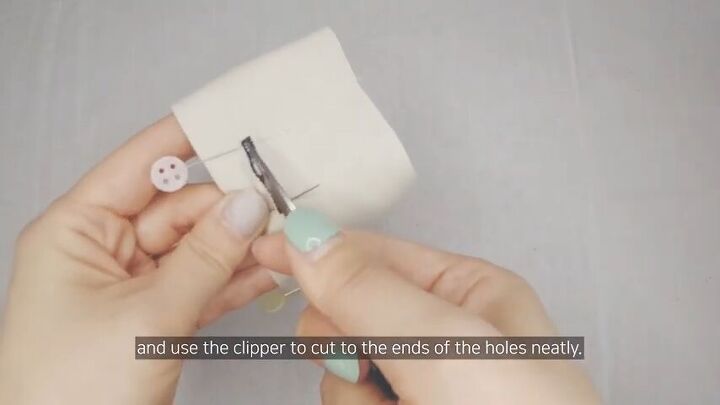
Now it’s time to open up your buttonholes. First insert pins into either side of the buttonhole to keep you from accidentally cutting through the stitching. Then you’re going to use a seam ripper to make a first hole and then a clipper to cut the ends of the hole neatly.
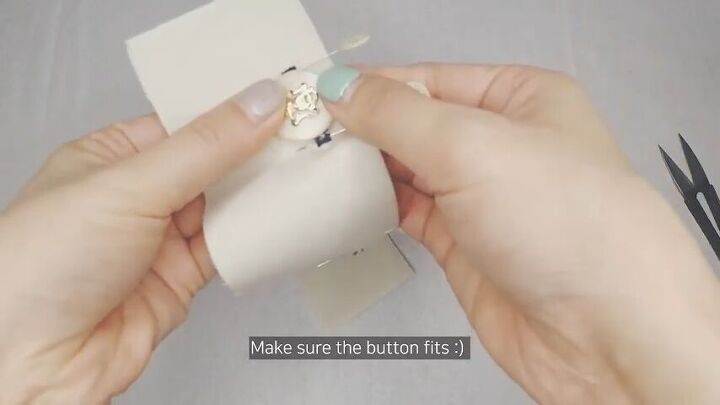
The last step is to put in your button and make sure it fits!
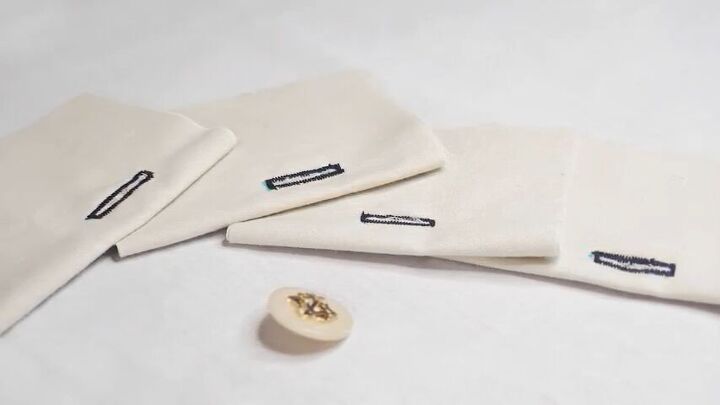
That’s it! Now you know how to make four different buttonholes using two different techniques. This will allow you to create any project that requires buttons without having to pause and figure out how to do it. You already know! It’s great to practice so that when you’re ready for your project you don’t have to think twice. I’d love to see your buttonholes and also your projects involving buttonholes, so show me what you do with this knowledge in the comments!
The author may collect a small share of sales from the links on this page.


Comments
Join the conversation