Three Easy Ways To Revamp Basic Tops Without A Sewing Machine

by
Ms. Melior
5 Materials
$10
1 Hour
Easy
With conscious fashion on the rise, we all are doing our best to keep clothing alive and wearable for as long as possible… and I’m totally here for it!I’m also here, to help give you some fresh and fashionable ways to do that. So, here are three easy ways to upcycle your tops (no sewing machine required)

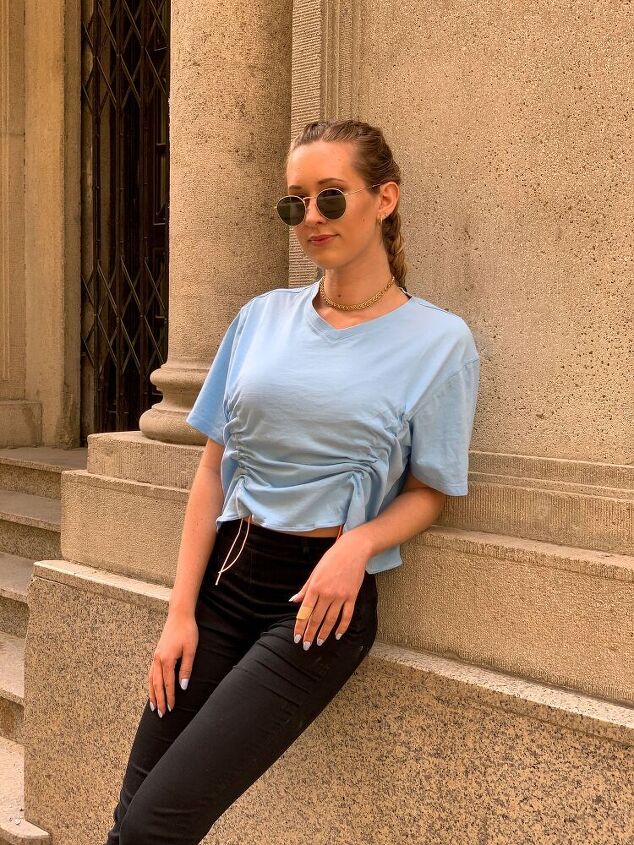
Ruch Your Tops
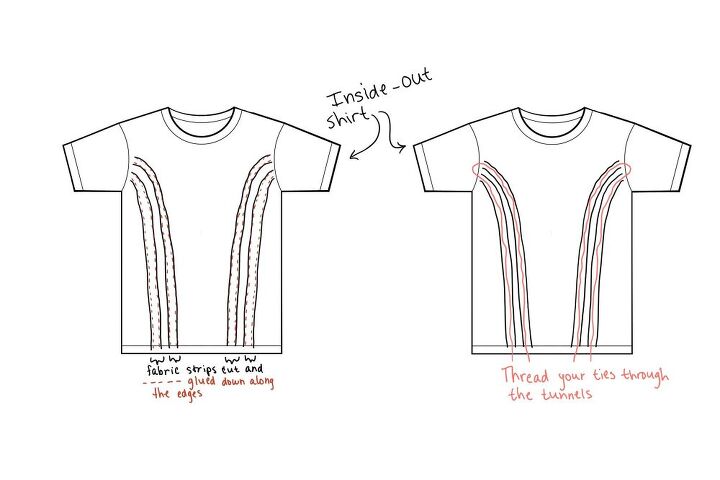
Do not glue in the center of the strips. The idea is to create tunnels for our strings.3. Cut off the excess fabric from the strips so that it can’t be seen below the t-shirt when you flip it right-side-out.4. Thread one string from the bottom of the shirt, up one tunnel, out the top end of the first tunnel and down the tunnel just next to it. 5. Repeat this with the second string on the other side.
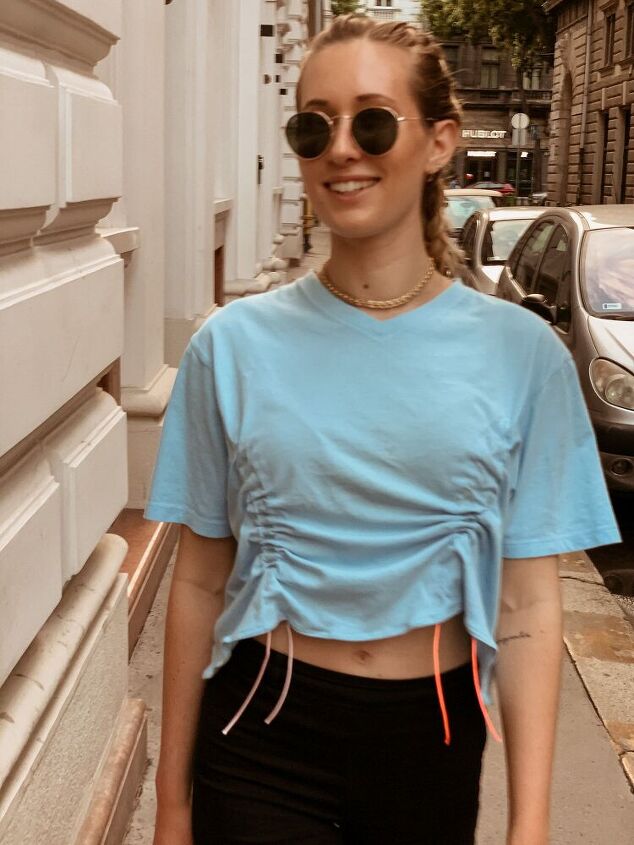
6. Now turn the shirt right-side-out. Pull the fabric up to create a ruch and tie the strings into knots to hold the fabric up.And that’s it!You have a super cool new t-shirt.
Scarves for Straps
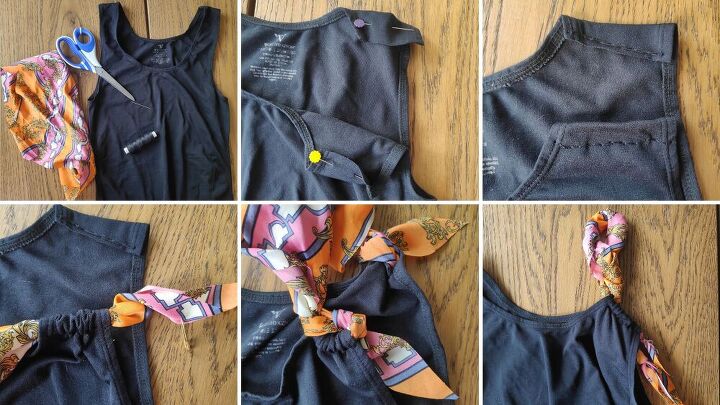
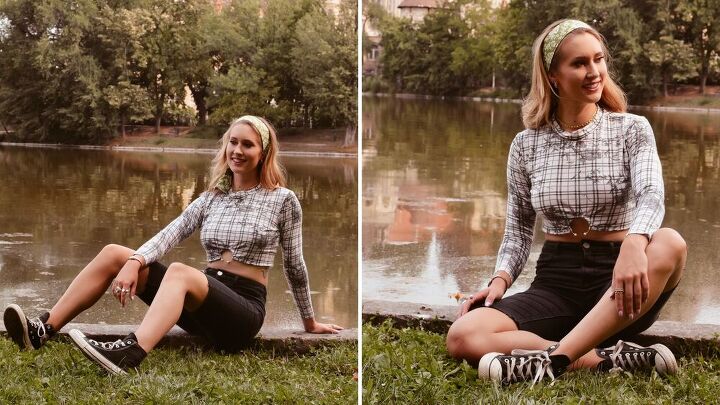
1. Cut off one strap2. Fold over the raw edges of the cut strap inward and pin3. Stitch the edge down leaving space for the scarf to pass through4. Put the scarf through the tunnel and tie in a knot5. Leave it as it is our tie it in a bow like I did!You can also replace this with any scarf any time. You can even get creative and use chain for a strap, or anything else you can think of!I love this upcycle idea because of how easy but versatile it is.
Add A Ring
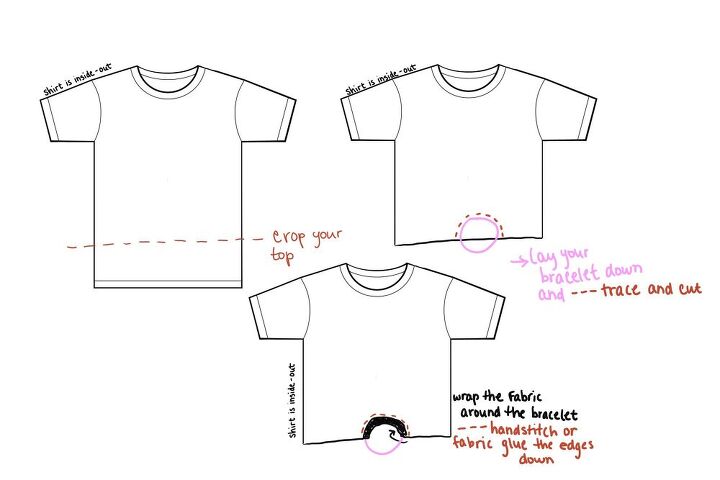
1. First, lay the bracelet onto the front of the top where you want it to sit (ideally, in the center). 2. Trace the top 3/4ths of the bracelet onto the top and cut out this rounded shape. 3. Then wrap the cut rounded edges around the bracelet and pin them in place.4. Using a backstitch or fabric glue, glue the edges of fabric down to keep the bracelet locked in.And ta-da! You’re all finished. I hope these upcycle ideas inspire you. Love, Ms. Melior
The author may collect a small share of sales from the links on this page.


Comments
Join the conversation
Wow! I love these simple edits that really make the look. So cool!