Learn How to Add Boning to Your DIY Bras With This Tutorial

A house has to have good bones, and a bra has to have good boning. Yep, I went there. There are different ways to add boning to your DIY bras, and in this tutorial I’m going to show you one of the methods that I use for my sheer bras. The bra that I used for this is a modified version of the Black Beauty, but it will work with any bra of this style. So keep reading to see how I do it.
Tools and Materials:
- Scissors
- Cotton twill tape - ⅝” wide
- Cable ties
- Bra
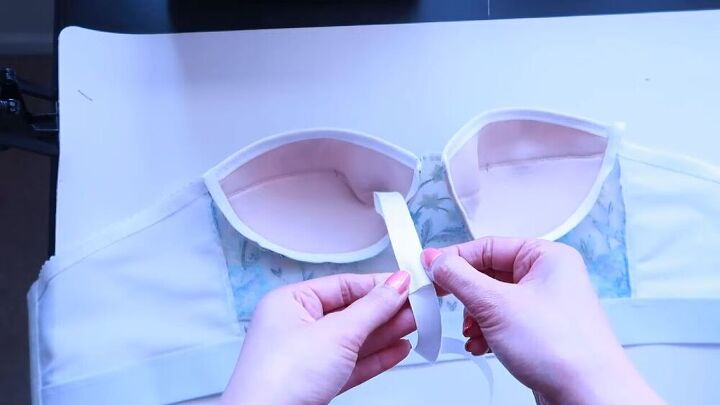
I add the boning when my bra is completed to the point where I’ve already put the underwire channeling into the cup, but haven’t finished sewing it down yet. Now you can actually use pre-bought boning casing, but I didn’t have any so I used twill tape. So what I did was fold over my tape so that it was doubled up and I’d be able to fit the boning in between the layers.
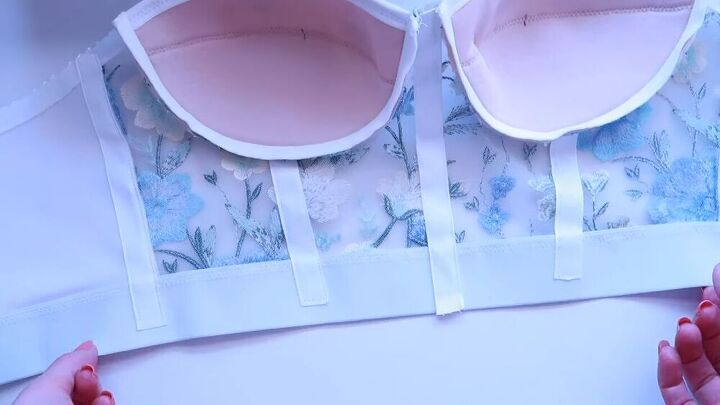
The next thing I need to do is sew my twill tape in place. So I pin it where I need it, and will later sew it at the bottom of the elastic, making sure to get both sides. I do this for five different locations on the bra. First is in between the cups. The second place is under the cups in the center, making sure that the end of the twill tape is up against the seam line where the cup connects to the frame of the bra. And last is along the side channels, where I line it up with the seam line that connects the two pieces of fabric.
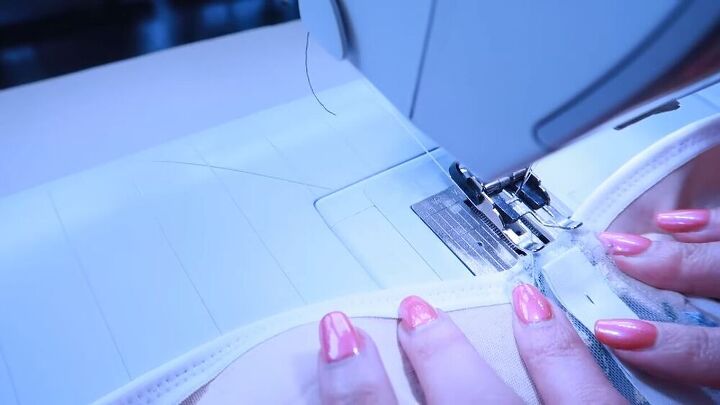
When sewing the twill tape in place, I always make sure to push my underwire channeling out of the way and I line my presser foot with the edge of that channeling. Then I move my needle over a couple of ticks so that I’m close to the edge, which will give me enough space to insert the boning later, and sew a straight stitch all the way down. Then I do the same exact thing for the other side of the tape. Once all the tapes are in place, I just sew down the bra cups like you would for any bra.
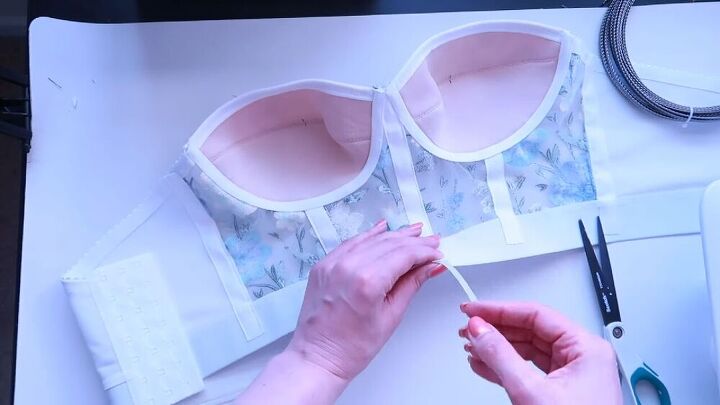
Usually spiral steel boning is the best option to use, but I find that in these types of bra it doesn’t work as well because it can start to erode when the bra is washed. So instead I actually just use cable ties. What I do is, take the cable tie and trim down the end, then trimming off the corners to get a rounder edge and prevent it from poking through. You can also file it down with a nail file to get rid of any sharpness. Then I cut the cable tie to the size I need for each boning and finish off the end again. Next I insert it in between the layers of the twill tape and push it up as far as it goes. Now all that’s left to do is to sew closed the ends of the channels, and my bra is done!
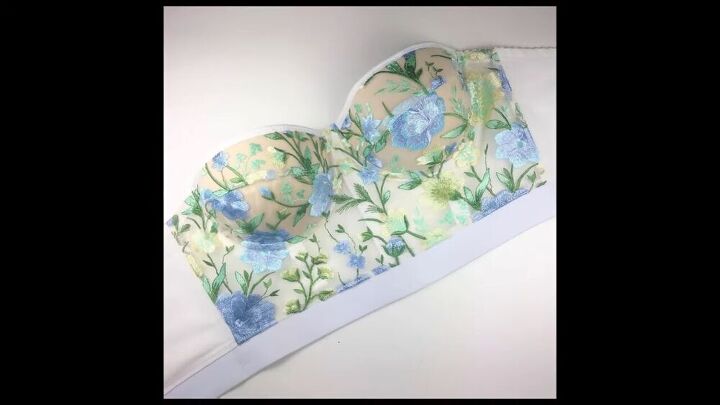
There you have it, guys! The boning is now effectively in place, and even looks good, which is important since you can see it through the sheer material. This process will work with any bra of this style. I also love that I did this with things that I just had lying around the house since I couldn’t get out during Corona quarantine to get the materials I usually use. What do you think? Does it look just as good with these materials? Let me know in the comments!
The author may collect a small share of sales from the links on this page.


Comments
Join the conversation