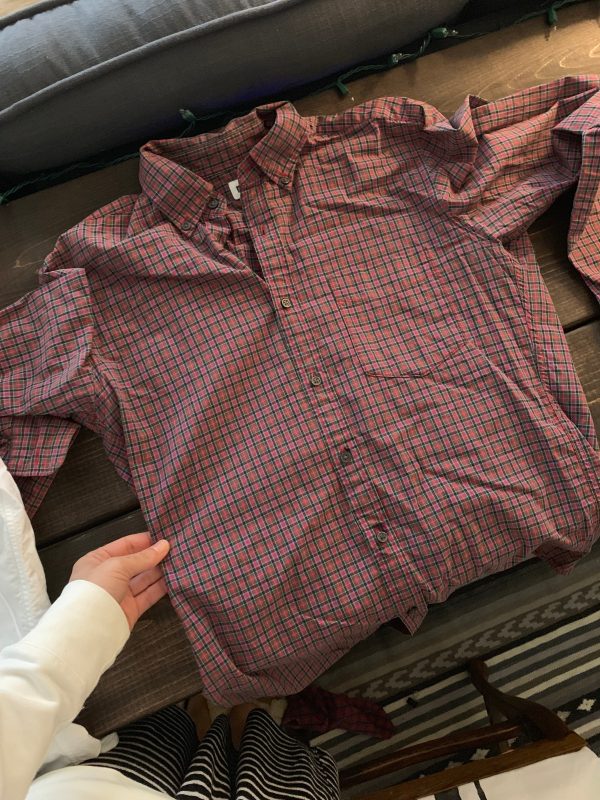
Bow Blouse From a Men’s Button Up Shirt
I love vintage style – even more so around the holidays. I think it is their ability to illuminate tradition. Every December, sequin, plaid and bows strikes again. So, In the festive spirit I decided to combine at least two (sorry sequins). To make this up-cycle I simply used an old mens shirt from the Goodwill. Ya’ll know I love a good thrift hunt. Luckily, the Boston Goodwill is always a treasure trove and I was able to whip up this shirt.
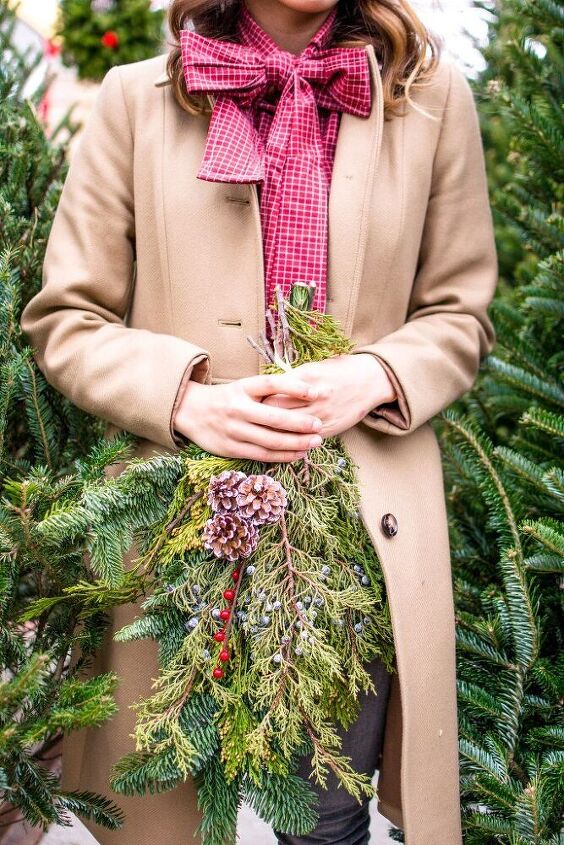
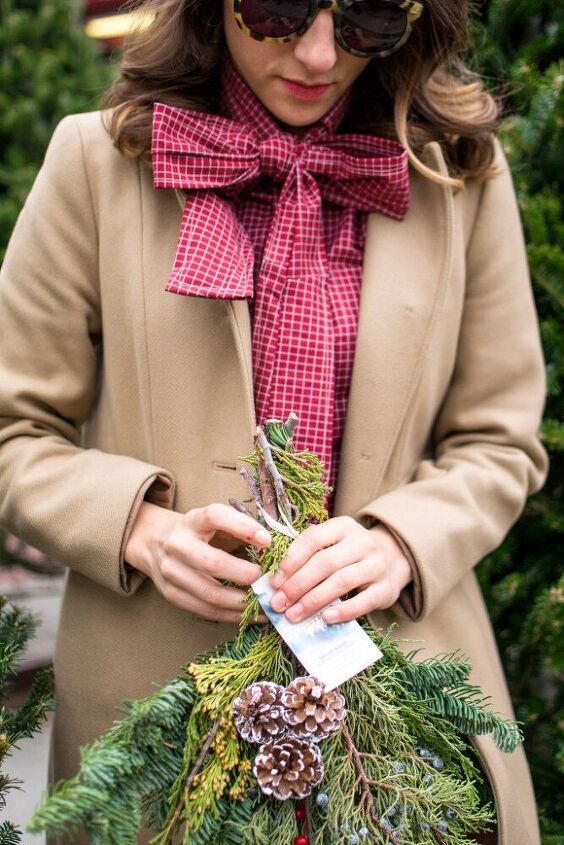
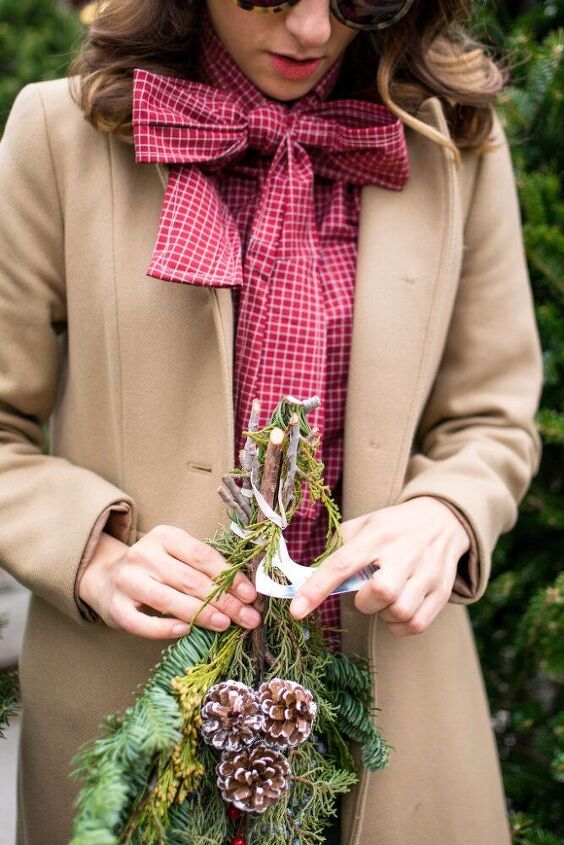
One of the placed we stopped on our way to the Cape was a Christmas tree stand. While dozens of tree pop-ups nestled themselves along the road, we stopped at Lambert’s because it is photogenic glory. When you find a photogenic place, it is not without the struggle of on-lookers asking why i’m taking a picture. I’ll tell you that being a blogger always comes with the same struggle – explaining why you are taking photos in the middle of the day. After explaining to the owner that I was taking pictures for a blog (which is always SO awkward) he finally obliged. So if you are on the Cape – go to Lambert’s and tell them the “crafty” girl sent you

So, among the evergreen, I was able to shoot photos that really made the red plaid of this up-cycled top really pop. I love how festive the color turned out next to the green of the fir. Luckily, the bow tie behaved well. I’ve learned, it is not easy to tie a bow on yourself.
Materials
- mens button down (usually 1 size bigger than yourself)Matching threadironsewing machine
STEP 1: Iron the mens shirt to make sure that it is free of wrinkles
STEP 2: Using an existing shirt as a template, pin from the shoulders all the way down the bust. If you are busty, you should stencil the front and back separately. However, if you are modestly build like myself it doesn’t matter much. I stenciled and cut up the sides with 1/2 inch seam allowance.STEP 3: Sleeves (optional step) if you choose to add sleeves, open the shirt (it should still be connected at the shoulders, like you are butterflying a chicken. the entire piece should be flat on the working surface. cut along the seam of the sleeve to open and lay flat underneath the shoulder/arm hole of the bodice piece. Using the bodice piece as a stencil, cut the top of the sleeve to the shape of the bodice arm hole and remove excess material. cut down the diagonal of the sleeve from arm pit to wrist. pin to the arm hole and right sides together, connect to the bodice. *do not down sleeve seam first*STEP 4: Pin and sew from the end of the wrist of the sleeve to the armpit, all the way down to the end of the bodice.STEP 5: At this point, i would try on the shirt. it is a boxy fit SO it might need some altering. I ended up creating a seam at the back of the collar, as it was a little big. I also made two darts in the back of the shirt (diamond shape) to pull in the the back.STEP 6: For the bow tie- this is why it is essential to get a bigger shirt than your actual size. I used remnant fabric from both sleeves and the bottom of the shirt to create a strip of fabric about 1 yard long x 6 inches wide. I then ironed “hot dog style” and sewed to create a 3″ tube. flip right side out and iron. sew to close the ends.STEP 7: Pin the center of the strip to the back of the collar. sew to connect the tie to the collar. it should conceal the old collar entirely.
STEP 8: Tie the bow and wear to pick out your tree.

Marissa
The author may collect a small share of sales from the links on this page.

Want more details about this and other fashion and style ideas? Check out more here!


Comments
Join the conversation
I love how festive this look is!