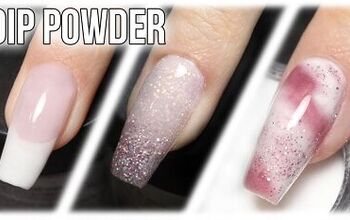
How to Create Fun Ombre Nails With Dip Powder and Stamps

If you ever wanted to learn how to do a triple ombre nail design, then this tutorial is for you!
This 3-color ombre technique is done without any gels: it’s all about the dips and stamping here. So, let’s get started.
Tools and materials:
- Neutral nail polish colors (lightest to darkest)
- Builder gel or rubber base
- Dip powders in blue, yellow, and pink
- Dip liquid (base, activator, top coat)
- Stamping plate with floral designs
- Stamping polish in black and other colors
- Smudge-free top coat
- Lint roller
- Toothpick or thin brush
- Acetone or nail polish remover

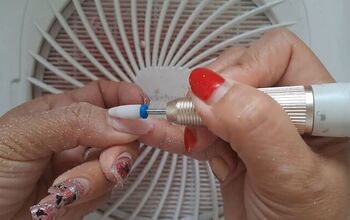
1. Prepare your nails
Start with clean, trimmed nails.
Apply builder gel or rubber base and create your desired nail shape.

2. Apply neutral colors
Begin with the lightest neutral color as the base.
Apply two thin and even coats of each neutral color, ensuring they don't overlap.

Between each layer, remember to clean off the excess powder around your nail bed.

Lightly brush off the excess dip powder from the top of your nails.
I did two coats of neutral color followed by a coat of clear dip powder.

3. Use this triple ombre technique
Start with tapping the blue powder onto the bottom third of your nail.
Using a brush to tap on the dip powder will help you get nice thin layers.

Tap the yellow powder onto the middle section, overlapping slightly with the blue.

Finally, tap the pink powder onto the top section, overlapping slightly with the yellow.
Allow the powders to sit for a moment to blend.

Clean up the edges.
4. Apply the second layer of ombre
Repeat the ombre process for the second layer, but reverse the order of colors. Start with the color that needs to pop the most (e.g., yellow), followed by the other colors.
Unfortunately, I realized that reverse tip too late. I should have started with the yellow on the bottom third.
Ensure even application and blending between colors.

5 Blend by scrubbing
Use an ombre brush to scrub the colors together for a smoother transition.

Focus on areas where colors meet to create a seamless blend.
By scrubbing the edges, you are creating new colors in the ombre blend.
You can see the green emerging where the yellow and blue edges were scrubbed, and orange where the pink and yellow edges are scrubbed.

6. Apply top coat and finishing
Apply a clear top coat over the ombre nails.

Activate your ombre nails, then buff, file, and shape them for a smooth finish.

7. Prepare for stamping
Clean your stamping plate with acetone to remove any residue.
Then, roll your stampers over a lint roller to ensure they're clean and free of debris.

8. Stamp your nails
Use stamping polish to transfer floral designs onto your nails that you left neutral, with no ombre application.

For layered stamping, ensure each layer is clean and visible for accurate placement.
Using a larger image for layered stamping is easier.

Use a toothpick or thin brush for filling in designs, especially for reverse stamping.
9. Allow to dry
Let the stamped designs dry completely before applying any top coat.

10. Apply top coat
Apply a smudge-free top coat over the stamped designs. Allow the top coat to dry thoroughly before proceeding to the next step.

11. Use dip top-coating
Apply dip liquid activator and top coat following the manufacturer's instructions.
Ensure the smudge-free top coat is fully dry to prevent wrinkling.
Now, just check for any imperfections and touch up, if necessary.

Ombre nails with dip powder
Then, admire your triple ombre and stamped nail art masterpiece!
By following these steps, you can achieve a stunning triple ombre and stamped nail design, perfect for any occasion. Remember to take your time and enjoy the creative process!
Leave a comment to let me know how your 3-color ombre nails turned out!
Next, check out my Pantone-inspired Peach Fuzz Nails Tutorial.
The author may collect a small share of sales from the links on this page.


Comments
Join the conversation