Easy No-sew Ideas: Step-by-step DIY T-shirt Cutting Tutorial

I took a man’s XL t-shirt with no side seams (this part is important) and turned it both into a cropped tank and a wrap top that can be worn in over 20 different ways.
This is one of my favorite upcycling ideas for clothes. So follow along for my step-by-step t-shirt cutting ideas for no-sew tops.
Tools and materials:
- Oversized t-shirt without side seams
- Fabric marker
- Ruler
- Scissors

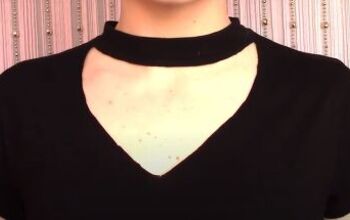
1. Crop top
Wear your t-shirt inside out and mark the shortest you want your tank top to be.

Lay it down flat. If your mark is above the bottom of the sleeves, draw a line straight across the t-shirt at the level of the sleeves.
Otherwise draw the line at your mark.

Draw a curved line from the bottom of the sleeves to the side of the collar at the width you want your tank top straps to be, and draw a matching line on the other side.

Cut along all the lines through both layers of fabric.
If the front and back are still attached, separate them at the sides.

Put the top on and pull gently on the ends of each piece to stretch them.

Tie the front and back together at the sides.

And there’s your tank top!

2. Cut the wrap top
We’re going to cut the remainder of the t-shirt into a long, continuous strip of fabric.
For sizes XS to S, the strip should be 6 to 8 inches (15 to 20 cm) wide, for M make it 9 to 11 inches (23 to 29 cm) and for L or XL I’d suggest 12 to 14 inches (30 to 40 cm). If in doubt, make it larger.
Cut off the bottom hem, or unpick it if you’re making one of the larger sizes.

Mark the width of your strip on the fabric as many times as you can with parallel lines.
Mine was 7 inches (18 cm) wide and I got three strips from my shirt.
Mark where these lines end on the back.

Turn the fabric over and connect the top mark on one side to the bottom mark on the other side with a diagonal line.

Measure and mark parallel lines on either side, the width of your strip.
These lines should run from the remaining marks to the edge of the fabric.
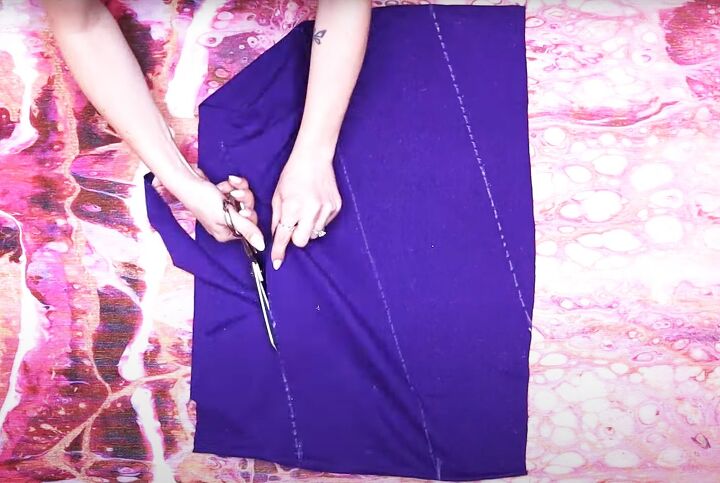
Starting from the top or bottom, cut through the single layers of fabric along what should now be a continuous line, so you end up with one long strip.

3. Styling the wrap top
I created four basic styles of wrap which I’m going to tie in different ways.

They all need you to find the center of the long strip, so I’d suggest you mark that in some way before we start.

4. First style: wide bandeau
Find the center and spread out the width of your strip.
Wrap it around your bust from the front.

Cross the straps at the back and pull them tightly.
Spread them out again as you cross them in the front at your waist.
Tie at the back for your first base style.

Watch the video from 4:14 to 5:26 to see the different variations of this style.

5. Second style: cross front
Find the center as before and spread the strip out.
Twist it once before wrapping it around your bust from the front.

Cross the straps at the back and as you wrap them forward again, bring one to the top and one to the bottom.
Carefully spread them out and cross them in an X shape over the front of the wrap.
Tie the straps at the back for the second base style.

Watch the video from 5:52 to 6:27 to see all the variations.
As you’ll notice they’re wrapped very similarly to the first set, but over a different base.

6. Third style: Knot front
Find the center, spread it out and then wrap the strip around your chest from the back.
Tie it in a knot in the center front and spread it out to cover your bust.

Take the straps around to the back, one at the top and one at the bottom.
This is actually the base style.

To make it wearable, cross the straps at the back, then cross them in front again below the top and tie them at the back.

Watch the video from 7:00 to 7:21 for details of the other styles based on this wrap.

7. Fourth style: halter wrap
This style is slightly different.
Find the center and wrap it around your bust from the back.
Cross them in an X shape in the front, throwing the straps over your shoulders to make the base style..

You can see the last three styles in the video from 7:32 to 8:08.

Step-by-step DIY t-shirt cutting ideas no-sew
I’m sure there are more than 20 ways you can wrap this top, but I hope these have given you a good start.
I’d love to see what else you come up with. Please leave me a comment below and let me know.
Next, check out my Easy DIY T-shirt and Leggings Weaving Tutorial.
The author may collect a small share of sales from the links on this page.


Comments
Join the conversation