How to Create Cute Blue Dip Powder Nails At Home

Today, we are going to talk about how to get beautiful blue dip powder nails.
Once we’ve done our dip powder, we're going to do some super fun layered stamping over the top of it. I’ll talk you through just what you need to do.
Tools and materials:
- Builder gel
- Colored dip powder
- Clear dip powder
- Glitter dip powder
- Nail brush
- Nail file
- Nail barriers
- Top coat
- Stamper
- Scraper
- Tweezers
- Cotton balls
- Stamping polish
- Stamping tray
- Sticky base
- Toothpick
- Acetone

1. Apply base coat
First, apply builder gel as a base.

2. Add blue dip powder
Pour the blue dip powder over your nails.
Do one layer, then apply builder gel, and then apply a second layer.
When applying dip powders, you want your nails not to be super thick. Make sure that your dip liquids are as thin as they possibly can be and that they just cover the nails.
You don't want the liquids to be super thick on your nails, or else your dip is going to end up really thick as the dip soaks up into whatever liquid you have on your nails.
Ensure that after each layer, you brush off the excess powder with a nail brush.

3. Add glitter dip powder
On some of my nails, I’m using a glitter dip powder. For this, I lay my nail right into the powder.

4. Add clear dip powder
Do a final dip with clear dip powder, and then add builder gel to activate the nails.

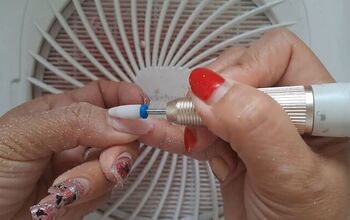
5. File, buff and shape
Once your nails are completely dry, fix up any shaping on the top of the nail.
Go in on the cuticles to clean up any cuticle lines and make them nice and smooth.

6. Put nail barriers on
Protect your skin from the stamps that are going to get on the side of your skin by putting on some nail barriers.

7. Prepare reverse stamp
When you're doing a layered stamp, the first thing you want to do is get the top ready that you're going to do the reverse stamping on.
Let that dry while you do the base stamp.

8. Stamp nails
Put a sticky base on your nail. Then, to stamp, apply white stamping polish to the stamping tray, scrape it down so it's very thin.
Then, place your stamp over the design that you want and roll it onto your nails.

9. Paint reverse stamp
Now, you can work on the reverse stamping by coloring in the top stamp.
Once you get your initial image picked up off the plate, you can go through and just fill in the rest of the image with various colors, using a toothpick to put them on.
I wanted to do a really dark seashell design, so I used a dark gray, a lighter gray, and navy blue for the base color.
When you’ve finished filling in your stamp, let it totally dry before you go and apply on top of the first stamping layer.

10. Apply to nails
When the first layer is dried, apply a sticky base and allow it to sit for about 15 to 20 seconds to make sure it's tacky but not wet.
Then you can go and just roll your reverse stamp right on down.

11. Clean up nails
Once the stamping is done, take off the nail barriers and go around your nails with acetone to clean up any excess stamping polish that got on your skin.

12. Apply top coat
Finish off with a top coat.

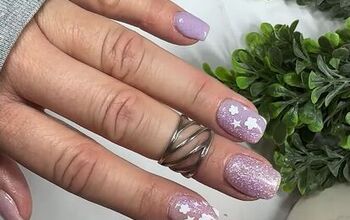
Blue dip powder nails
Here is the finished look, and I have a complete mix of different designs. I have my gorgeous blue dip powder, the sparkly dip powder, and a nail with half and half.
And then, of course, we have our stamped nail with the white stamped base and a layer of colored sea shells over the top.
Next, check out my Easy Pink Barbie-inspired Nails Tutorial.
The author may collect a small share of sales from the links on this page.


Comments
Join the conversation