Quick and Easy Dutch Braid Hairstyle Tutorial

Today, I’m going to teach you a deceivingly simple hairstyle that only takes a few minutes to style and looks so pretty.
Follow along for this peek-a-boo Dutch braid hairstyle.
Best frizz control serum!
Tools and materials:
- Hair brush
- Hair elastic
- Claw clip
- Bobby pins

1. Brush and part your hair
Start with your hair brushed and in a side part.
If this is your first time making a Dutch braid, check out my Dutch braid tutorial that shows the process close up.
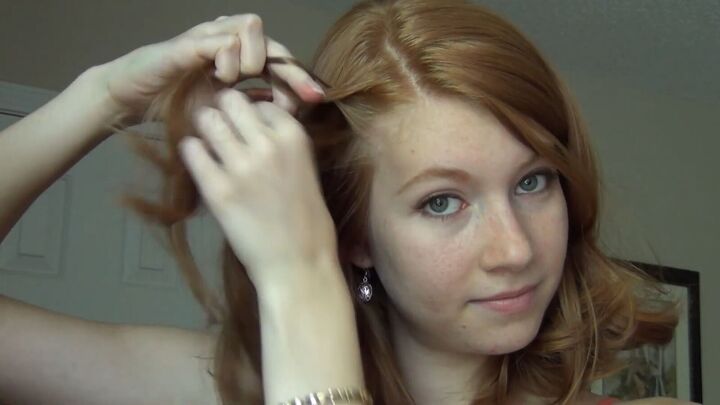
2. Make a Dutch braid
The side of your part with less hair is where we will make the Dutch braid.
Grab a diagonal section of hair, toward your part, and split it into 3 equal pieces.

Start your braid by crossing your first piece (either of the outer pieces) under the middle strand. This crossing under is what characterizes the Dutch braid.
Next, cross the other outer piece under the middle strand.
After crossing both outer pieces under the middle strand, alternate adding more hair from the front and from the back.
Repeat this until you’ve used all the hair above your ear.
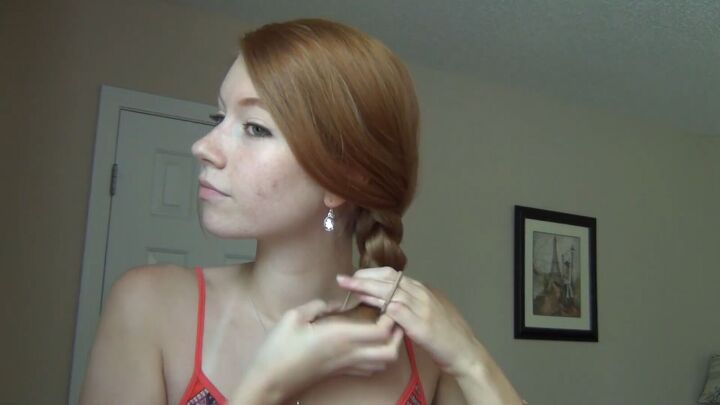
3. Continue with a regular braid
Just after your ear, continue by making a regular, 3 strand braid.

Tie off the end with a small, hair elastic.

4. Pinch and pull the Dutch braid
Fluff out each piece of the Dutch braid to make it bigger and allow it to lie flatter against your head.

Pull out a few face-framing strands of hair too if you’d like.

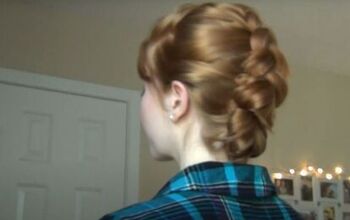
5. Hide the tail of the Dutch braid
At the back of your head, lift up some of the hair and temporarily clip it on top of your head.

Grab the end of the braid and lay it flat against your head, under the hair you clipped up. Use a couple of bobby pins to secure it in place.

I recommend placing 1 pin from the top of the braid and 1 from the bottom to make an X.

Then release the hair clipped on top of your head so that the braid disappears into your hair.

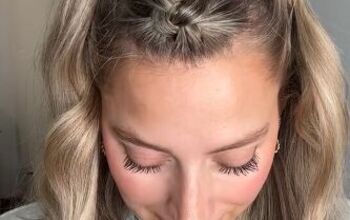
You can wear the peek-a-boo Dutch braid just like this:

You could also pull up the rest of your hair into a messy bun.

Or you could twist and pull back some of the hair from the other side.

A final option is to pull all the hair to the side without the Dutch braid and braid it into a regular, 3-strand braid.
This side braid option works best if your hair is a bit longer than mine!
Dutch braid hairstyle
That’s all there is to this peek-a-book Dutch braid hairstyle and I hope you’ll try it! Leave a comment down below.

The author may collect a small share of sales from the links on this page.


Comments
Join the conversation
Very pretty! it's good to see some hairdos for shorter hair. Thanks.🙃