Inspiration: Polymer Clay Beads Done Right

So we know we can do a lot of stunning accessories from polymer clay, the most popular being earrings. Today, I will take my tutorial to the next level and show you how to make polymer clay beads. They are so fun to make, and you can use these beads to make polymer clay bead earrings or even bracelets. There are so many options for this versatile clay, so let your creative juices flow as I give you some awesome inspiration for your next craft DIY project.
Tools and materials:
- Pin
- 3 sections of different colored polymer clay
- Blade
Make the actual beads
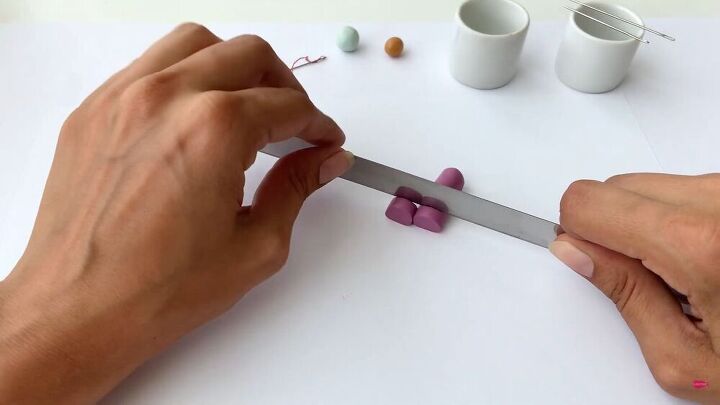
Using a clay of your choice, roll into a long log-like structure and cut out small pieces. This will be for your actual beads. To get a precise shape for each bead, place the first cut-out piece next to the log and use it as a guide when cutting the rest of the pieces.
Next, roll the clay into perfect, smooth balls.
Slide the tip of each ball onto a pin to make it easier to work with. Slide it in carefully, rolling and twisting the pin as you slowly push it up through the ball. Repeat the same for the other ball.
Create the leaves
Next, for the leaves, take a different colored clay; in my case, I chose a beautiful pastel green. Roll it until it shapes into a thin pipe, as shown. Next, cut out tiny pieces with your blade.
Take a piece and flatten it with your index finger so that it has a leaf-like flattened shape. With a pin, lay the green pastel piece on the bottom side of the bead. With your pin, create a middle line and 3 outer lines by gently stroking it. Repeat this step all around the bead itself, making sure it is evenly distributed around the circumference.
Create more leaves
Take a third colored clay ball and roll it out just like you did with the leaves—portion into tiny pieces. With your index finger, flatten it down but this time, make it elongated so that it’s longer than the green leaves.
Carefully place these between each green leaf, making a slight fold in the middle with your pin.
TIP-
This process can take a while, so play some music or put your favorite podcast on while making your polymer clay beads.
Poke indents
Next, using your pin, poke some indents on the upper portion of the bead. These should be tiny holes that are paired in threes. This will give your beads some pattern and depth. Make sure to repeat the whole process on the other bead.
Now you have a set of stunning polymer clay beads. As mentioned, you can use these beauties as earrings, as shown above, or in a necklace. It’s your own work of art that you get to wear, giving you a unique personal touch to your accessories. Happy beading!
Enjoyed the project?
Suggested materials:
- Pins
- Polymer clay
- Blade
The author may collect a small share of sales from the links on this page.


Comments
Join the conversation
Very pretty😊 Are they light weight?
Lovely, thank you for sharing :)