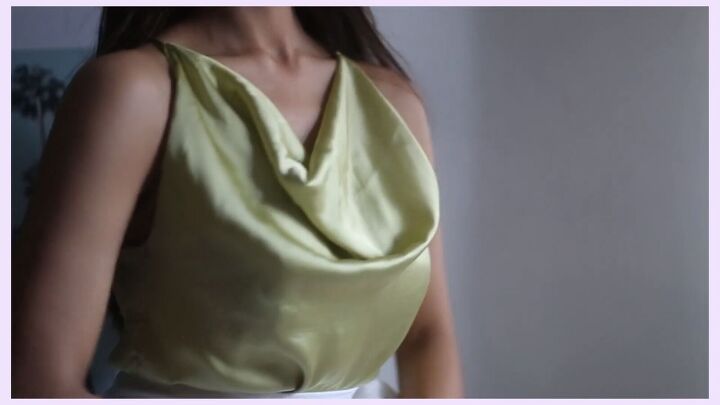
How to Sew a Cowl Neck Top That's Essential For Your Summer Wardrobe

We’re going to be making an absolute essential for your wardrobe! I'll show you how to sew a cowl neck top. This sleek and satin DIY cowl neck top has a beautiful open strappy situation in the back, too.
You’ll definitely look like a glam goddess with this beautiful cowl neck top. I can’t wait to show you the results, so let’s get started!
Tools and materials:
- Fabric 2x1m (2.18 x1.09 yards)
- Scissors
- Thread cutter
- Measuring tape
- Sewing machine
- Pins
- Safety pins
1. Make the DIY cowl neck top pattern
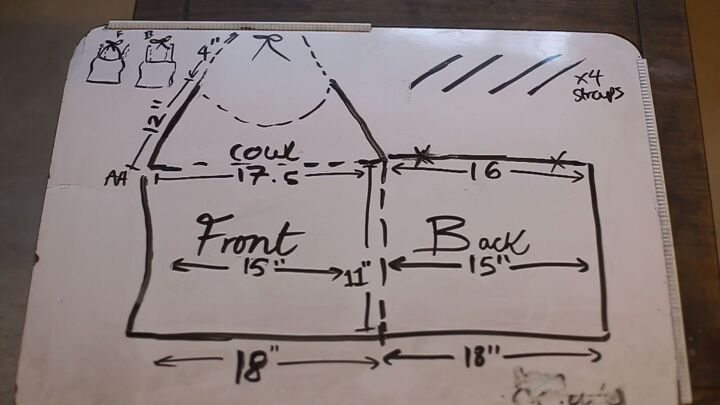
Just to help you visualize the pattern, I drew out the pattern on a whiteboard. This pattern will be most suited to UK 6-8 (2-4 US). It is on the looser end because I like cowl tops that way.
The pattern is accompanied by a four-strap design so you can make a halter at the back. There’s also an extra two straps to cinch in the top here and there. Trust the process; it’s going to look great!
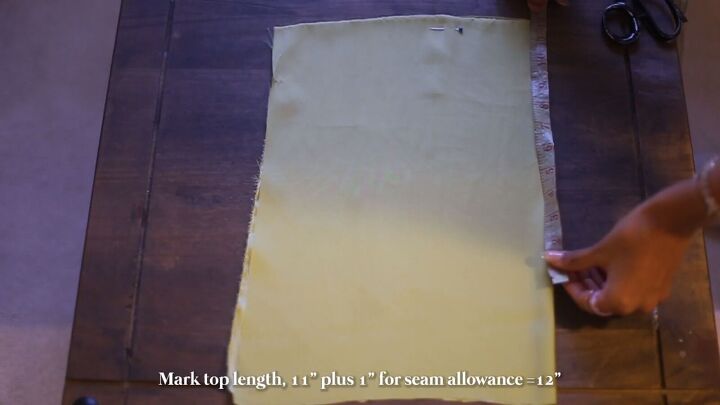
For the back panel, fold your fabric in half. Mark 11 inches from the top plus 1 inch for seam allowance. To be on the safe side, add another inch for seam allowance.
Mark off the hem for the back piece.
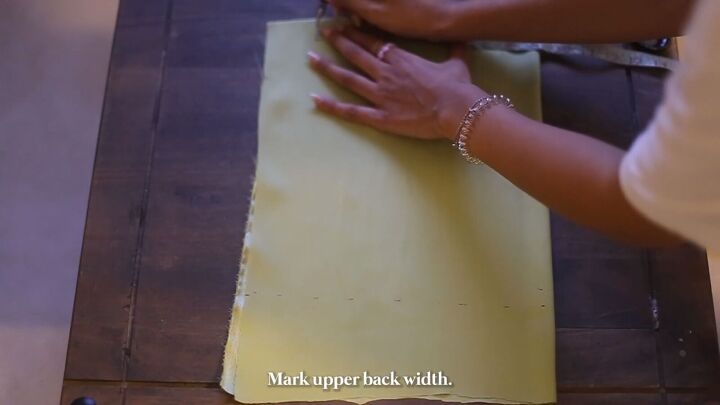
Starting with the top edge of the garment, measure 16 inches for the width plus a 1-inch seam allowance for both the left and right seams.
Fold the measuring tape in half to find the mark on the fabric that’s also halved. The total is 18 inches.
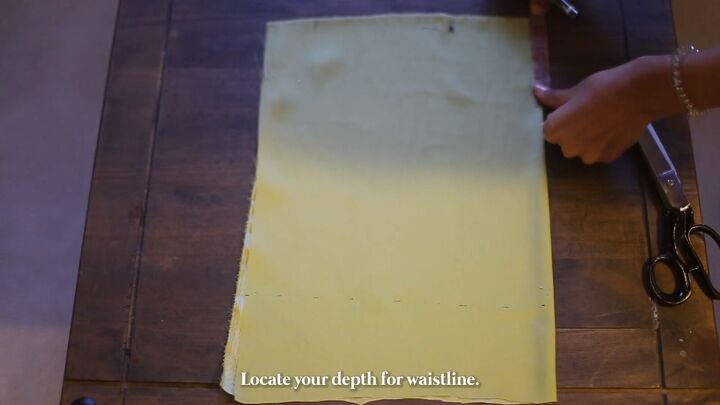
Locate your depth for the waistline and mark.

Using the same measuring tape method, mark the waist’s width. Remember to account for a 2-inch seam allowance for the waist measurement.

Mark the hem measurement; mine is 18 inches + a 2-inch seam allowance.
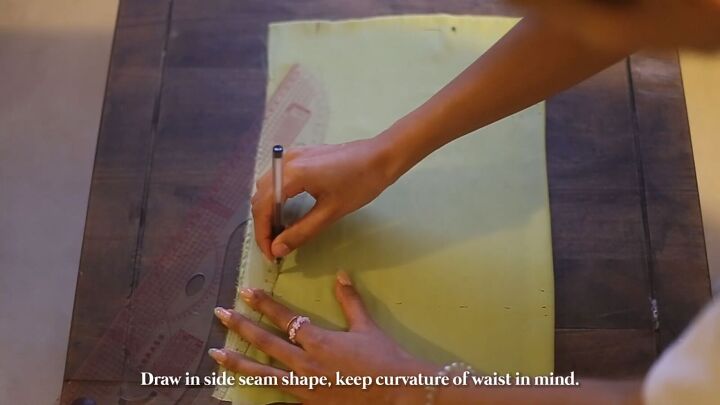
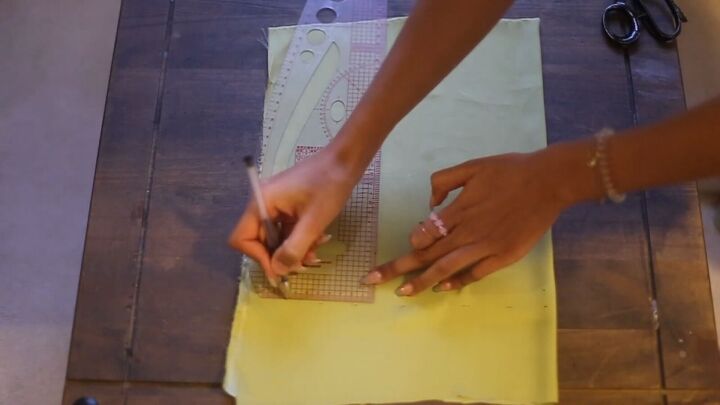
Draw in the side seam shape while keeping the curvature of the waist in mind.
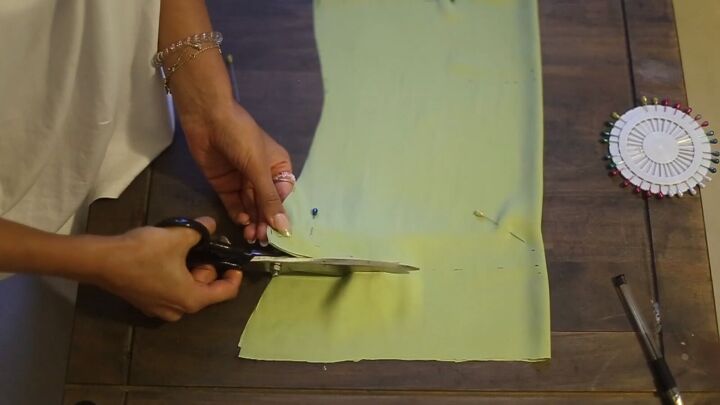
Satin is extremely slippery, so use as many pins as possible to secure it down when cutting. Better to be safe than sorry.
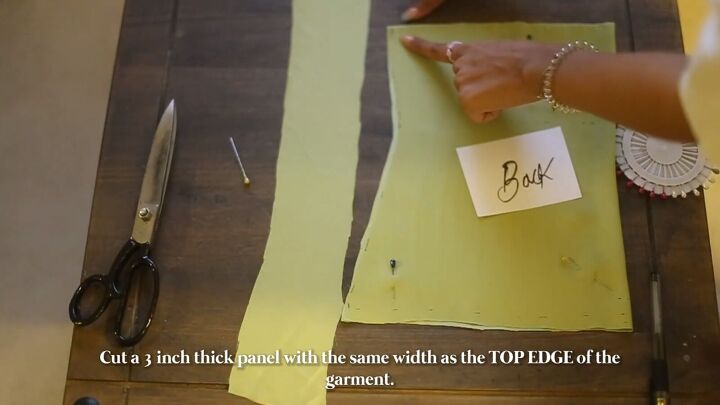
Cut a 3-inch thick panel with the same width as the top edge of the garment.
The front panel will come out quite long as it contains the cowl piece in front and an additional piece that folds behind the cowl, resulting in that weighted effect.
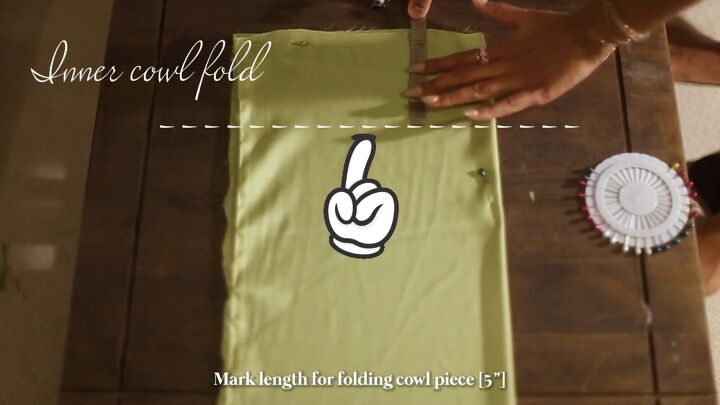
Start by folding the fabric in half (mine measured 34 x 25 inches). Mark the length for the inner folding cowl piece, which is 5 inches.
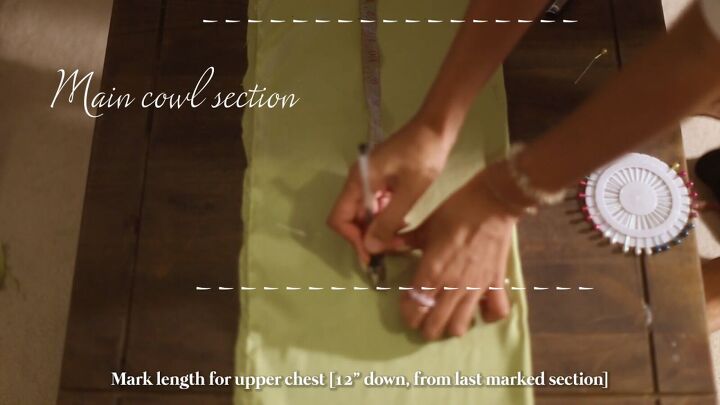
Mark the length of the upper chest. This will be 12 inches down from the last marked section.
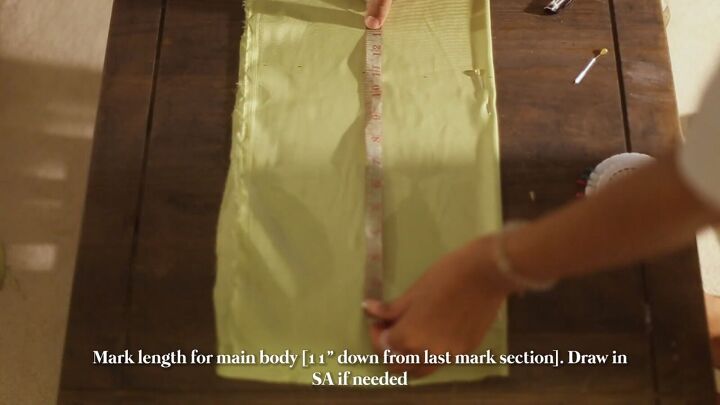
Next, mark the length of the main body. This will be 11 inches down from the last marked section. Add in seam allowance if needed.
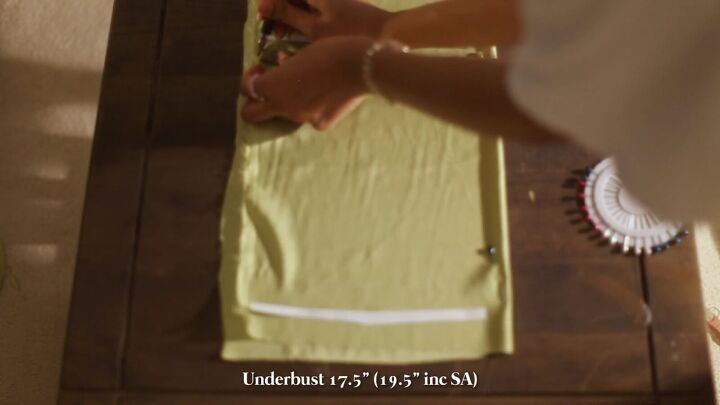
Mark in measurements for the bodice shape and account for 2 inches of seam allowance. This will be for the underbust, waist, and hip. Here, I’m measuring the underbust with the folded tape method.
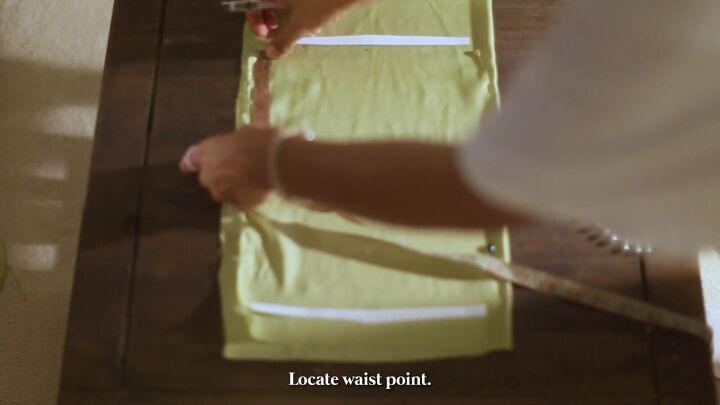
Locate the waist point.
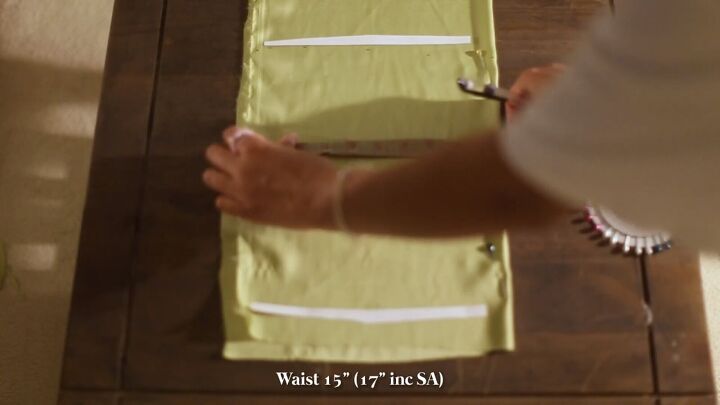
Then, mark the waistline; 15 inches + a 2-inch seam allowance.
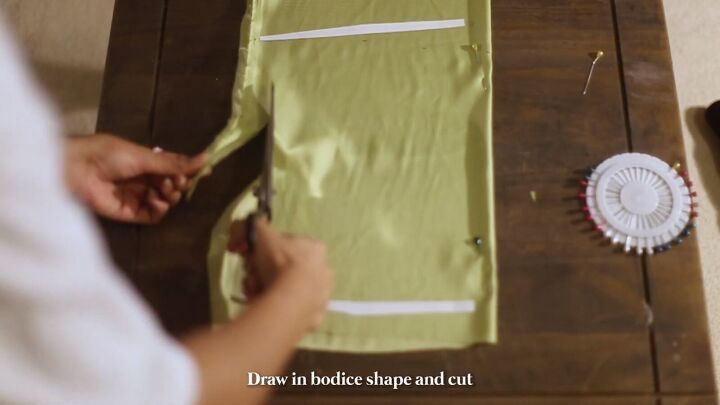
Draw the bodice shape and cut. Remember to place pins to secure the fabric.
Open your fabric and locate the demarcation line for the cowl area. Iron down the fold with the matte (or wrong sides) kissing.
2. Assemble the DIY cowl neck top
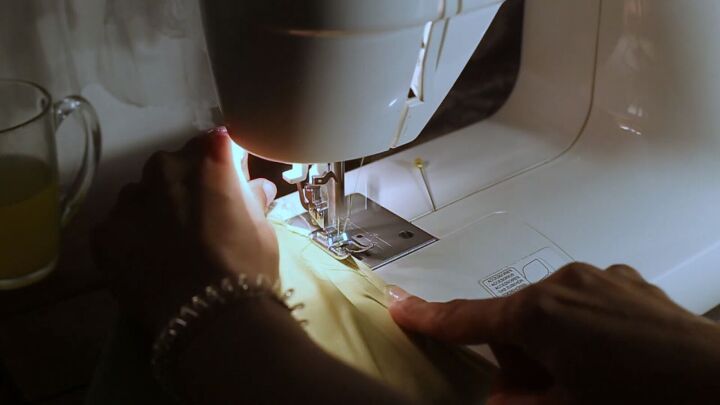
Zigzag stitch the lower edge of the inner cowl segment. Then, straight stitch the side edges of the front bodice by folding the edges over twice.
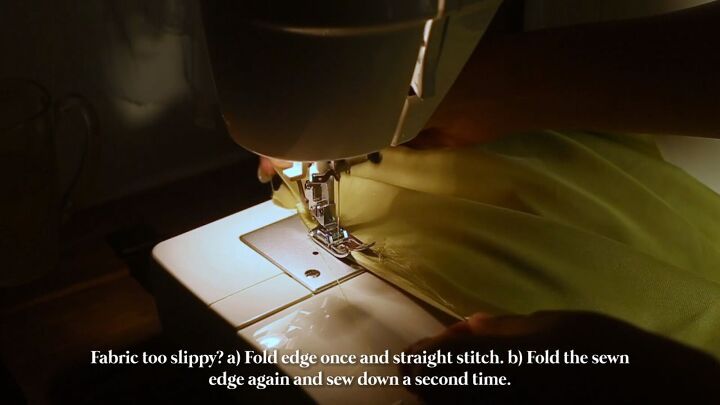
If your fabric is too slippery, fold the edge over once and sew a straight stitch. Then, fold the sewn edge again and sew a second line.
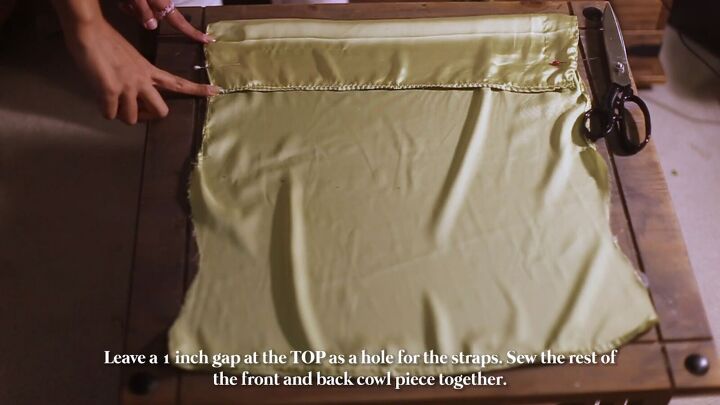
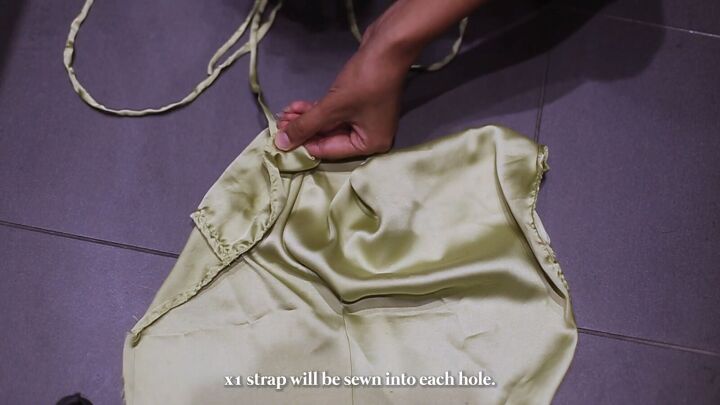
Leave a one-inch gap at the top as a hole for the straps.
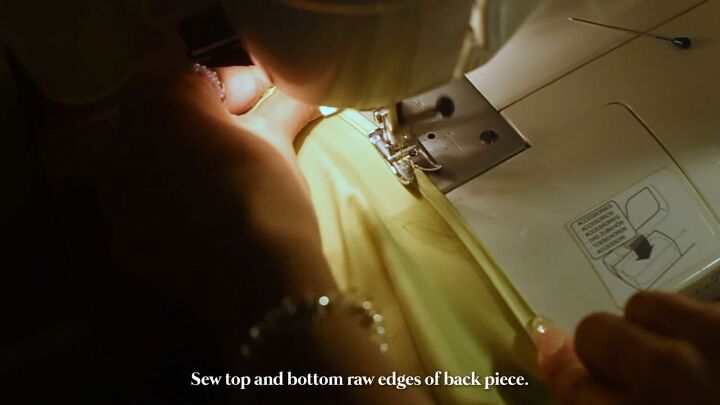
Sew the top and bottom raw edges of the back piece.
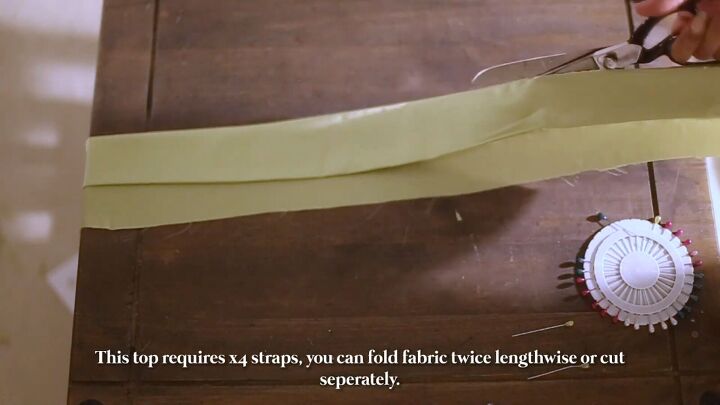
3. Make the straps
Make four spaghetti strap pieces. You can fold the fabric twice lengthwise or cut it separately.
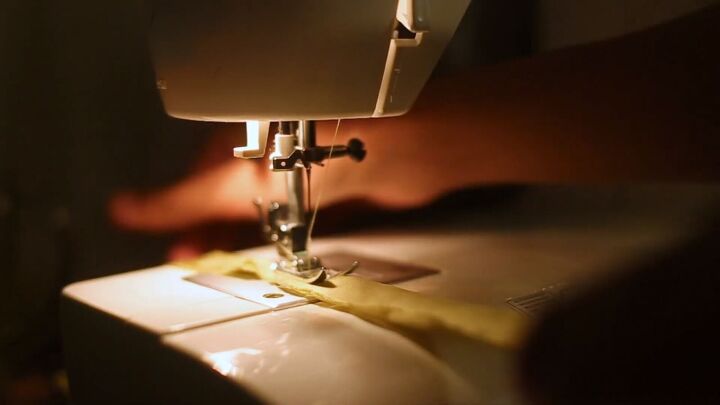
Fold the strips in half, wrong sides kissing. Sew a strap thickness of 4mm (0.004”).
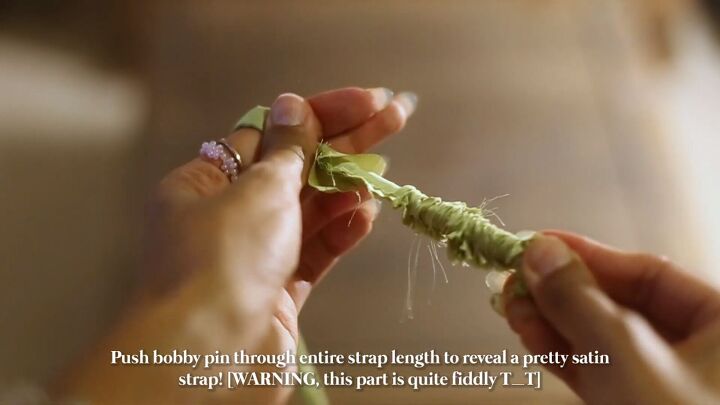
Now, turn each strap inside out using either a loop turner or bobby pin.
Tip: For the bobby pin method, create a small incision at one strap's end and feed the pin through it to act as a grip.
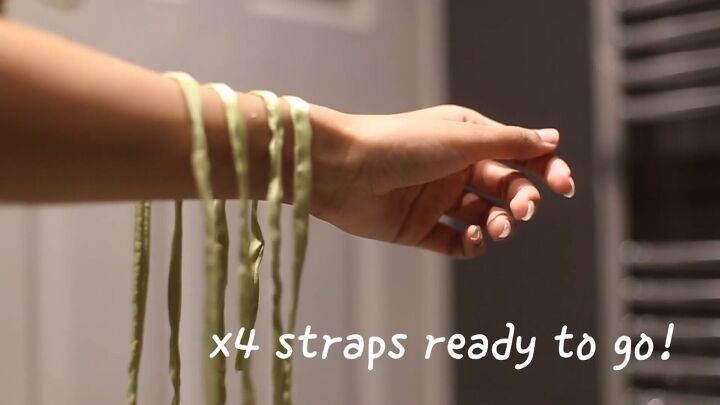
You should now have four straps for your DIY cowl neck top.
4. Insert the straps
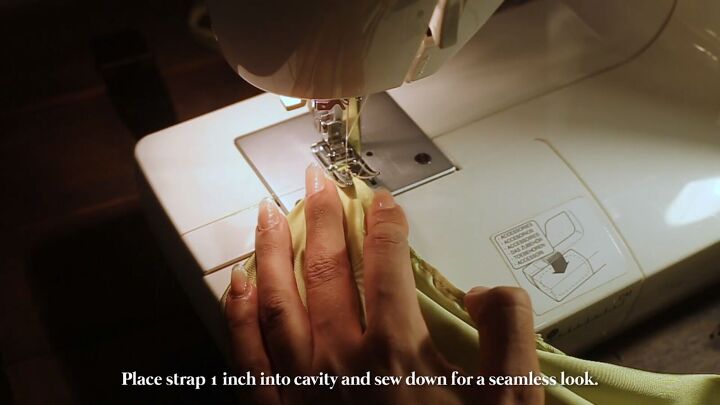
Insert one end of each strap through either side of the front bodice (where you originally left a gap). Then, sew to secure.
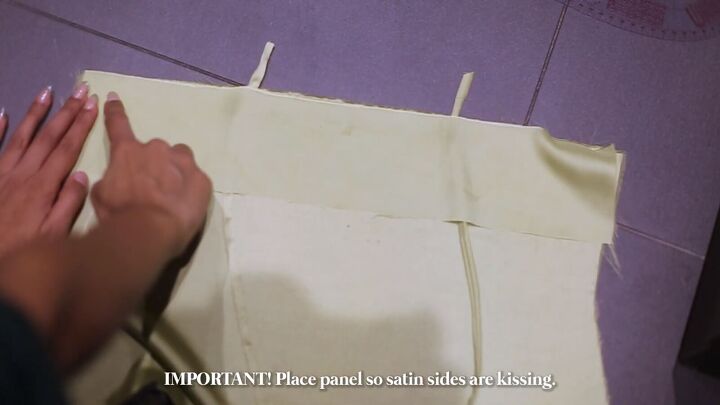
Now, place the back panel and two remaining straps on the back piece. The panel and whole back piece should be right sides kissing. Decide on your strap placement and place the panel over, as shown. 1-2 inches of the strap should extend outward.
Sew along the top edge. Backstitch when you get to the straps for a more secure stitch.
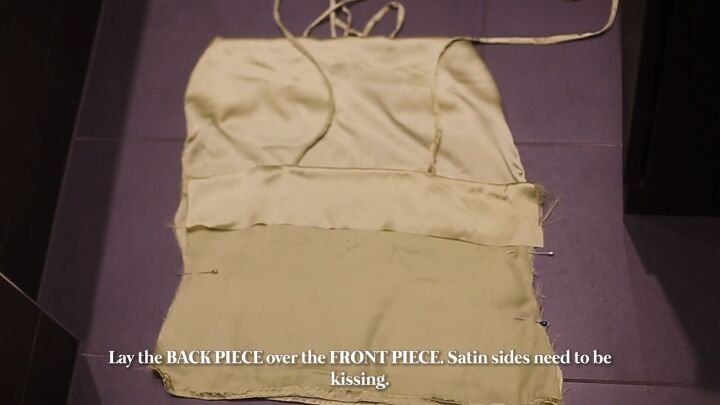
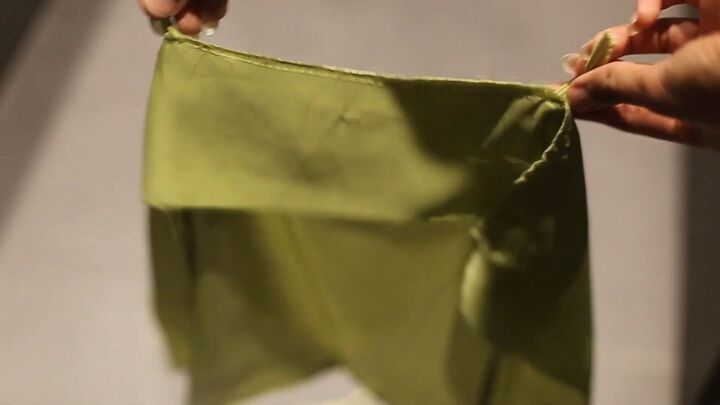
Now all that’s left is to layer the front and back piece, right sides facing, and sew the side seams.
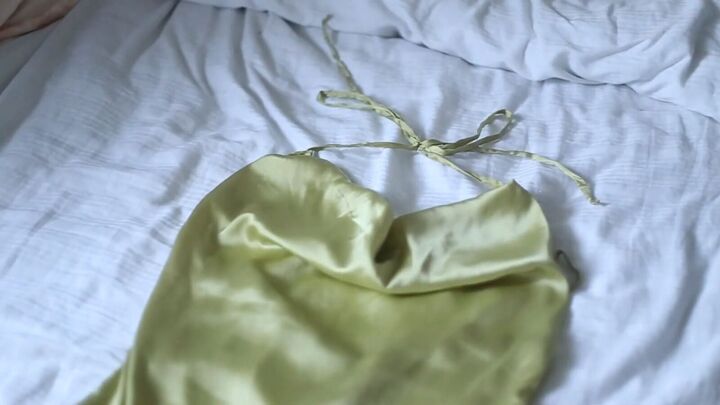
You can tie your straps low or high according to your preference. Remember, this DIY cowl neck top also serves as a halter top because of the versatility of the straps.
The same goes for the back straps; they’re pretty adjustable but do cinch at the waist depending on how high you tie them.

How to sew a cowl neck top
That’s how to sew a cowl neck top! Thanks for joining me on this tutorial! It’s pretty straightforward and so is the cowl neck top sewing pattern. Good luck!
The author may collect a small share of sales from the links on this page.


Comments
Join the conversation
Looking forward to trying this😉 Great instructions 👍