How to Sew a Water Bottle Holder From a Reusable Shopping Bag!

Are you starting the new year off with a mission to hydrate more too? If so, you can stay hydrated and stylish in under an hour! This post is here to help with a cute holder bag made out of a reusable shopping bag!
Watch this super quick video to see how easy it is!
You will need:
- Grocery Bag
- Sewing machine
- Stainless steel water bottle
- Grid ruler
- Pins
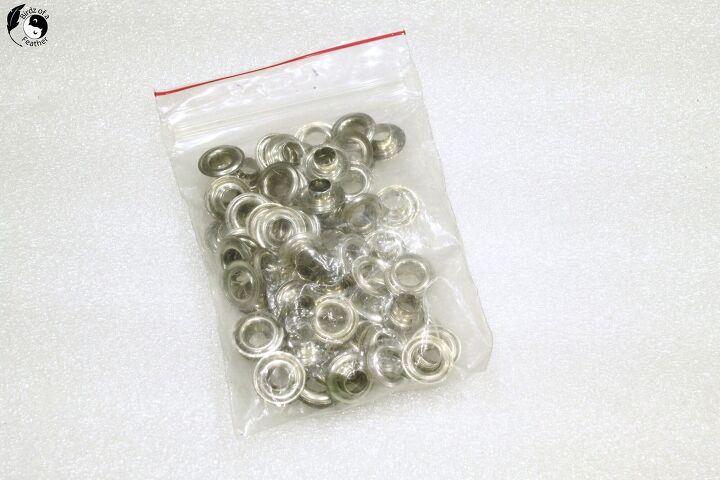
- Grommet + grommet pliers
- Nylon cord
- Bodkin
- Carabiner (optional)
- Plastic cord lock
- Fabric sheers
- Pointed scissors
- Chalk pencil (our fave is Fons and Porter)
- Pencil
- Thread
If you're using a black bag like us, and want to add an emblem on the front, be sure to hide any printing on the inside or use a piece without.
We're using every single part of the bag we can. To start, use a stitch ripper to harvest the trim from the reusable grocery bag. Don't cut off the handle; this will be the shoulder sling.
Measure the height of your reusable water bottle allowing for seam allowance and cut to length. I’m using the full width of the bag – handle and all.
I’m using upcycled cord from another bag, but use new cord if necessary!
Now cut two circles (to double up the bottom for strength).
Using a chalk pencil, trace around a circle. Using a grid ruler, add on seam allowance. Cardboard from Duck tape is perfect for this, or use a compass.
If you need to iron out wrinkles, be careful. Plastic melts easily so use a cloth and a low setting.
Place any kind of patch or emblem, like your favourite team for instance, onto the front of the bag.
Of course, we printed our own Birdz of a Feather logo to personalize it (see how to print on canvas). Finish the raw edges with the trim saved from the bag.
Pin the emblem onto the centre of one half of the bag and then stitch around. If you want to create a pocket, leave an opening at the top.
Fold the wrong sides of the bag together, emblem side out. Stitch a 1/4″ seam down the side.
Using more of the trim that was saved earlier, fold it around the raw edges of the bag and stitch it down using a 1/4″ seam allowance. Cut away the excess length of trim.
Pin the double layer circle onto the bottom of the bag, wrong sides together, and stitch around the perimeter using 1/4″ seam allowance. Again, cover the edges with trim. Cut away the excess length.
Now we’ll stitch a casing on the top of the bag to hold the drawstring closure.
Cut a piece 2″ wide; don’t worry about the length as that will be cut away at the sewing machine.
Fold one end of the casing about an inch or so to accommodate the grommet. Double fabric will be more durable to secure the grommet. Use your pointy scissors to make a starter hole in the centre of one end as shown.
Don’t be tempted to cut a hole or it will weaken the grommet; the goal is to stretch the fabric. Insert a pencil into the starter hole to stretch it wide enough to fit over the post of the grommet.
Sandwich the hole between the two halves of the connecting grommets.
Then use a grommet plier to squeeze the two pieces of metal together.
Fold in the ends under along the length.
Then stitch around the top opening of the bag on both edges to make a casing for the cord.
Cord
Thread one end of the cord through the eye of a bodkin. Insert it into the grommet and thread it all the way around the casing and back out the other side.
Squeeze the plastic cord lock to open it, thread the two ends of the cord through and release the lock.
Tie each end of the cord into the knot (if the ends are strayed, you can trim them or carefully pass a lighter over them to fuse and seal the edges together).
It's ready for a bottle! It's a personal choice, but we prefer to use a reusable water bottle. How about you?
Use the shoulder strap to carry it when you're on the go. You'll notice that we sized our bag extra long to carry a large stainless steel water bottle, but it also doubles as a wine holder too!
Subscribe for upcoming DIYs. Also follow us on social media (copy & paste in browser – or use the direct links at the top of this post):
Subscribe: https://bit.ly/BOFSubscribe
Pinterest: http://bit.ly/BirdzPIN
YouTube: http://bit.ly/BirdzYT
Facebook: http://bit.ly/BirdzFB
Instagram: http://bit.ly/BirdzIG
Enjoyed the project?
Suggested materials:
- Reusable shopping bag (grocery store)
- Cord (shopping bag)
The author may collect a small share of sales from the links on this page.


Comments
Join the conversation