How to Make a Waterfall Jacket for a Finishing Touch to Any Outfit

Need to cover a bit of overindulgence yet look chic? This DIY waterfall jacket with a belt is the answer.
My simple pattern for a lady's casual summer jacket takes mere minutes. You’ll need to already know how to make a belt and sew bias tape if you want to professionally finish the armholes.
Let’s get started making a waterfall jacket.
Tools and materials:
- 2 yards of stretchy fabric
- Measuring tape
- Ruler
- Tailor’s chalk
- Scissors
- Sewing machine
1. Make the pattern
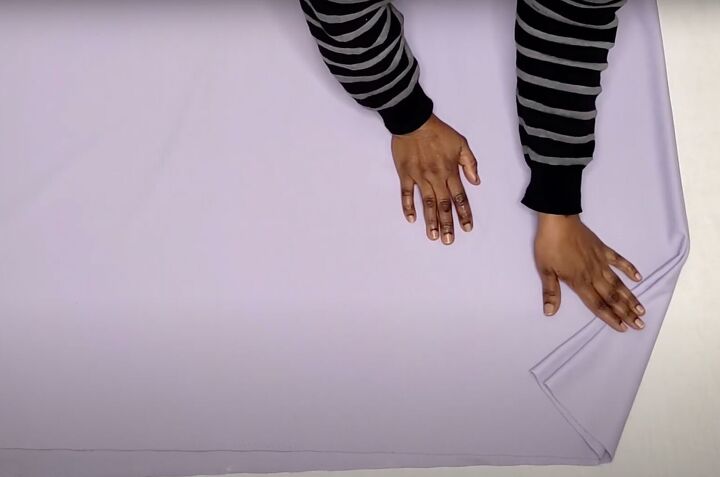
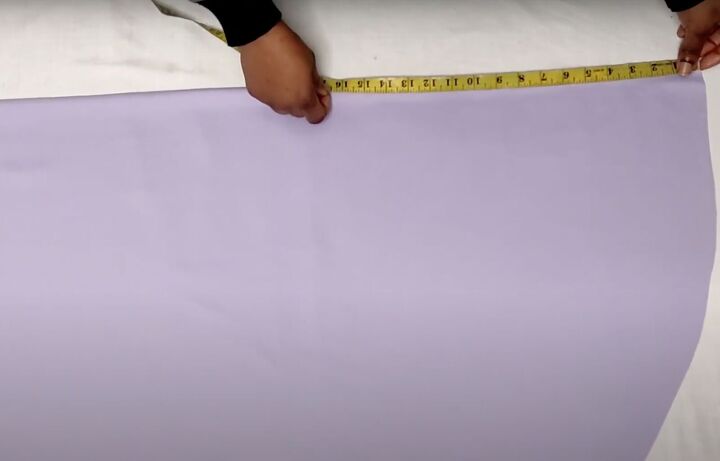
Fold your fabric in half and then in half again. When you want to sew a garment with a 360-degree flare, folding the fabric into quarters is the best way to do it.
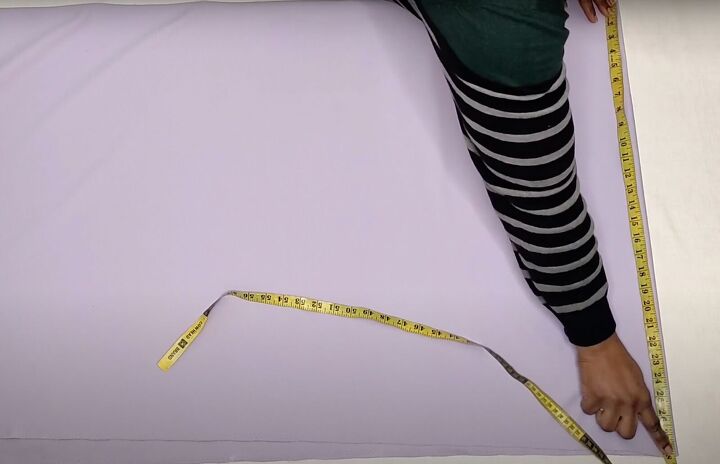
Measure down from the top fold along the folded edge that has both folds to determine the length. In this tutorial, I’m marking it at 28 inches but you can make it shorter.
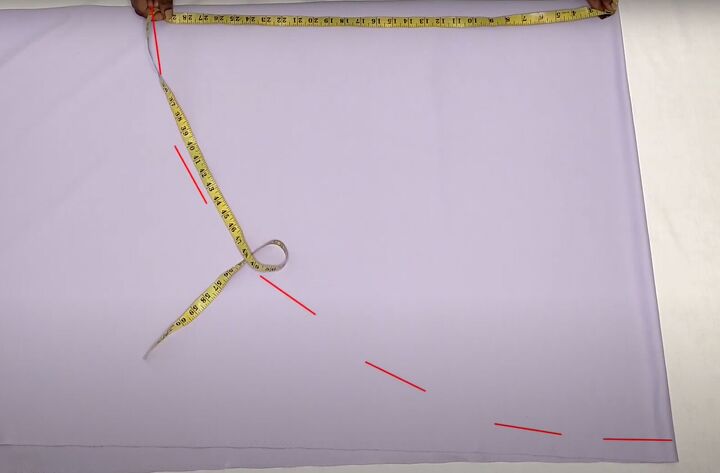
Once you have that mark, mark that exact measurement in a quarter circle all the way back up to the top fold.
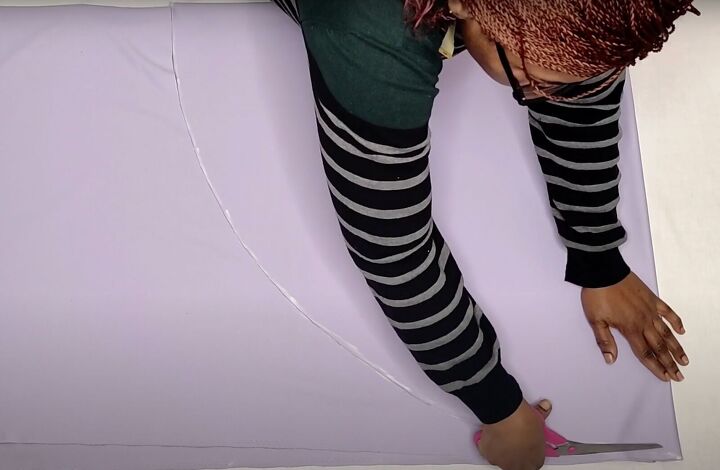
Cut along the marks.
2. Make the collar and armholes
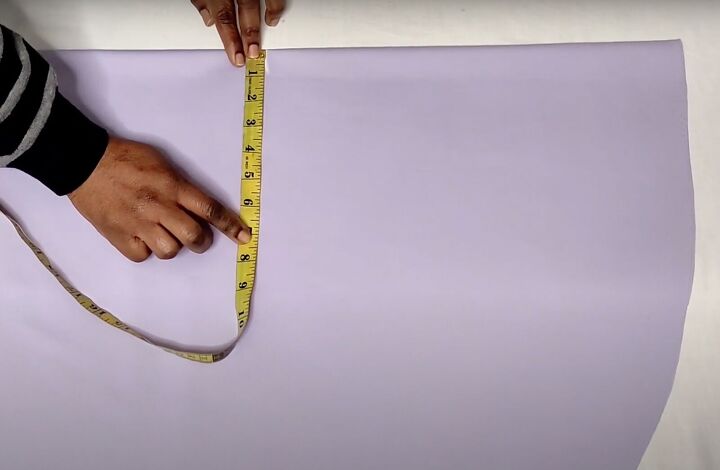
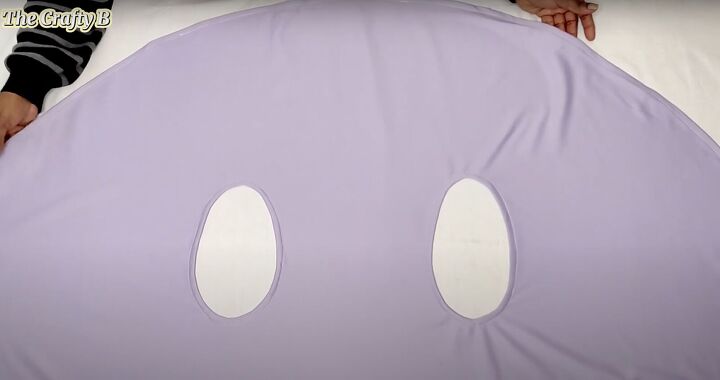
Unfold the first fold. You’ll have a semi-circle.
Mark along the fold from the right side to determine how long you want the collar to be. I’ve marked it at 15 inches because I want a dramatically draped collar. You can choose to make it the same size or a bit smaller depending on how you want the collar to fall or drape over.
Measure your shoulder width. Divide by two to get the shoulder measurement for the waterfall jacket. Mark at the end of the collar line with a vertical mark. If you’re like me and it’s 14 inches, measure and mark 7 inches with a straight line.
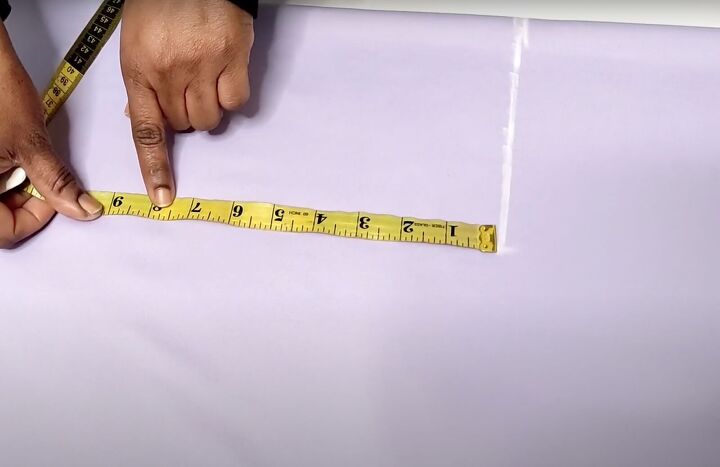
From that line, measure and mark the armhole depth towards the left side - about 7 to 8 inches. Draw a straight line.
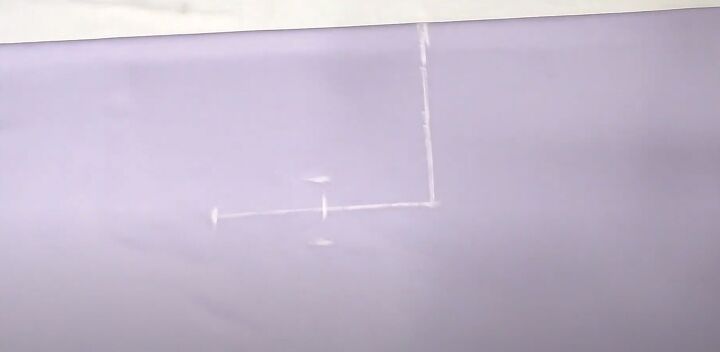
Mark the mid-point of that line. Then mark 1 inch above and 1 inch below that vertical line.
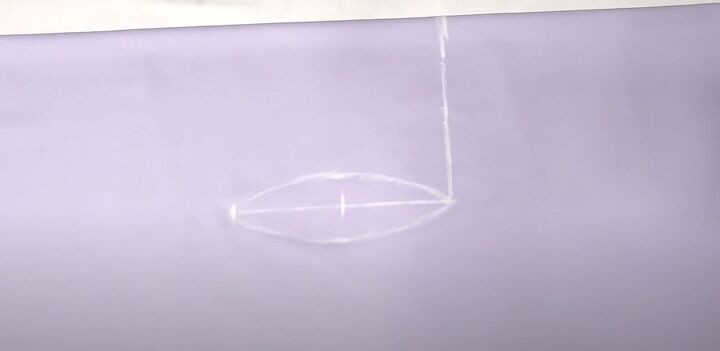
Connect into an oval shape. These will be your armholes. You can always make them a bit larger by increasing the size. Just make sure they are equal at the top and bottom.
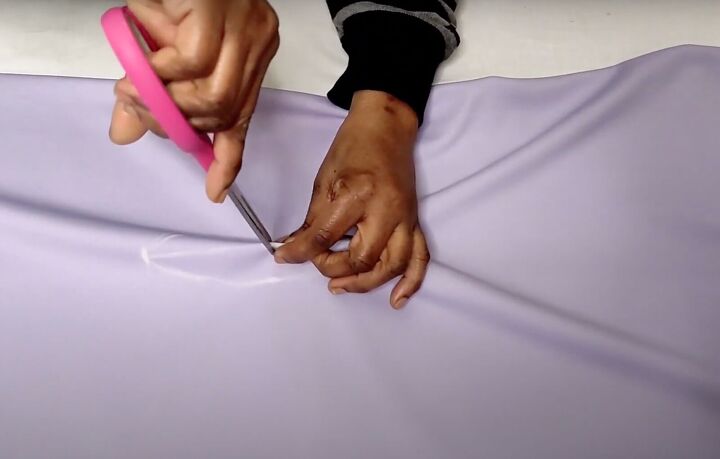
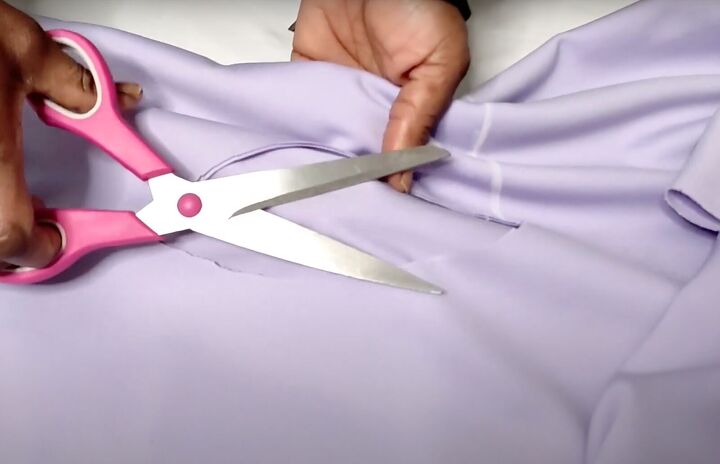
Pinch the center and cut with the scissors.
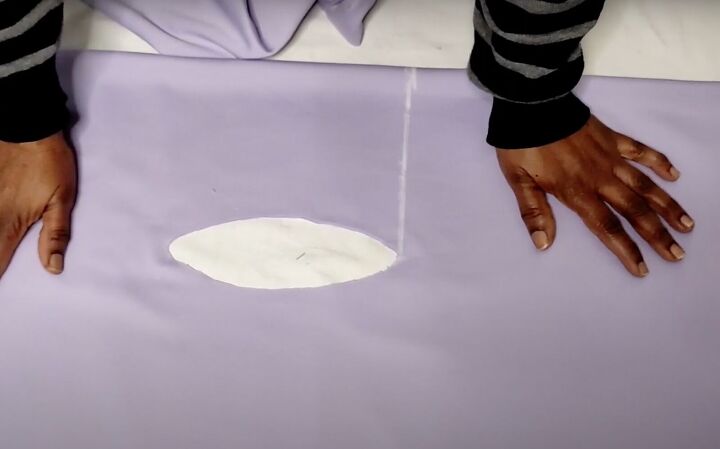
Carefully cut out the ovals.
3. Finish the waterfall jacket
If your fabric doesn’t fray, you can leave the armholes as is as well as the hem. However, if you want a smooth, professional look, make bias tape for the armholes.
Lay the folded fabric with the cut ovals on top of a piece of folded fabric. Trace the oval shape. Pinch the center and cut the oval out. This way you get the exact measurement of your armhole.
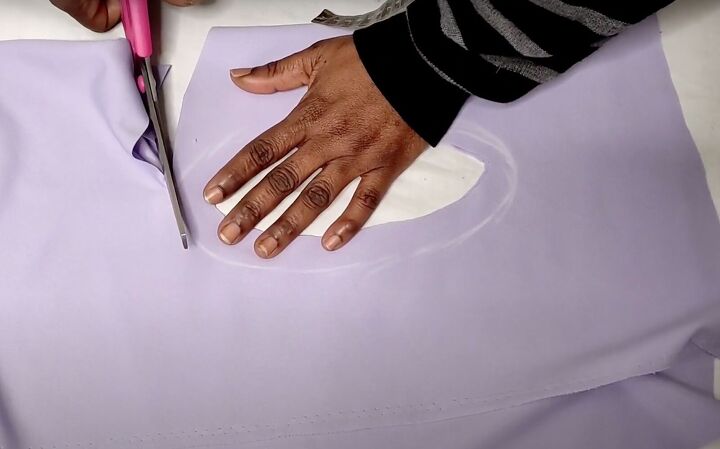
Trace your desired bias tape width around the oval. Cut out the bias tape. Attach your bias tape in the usual way. Hem the entire circle. If you have extra fabric, you can make a belt.
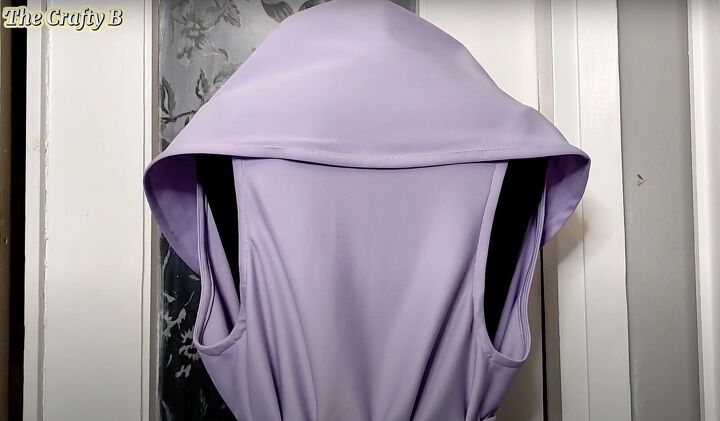
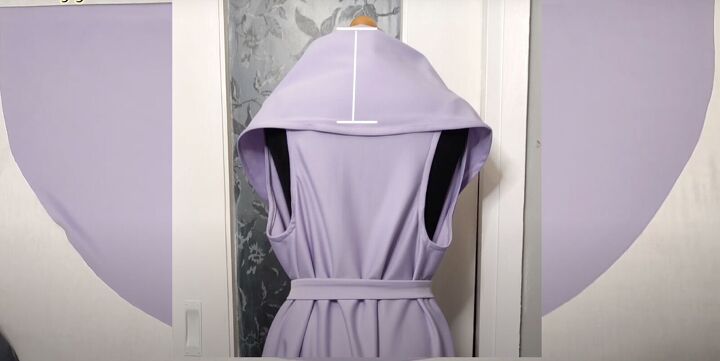
You’ve made this beautiful waterfall jacket.
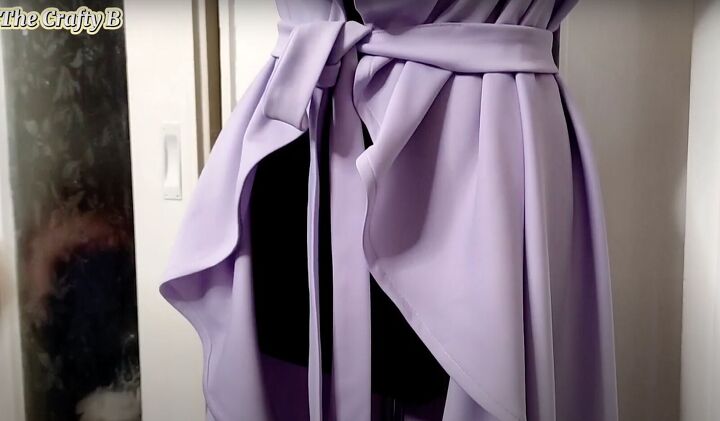
Waterfall jacket tutorial
Depending on the fabric, this could be a perfect lady's summer casual jacket that could transition to fall. Please let me know in the comments how easy you found this project.
The author may collect a small share of sales from the links on this page.


Comments
Join the conversation