How to Use Old Necklaces to Make a Pretty DIY Pearl Chain Bracelet

Have you got some old jewelry hanging around that you just never wear anymore, but also can’t part with? If you answered “yes!” then follow this tutorial to learn how to turn some old necklaces into a new pearl chain bracelet.
You’re going to love these trendy bracelets so much that even if you don’t have old jewelry you might want to pick some up at the thrift store. Alternatively, this is such a simple bracelet, you can just pick up the raw materials at a craft store.
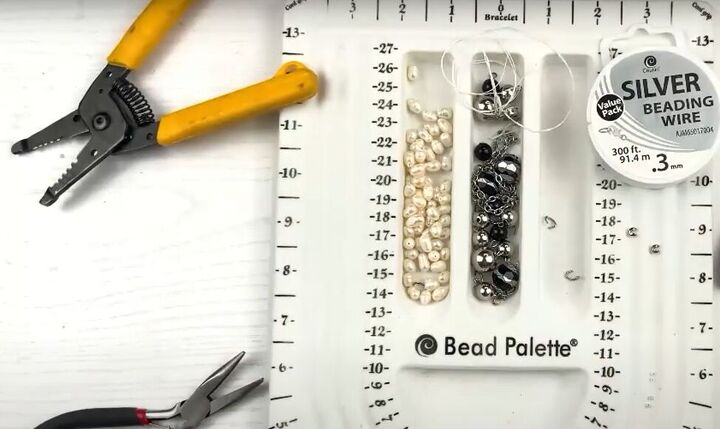
Tools and materials:
- Old pearl necklace or loose pearls
- Chain
- Beading wire
- Crimping beads
- Crimp covers
- Lobster clasp (may come from your old necklace)
- Round-nose pliers
- Long-nose pliers
- Cutting tool

1. Take apart your old jewelry
I’m starting with an old pearl necklace and an old beaded chain necklace. First, use pliers to remove the beads and the small links from your bead necklace, so you are left with just the large-link chain.
Take apart your pearl necklace by simply cutting the string so the pearls come loose.

Measure the chain to just over half the circumference of your wrist and remove the links necessary to get that length remaining. You will be reattaching the lobster clip to the chain, so take that into account with your measurement.
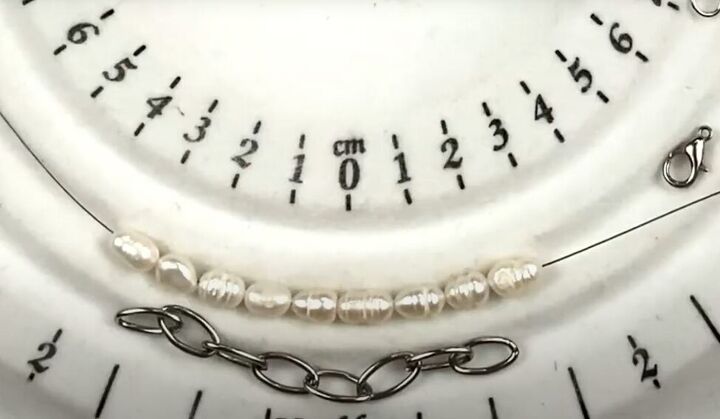
2. String your pearls
Choose which pearls you want in your bracelet, and string them onto beading wire so the length of your pearls matches the length of your chain.
3. Add the chain
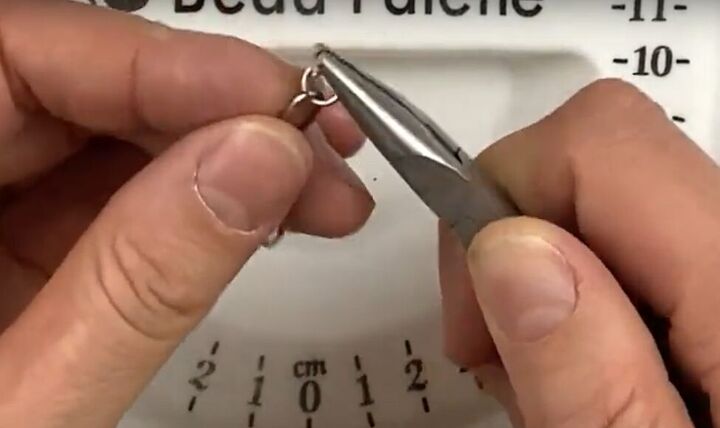
Add a jump ring to one end of the chain, making sure you completely close the gap in the jump ring.
Place a crimping bead onto the beading wire at one end of the pearls. Then put the beading wire through your jump ring on the end of the chain, loop the wire around the jump ring and insert the end of the wire back into the crimping bead. Use pliers to crimp the wire closed.
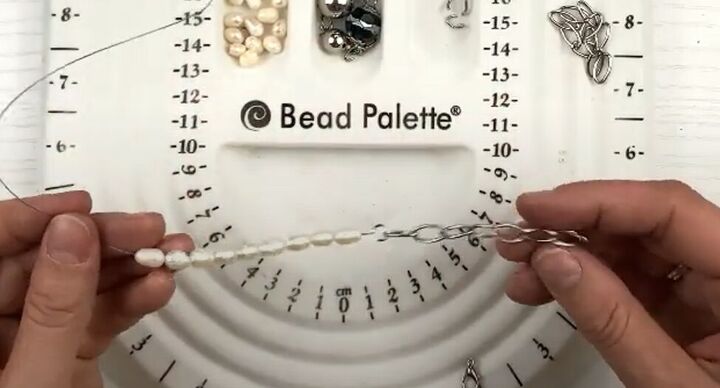
Now string your pearls back along the beading wire toward the crimping bead, catching the loose bit of wire inside the pearls.
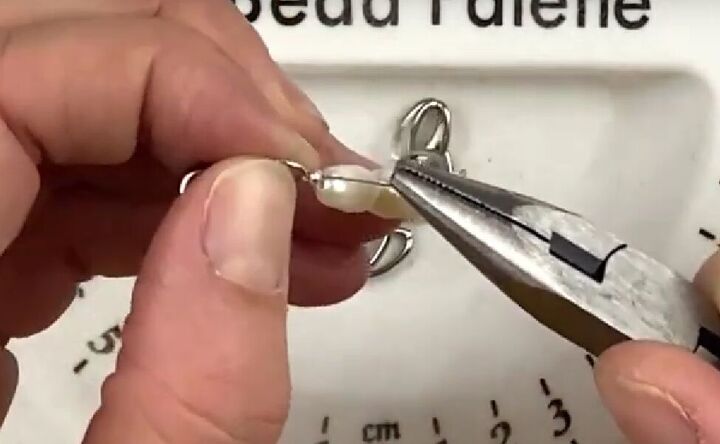
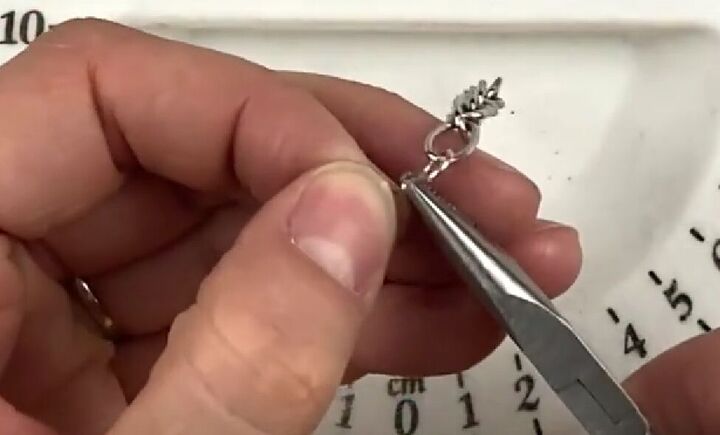
4. Add the clasp
Put the lobster clasp you previously removed from your chain necklace onto a jump ring.
Add a crimping to the open pearl end of the wire. Then place your jump ring, with the lobster clasp, onto the wire. Before you secure the wire, use pliers to pull the wire taught.
Crimp the wire as you did with the jump ring on the other end and cut off some of the excess wire and thread the remaining excess wire through the adjacent pearl.
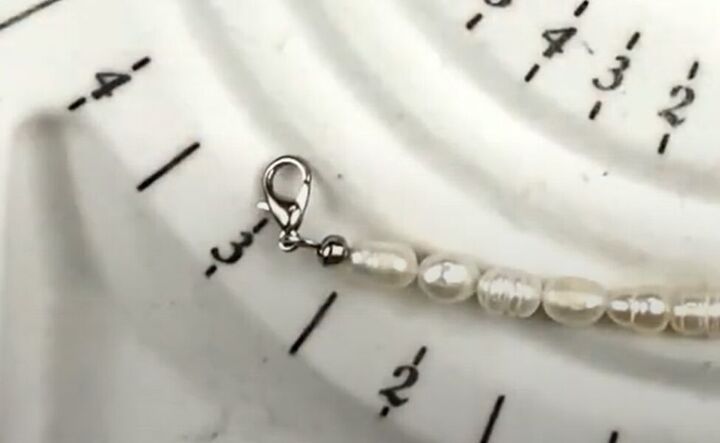
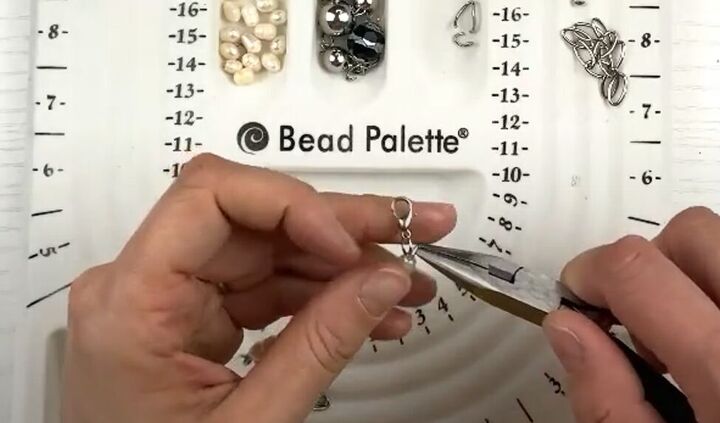
5. Finish the end of the bracelet
Use pliers to put a crimping bead cover over the crimping bead next to the clasp. This gives a final polished look to your bracelet.
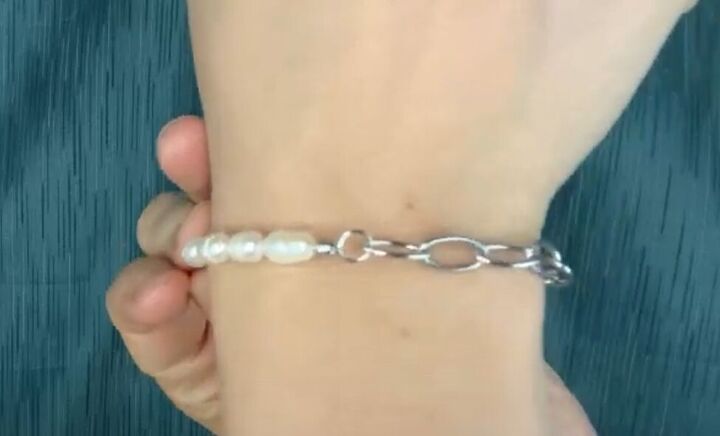
DIY pearl chain bracelet tutorial
Here’s my finished pearl chain bracelet, and I love it! I bet if you try making this simple bracelet you will love it too. And I hope you leave a comment to let me know what other ways you have found to repurpose your old jewelry.
The author may collect a small share of sales from the links on this page.


Comments
Join the conversation