See How I Transformed These Vintage Dresses Into Cute Modern Ones

On a recent trip to the thrift store, I bought three dresses. Now, I really liked them and thought they were really cute. However, for lack of a better description, they were very much grandma dresses. Like I said, though, they were cute. So I decided to get them and do some work on them to make them more modern. In this tutorial, I’ll show you the steps I took to transform these three different dresses.
Tools and materials:
- Sewing machine
- Measuring tape
- Scissors
- Sewing pins
Determine the changes
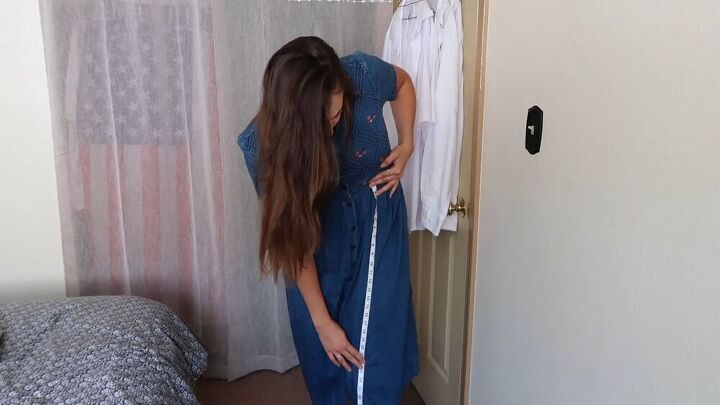
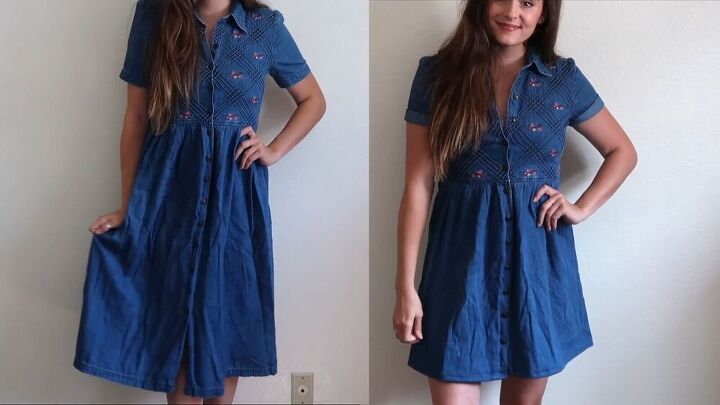
Starting with the dark blue dress, the first thing I did was figure out how much I wanted to cut the dress. So I put it on and, using my measuring tape, measured from my waist down to where I wanted to cut the dress. I decided to cut it at my kneecap which was 26”. I also decided that I would need to remove the shoulder pads and cuff the arms.
Determine changes to the second dress
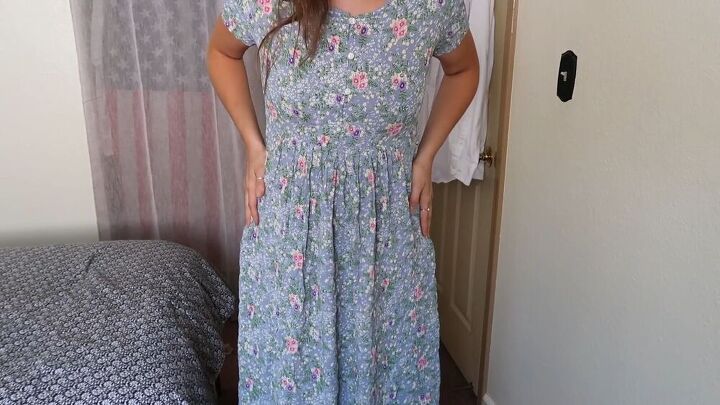
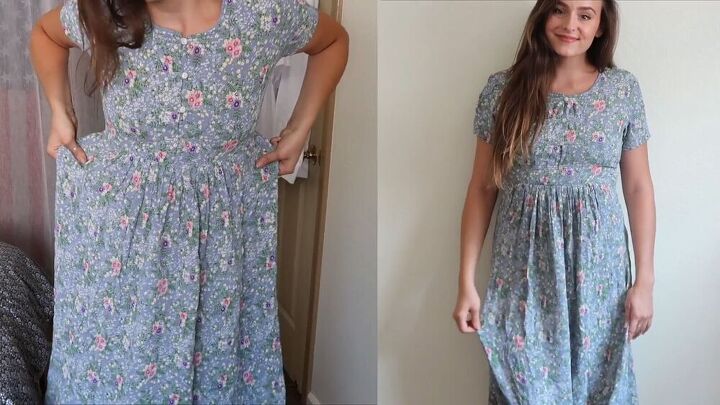
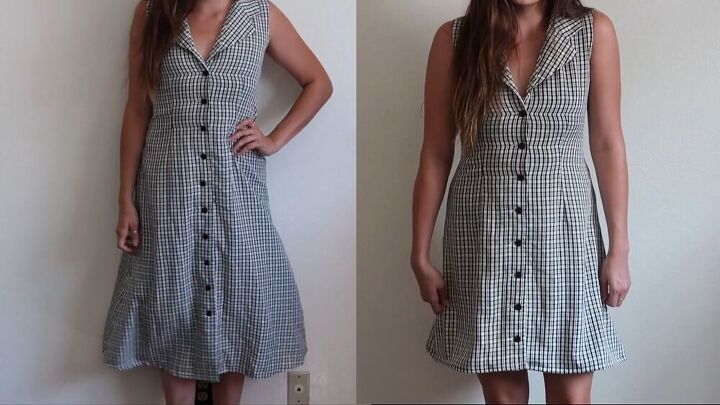
I moved on to the second dress to decide what I wanted to do with it. I wasn’t sure whether I wanted to keep it long or cut it shorter, so I decided to go with the flow. I did realize, though, that I would have to take the dress in at the sides to get a better fit.
The third dress
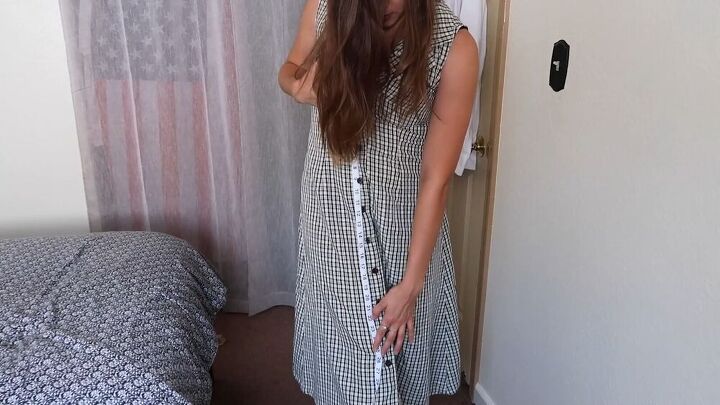
I already knew I didn’t need to do much to this dress. I only needed to hem the bottom. So I grabbed my measuring tape again and measured from the top button down to my kneecap. I decided to hem it at about 3” above my kneecap but left more room. You can always shorten it later, but you can never lengthen it.
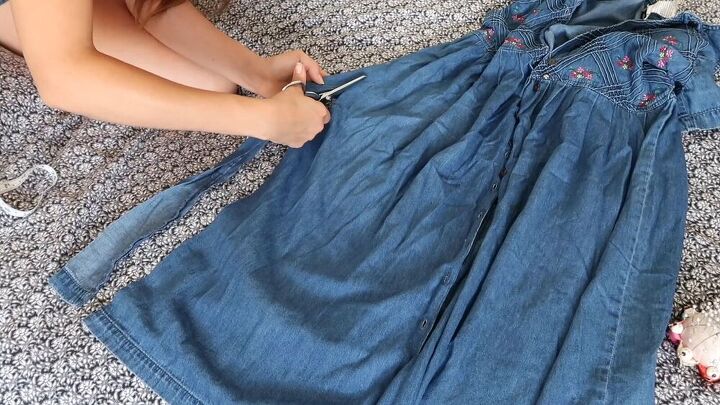
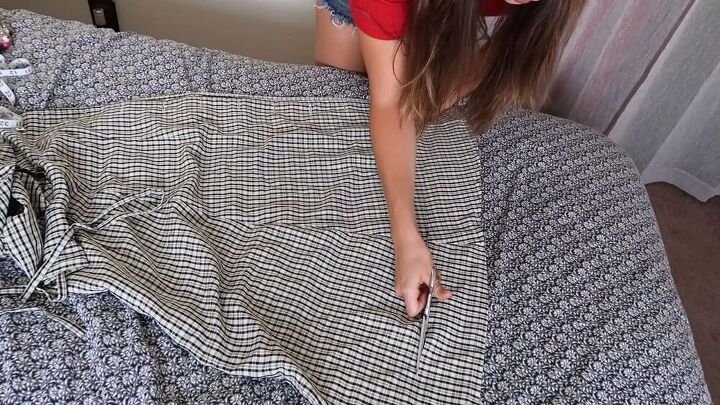
Cut the first dress
I flipped the dress inside out and cut out the shoulder pads. Then I folded the dress down the sides and cut about 2” from each side, including room for seam allowance. I cut the sides at a diagonal angle toward the top so that it would blend well. Then I cut the bottom of the skirt to the length I wanted.

Cut the second dress
Moving on to the second dress, I did almost the same thing to it as I did to the first. I turned it inside out and cut out the pockets that I didn’t need. Then I cut the sides diagonally the same way I did for the previous dress.
Make adjustments
I then laid out the third dress and cut off the bottom to my desired length. I then tried them all on and decided that I wanted the first and last dresses to be even shorter. So I cut off another 2” from each one, using another dress for length comparison, and left 1” for hemming. Pro tip: I kept all my scraps so that I could use them to make headbands later!
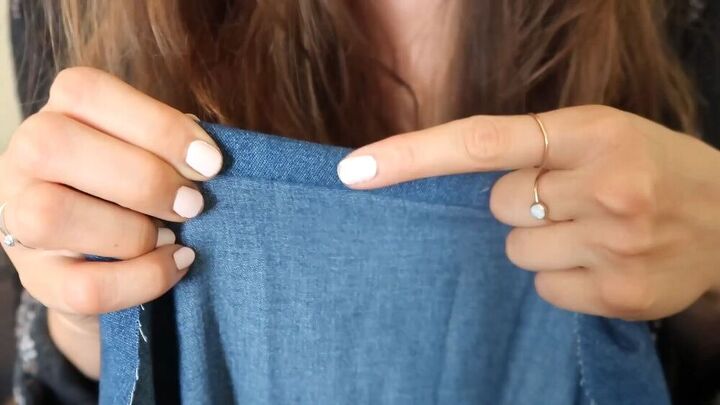
Prepare to sew
Starting below the waistband on the blue dress, I sewed diagonally and then straight down, leaving ⅝” for seam allowance. Then, to create the hem, I folded in the bottom edge ½” and folded it again ½”, then pinned the fold in place.
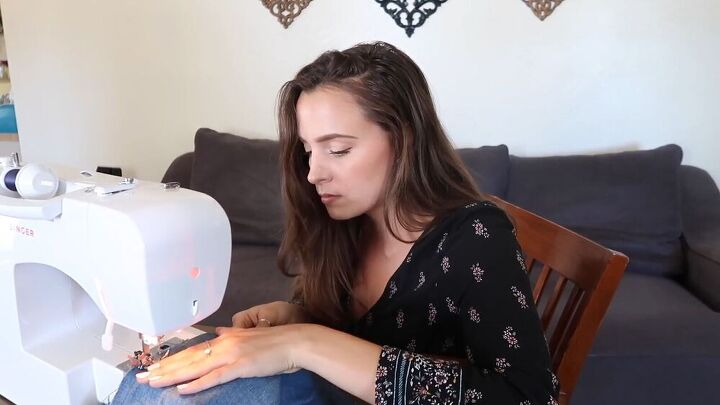
Sew the first dress
It was now time to head over to my sewing machine. First, I set the machine to a straight stitch, the length to 2, and the width to 2.5. Then I sewed a straight stitch all the way down, starting and ending with a backstitch. When I was done with one side, I repeated the process on the other side. I then sewed down the hem.
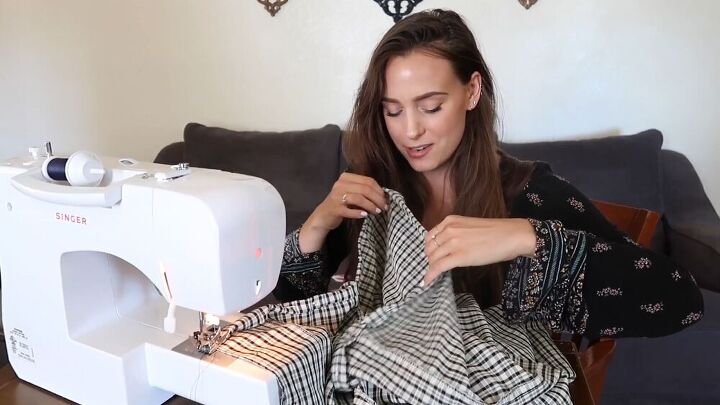
Finish the next two dresses
The other two dresses were super easy at this point. For the floral one, all I did was sew the sides. For the last dress, all I did was fold over the hem, pin it, and sew it. With that, I was done, and ready to try them on!
And with that, I was done! I love the way all three of these dresses turned out! The second one wasn’t so different than it was originally, but the other two really look like completely new dresses. I think they’re all so cute and am so excited that I took on this project! Which of these three is your favorite dress? Let me know in the comments!
The author may collect a small share of sales from the links on this page.


Comments
Join the conversation
Your end results all look a half size too small even though you did a nice job of updating the styles.
Enjoyed the video. Sewed years ago but it’s been awhile. Ready to start again.