How to: Make a One Handle Bag

Bags are the perfect accessory - and not only because they are useful too! A bag can make or break an outfit, so, why not try and make sure it’s the best it can be. This tutorial will teach you how to make a one-handle bag that I know you’ll love.
Tools and materials:
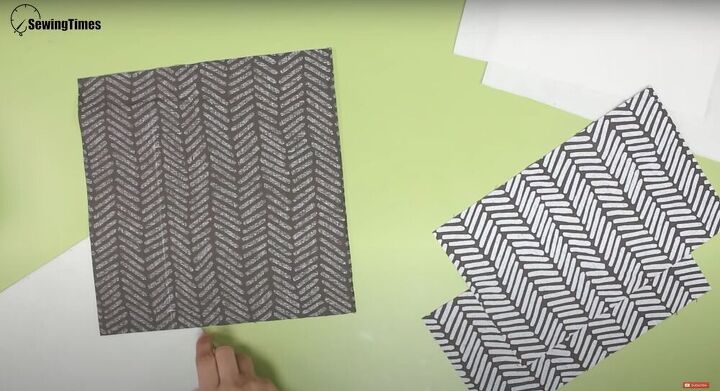
- Fabric
- Fusible fleece
- Iron
- Scissors
- Sewing machine
- Pins
- Tailor’s chalk
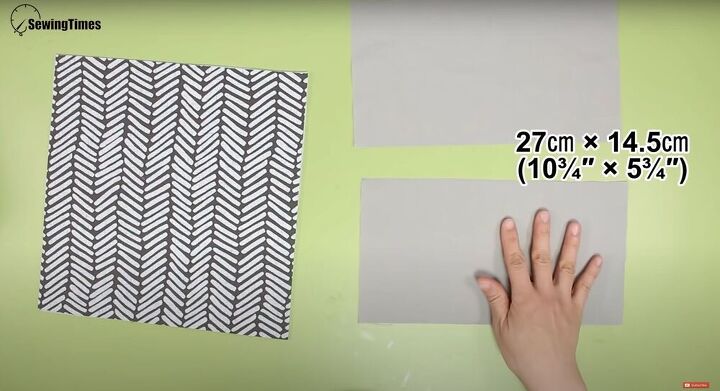
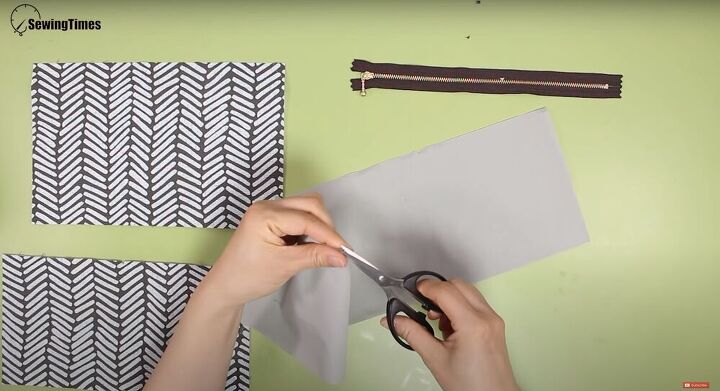
Cut out your fabric
Start with your fabric and measure out your four pieces. You will need one square piece that is 10 ¾ by 10 ¾ inches, two rectangle pieces; one 10 ¾ by 6 ¾ and the other 10 ¾ by 5.5. And finally, one long strip that is 3 ¼ by 15 ¾. Next, cut out four lining pieces; two should be 10 ¾ inches by 5 ¾ and the other two will be 10 ¾ by 5.5. Then, cut out a piece of the zipper that is ten inches long. Finally, cut out three pieces of fusible fleece, one 10 ¾ by 10 ¾ square and two 10 ¾ by 5.5 rectangles.
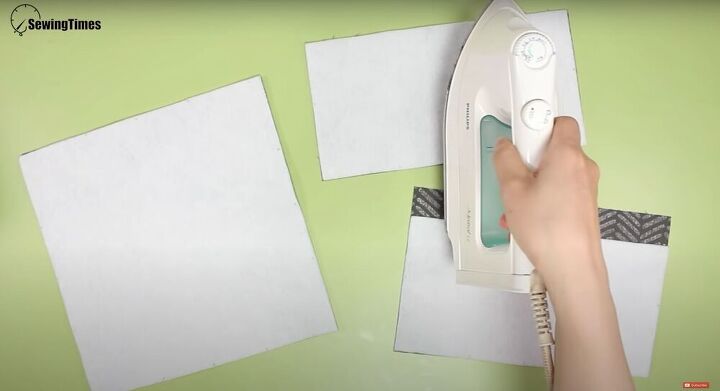
Connect the fusible fleece
Take your square piece of fabric and lay it on its front. Then, place a piece of fusible fleece on top of it. Repeat this process with the two fabric rectangles; one will match the fleece perfectly and the other will be a little bigger than the fleece. Iron the fleece down.
Make an octagon
Take two rectangles from your lining and place them right sides together. Pin the pieces together and mark off two lines, 0.4 inches from each edge. Sew until the markings, leaving a small gap on the top of the lining. Next, open the lining up and iron down the seams, you should now have a square that is approximately the same size as the square of fabric.
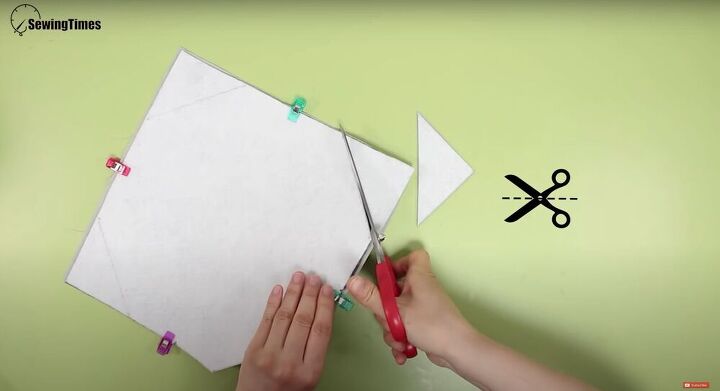
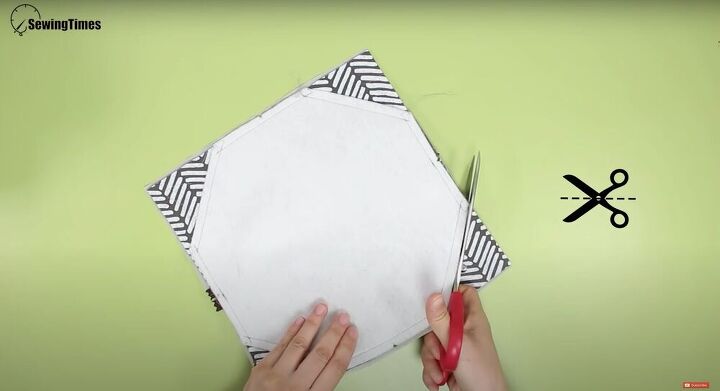
Fold the square of fabric in half and snip off the corners by the fold. Then unfold and refold the other way and repeat. Next, measure 4 ⅝ inches with the cuts in the center and mark off the ends. Connect all the markings with straight lines and place the square of fabric over the lining, right sides together. Follow the markings and cut off the corners to make an octagon.
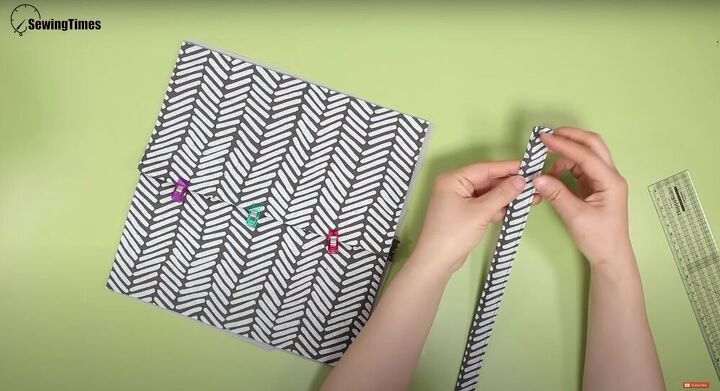
Make your strap
Take the strip of fabric and fold it in on each side, wrong sides together. Next, fold it in half to create a tube that doesn’t have any raw edges. Pin it down and sew on either side to secure it.
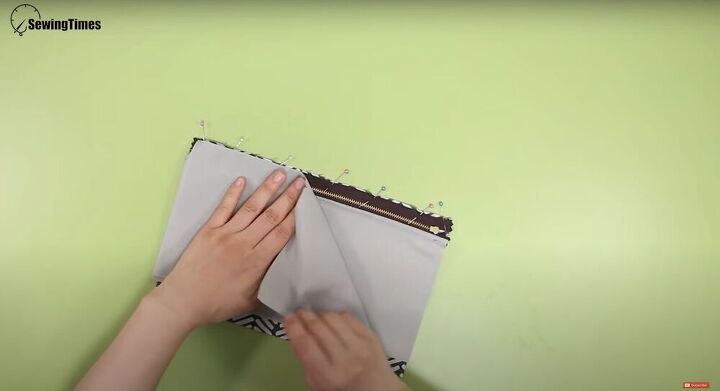
Connect the zipper
Starting with the piece of fabric with the fleece sewed on from earlier, fold it in half, and snip off the corner (the part without the fleece). Repeat this with the second rectangle and the two lining pieces and the zipper. Next, place the zipper onto the smaller rectangle of fabric, right sides together. Place the second lining piece over the zipper, right side down, and sew the three pieces together with about 0.4 inches of the seam allowance. Then, fold the lining over so that the lining and fabric are wrong sides together and sew beneath the zipper to secure.
Connect the back pieces
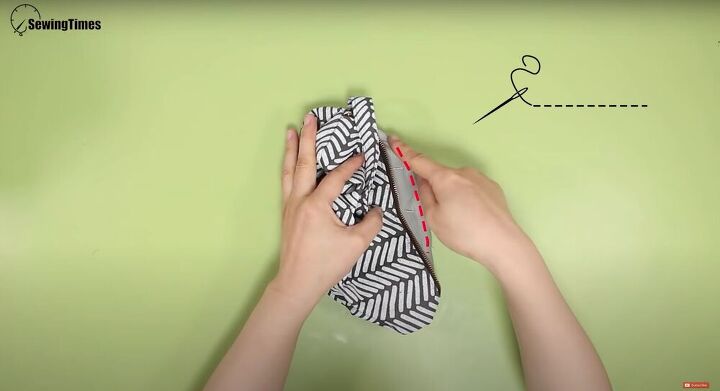
Take the remaining piece of fabric with fleece (already snipped from earlier) and place it over the zipper piece, right sides together. Next, turn the piece over and connect the second lining piece against the first (right sides together), pin both pieces down. Sew along the edge with about 0.4 inches seam allowance. Fold the lining piece over so that the right side is showing and sew beneath the zipper (it will be along with the seam allowance).
Add your strap
Fold the fabric with the fleece at the cut-off point (the piece that is bigger than the fleece) so that it folds over the zipper and hides it (see above). Then, take the strap, fold it over at the edges and pin it onto the edges of the fabric, in the center. Sew two lines on either side to secure the strap to the bag. You should now be left with two pieces: the zipper piece with a strap sticking up and the octagon piece we made earlier.
Connect the bottom
Push the strap down and palace the octagon piece over it so that the right sides are together. Then, flip the bag over and place the lining of the octagon over the lining on the inside of the bag. Sew the octagons to the bag with 0.4 inches seam allowance. Cut the excess corners off.
Finish the bag
Turn the bag right side out through the opening we left earlier. Make sure to push the lining in and flat and finish off the bag by sewing the bottom opening closed.
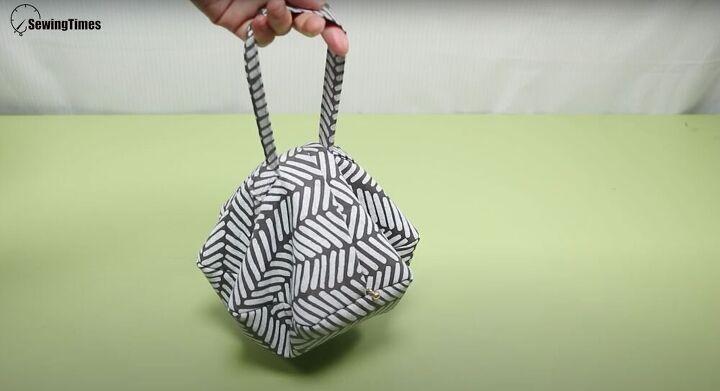
There you have it, how to sew a one-handle bag! This one is a little bit trickier but so worth it. I love how unique the shape is and how easy it is to make it your own by mixing and matching different fabrics!
The author may collect a small share of sales from the links on this page.


Comments
Join the conversation
Good idea. I don’t have swing machine I do everything by hand.
Love this idea as a gift for friends and relatives.