Save on the Salon and Learn How to Cut Your Own Curtain Bangs At Home

If you love keeping up with trending hairstyles but don’t have the time or the extra cash to keep visiting the salon, follow along.
In this tutorial, I’ll show you how to cut your own bangs at home with confidence!
Upstyle Recommends!
Tools and materials:
- Round brush
- Blow dryer
- Texturizing shears
- Professional scissors
- Hair sectioning clips
- Tail comb
- Flat iron
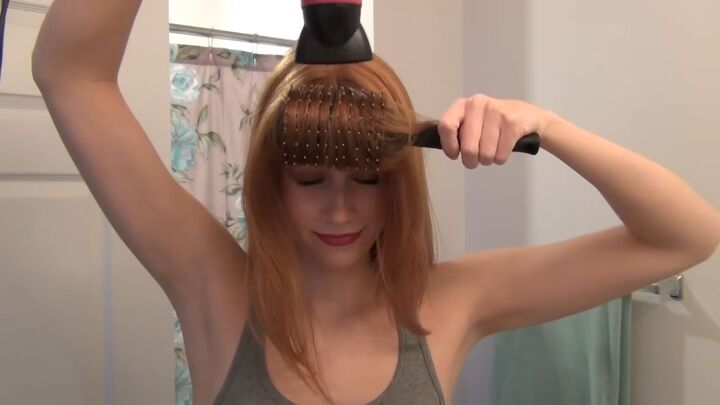
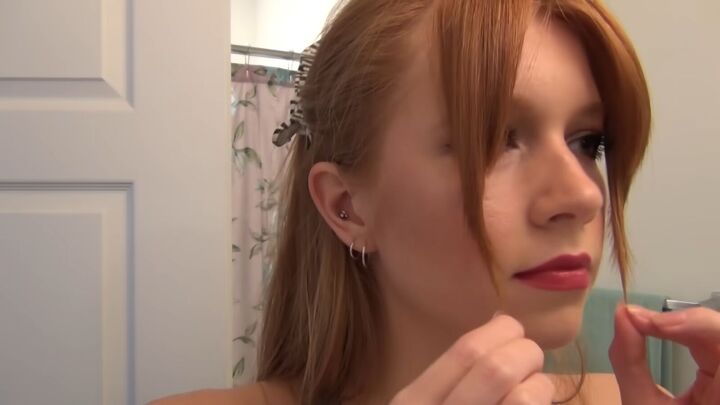
1. Dry your current bangs
Start off by blow drying your current bangs, smoothing them forward with the help of a round brush.
If you don’t have bangs, check out how long you want these face framing bangs to lay and work slowly.
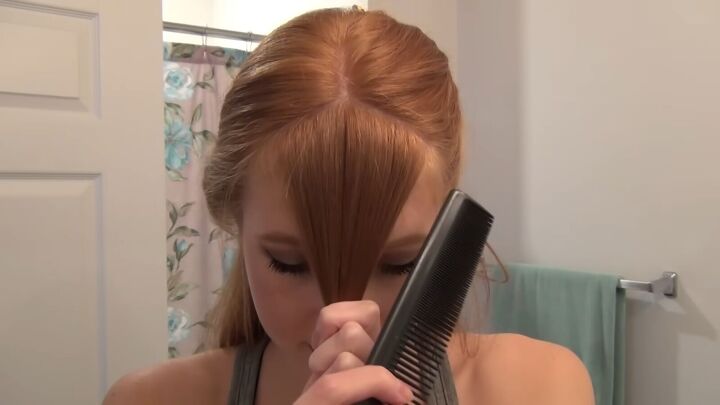
2. Make a clean, middle part
Use a comb to clean up your middle part to ensure that your bangs turn out even.
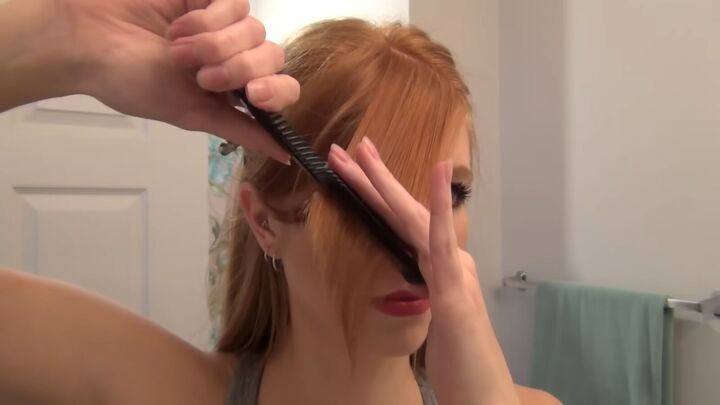
3. Section off your bangs
Make a triangle part to section out the front of your hair for these face framing fringe bangs.
I recommend starting off with a thinner section because you can always add more.
Use clips to hold back the hair just beyond the bangs section.
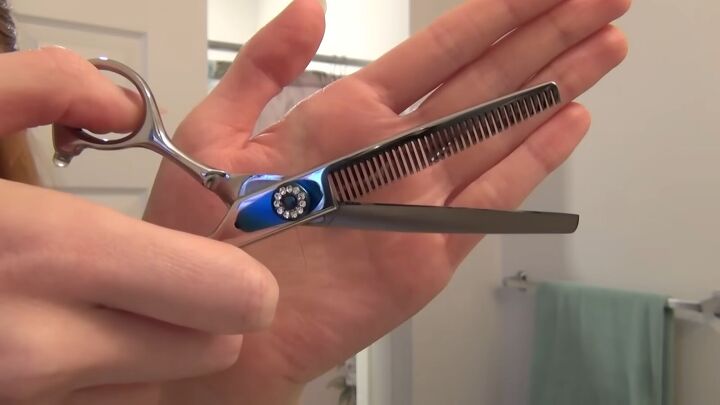
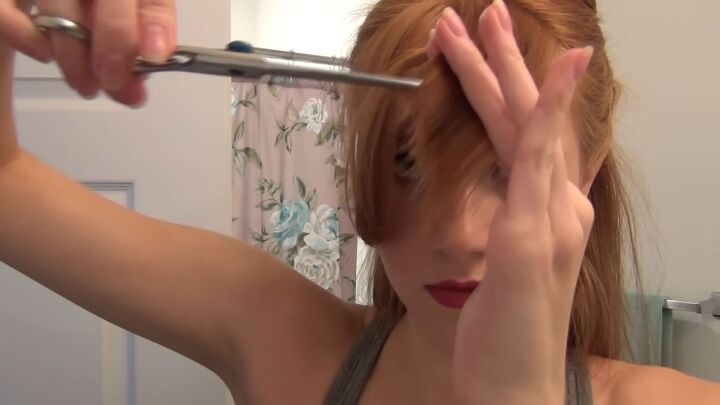
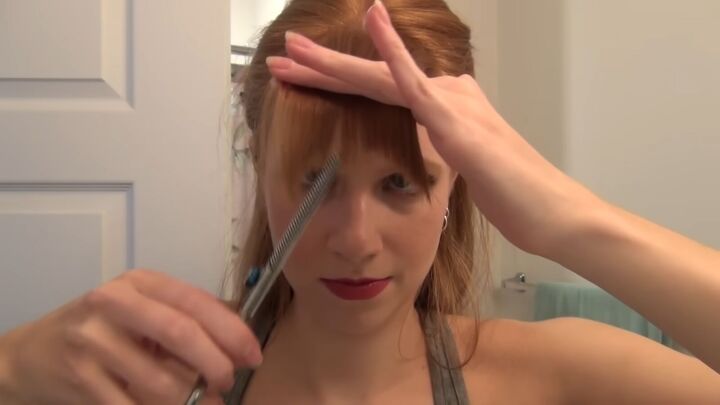
4. Cut one side, gradually at an angle
You can use regular shears but I prefer the softer edge that these texturizing shears give.
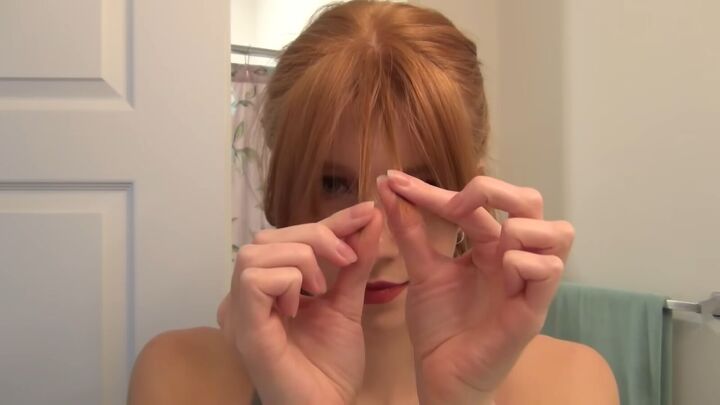
Grab your comb, and placing the bangs hair between your fingers, pull the hair in the opposite direction of how you’re going to wear your bangs.
We’re going to cut an angle, with the top part being the shortest.
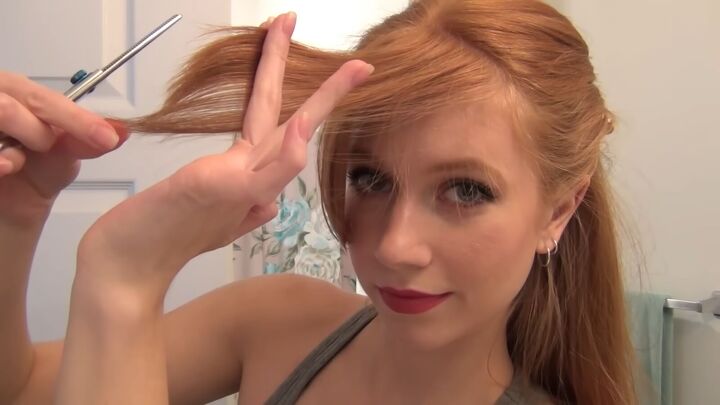
Tip: cut off less length than you planned so that you can tweak the final length at the end, if necessary. You can always shorten them, but you obviously can’t undo a cut!
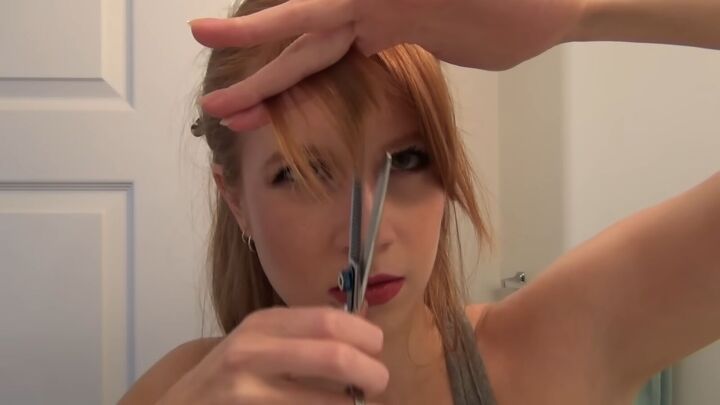
Grab your shears and start cutting the tips at an angle so that the top piece is shorter than the bottom.
This way, when the face frame bangs lay, they have a tapered effect.

Start again to gradually trim off more length, if necessary.
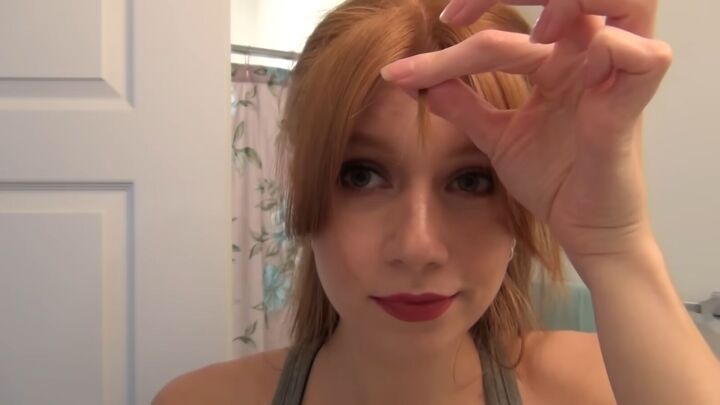
When I release the hair, the bangs are shorter by my eyebrow and longer toward my ear, blending well with the rest of my hair.
They still feel too long, so I’m pulling them in the opposite direction, almost parallel to my part, and trimming them slightly.
Especially if you’re using regular shears, you’ll need to cut up into the hair for a softer finish at the ends.
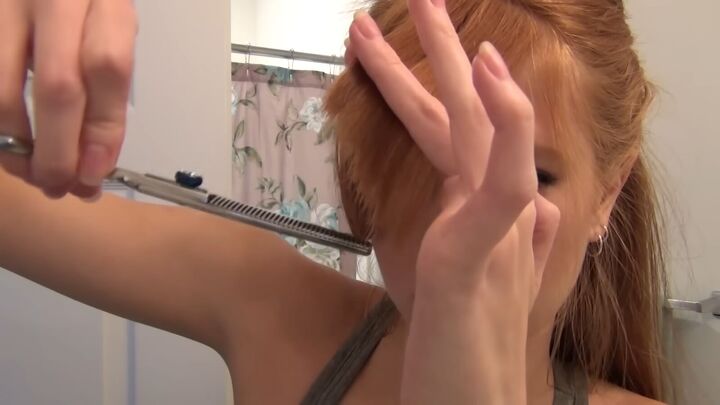
5. Cut the other side
Take a piece from the middle (the shortest part), from the side of the bangs you already cut.
Add that piece to the other side to show us the shortest length where we will start cutting the angle on this side.
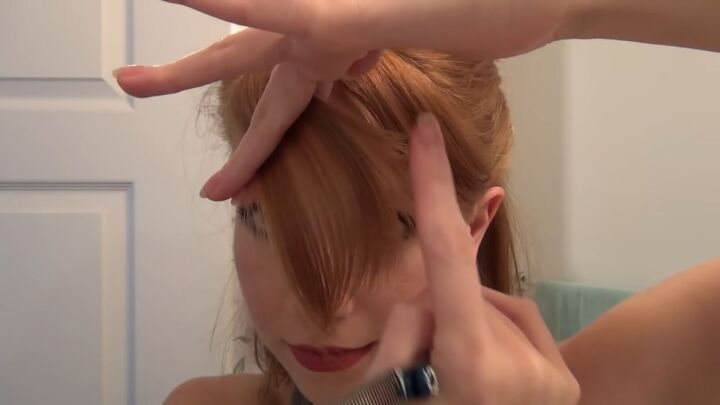
Trim slowly from the bottom (longest section) upward to meet that short piece at a gradual angle.
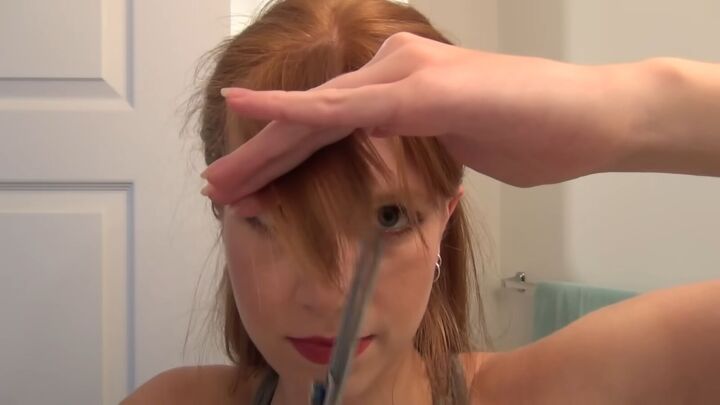
6. Check for evenness
Pull the long pieces of your curtain bangs to the front to make sure they are even.
Trim as needed.

Check the short pieces next.
Shorten as needed, making sure to do so while holding the bangs between your fingers in the opposite direction, like before.
Now use your comb to pull all of your bangs forward to see if there are any strays.
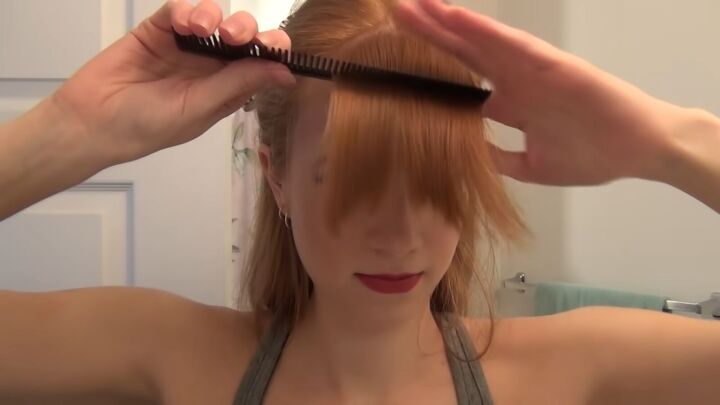
One side needed a bit more attention.
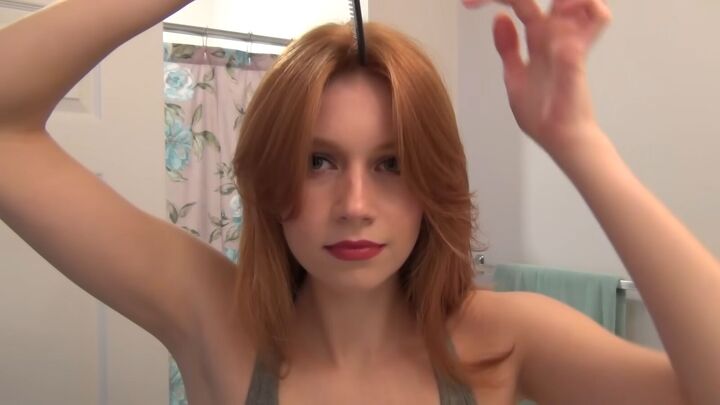
That’s it! Take out the clips and see how nicely these face framing bangs blend with the rest of your hair:
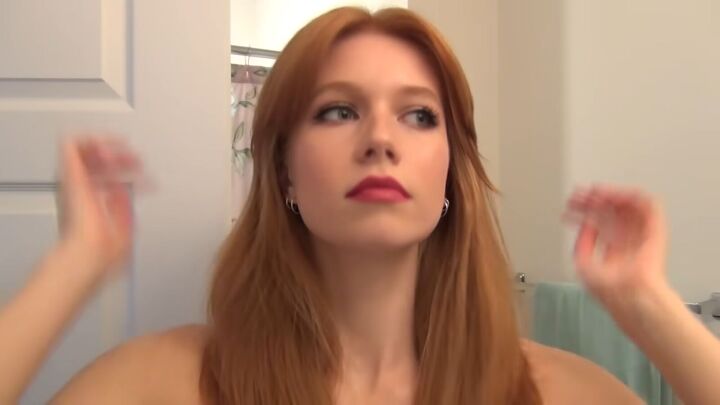
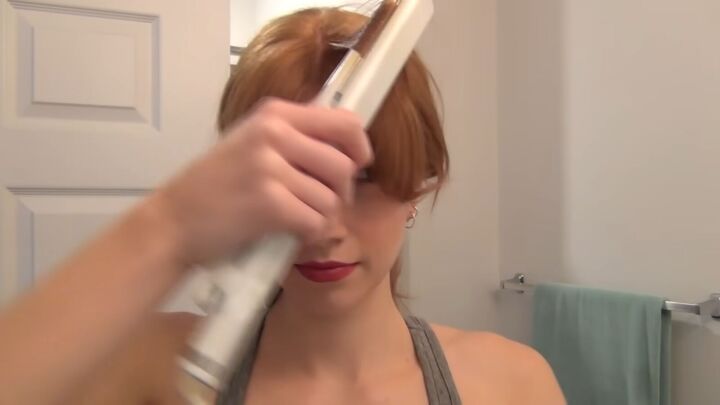
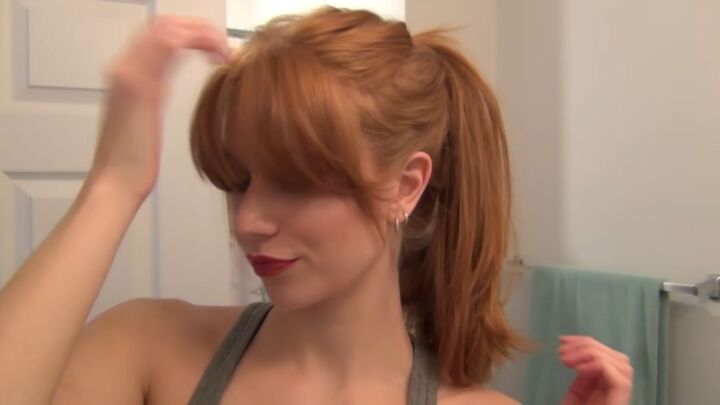
7. Style your curtain bangs
Bangs require some maintenance but they look effortlessly cool and are totally worth it!
Clip the top layer of your bangs up and use a flat iron to curl the middle for some shape.
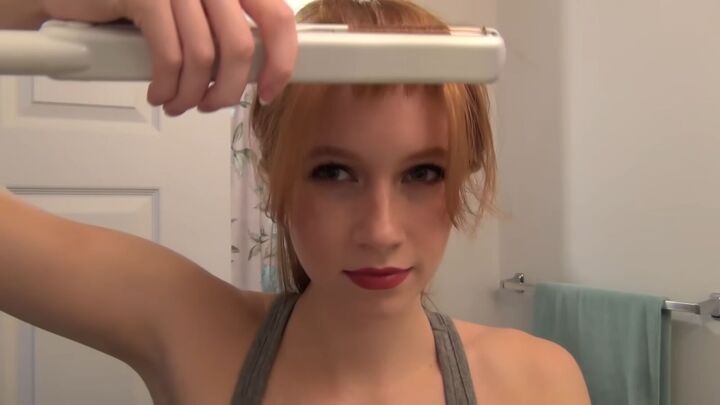
Repeat for the side portions.
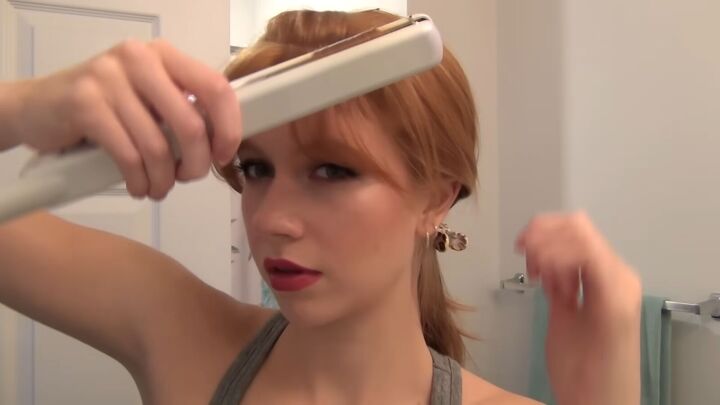
Let out the top section and curl those pieces as well.
My favorite way to wear these face frame bangs is with my hair pulled back–they always get so many compliments!
How to cut your own curtain bangs
Now that you’ve learned how to cut your own curtain bangs, will you try out this look at home? Comment down below.
You might also like my natural 15 minute makeup routine for everyday wear.
The author may collect a small share of sales from the links on this page.


Comments
Join the conversation