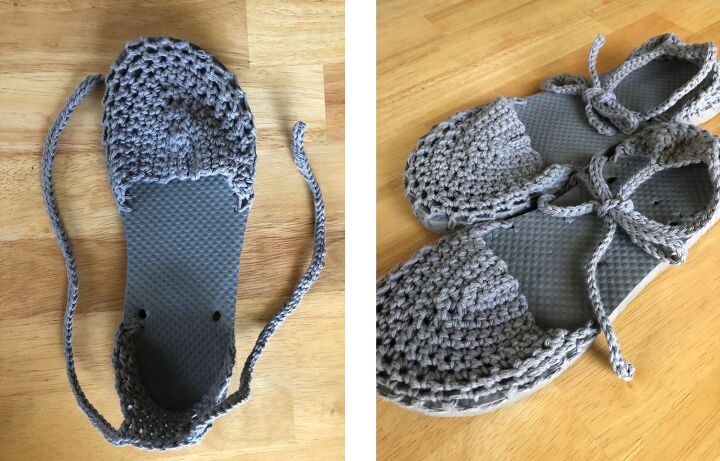
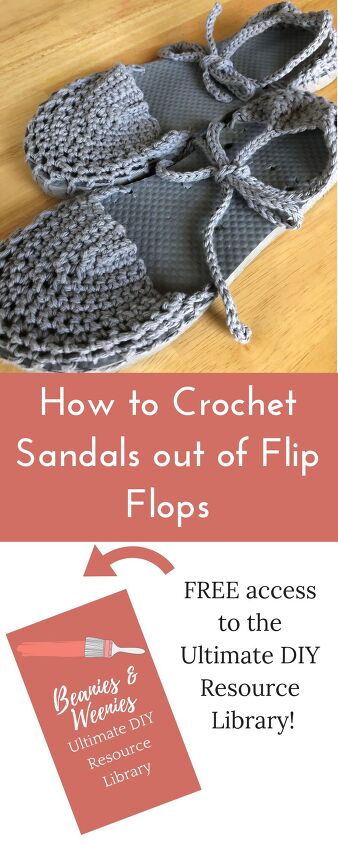
How to Crochet Sandals Out of Flip Flops | Crochet Shoes Free Pattern
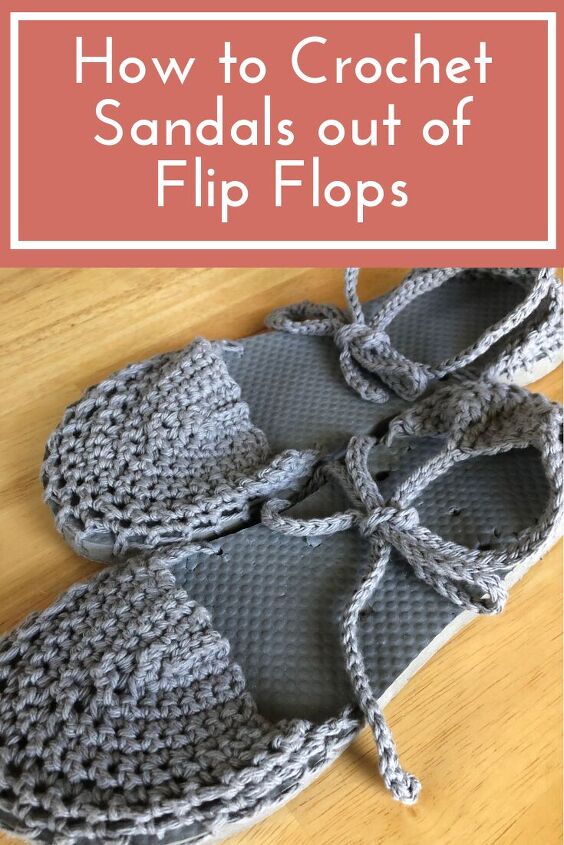
I'm all for being eco-friendly. That's why when I found my dog, Jasper, started chewing the straps off of my flip flops, I knew I didn't want to throw them away. Thankfully, I had a great a idea for reusing them: crochet sandals! Crocheting these cute sandals out of this old pair of flips flops was actually pretty easy once I got going. This project only takes a few hours to whip up and will leave your feel looking stylish for the rest of summer!
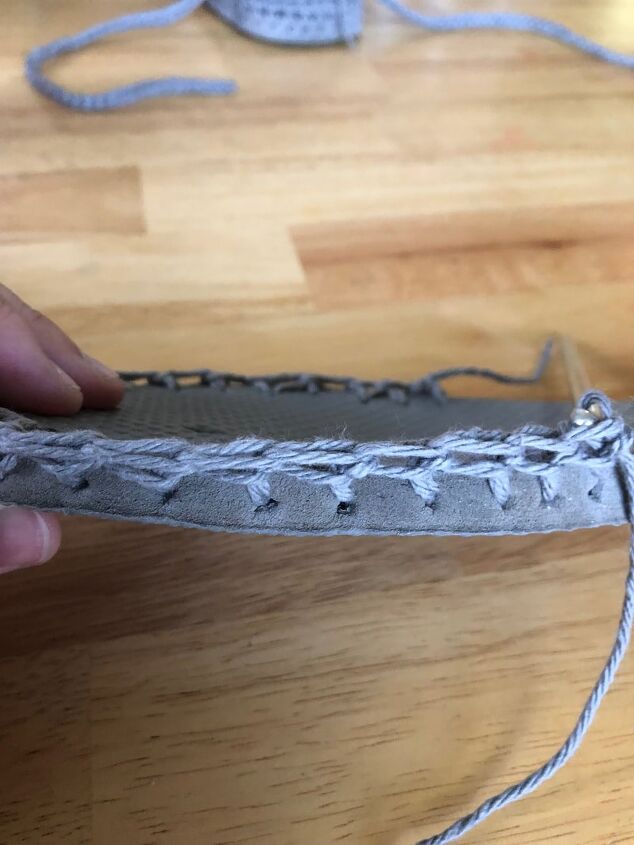
To crochet these sandals, start by removing the straps. You will need to use the skewer to poke holes around the toe and heel of each shoe to be able to crochet around what will become the sole of your crochet shoe. To poke the holes correctly, start by going in through the side of the shoe and poking it through the top of the shoe, at an angle. (See pictures below.)
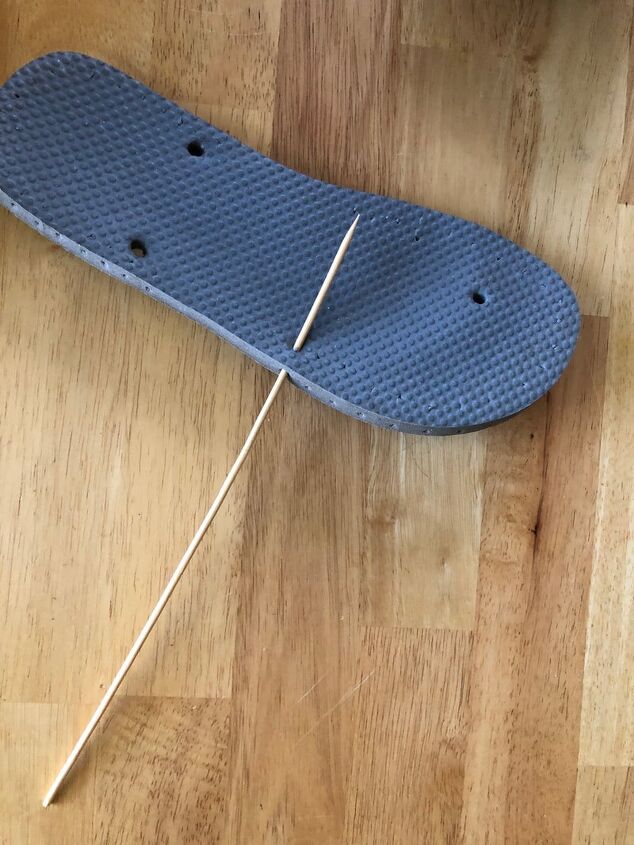
As you begin crocheting into the holes you create, go very slowly. The holes will easily rip if you go too fast. No worries, though! If you do rip a hole, do your best to correct it by creating a new one right next to it, or skipping it completely and adding another one on to the end. Don't worry about the foundation row being pretty or not as long as it is sturdy. From here, crochet the rest of the shoe is easy peasy!
Materials
- Pair of Flip Flops
- Wooden Skewer (or anything that can poke holes through your flip flops)
- Cotton Yarn
- H Hook
- Tapestry Needle
Abbreviations
- Sc= Single Crochet
- St= Stitch
- Sc Dec= Single Crochet Decrease
- Ch= Chain
- Sl St= Slip Stitch
Crochet Sandals Pattern
TOE
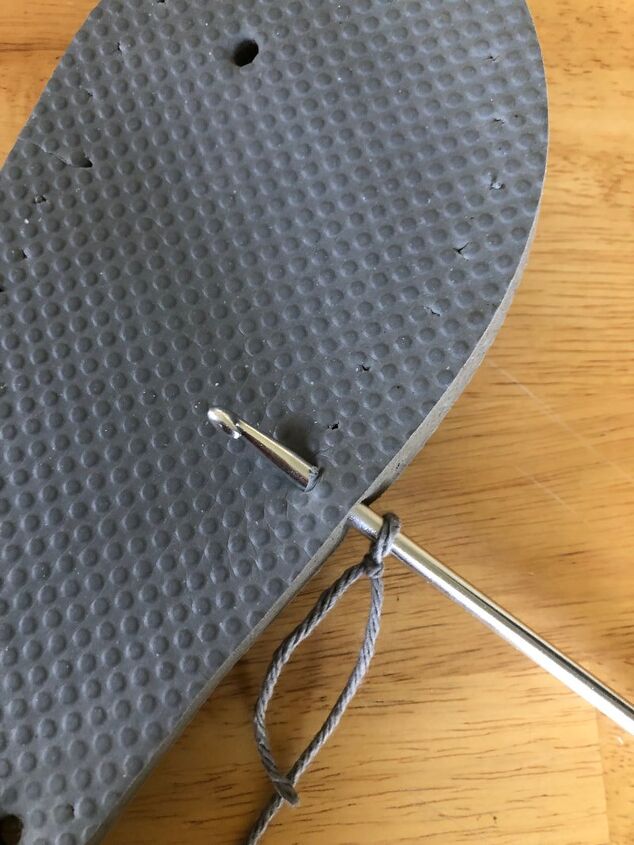
Start by poking 22 holes apprx. 1/2 inch apart around the toe of your flip flop. You may need more or less, depending on the size of your shoe. Use your best judgement as you go. Do an even number on each side of the flip flop. Attach your yarn with a sc to the first hole on the right side of the flip flop.
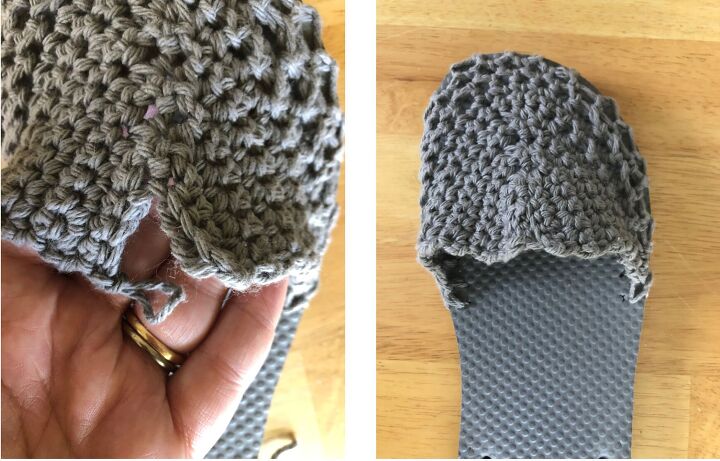
1. Sc into every hole around, turn (22)
2. Ch. 1, sc in every st around (22) [make sure to sc in the first sc used to attach the yarn to the flip flop]
3-5. Repeat row 2
6. Ch. 1, sc in the next 9 st, 2 dc dec in the next 4 st, sc in next 9 st, turn (20)
7. Ch. 1, sc in the next 8 st, 2 dc dec in the next 4 st, sc in next 8 st, turn (18)
8. Ch. 1, sc in the next 7 st, 2 dc dec in the next 4 st, sc in next 7 st, turn (16)
9.Ch. 1, sc in the next 6 st, 2 dc dec in the next 4 st, sc in next 6 st, turn (14)
10. Ch. 1, sc in the next 5 st, 2 dc dec in the next 4 st, sc in next 5 st, turn (12)
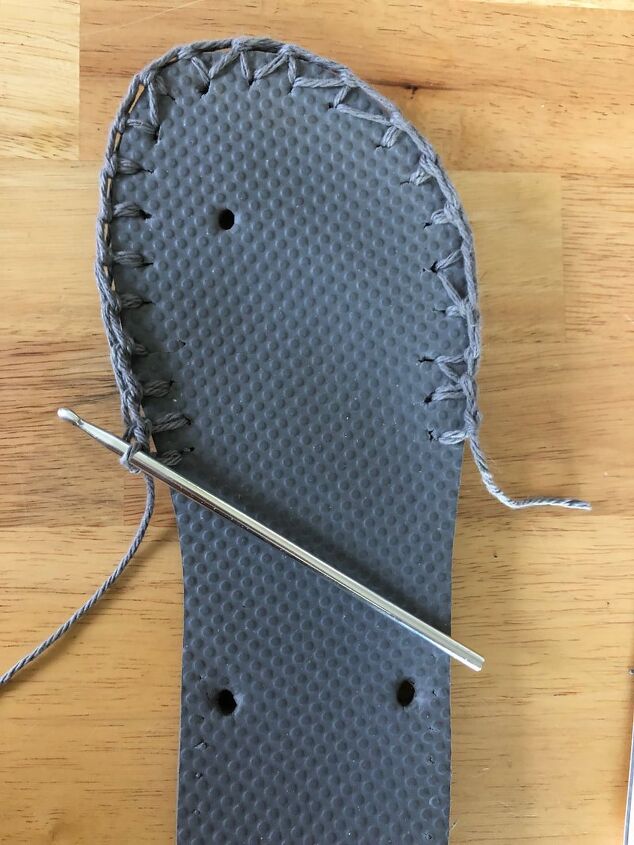
11. Ch. 1, sc in the next 4 st, 2 dc dec in the next 4 st, sc in next 4 st, turn (10)
Cut Yarn. Use a tapestry needle to join the two sides of the top together. (See photos below.)
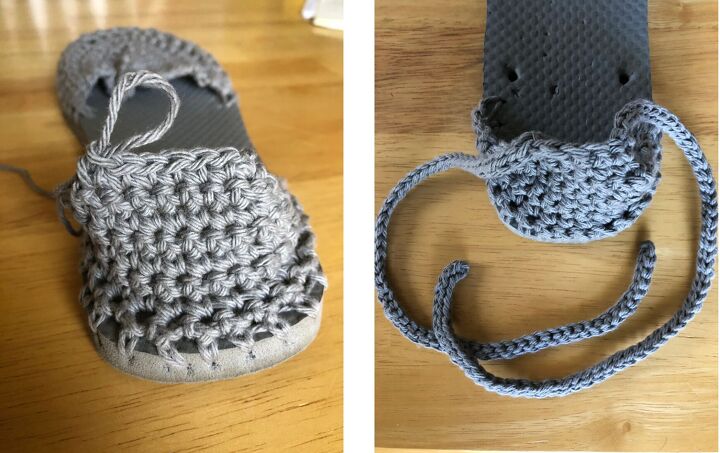
HEEL
Poke 17 holes apprx. 1/2 inch apart around the bottom of the flip flop. You may need more or less, depending on the size of your shoe. Use your best judgement as you go. Do an even number on each side of the flip flop. Attach your yarn with a sc to the first hole on the right side of the flip flop.
1. Sc into each st around, turn (17)
2. Ch. 1, sc in each st across, turn (17)
3. Repeat row 2
4. Ch. 1, sc dec in next 2 st, sc in next 13 st, sc dec in next 2 st, turn (15)
5. Ch. 1, sc dec in next 2 st, sc in next 11 st, sc dec in next 2 st, turn (13)
6. Ch. 1, sc dec in next 2 st, sc in next 9 st, sc dec in next 2 st, turn (11)
7. Ch. 1, sc dec in next 2 st, sc in next 7 st, sc dec in next 2 st, turn (9)
8. Ch. 1, sc dec in next 2 st, sc in next 5 st, sc dec in next 2 st, turn (7)
9. Ch. 1, sc across, turn (7)
10. Ch. 60, sl st in 2nd ch from hook and in every ch down, sc acros the top of the heel portion, ch. 60, sl st in 2nd ch from hook and in every ch down, sl st in next sc
Cut yarn and hide tails.
The author may collect a small share of sales from the links on this page.


Comments
Join the conversation
I don't crochet but want to do with stitching and fabric. Any tutorial available for that?
Brilliant idea! Thanks!