How to Make a UV Resin Pendant With Dried Flowers

What's going on my fellow jewelers? Today, I'm going down the resin avenue. That's right, come along on this little journey with me and let's make a UV resin pendant with flowers in it. If you’ve never worked with resin before, this is a great starting project.
Tools and materials:
- UV resin
- Bezels (metal pendant part)
- Dried flowers
- Tweezers
- UV light
- Toothpick
- Gloves
- Mask
- Lighter or heat gun
- Scissors
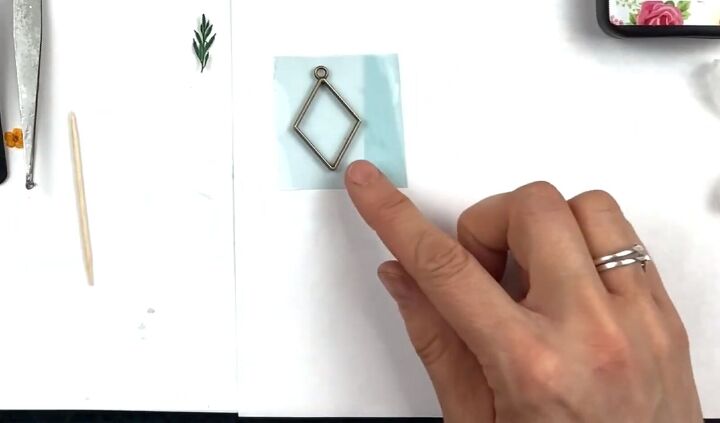
1. Tape the pendant
Start by putting tape behind your pendant. I am using special tape for UV resin and the bezel but you can actually use packing tape. So get your tape out, put your bezel where you want it and then cut extra tape.
The reason I do that is because I need a place for my finger to hold down when I’m working with the bezel. Rub your finger along the bezel so you know that it's stuck to every part of the tape.
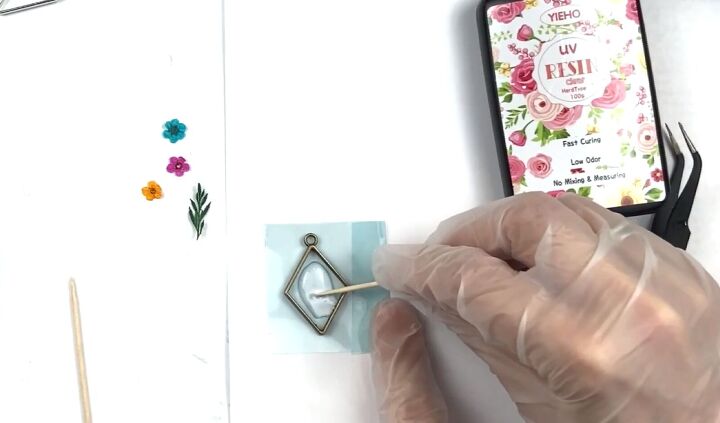
2. Add the resin
Put on your gloves and mask and make sure you have a window open or you're in a well ventilated area. This is to protect you from the fumes because they are toxic and dangerous.
Now you want to make a really thin layer of resin along the bottom. To do this, put it in the middle and then put your finger on the side and move the resin around with a toothpick.
Make sure it gets in every corner. The resin will bubble up so the next thing you need to do is get your bubbles out. This can be a bit tricky.
I try to bring the bubbles to the top and then put my lighter above the resin. The fire will cause a lot of bubbles to pop and the ones that don't, you need to keep at until they’re all gone.
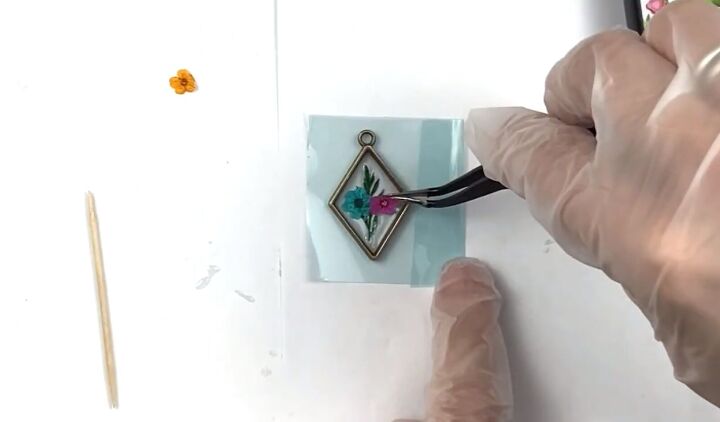
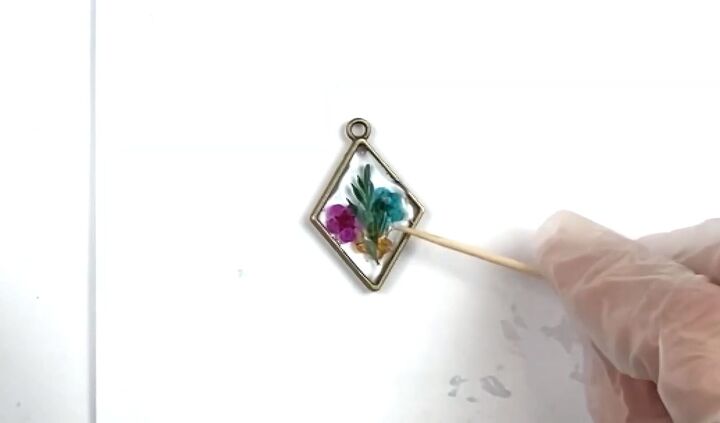
3. Add the flowers
Now it's time to put your flowers in. Before I even put the UV light on it, I want to get my flowers on that first layer of resin. Put the flowers on the resin with the tweezers and set it where you want it, all surrounded by the resin.
Be careful with the flowers as they are super delicate. Then gently tap the flowers with the toothpick and make sure there are no bubbles.
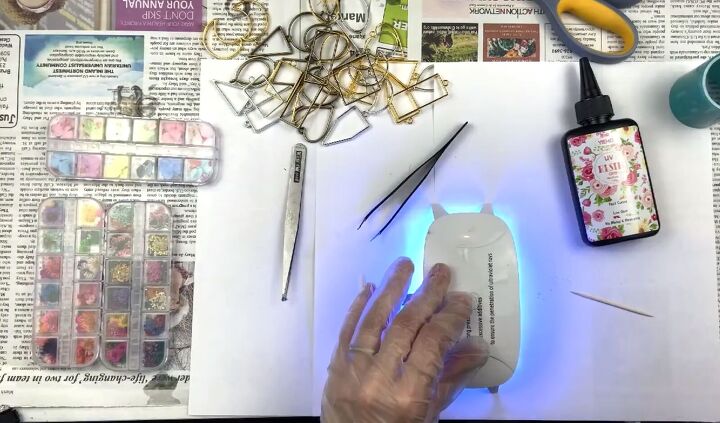
4. Put it under the UV light
Now put the necklace under the UV light for 60 seconds on one side. Then flip it over and do it again because I feel like it helps with the bubbles that way.

5. Add more resin
Now we’re going to go in and fill up the pendant and get rid of any bubbles. Once done, put it under the UV light again for 60 seconds.
6. Add more resin
Next, peel off the tape and rub any stickiness from the tape off. Then put resin on the back to make it a nice shiny back. Use your handy dandy toothpick to make sure it's on all corners and that it’s even. Once done, put it under the UV light for 60 seconds.
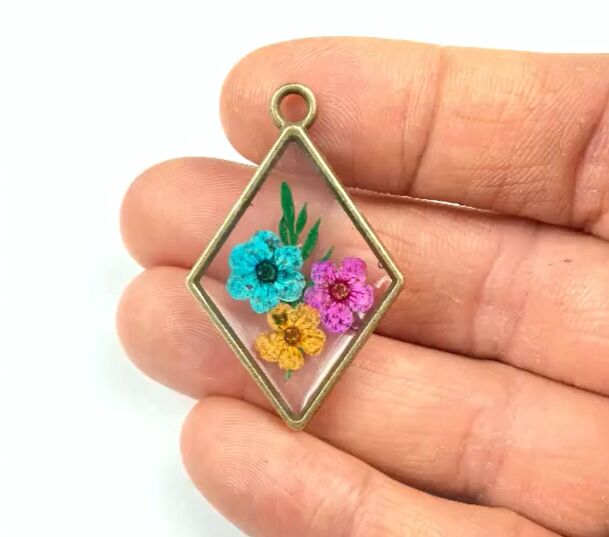
And there my fellow jewelers you have this amazing beautiful flower pendant, isn't she gorgeous?
How to make a UV resin pendant
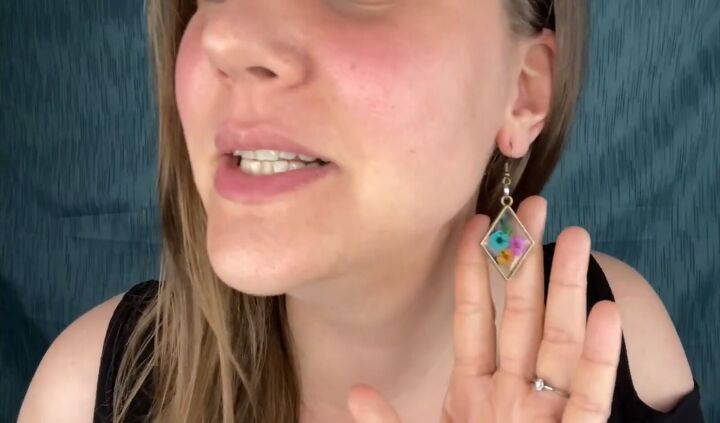
I know it's a pendant and should be part of a necklace but I made mine into an earring instead. If you do want to turn yours into earrings like me, you just need to repeat the process to make another pendant. If you’d like to make it into a necklace, simply put it on a chain and pop it around your neck.
The author may collect a small share of sales from the links on this page.


Comments
Join the conversation