Quick and Cute Tape Measure Bracelet DIY

Today I’m going to be showing you how to make an adorable and easy tape measure bracelet. I have a tape measure that is actually a family heirloom, but it’s getting worn and frayed, so I figured now would be a good time to turn it into something cool and new.
Tools and materials:
- Measuring tape
- Heat ‘n’ Bond tape
- Denim selvage
- Iron
- Thread
- Needle
- Elastic string
- Button
Measure and cut
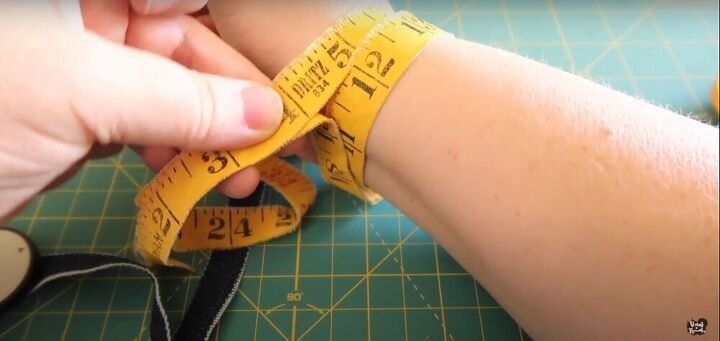
To start, I wrapped the measuring tape around my wrist to figure out how long I needed to cut it. I wanted the number 7 to be at the top of my wrist, so I made sure to position it that way when I wrapped it around my wrist, and I cut it at the 4 and the 19. I suggest cutting it a bit longer than you want it and adjusting later.
Layer and press
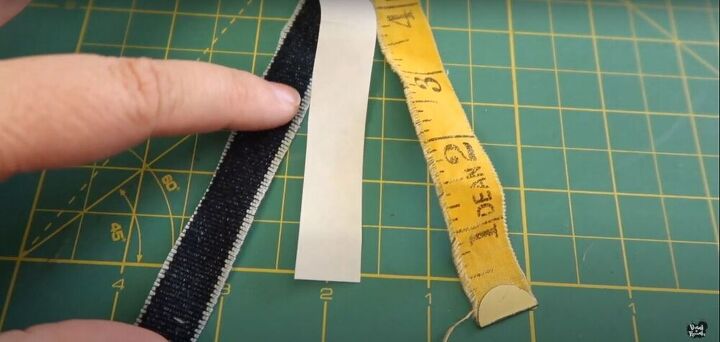
Next, I attached the denim selvage to the measuring tape by layering a strip of Heat ‘n’ Bond between them and ironing them all together.
Curl
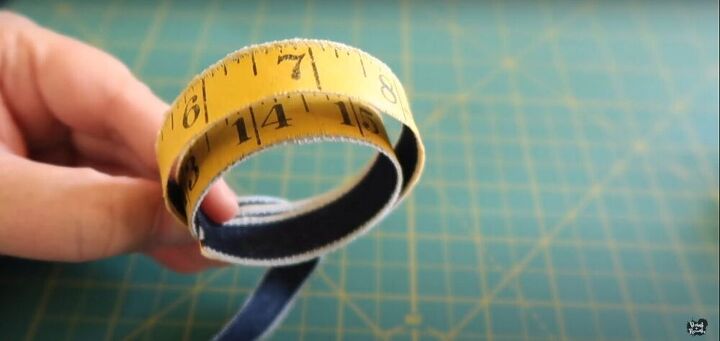
Before the adhesive cooled, I curled everything into wide circles, to help the bracelet keep its shape.
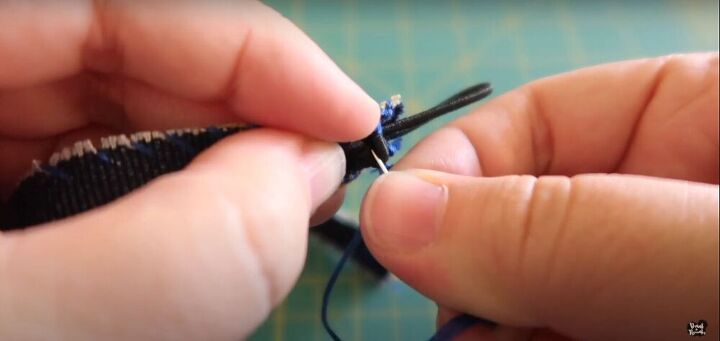
Sew
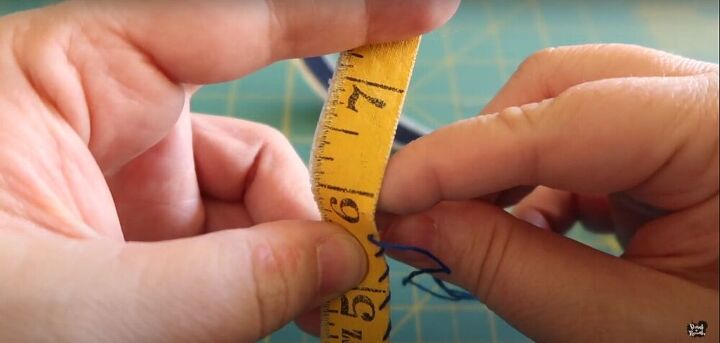
Use a contrasting colored thread to whip-stitch the edges of the measuring tape. This will help keep everything together, and it also gives the bracelet a little decorative pop.
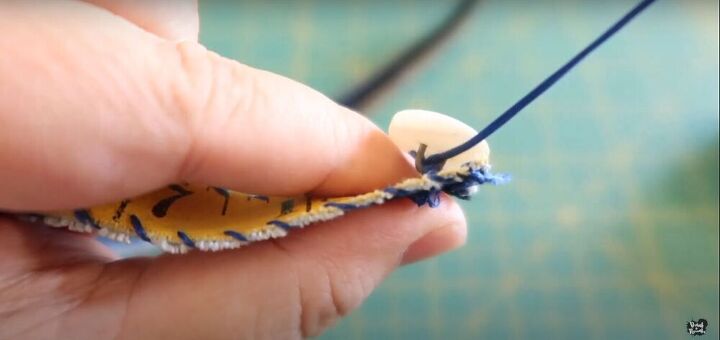
Attach the closures
For the closure, I sewed a button onto one side of the measuring tape.
Then I took a piece of elastic, tied it in a loop, and sewed it into place on the other side.

Check this cutie out! Isn’t it adorable?
I hope you enjoyed my simple tape measure bracelet tutorial. What other accessories do you think I should make with what’s left of the tape measure? Let me know in the comments!
The author may collect a small share of sales from the links on this page.


Comments
Join the conversation
What a cute idea for a true "seamstress" if any sewers do a get together, wouldn't it be cute to wear.