Recycle/Upcycle Toilet Paper Into Beads
Let's get personal and talk toilet paper! Some of you may have a whole lot of toilet paper on hand right now - as a result of the pandemic. Trying to think of things to make to keep busy? Make beads out of toilet paper!
This is probably one of the easiest and cheapest crafts ever! I used a sheet of toilet paper, white glue, and water to form jewelry beads. Let dry and then use a nail or drill to make a hole, paint, nail polish and/or use utee to decorate!
Here's how:
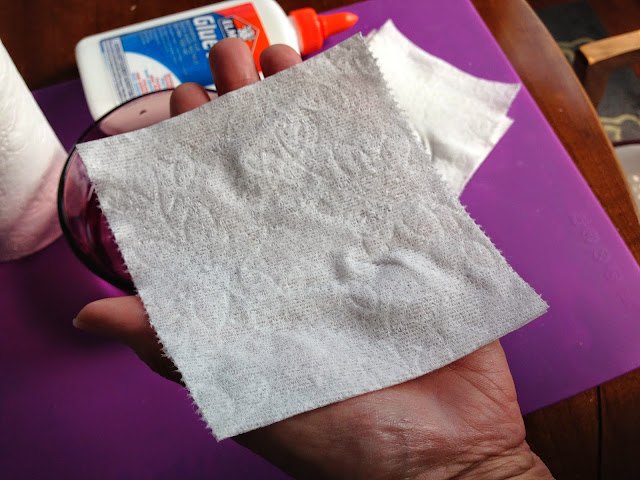
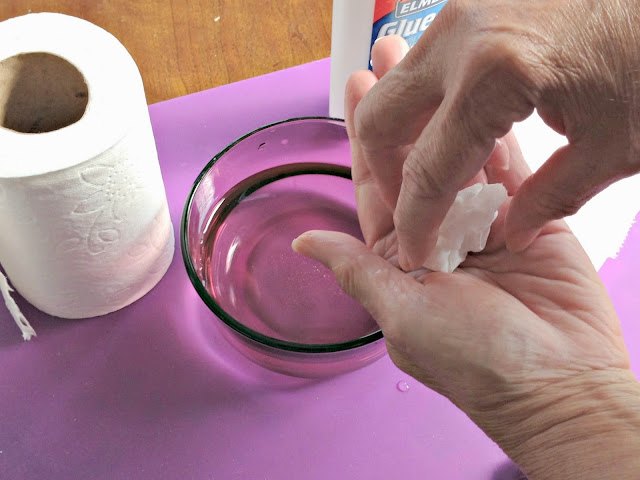
Take a sheet of toilet paper (I used Charmin),
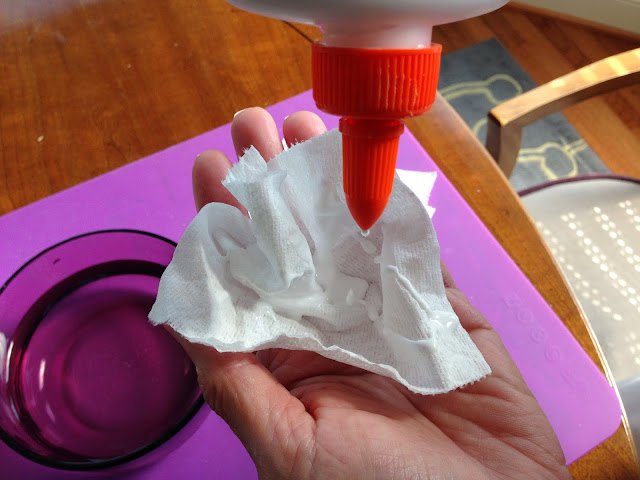
and cup it in the palm of your hand, squeeze some white glue in the center and crumble it together.
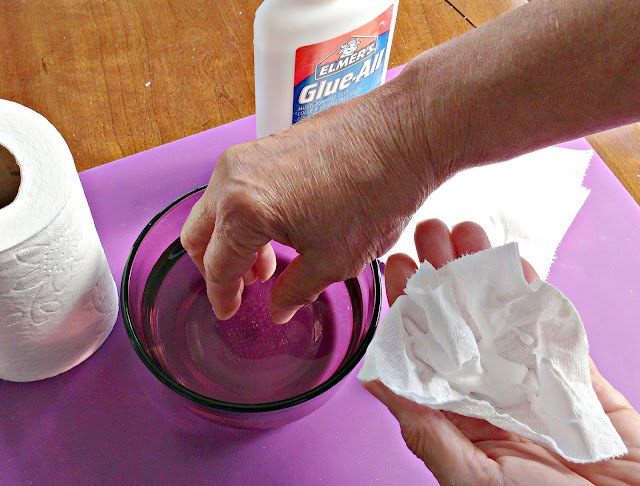
Wet you fingers with a bit of water and dampen the toilet paper and glue,
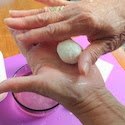
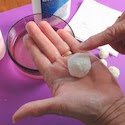
squashing and swirling it between your palms . . . . around, and around, shaping it into a ball.

Imagine making meat balls . . .
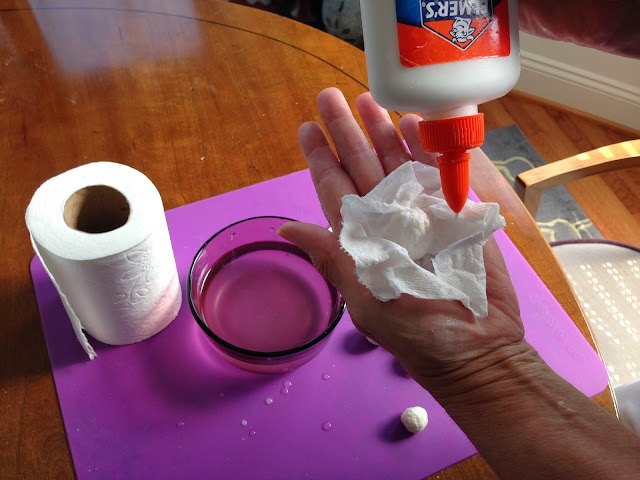
For larger beads, place the ball on another sheet of tp, add glue and dampen the tissue as before, and shape into a ball.
Keep adding additional sheets, glue and water for larger balls.
If it gets a bit sticky, add a little water to continue rolling.
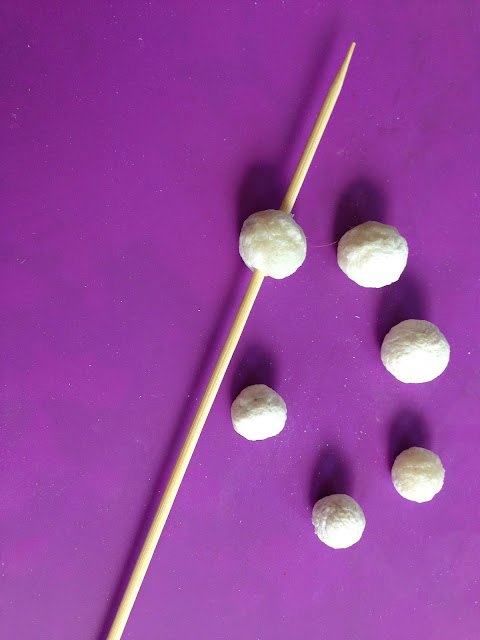
Place on parchment paper after reaching desired size bead and let dry overnight or if you'll impatient, use a blow dryer or place in a 250 degree oven for a while, til dry. You'll find it hard, hard, hard after completely drying!
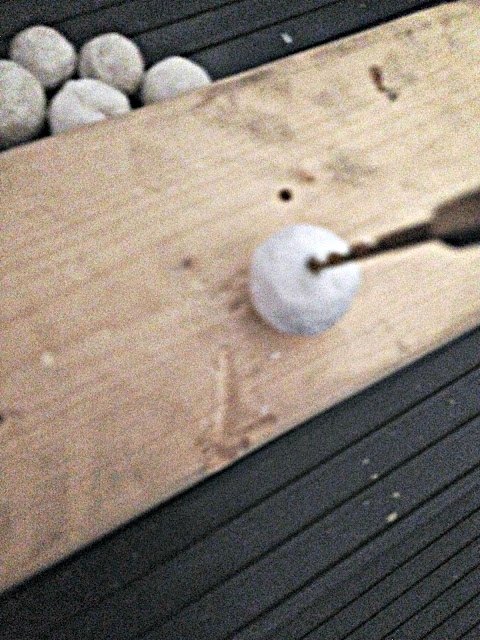
Use a drill or nail to make holes in the beads.
Now here's the fun part . . . decorating the tp beads!
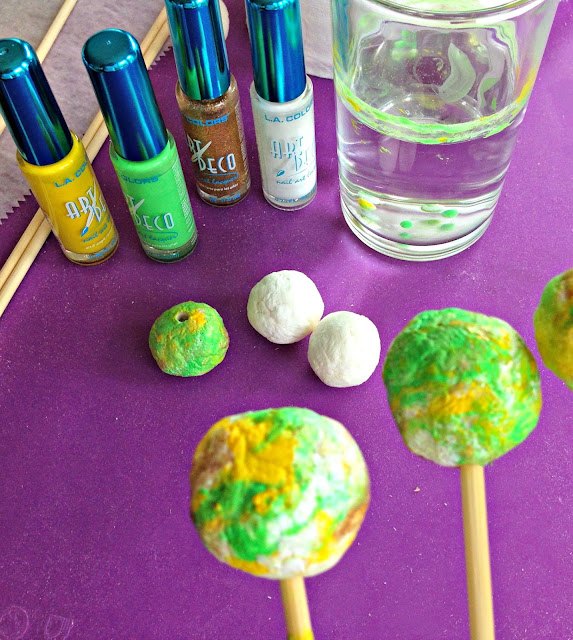
You can color the beads anyway you like, but have you ever heard of nail polish marble dipped beads? This is how I colored mine:
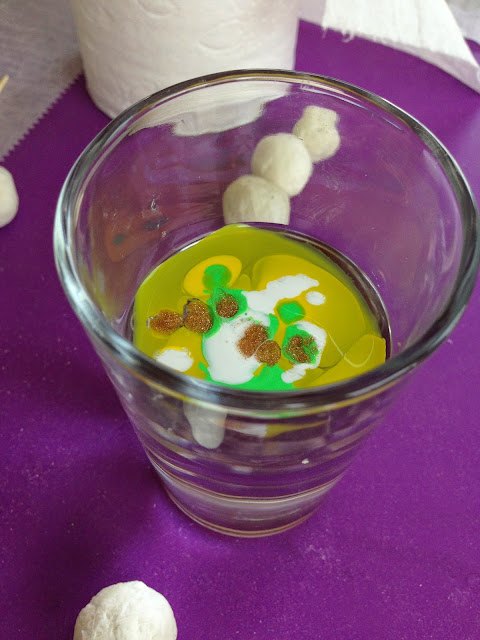
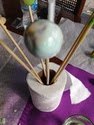
Take a bead and put a skewer through the holes on the beads you made. Using a glass (the nail polish might make holes in a plastic cup) of water, put 4-6 drops of each color of nail polish you like. The polish will float to the top.
Immediately dip the bead skewer into the floating polish and take it out quickly.
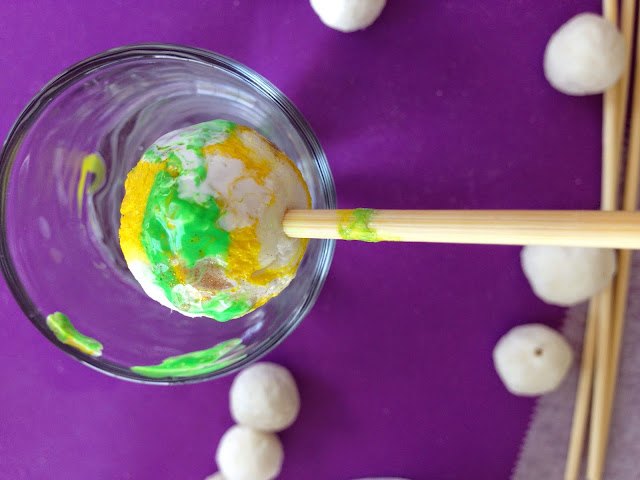
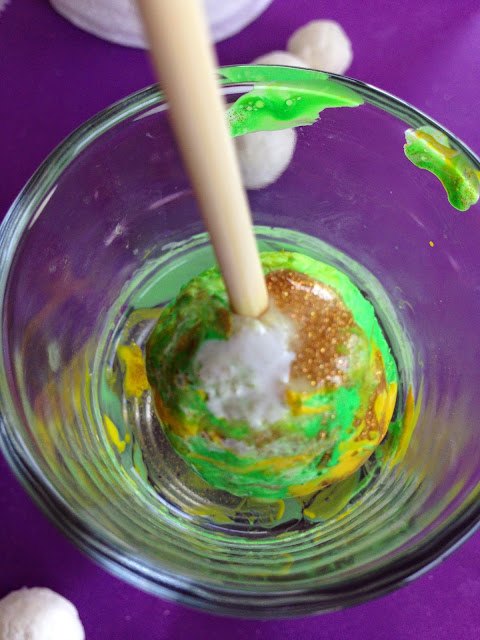
The amazing result is a pretty marbled bead.
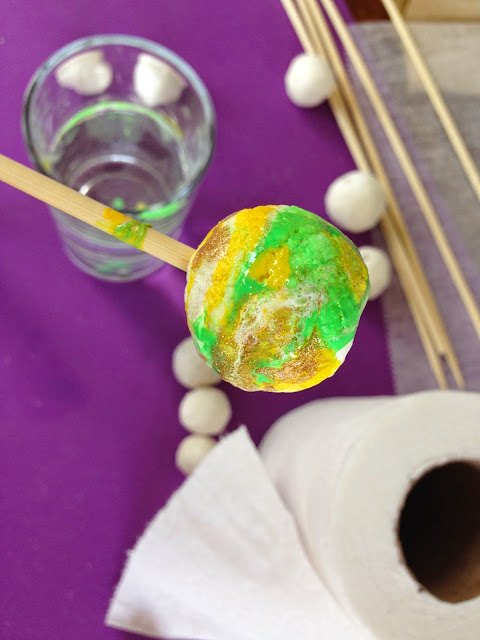
If you need more coverage, dip the bead again after adding more nail polish drops. If you wait too long to dip, the polish will get filmy and harden while floating on the water. And you don't want this.
After dipping, you can take a skewer and scoop the left over scaly polish out of the water and use the water, again and again. After marbleizing the beads, let them dry completely.
Isn't this another fun way to recycle or upcycle!
Oh, and you can try another decorating method, too, if you want!
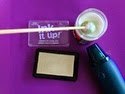
To take your tp marbleizing bead to a whole new level of shine, try dunking it in some ultra thick embossing enamel or utee for a glassy or ceramic look! How cool is this!
Just place the bead on a skewer. Then roll it across a clear embossing inkpad to dampen. Quickly roll the bead in utee. When the bead is covered with powder, use a heat gun and roll the bead around so that the utee melts evenly.
While the melted utee is still hot, dip the bead back into the dry powder for a second or third coverage coat and melt again using the heating tool, making sure the utee coverage is even.
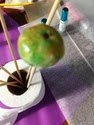
It doesn't take long for the utee to cool off and look amazing with all the colors flowing together.
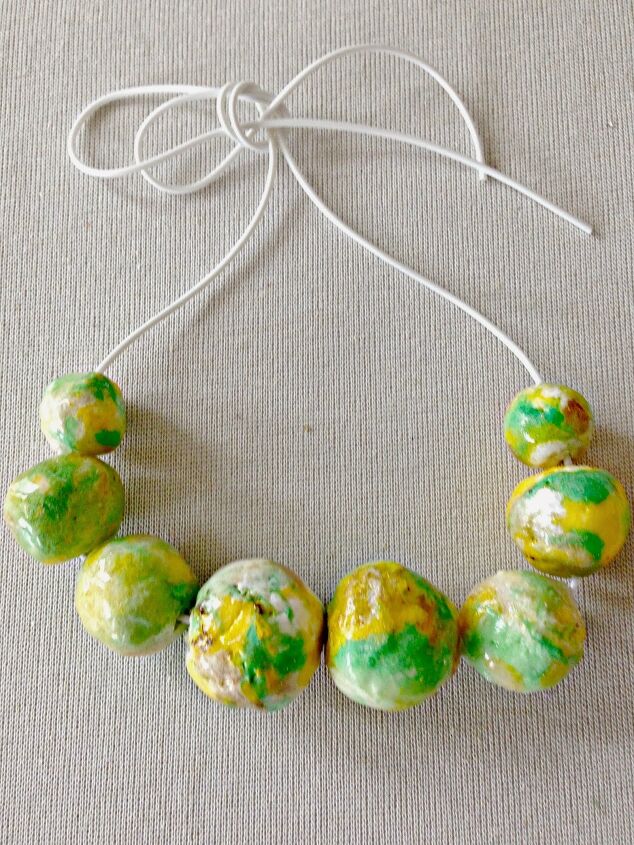
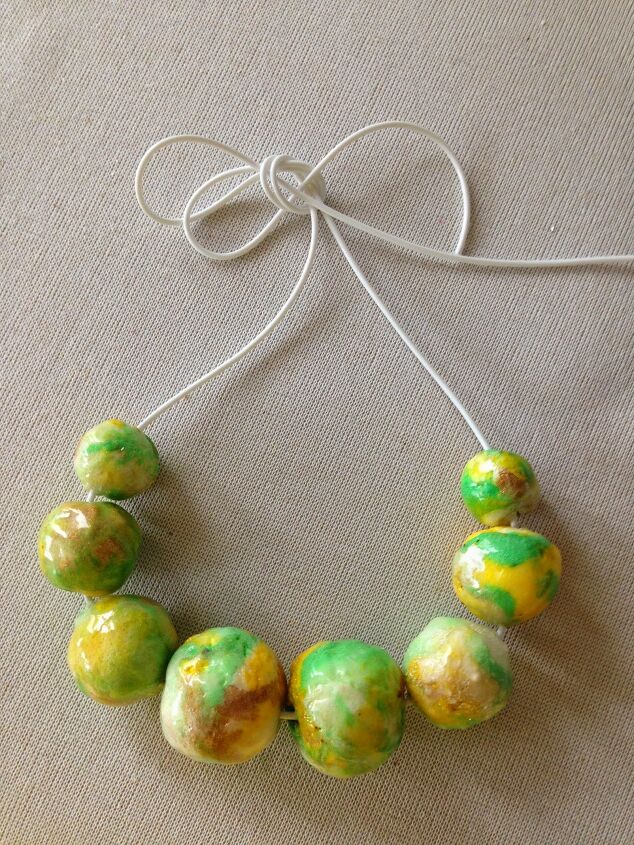
String on a simple ribbon or cord and WOW!
Perfect for making a garland of beads!
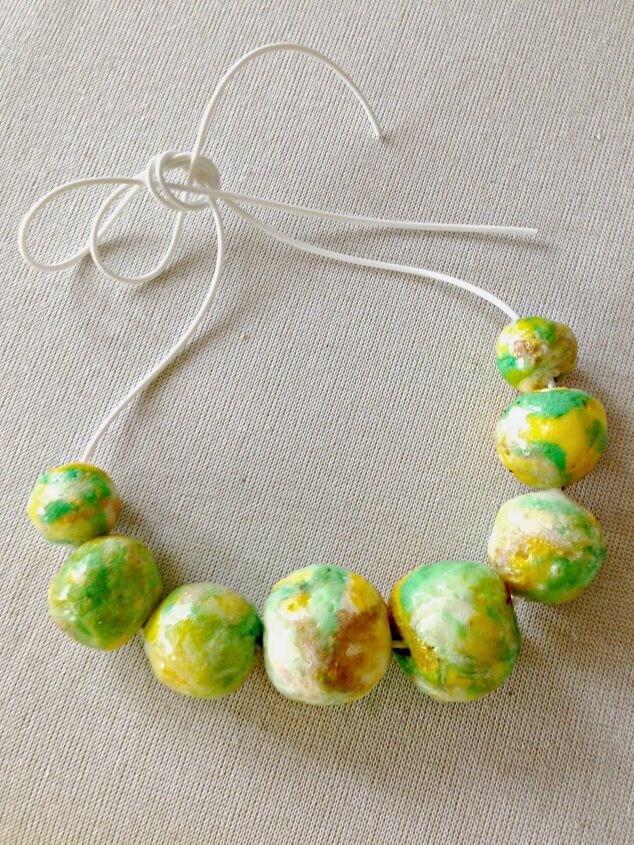
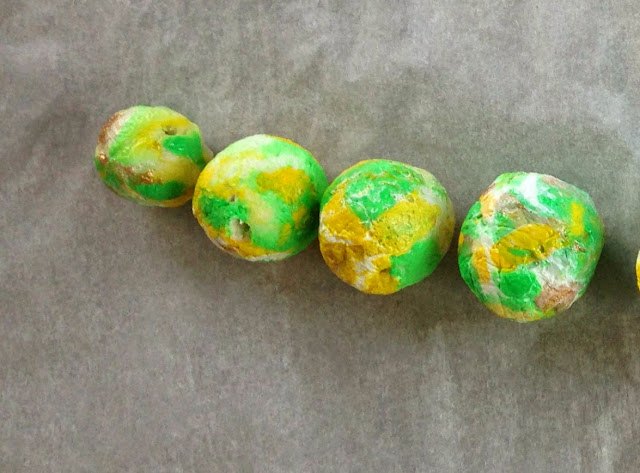
Each bead is a unique organic looking creation. Kinda wonky, I think!
No two are the same!
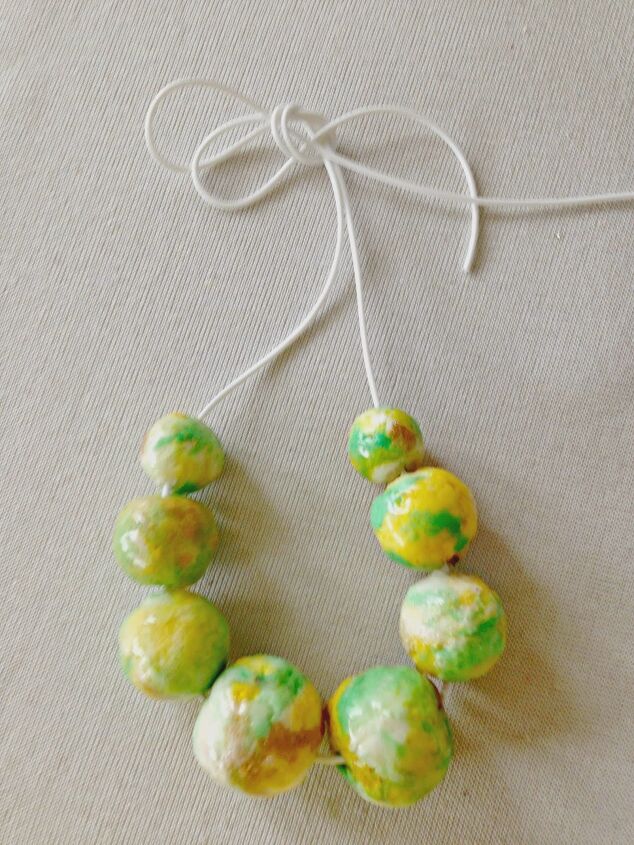
What a great way to use up all that toilet paper and costs just pennies to make!
The author may collect a small share of sales from the links on this page.


Comments
Join the conversation
This would be a cute project for kindergarteners for Mother’s Day.
Wow! This so cool!! I’m thinking snowman ornaments or jewelry! LOVE this & SO INEXPENSIVE!! Thank you!!