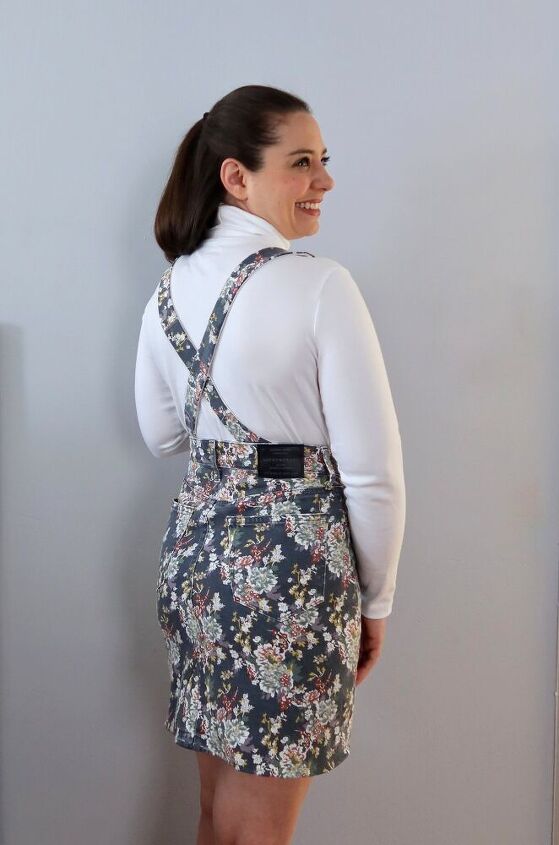
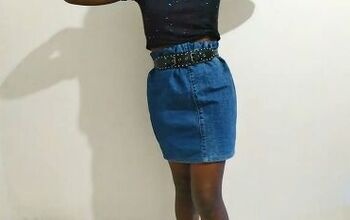
Jeans to Pinafore Refashion
Today I'm sharing my latest refashion! This piece has been several months in the making. I started dreaming about this project back in December! I wanted to share a little of my thought process, because it really was an idea that bounced around a bit before landing! One of the most common questions I get asked is where my ideas come from, so here’s how this one formed!
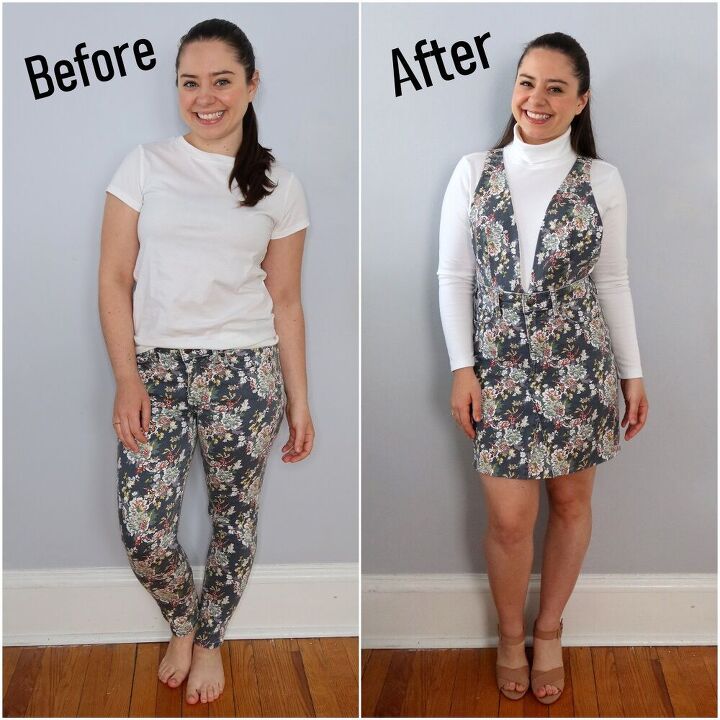
I had a pair of corduroy pants in my refashion pile, that I was stuck on what to do with. I started looking online for corduroy dresses, or jackets to gather some inspiration. I came across this adorable pinafore from Show Me Your Mumu, and started going down the pinafore rabbit hole!
I do quite a bit of fabric Tetris in my mind when figuring out if I can realistically make a refashion work. I knew if the pants were long enough, and I was able to cut them off with enough fabric to spare, this project would work.
I sat with the idea for a bit (some other projects got in the way of starting) and before I knew it the weather was warming up. I wasn’t motivated to sew with corduroy anymore, but the idea was still taking over in my mind. I started searching on ThredUP to find a replacement garment to bring the idea to life. Thankfully the perfect pair popped up in my search and the project was back on!
I started searching for a pattern for the bodice. (This is something that can be self drafted!) I came across the Amber Pinafore Dress from Named Clothing. I’ve had great luck with Named Patterns in the past so I knew it would be reliable for me. I tested the bodice with cotton fabric before cutting so I could work out any fit issues beforehand.
Now onto the tutorial! Sorry for the photo quality, I realized I was taking more video than photos for this project so some of these are from screenshots.
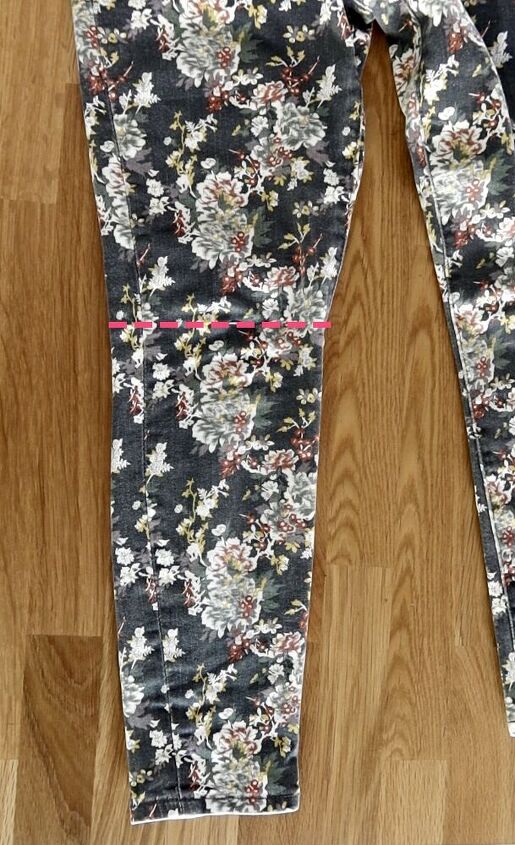
First, with the jeans on, mark knee length. This was my starting point to cut because I didn’t want to make my skirt too short. (I cut off an additional 2” once I had a better idea of length.)
Seam rip open each cut pant leg, leaving one side seam intact. Undo hem as well.
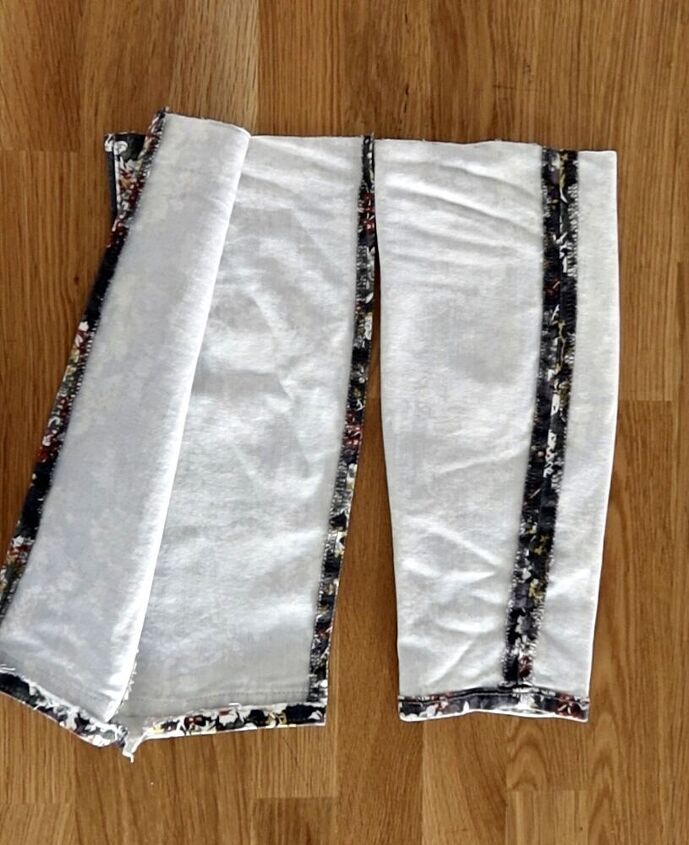
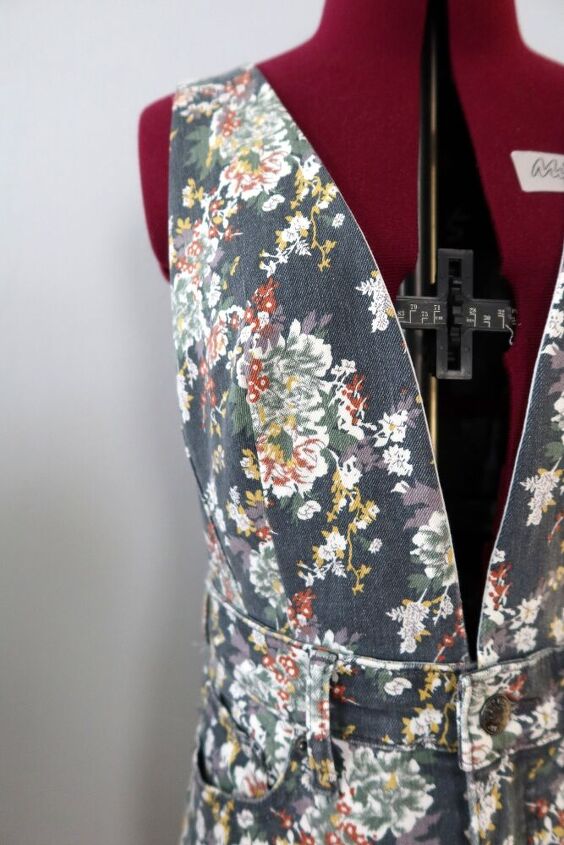
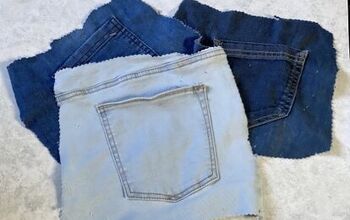
Cut bodice out of each pant leg. (For a better fit, the top of my bodice lined with the jean hem, and the bottom of the bodice lined up with my original pant cut line.) I traced my bodice piece onto each leg, making sure to match where the Jean seam line was for a consistent look. (Tip: mark on your pattern piece where seams need to hit!) Try to keep the bodice towards the ends of the leg to be sure you get the most use out of your fabric.
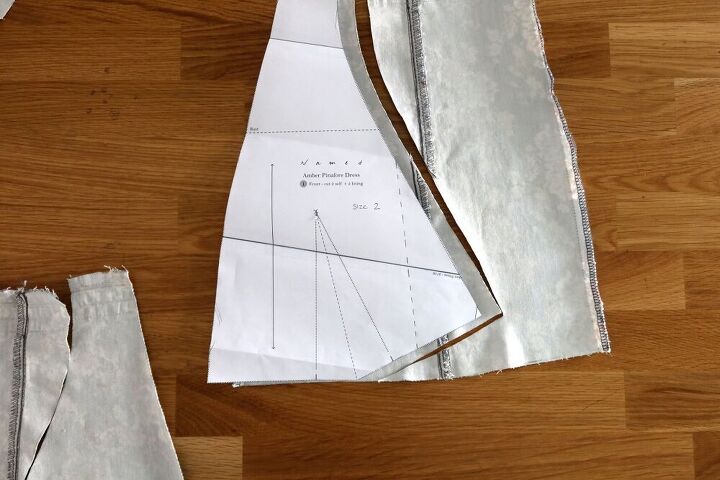
Once your bodice is cut, you can see how much fabric you have left to work with.
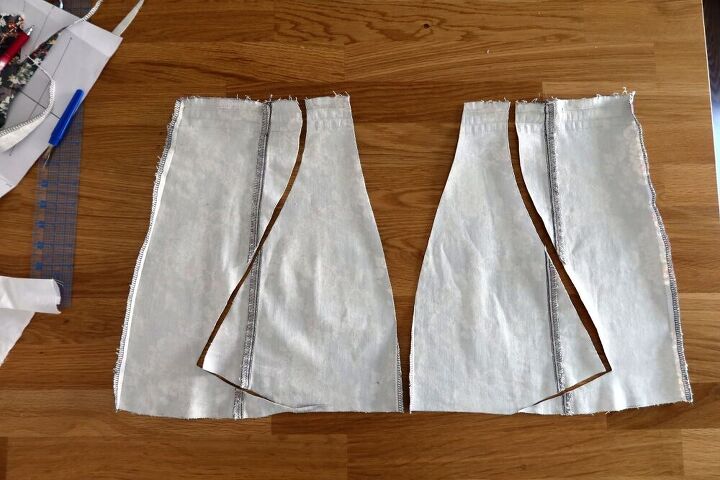
Next step is to turn the remaining jeans into the skirt. Going back to the top portion of your jeans, seam rip the inner legs.
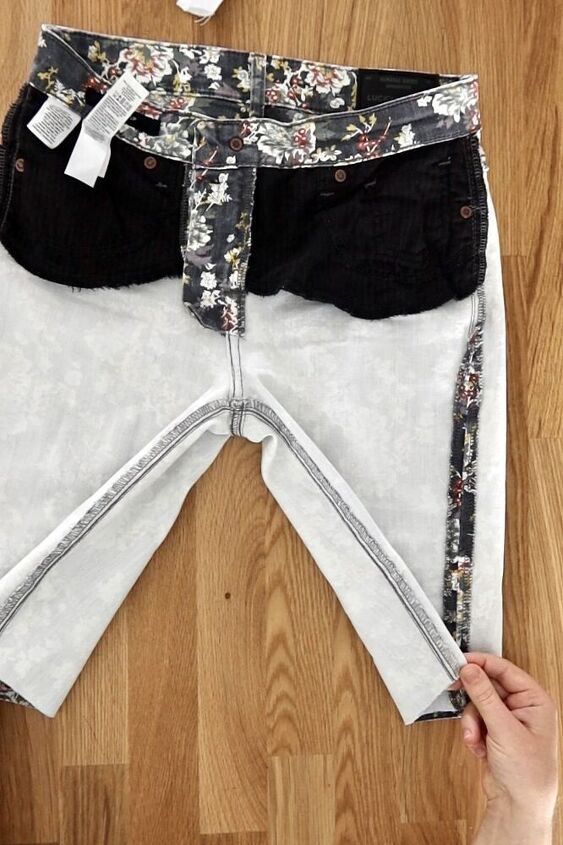
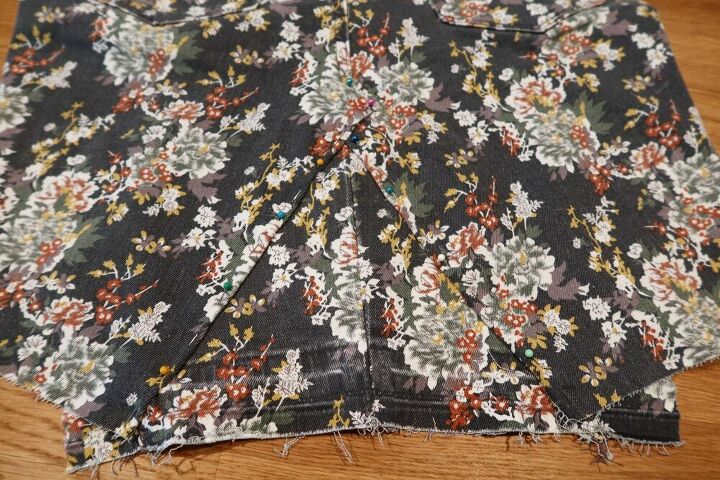
On the front of the jeans, seam rip the fly section a few inches up, until the jeans can lay flat, and you can see the triangle start to form on the bottom. Don’t seam rip too far up, and don’t hit the fly zipper. This part of the project you may have to play around with a bit to get the right fit. Pin the triangle in place before adding any fabric, and try the skirt on to test the opening width.

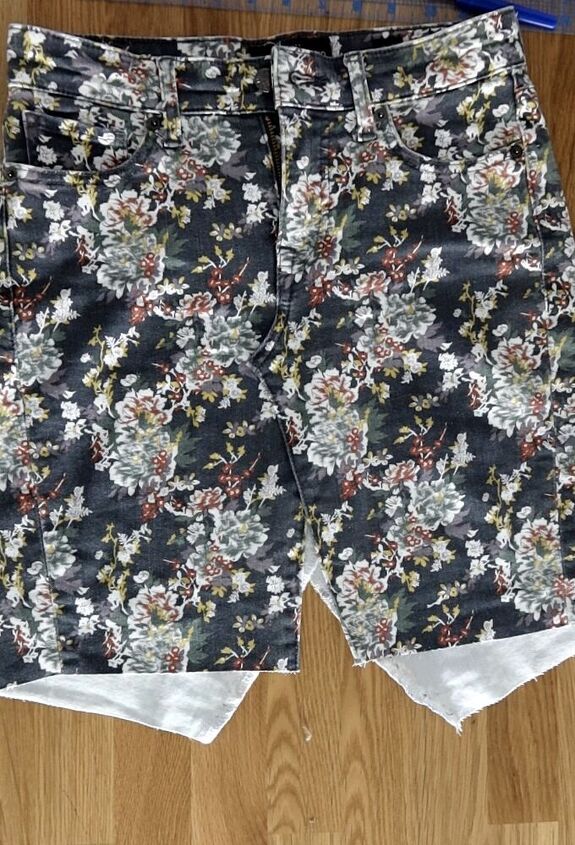
Thankfully my front triangle didn’t need much fabric, so only a small portion of my fabric went into this section.
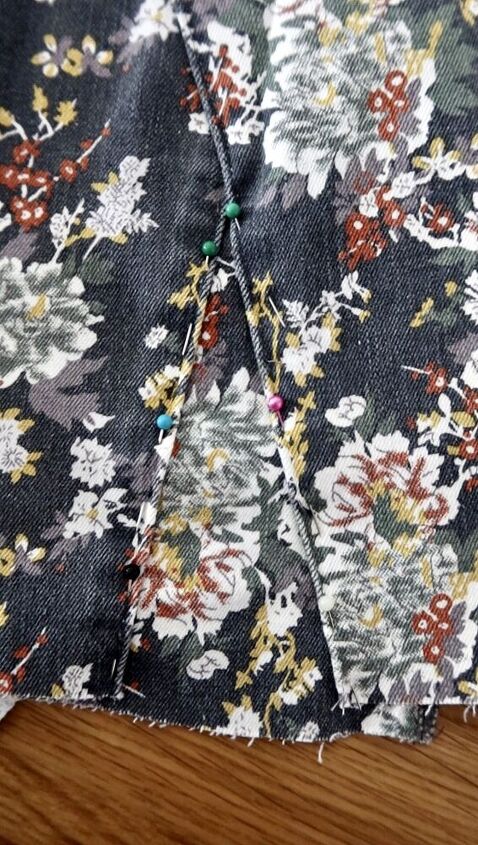
Continue this process for the skirt back as well. Seam rip the center back seam a few inches, and lay back flat. You may have to seam rip more on the back than the front. My opening was wider in the back, and I didn’t have enough material from one pant leg to properly fit. I stitched my remaining fabric together for a bigger insert. You can see I placed my new seam in the center of my insert, which takes extra time to pin and stitch properly, but creates a more finished look. I also folded the pant leg triangle sides in more to create a flatter piece.
The back was a bit harder for me to fit. I recommend pinning in place, then trying the skirt on to be sure it lays nicely.
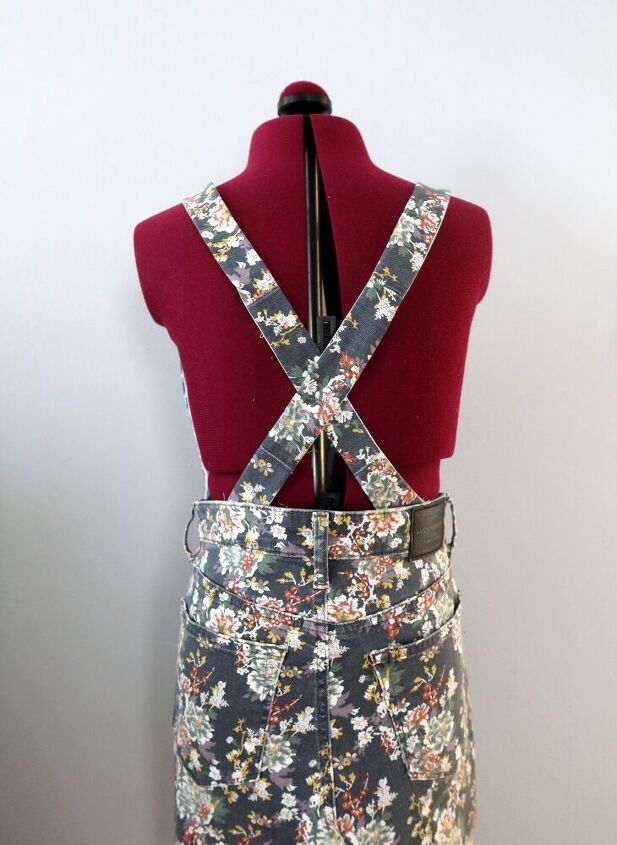
After the inserts are finished, the rest of the material is for the straps! Now, on my pants, since I cut off an extra 2” from my original pants, I was able to use most of that for my straps. (You may not have that material to work with, but you can always make the back straps out of a coordinating fabric if you don’t have enough!) I had to add some length from my remaining fabric to extend the straps, as you can see with my seam lines.
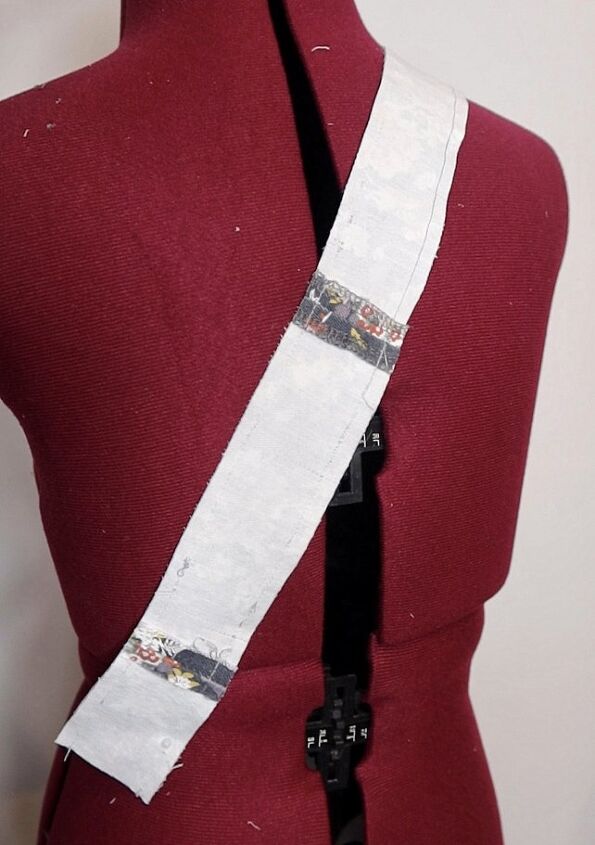
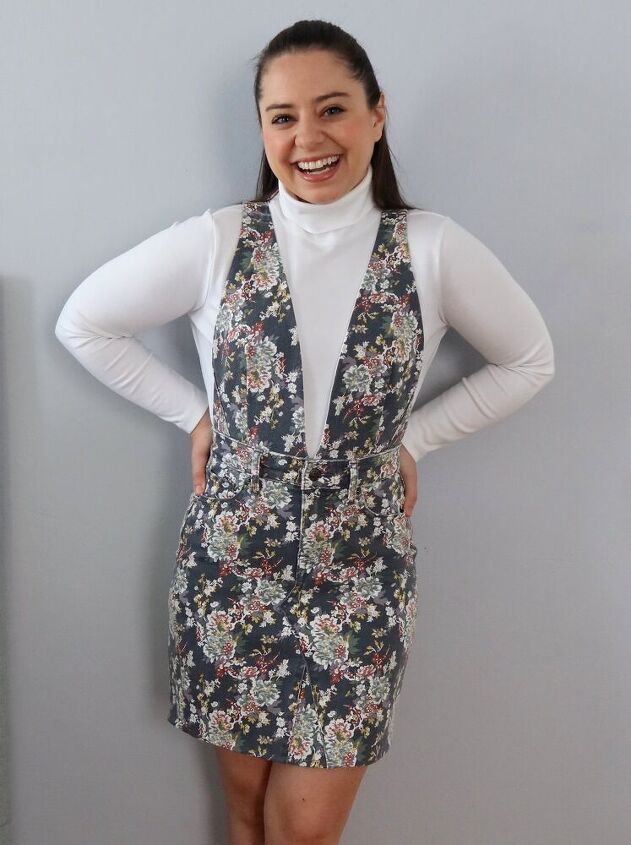
My entire bodice is lined with cotton muslin. For reference, my straps were cut 2” wide and stitched with a 3/8” seam allowance.
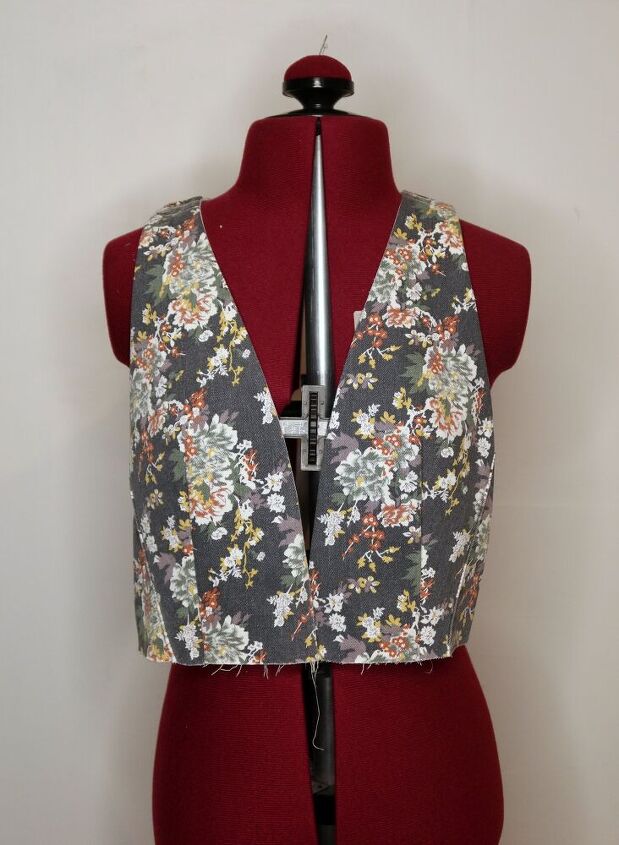
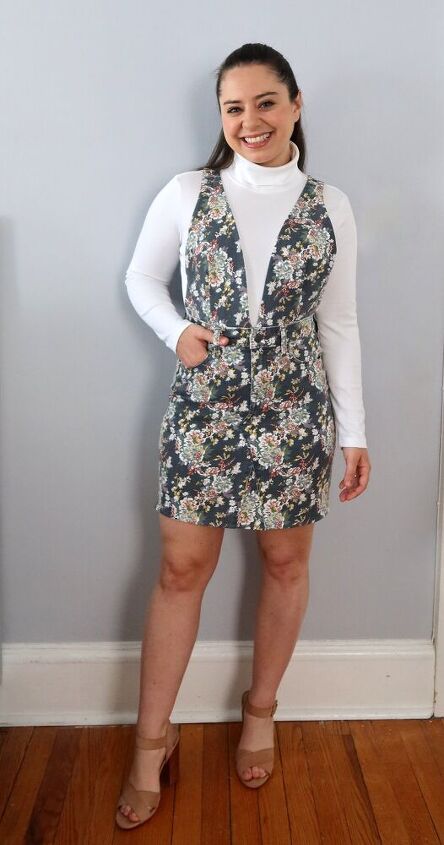
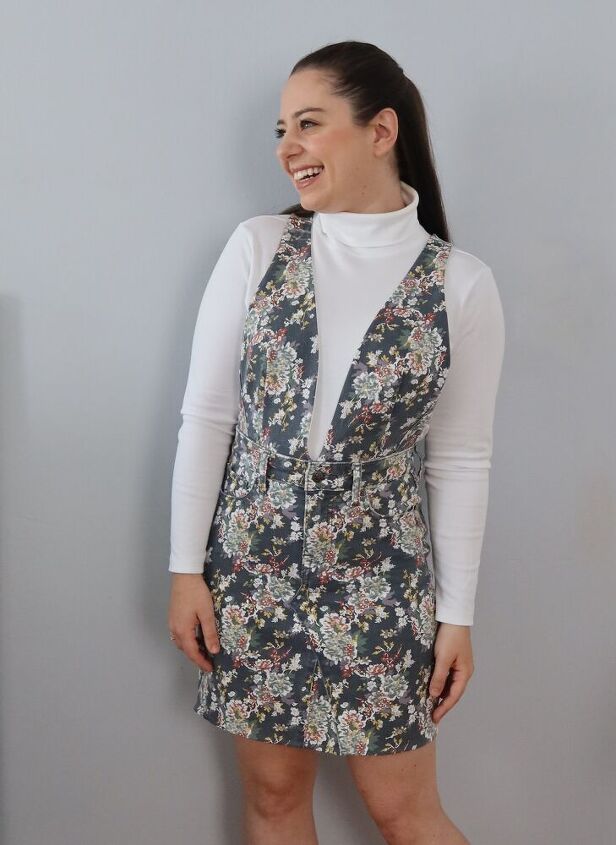
Try your skirt on and pin bodice in place. I started by pinning the front, making sure to get my bodice pieces close to each other. Once front is pinned, pin back straps, making sure straps are comfortably tight. These will be pinned on an angle. Remove pinafore and double check the back straps to make sure their distance is even. If your jeans have belt loops, the back loop is a great center point to measure from. I hand stitched my bodice down, but you can certainly sew by machine.
To finish the skirt, I evened out my hem, serged the edge and hand stitched up 3/8”. I didn’t want to make my skirt any shorter, but this part is all personal preference!
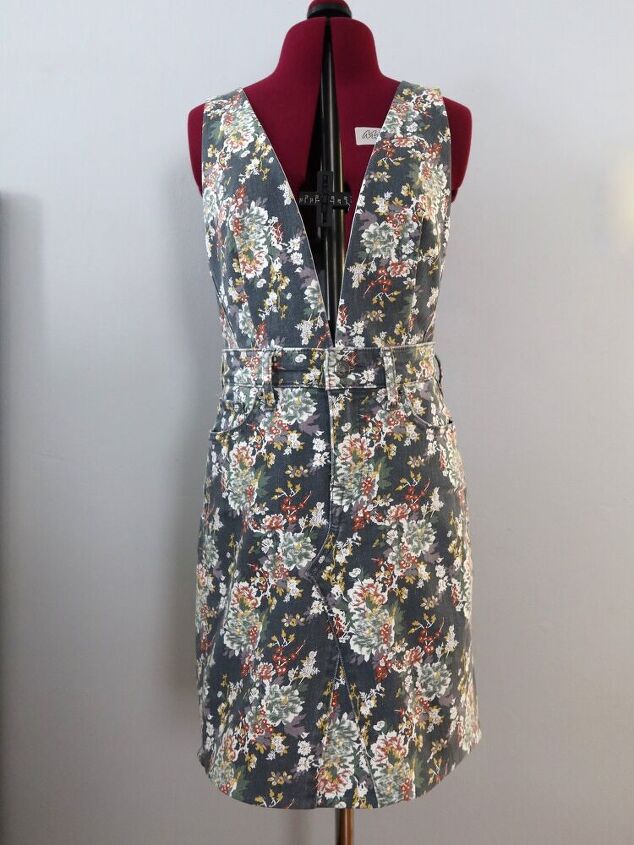
What made this project work: mid-rise jeans. With the type of bodice I added, the waist of my jeans needed to come up, so starting with mid rise jeans meant they didn’t have to come up that much higher. This is something to consider if you want to make this style pinafore yourself, mid rise or high rise jeans would work best. If you have a pair of low rise jeans, you may have to re-fit the waist altogether and may not have enough material for the entire bodice (or you may have to build a different bodice. Search for “overall dresses” for another idea!)
Another tip, if you want more material to work with, use boot cut or flare jeans! My original jeans were technically a “crop pant” but because of my height, they were normal length skinny jean on me.
Want to go a step further? Add a little extra length to the bodice front and strap ends, and make the entire top removable with buttons! I did this for my skirt to overall pinafore refashion a few years back. It’s a great way to get more wear out of the garment! ( Post here!)
The author may collect a small share of sales from the links on this page.


Comments
Join the conversation
Beautiful!!! I just love it!! Great job!!!
Very cute and very well done!!