Easy Sewing Tutorial: Follow Along as I Make Cute Fingerless Gloves

Today, I’m making fingerless gloves from a few pieces of fabric.
You can easily make them from leftover fabric from an outfit so you have gloves to match.
They’re a perfect project for beginners because I’m going to show you how to sew fingerless gloves step by step.
Tools and materials:
- Fleece or pile fabric
- Toning non-stretch fabric scrap
- 1 inch (2.5 cm) wide elastic
- Pins or clips
- Tailor’s chalk
- Sewing machine
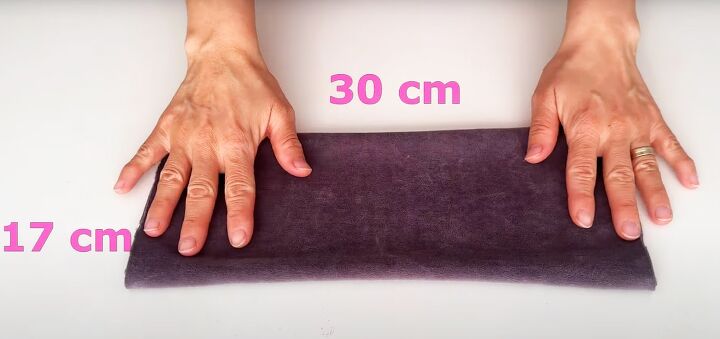
1. Cut out the glove shape
Cut a rectangle of fabric 12 inches (30 cm) long by 7 inches (17 cm) wide.
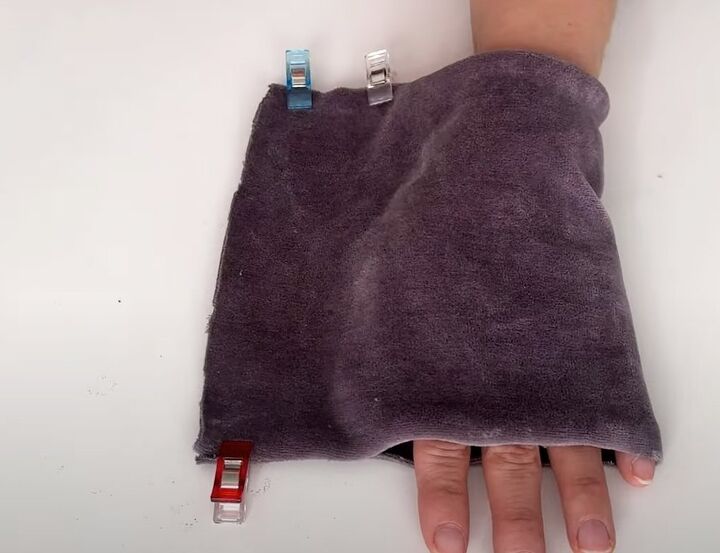
Fold it in half widthways with the wrong side inside, and clip or pin the top and bottom edges together, leaving enough space to insert your hand.
Insert your hand past your wrist and open out your fingers slightly. Your pinkie should be against the fold.
Trace around the inner, thumb edge of your hand with tailor’s chalk.
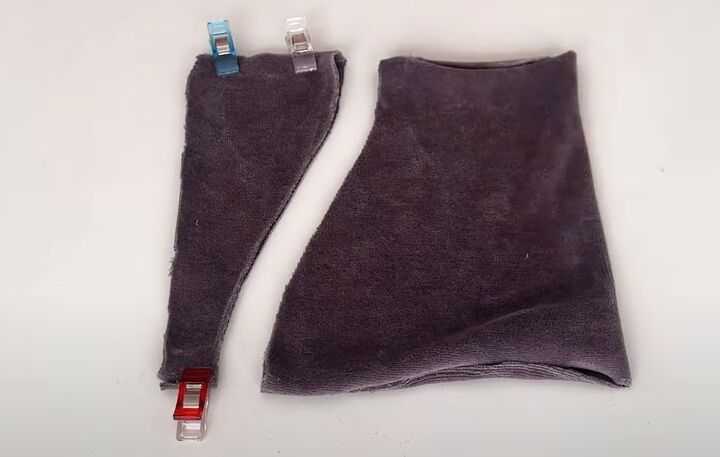
Remove your hand carefully and cut along the chalked line.
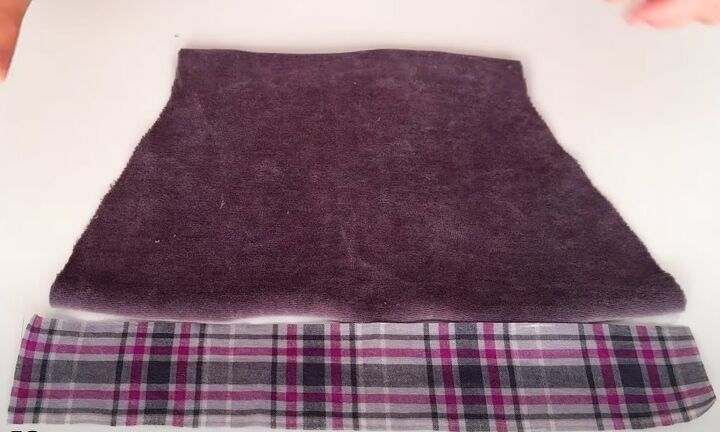
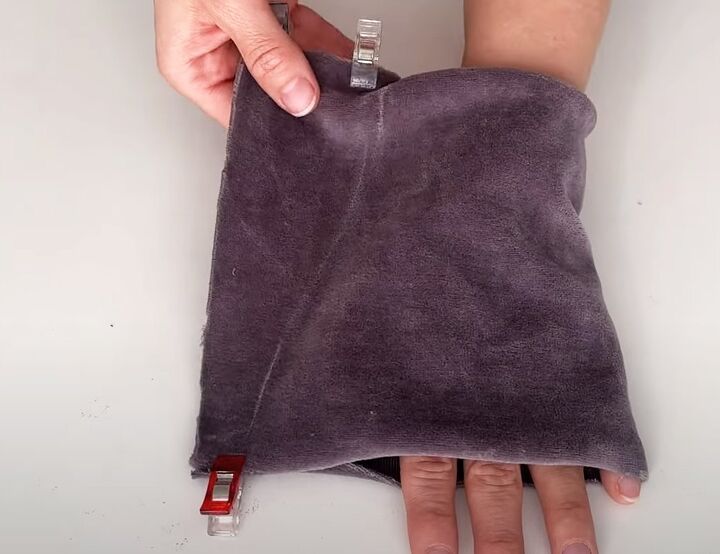
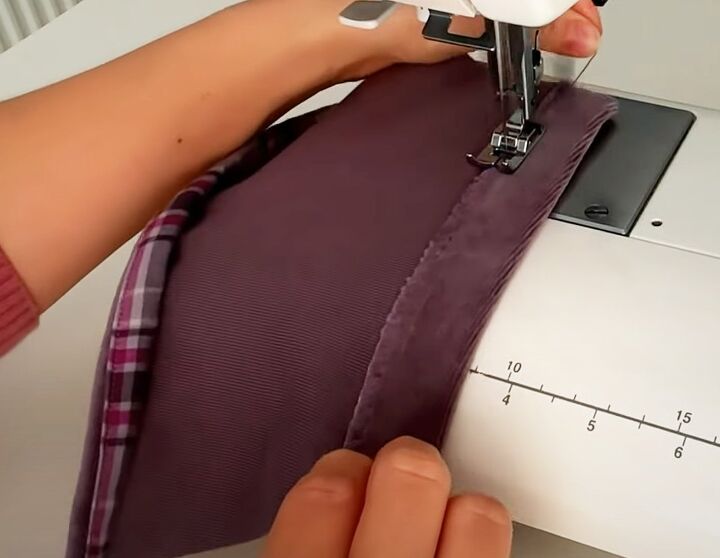
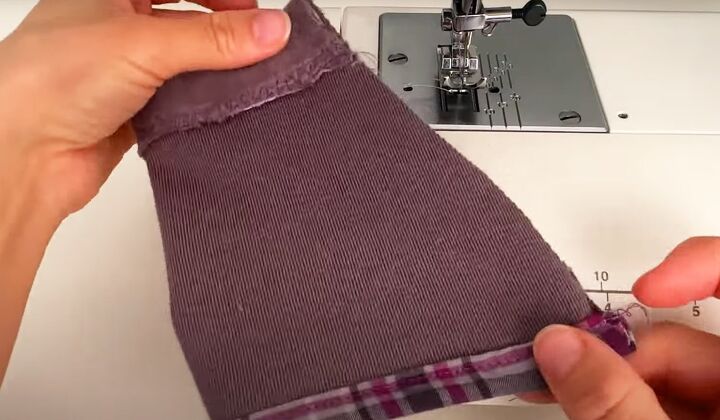
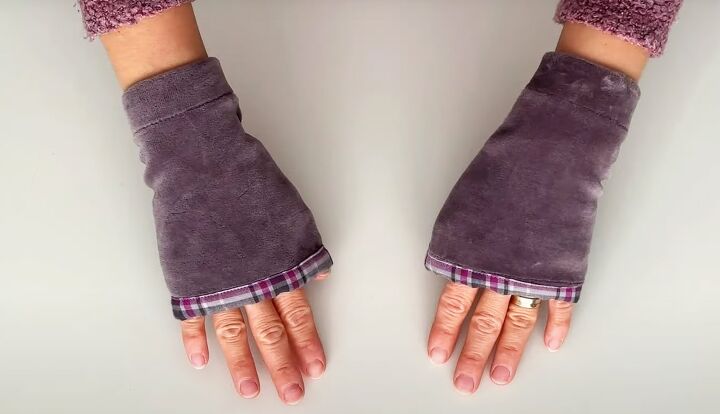
2. Trim the top edge
Open out the fabric.
Cut a strip of toning or contrast fabric the length of the longest edge and 1.5 inches (4 cm) wide.
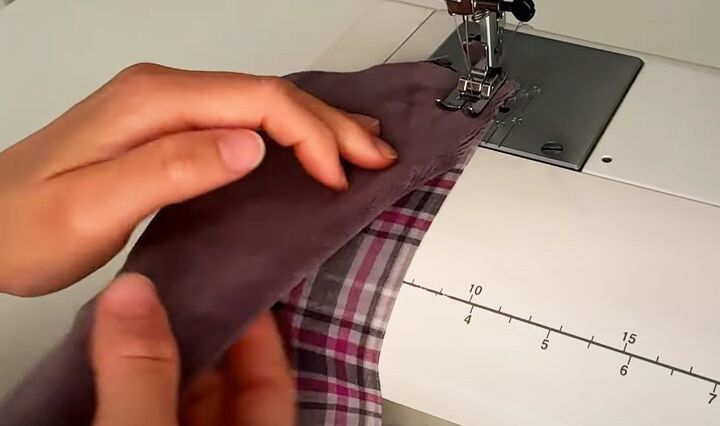
Top stitch the right side of the fabric to the wrong side of the glove, matching the raw edges.
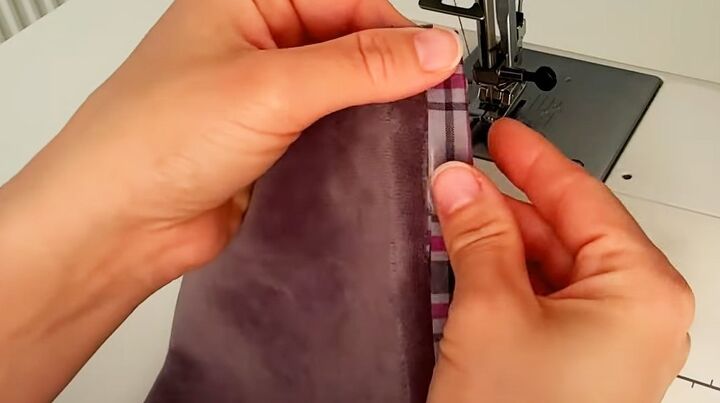
Fold the fabric over the raw seam edge to the right side of the glove.
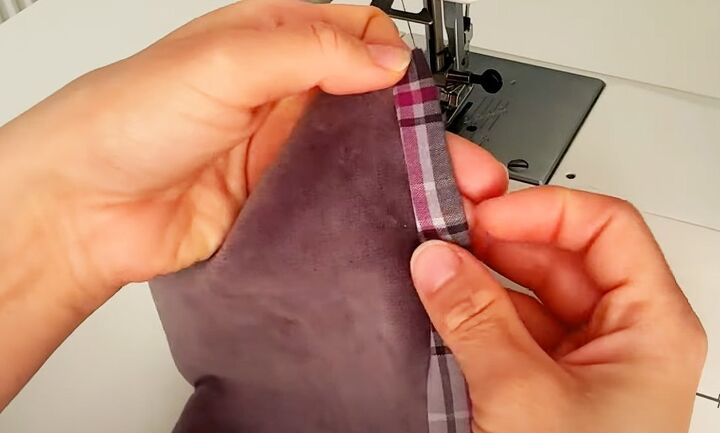
Fold it over again so the edge of the fabric is hidden.
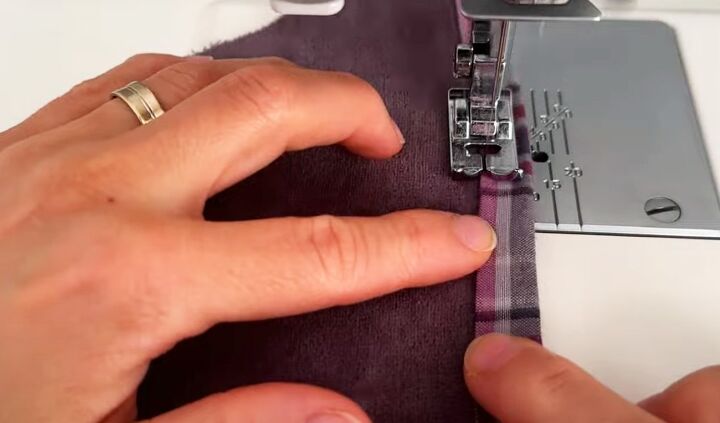
Top stitch the fabric to the glove on the right side, close to the edge.
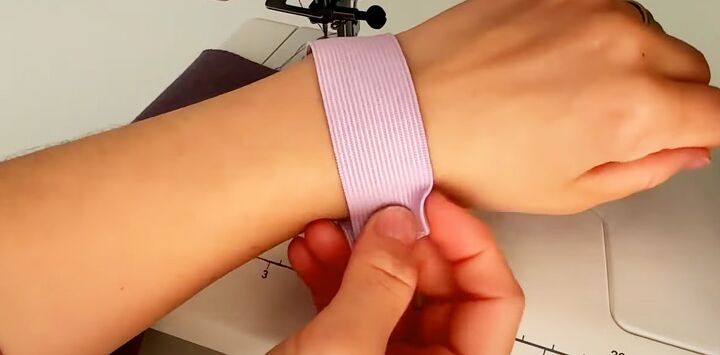
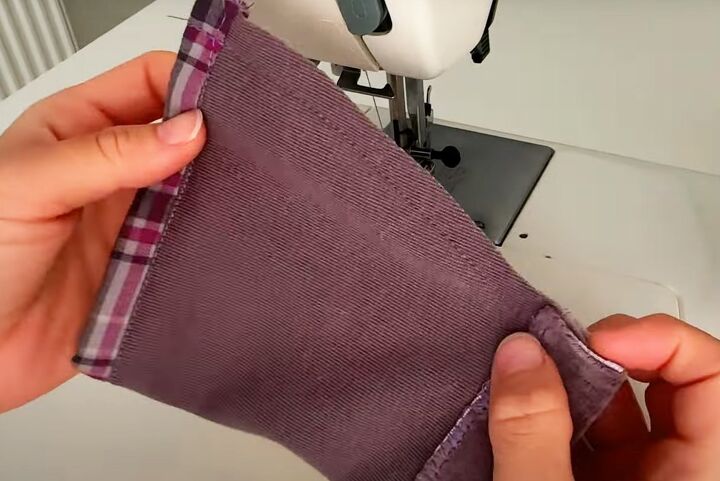
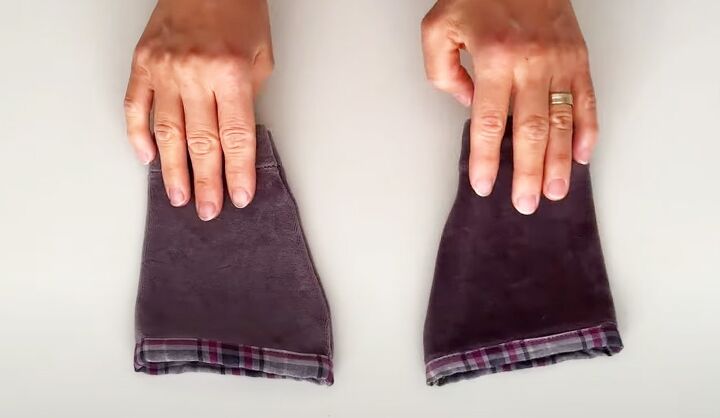
3. Add the elastic
Cut a piece of elastic the length of the lower edge of the glove.
Check that it fits comfortably around your wrist.
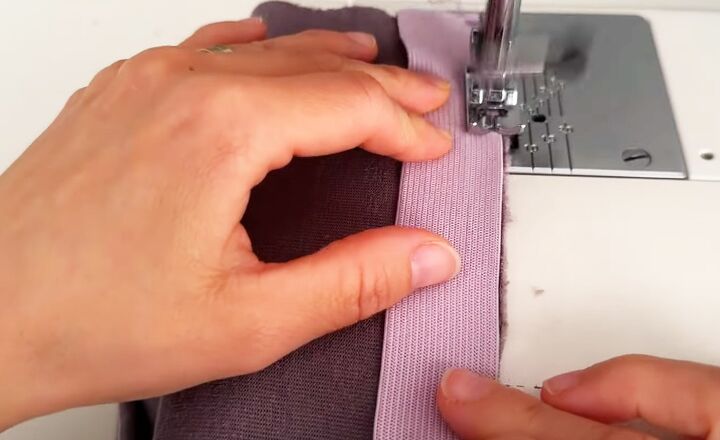
Sew the edge of the elastic to the lower edge of the glove on the wrong side, using a zigzag or overlock stitch.
Turn the elastic to the wrong side.
Sew the raw edge to the glove with a zigzag stitch.
Stretch the elastic slightly as you sew to make sure the short edges meet the side edges of the glove.
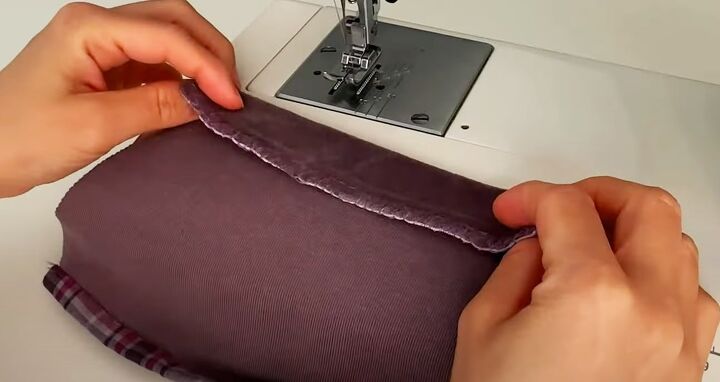
4. Sew the side seams
Fold the glove in half lengthways with the right side inside.
Sew the side seam with a straight stitch, taking a half inch (1 cm) seam allowance.
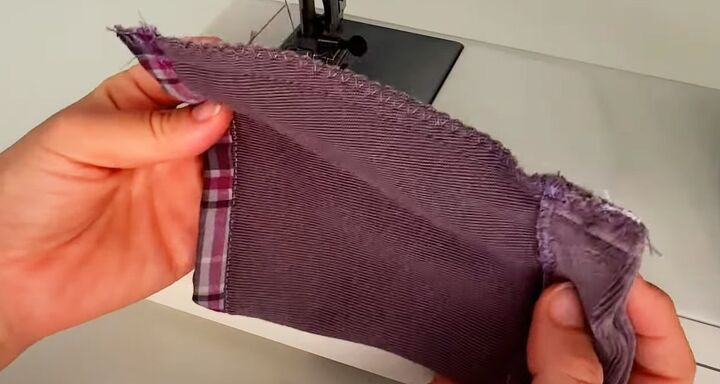
Finish the raw edges with a zigzag or overlock stitch.
If you’re a more advanced sewist, you can bind the seam with tape.
Making fingerless gloves
These DIY fingerless gloves give a unique personal touch to an outfit. They also make great gifts.
These fingerless gloves take less than half an hour to sew and can be made from almost any type of fabric, even cotton to give a vintage look to your spring and summer dresses.
I have lots of great sewing tips and ideas like this to show you. Please check them out and follow me on TikTok: @tugbaisler
Next, check out this Cute and Easy DIY Bag Made From Jeans.
The author may collect a small share of sales from the links on this page.


Comments
Join the conversation