Get Stunning Robe Tie Curls Overnight

The heatless curls technique has been trending all over the internet, and I’ve seen some really horrendous results. I think it has to do with how the hair is being curled. So, I’m going to show you my step-by-step heatless curls technique so you could get really great robe tie curls. Let’s get started!
Tools and materials:
- Robe tie
- Elastics
1. Part your hair
Part your hair down the middle. It doesn’t have to be perfect because you’re going to be sleeping on it anyway.
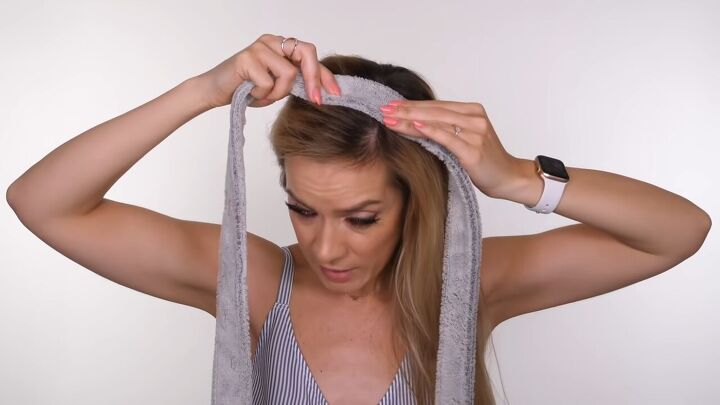
2. Place robe
Place the middle of the robe tie in the middle of your head, and use a bobby pin to secure it in place.

3. Section
When creating your sections, remember the smaller you do them, the tighter the curls. We’re going to be doing large sections. To create them, we’re going to start from the outer edge and go all the way to the center.
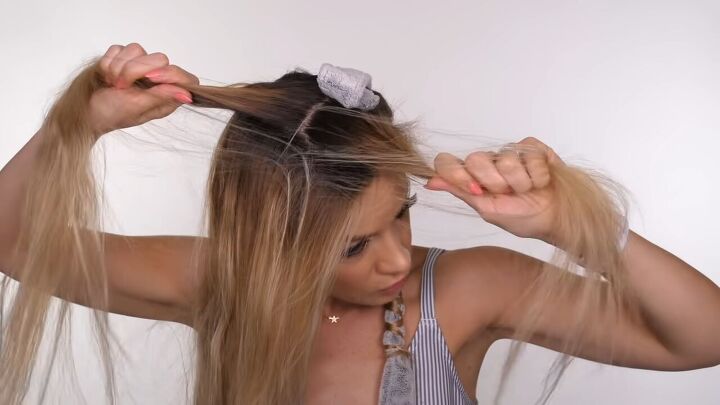
Then, split that section into two right at the center. These are two different sections, so you’ll only work with one at a time.
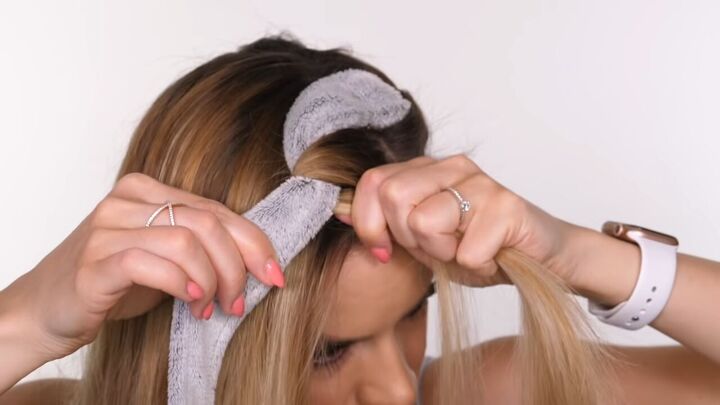
4. Wrap hair around the robe down to the nape of the neck
Take the first section at the front, and just wrap it over and under the robe.
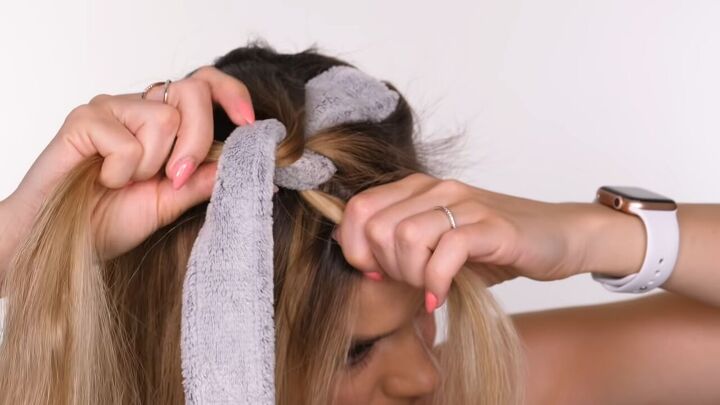
Then, take the section directly behind it (usually about 1.5 inches wide and in depth). This time, wrap it under and then over the robe. I find it easier to swap the hair into opposite hands when wrapping.

As you wrap, pick up new hair with each section, like you would with a French braid.
This technique is actually very similar to a French braid, except when you’re using the robe tie, you want to keep it as straight as possible and you should never pick up hair with that section. You should only be picking up hair with the front and back section, and each section should always wrap back around to where they started. It’s a lot easier than it looks, as all you’re doing is wrapping the hair around the robe tie.
Make sure the hair you’re picking out comes all the way from the parting. Follow this technique all the way down to the nape of your neck, and make sure you’re pulling the strands in tight so it follows the shape of your head.
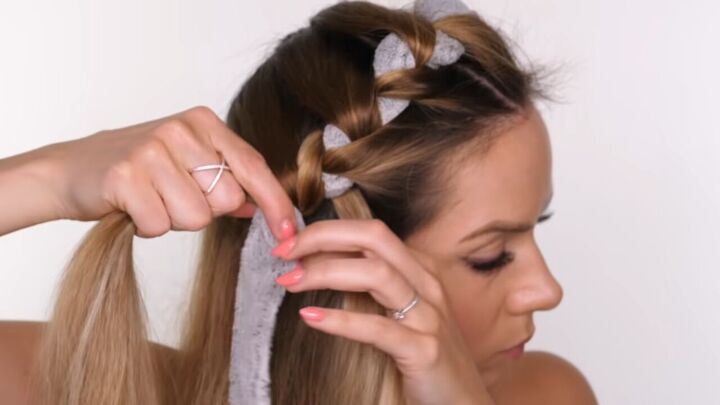
5. Finish wrapping
Once you reach the nape, all you have to do now is wrap the right side over the front of the robe and all the way around the back until it comes back to the front. Then, repeat with the left side. Do this all the way down, and tie off with a clear elastic.
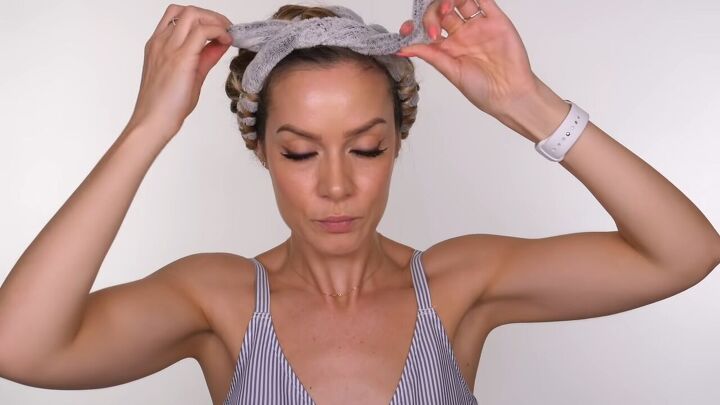
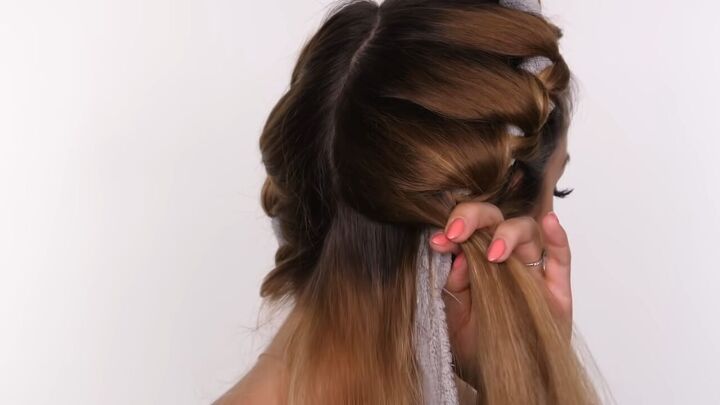
6. Tie the hair around your head
With the extra robe length, cross each hair strand behind your head, and then wrap it around the top and tie them.

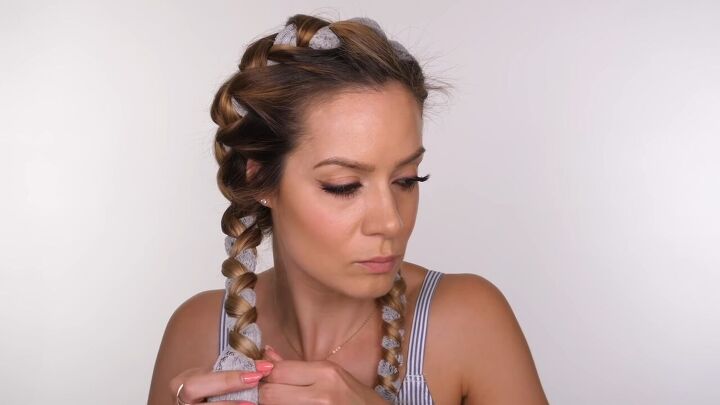
7. Take down your hair in the morning
Sleep on your hair overnight. In the morning, it'll be time to take it down. Be careful not to disturb the actual curls as you don’t want them to get too fuzzy. The great thing about this technique is that your curls go in different ways, so your hair doesn’t end up getting tangled and looking frizzy.

8. Shake
Shake your hair out, and you’re done!

Robe Tie Curls Tutorial
These robe hair curls are the perfect, voluminous heatless curls. There’s absolutely no product, and you can sleep in them overnight or wear them in the morning so that they’re done by the evening for a going-out look. It’s also super customizable to your preferences. If you want looser robe tie curls, take bigger sections, and just leave a bigger gap when wrapping around the robe, and you’ll achieve a softer wave. It’s also great for those with naturally curly hair who want to tame their ordinarily quite frizzy hair. You can just apply a sealant and then do this technique, and it’ll help tame your curls overnight. Let me know what you guys think and if you’ll try this technique!
The author may collect a small share of sales from the links on this page.


Comments
Join the conversation
love it…will definitely try this
I will try this!