Cable Knit Cardigan Sweater Refashion
Spring has sprung…or so they say! When I think of spring, I think soft hues, florals and lighter layers.
That brings me to this once waterfall cardigan (from Hollister). I had a love-hate relationship with it. My twin gave it to me a while back, since she barely wore it (and I could see why).
The fit was just plain weird! It was as though the shoulder seams were non-existent, so whenever I wore it, I found myself constantly adjusting it.
As much as I hated the fit, I couldn’t come to terms with getting rid of it because I loved the look and feel of the cable knit. Ergo, I decided on a DIY oversized sweater.
Here’s what I did (V-Neck Oversized Sweater)
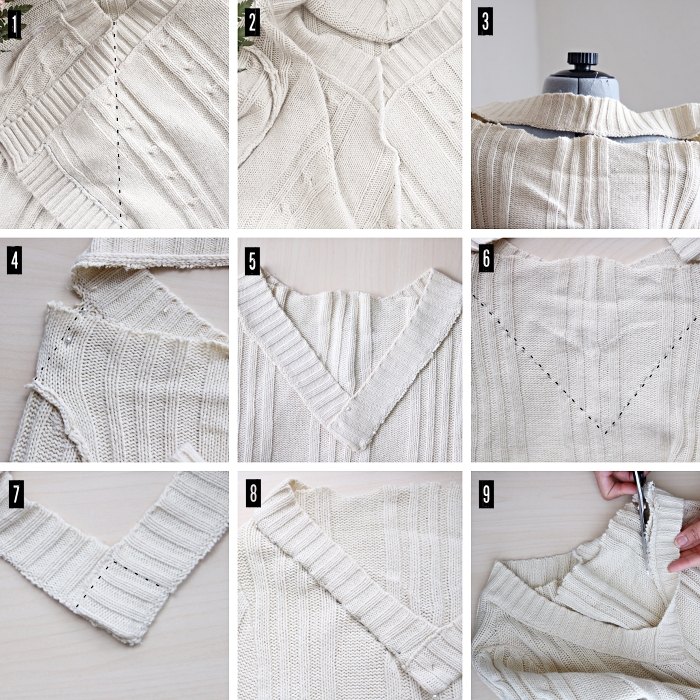
- I started by fitting the cardigan. I then pinned and basted the front flaps together, to align the knit ribbings.
- Once I was happy with the fit, I finished with a straight stitch (using a ballpoint needle), then removed the excess before serging the edges together.
- To create the front v-neck, I started by removing the label, then cutting the neck band off (just below the band stitch) and stopping an inch past the shoulder seams.
- Afterwards, I laid out the sweater to ensure the neckline was nice and flat. There was some extra, so I took it in at the shoulders (in the form of a dart).
- Next, I located the center front of the sweater, then took the detached neck band and shaped it to form the new v-neck.
- Once I was happy with the layout, I outlined it with pins followed by a basting stitch. *This was done to add some stability to the knit while sewing and to use as a guide for step 8.
- Before reattaching the neck band, I first secured the overlapped center of the band with a straight stitch. I then removed the bulk (caused by the overlap) from the wrong side.
- To reattach the band, I folded the raw edge under and pinned it to the sweater (center front first) along the basting stitch. I then finished by sewing along the folded edge, being careful not to stretch the knit while sewing (to avoid distortion).
- Lastly, I trimmed the excess from the neckline (following the neck band allowance), then serged the edges together.


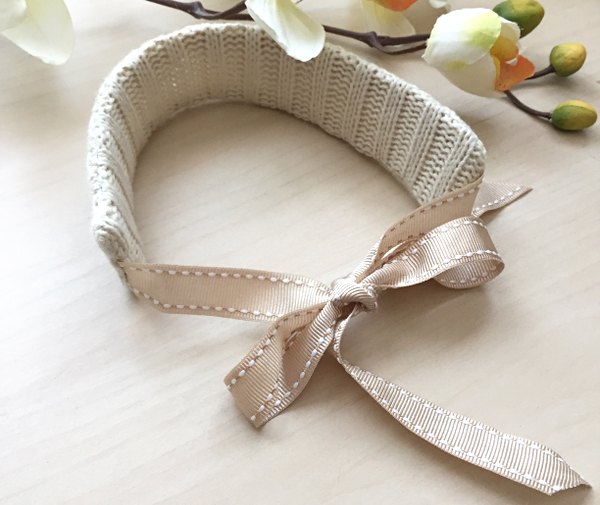
(Sweater Choker)
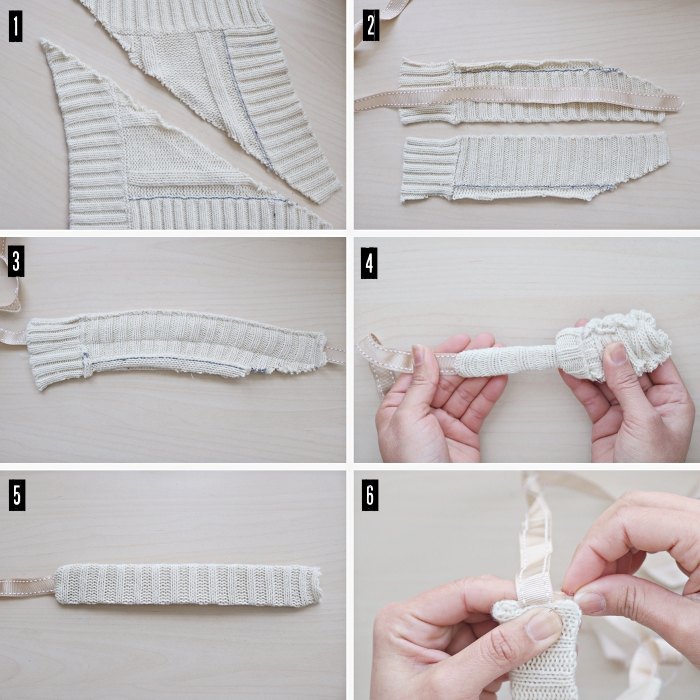
- First, I took the cable knit scraps (the discarded front flaps from the once cardigan) and placed one of top of the other, to cut two even strips.
- After the strips were cut, I laid them out running one end of the ribbon along the center of one strip. I then used the other strip to cover them, being careful not to shift the ribbon. *I used a few pins to help keep the ribbon in place while sewing.
- Next, I sewed the strips together, leaving the end with the rest of the ribbon open. *This time I stretched the knit while sewing, to prevent the threads from breaking for step 5.
- Afterwards, I trimmed off the extra from the sides of the choker. I then pulled on the ribbon at the open end, to turn the choker right side out.
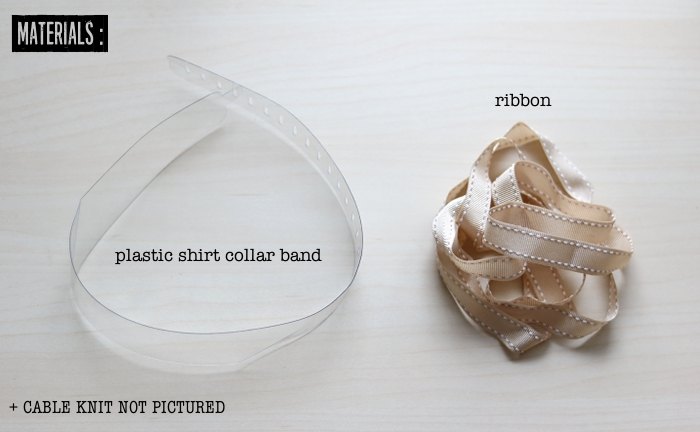
- Once on the right side, I inserted the plastic band. I first cut a strip of the plastic band the same width as the choker, making sure to round the corners and file any rough edges.
- Lastly, was closing the open end. I first tucked in the other end of the ribbon, along with the raw edges of the knit, then secured in place by hand (whip stitch). I finished off by cutting the ribbon to my desired length and done!


And there you have it! This was my first time working with cable knits. Dunno why I thought you had to be a knitter of some kind, to take on such projects. Silly me!
Btw, the choker was a last minute addition. Halfway through the tutorial, I realized that it needed some support, to maintain it’s shape. And that’s when I got the idea to use the shirt stay/insert. Well, after sifting through my “may come in handy one day” stash.
I definitely prefer it as a sweater than a cardigan. Especially since the shoulders are holding up a lot better, now that the front is closed. It also helped that I took in the shoulders a bit. All in all I’m happy with it and I’m sure it’ll get more use this time around.
Easy, no?
The author may collect a small share of sales from the links on this page.


Comments
Join the conversation