10 Professional Beauty & Makeup Hacks You Really Need to Know

For those of you that don’t know me, I am a professional makeup artist, and I’ve been working in the makeup industry for over a decade. In this tutorial, I will be sharing my top 10 beauty and makeup hacks that I use all the time, both on myself and my clients.
These genius hacks have really changed my makeup game, so I wanted to let you in on them!
Tools and materials:
- Moisturizer
- Foundation
- Color corrector
- Concealer (two shades)
- Powder
- Makeup brushes and sponges
- Eye drops
- Lip balm

1. Let your moisturizer set
Apply your moisturizer at least 5 to 10 minutes before you apply your makeup and let it set completely. This is because makeup does not sit very well on freshly applied moisturizer, and it can end up looking patchy.
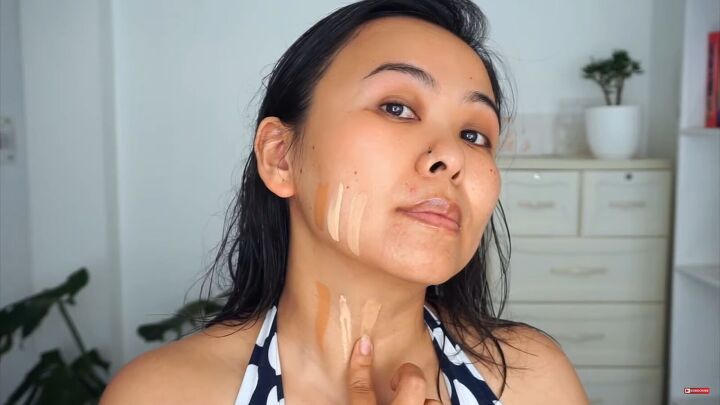
2. Where to swatch
Never swatch foundation shades on your arms. Instead, do it on your jawline, or your neck if it is a different tone to your face. This will make your foundation look a lot more even, and it will also match your body. You won’t end up looking like you’ve got a mask on.
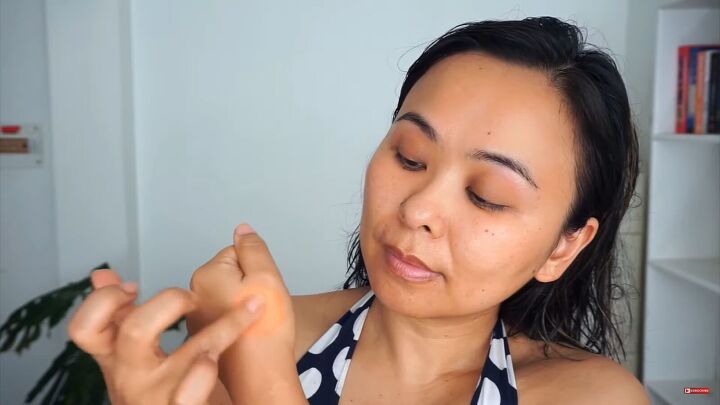
3. Melt products with your fingers
Use your fingertips to warm up any creamy products like correctors and concealers. The warmth of the fingers really melts the creamy products, and they blend out beautifully onto the skin. This makes the whole application process a lot easier and gives off a natural finish.
4. Allow your corrector to set
If you use color corrections, make sure to set the corrector before you go in with your concealer. If you apply concealer directly on top of the creamy corrector, then they end up mixing, and you end up with orange looking concealer.
But, if you set your corrector before applying the concealer, then the concealer looks a lot more natural and true to color.
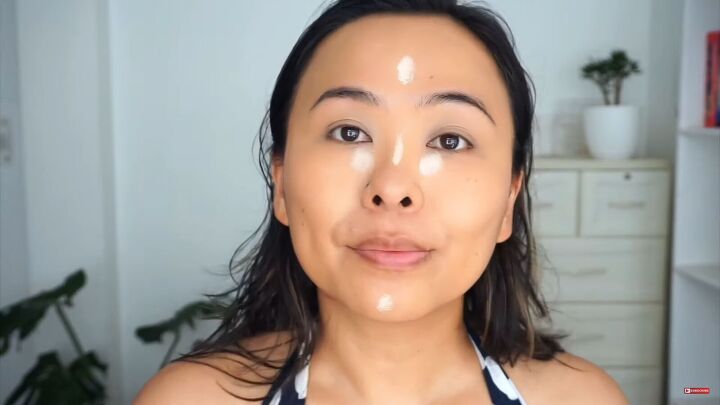
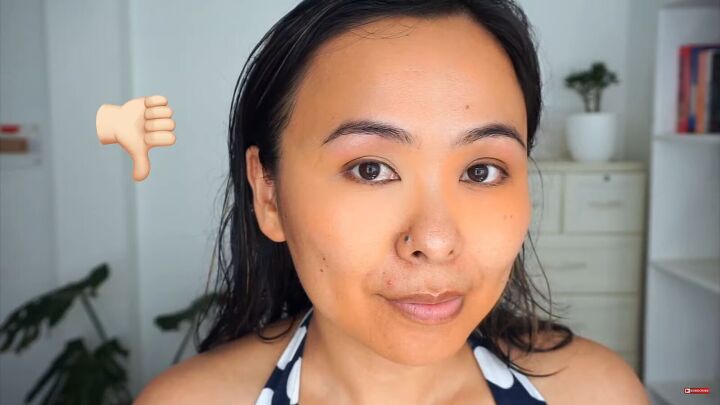
5. Two shades of concealer
Have at least two shades of concealer in your makeup kit. The first one is the lighter shade which you use to highlight your under-eye area and the center of your face. But you cannot use a lighter shade of concealer to cover up any flaws.
If you have dark circles or an uneven skin tone and you try to cover them up with a lighter tone of concealer, instead of covering up your flaws, it’s going to make them more visible. For all the dark spots and uneven areas, you want to use a concealer that is your exact match.
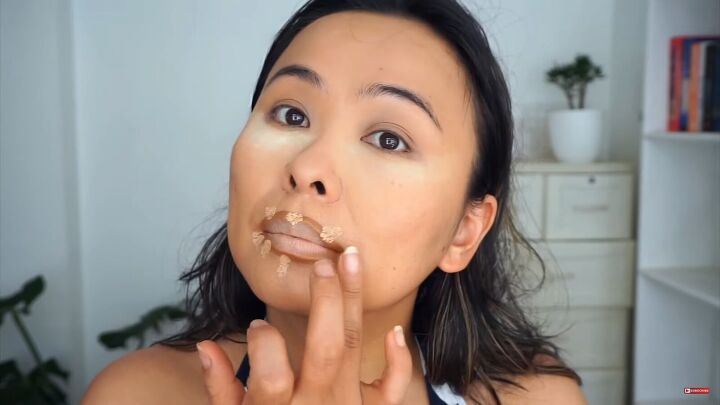
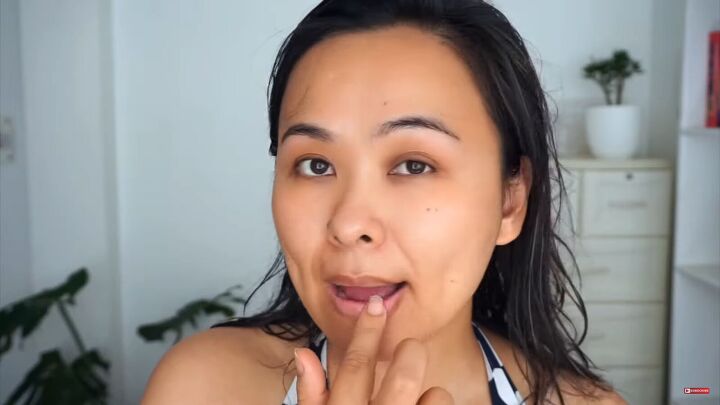
6. Lips before foundation
Contour and highlight the lips before actually going in with the foundation. Take a very dark shade of cream contour and contour all around your lips. Don’t hesitate to go overboard with this because it is going to look very natural later on.
Next, take a lighter shade of concealer and pat it on the center of your lips, which gives you very dramatic, pouty lips. Then, apply your foundation on top of this and pat it out with a beauty blender.
Once done, you will see that it gives a beautiful dimension to your lips, making them look fuller and more defined.
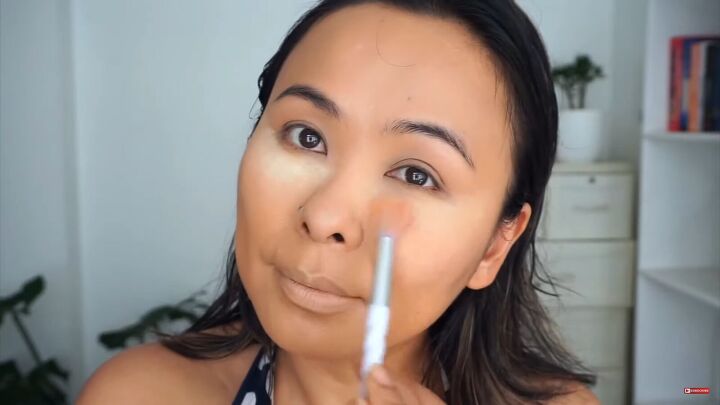
7. Dust before you bake
Most of us go in with lots of powder and bake our under-eye directly after applying concealer. Instead of this, set the concealer with a little bit of powder, and then go ahead and bake your under-eye area.
This technique is such a game-changer because every time I bake my under-eye without setting it first, it ends up looking quite cakey. It can also reflect on flash photography and give me a white cast.
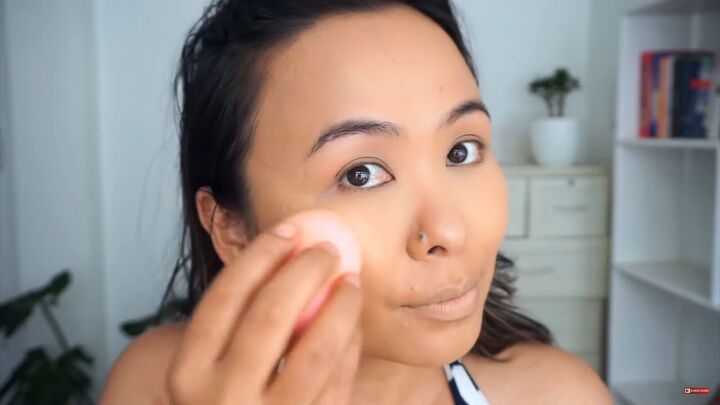
8. Highlight with a sponge
To apply a cream or liquid highlighter on top of your makeup that has already been set with powder, use a damp sponge. Make sure to use very gentle tapping motions, don’t press too hard.
This way, you will get a beautiful glow without lifting the foundation or making it look patchy, which is usually the case when you try to apply it with your fingertips.
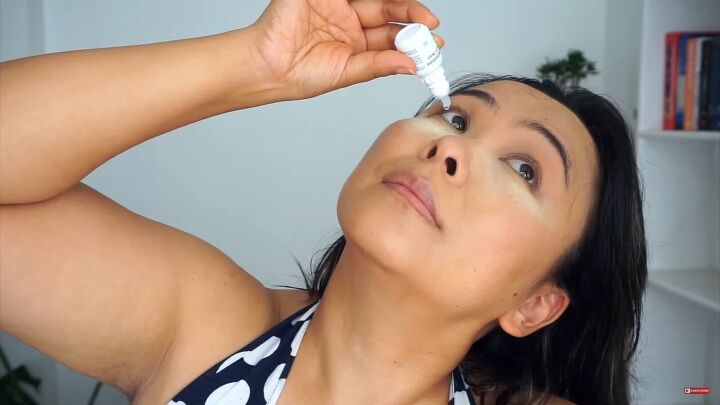
9. Lubricate your eyes
Often, our eyes tend to get red during the whole makeup process. All you need to do in such cases is take a lubricating eye drop and apply it to your eyes, and you will be good to go.
10. Lip balm first
You always want to apply a good lip balm and do that right in the beginning before you start your makeup because lip balm needs some time to settle into your lips to soften them and plump them up.
Also, lipstick does not set very well on freshly applied lip balm. So make sure to blot off any excess with a tissue before adding on your lipstick.
Beauty and makeup hacks
Those are all of my top beauty and makeup hacks. I hope you found them helpful, and you’ll try them out next time you’re applying makeup. Let me know if you have any other genius hacks in the comments below!
The author may collect a small share of sales from the links on this page.


Comments
Join the conversation
I don't know what you mean by "bake" your concealer.