How to Make a Wrap Top Out of a Shirt in 7 Quick & Easy Steps

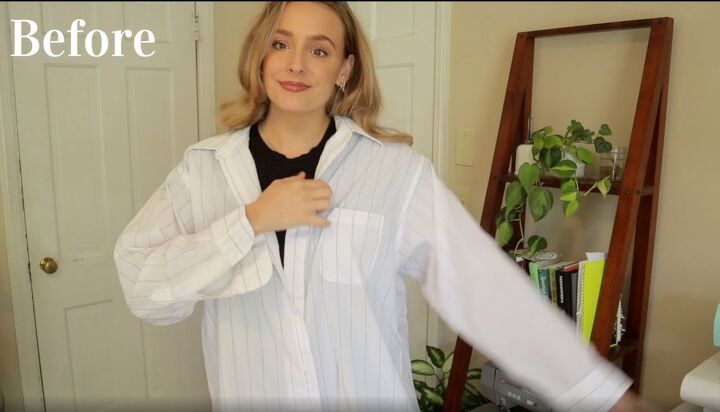
Today I'm going to show you how to make a wrap top out of a shirt. It’s a really fun upcycle of a men's button-down shirt, and so quick and simple to do. Let's get started.
Upstyle Recommends!
Tools and materials:
- Men's button-down shirt
- Seam ripper
- Scissors
- Pins
- Sewing machine
- Elastic
- Safety pin
- Dress form (optional)
- Iron
1. Modify the shirt
I started my upcycle by cutting the collar off.
Then I used a seam ripper to rip all of the buttons off. I didn't need them but wanted to save them for a future project.
Next I cut off the button bands and removed the pocket off the chest.
2. Reshape the neckline
With everything ready, I popped the shirt onto a dress form. You can also put it on yourself if you don’t have a dress form.
I wanted to reshape the neckline and give it nice slanted edges. It is totally up to you how you want the neckline to look though.
Once I decided how I want the neckline, I cut off the edges that were excess.
3. Crop the shirt
I also wanted to hem the shirt right about at the waistline. I cut off the excess but saved it for later.
4. Take in the shirt at the back
To fit the shirt a little better to my body, I took in the back so that it was tighter. I figured out how much fabric I needed to take in, pinned it while the shirt was inside out, then sewed it down.
Once it was sewed, I cut off the extra fabric. Be sure not to cut the seam though.
5. Make and add binding
Then it was time to finish the neckline and make it look nice and neat. I took some of the excess fabric and cut it into stips that I used as binding.
I pinned it all around the neckline, right sides together and then cut off any I didn’t need.
With it pinned in place, I sewed the two together.
Once that was done all I had to do was flip the binding over to the other side, pinit down, and sew it in place. Doing it this way gave it a really nice, professional-looking neckline.
6. Make the waist tie
To make the tie for the DIY wrap shirt, I took the rest of the scrap fabric and cut two pieces that together were about 100 inches long. I sewed them together so that they were one long piece.
I pinned the long piece, right sides together to the bottom of my shirt. I made sure there was some left at each end to use to tie a bow.
To attach it, I did the same as the neckline and sewed the strip to the shirt, folded it over and then sewed the edges together.
7. Shorten the sleeves
For the very last step of my DIY wrap shirt, I trimmed off the sleeves and gave them a nice little hem.
I just folded them up twice and sewed them down, making sure to leave a little opening to thread some elastic through. It helps if you press the fold with an iron.
To finish off the sleeves, I measured some elastic on my wrist, attached it to a safety pin, and fed the elastic through the sleeve hem.
Once the elastic was through I secured the ends together using a zigzag stitch and sewed up that opening in the sleeve.
How to make a wrap top out of a shirt
I love how this turned out. It was such a fun, easy upcycle. I hope that if you have a button-down shirt laying around, now you will know how to make a wrap top out of it!
Let me know what you think of this DIY wrap shirt in the comments below.
Enjoyed the project?
Suggested materials:
- Men's button-down shirt
- Seam ripper
- Scissors
- Pins
- Sewing machine
- Elastic
- Safety pin
- Dress form (optional)
- Iron
The author may collect a small share of sales from the links on this page.


Comments
Join the conversation
Your top looks fantastic and it looks great on you!!!
It would be easier to use a pattern and make a shirt