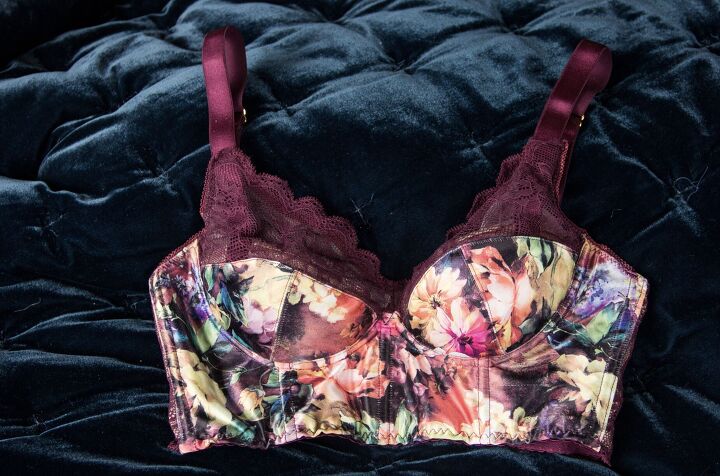
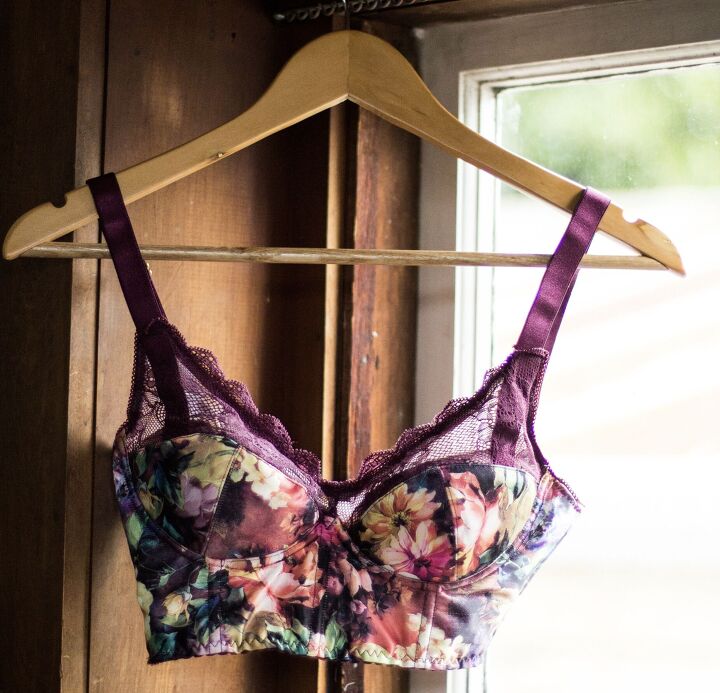
THE FLORAL SATIN BUSTIER

I've just spent the last five minutes scrolling through synonyms to try and find a single word to adequately sum up how I feel about this project. Delighted? Infatuated? Ecstatic? I feel like the proverbial cat that ate the canary. I feel as though I've succeeded in some nefarious plot and gotten away both unscathed and a million bucks richer (I wish..). I feel... Well. I finished this bra, put it on, and I've pretty much been peeking down my shirt to stare at my own boobs in awe all day, if that gives you an idea. I feel like dancing.
Hi, friend! you should know that this is a Really. Long. Post. Proceed with caution, or scroll for pictures.
I'll admit to some second thoughts at my abilities after the second one, but seriously. I'm so excited about this, but I'm going to start at the beginning and I hope it makes some kind of sense. It started when Lynda asked a few of her bramaking friends to test drive some beautiful new floral satin she'd just got in stock, and I saw one of the resulting beauties on instagram. I knew at that moment that I had to have it, and Lynda was kind enough to send me some before she'd even had a chance to list it in her store.
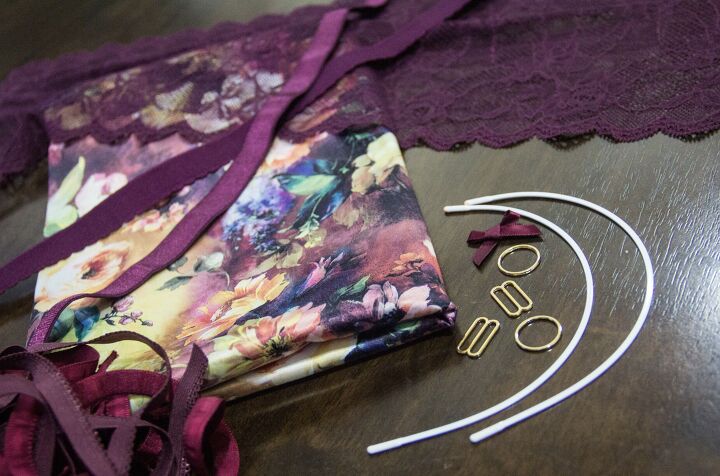
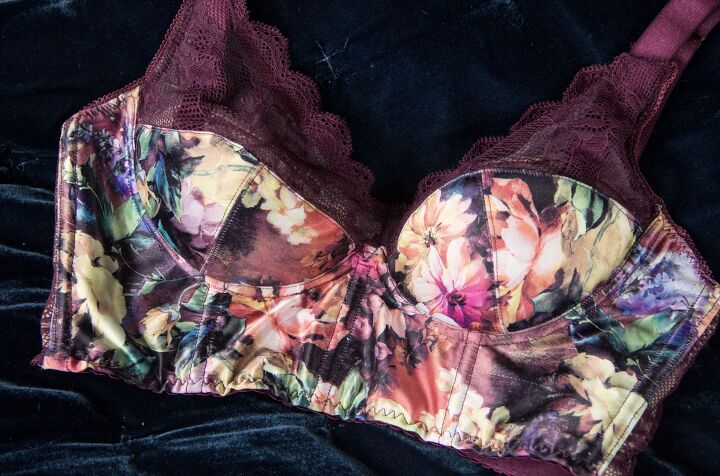
I also asked for some of her new 19mm strap and underbust elastic (which is AMAZING, let me tell you, but we'll get to that) - and when she apologized for being an enabler and mentioned some matching lace, I couldn't resist. When the package arrived, I discovered that she'd also included some of her beautiful, hand dyed satin channeling as a gift (it's the reddish curly stuff in the bottom corner of the photo above) and let me just tell you, it not only made my day, it also made the inside of this bra look way better than the black I was planning to use would have. It really does pull the whole inside together.
So, my package came, and I set it on my sewing table and stared at it every day until the weekend, when I promptly got distracted and ended up with last week's shirt and baby hat instead. This was partially because I'd realized that my original black powernet and cup lining was going to hide the pretty detail of the lace, and partially because I'm a terrible procrastinator and I was a bit afraid to mess the whole thing up.
From the beginning, I knew this was going to be a bustier with wide straps and boning, but the finer points of the design determined themselves along the way. Lynda's helpful post on how the stretch satin tended to behave influenced me to line the cradle with a double layer of sheer nylon lining (it has a slight directional stretch), and the combination of my desire to have the floral in the back somewhere, plus the lack of premade 5 hook bra clasp options prompted me to try making my own.
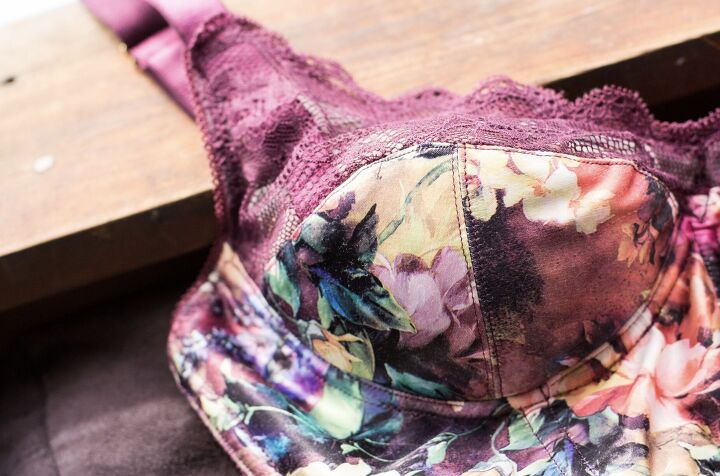
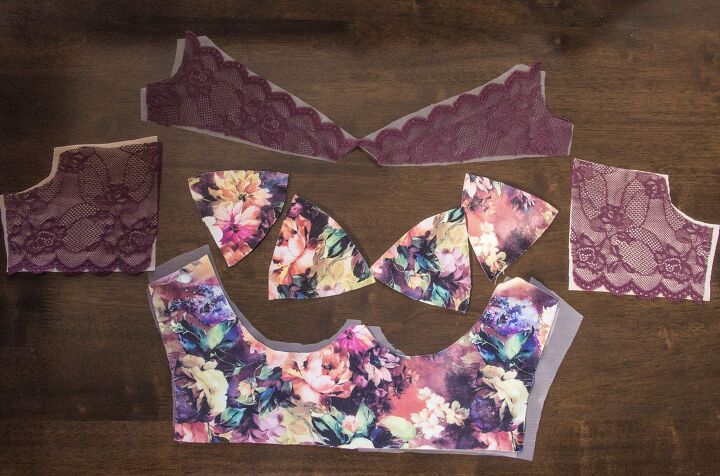
I cut out the pieces on Thursday evening, and did all the construction minus the back clasp and straps on Friday afternoon. (Working half day Fridays is wonderful).. The lower part of each cup is lined with cut and sew foam, and finished with self bias tape to hide the seams. There is boning at the center front, centered under each boob, at the side seams, and directly under the straps in the back. I actually attached the channeling to the band with the boning inside, because it was a pretty tight squeeze and I didn't want to sew too far in and risk the boning not fitting.
The cup construction was a puzzle to make sure I didn't end up with any exposed seams. I had originally intended to line the whole thing with sheer nylon, but it didn't hold the floral binding very well so I ended up just using it for the top piece under the lace.
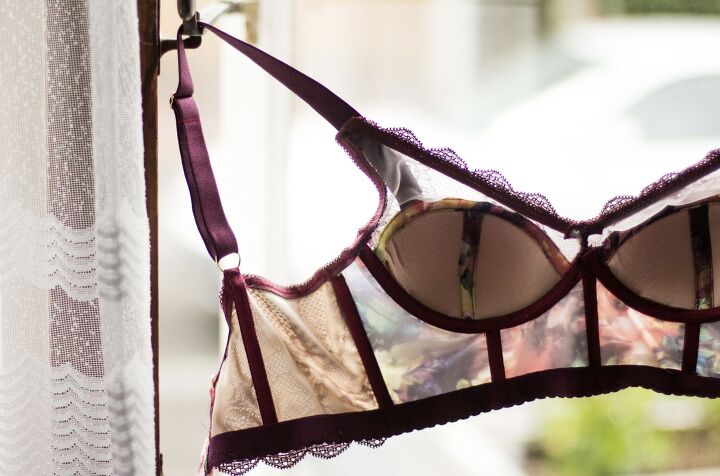
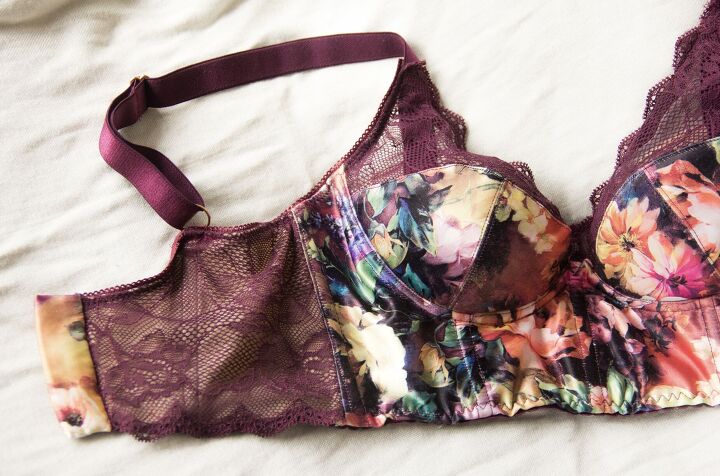
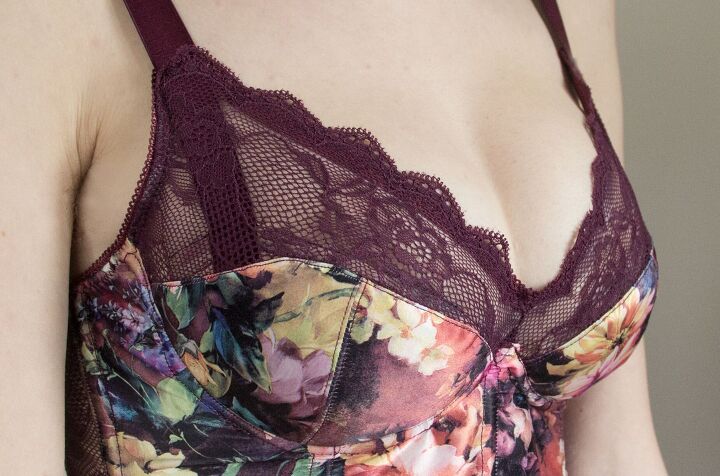
With my first two bras, I kind of just got to the strap attachment and thought.. 'well, now what?' - and ended up with some kind of weird, thick seam to zig zag over. Not an elegant solution. With this bra, I assumed I'd do the same thing, but realized once I was ready to attach the straps that attaching them to the top edge of stretchy lace and delicate lining was a recipe for disaster in the worst way. I didn't want to snap a strap and take an eye out or something! Instead, I squeezed them down between the lace and lining of the top cup and attached them to the foam edge of the lower cup. The support is on point, and the lace doesn't distort at the strap point. I'm pretty proud of that.
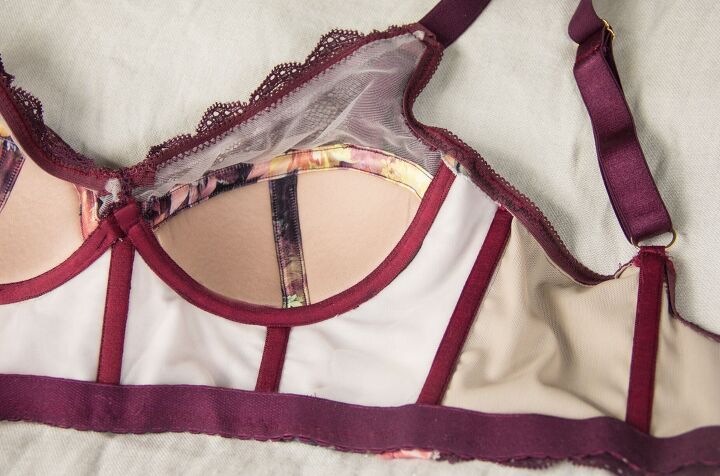
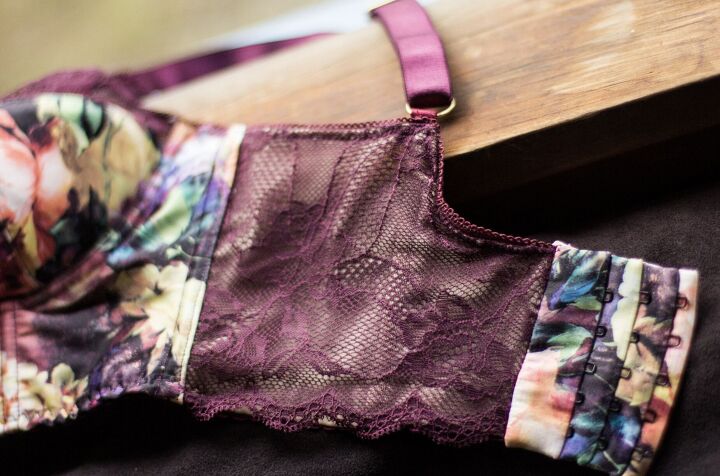
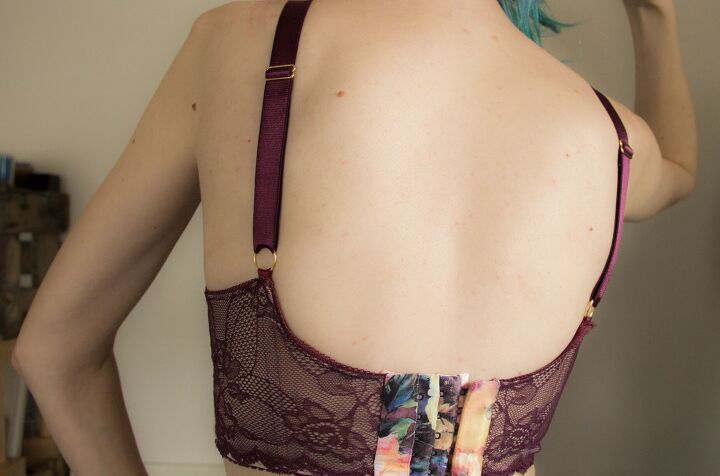
Now, onward to the back, and two more things I'm proud of: First, the rings. I left some spare channeling to fold under and stitch down with the boning, and while I was sitting there in my little corner puzzling over the straps, I had a brilliant idea. I slipped the ring on before folding the channeling under, which not only completely hides the attachment point, it also looks awesome and is literally the most supported it could possibly be, right on top of the boning. It looks like I planned it.

The second - and probably the feature you're most curious about - is that fantabulous floral bra clasp! Hello, all of my Saturday afternoon! I'd like to do a post on how I did this in depth, but I need to iron out some kinks in the process first - (also is there interest in such a tutorial?). I was going to use normal hook and eyes but it was less expensive to buy a couple of cheap bra extenders and rip them up, so I went that route instead. Here's the first surprising thing I found:
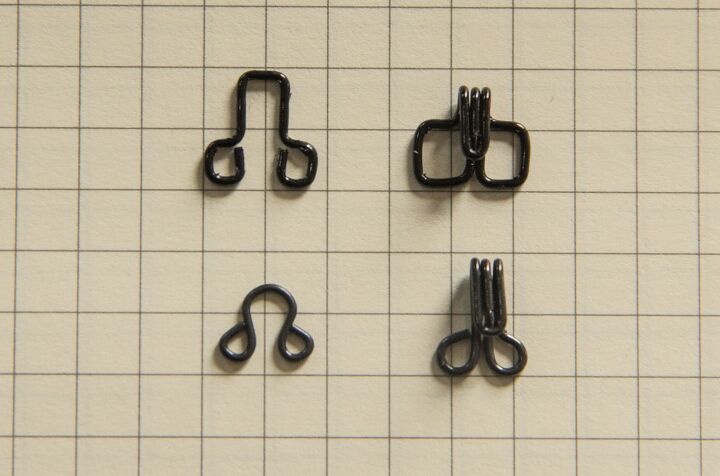
Presumably, the difference between normal and bra-specific hardware can be explained by the fact that machines put bra clasps together, and the larger holes must be to ensure the machine can attach it? Maybe? Either way, interesting.
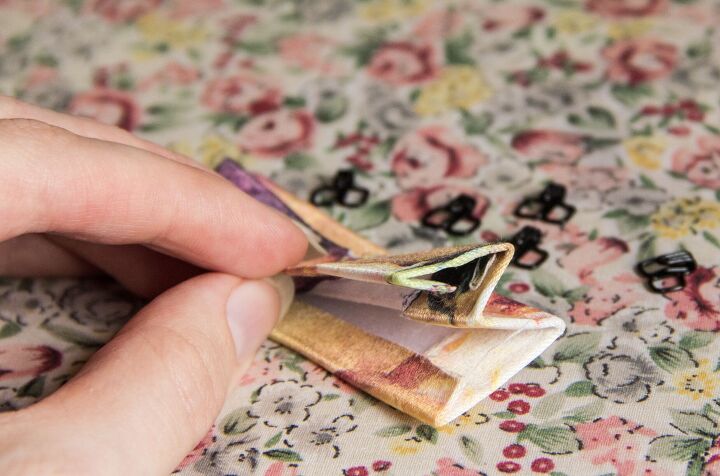
First the hook band: I folded and ironed my fabric to mimic the shape of the one I'd cannibalized, attached each hook with a bar tack, and then stitched two rows to secure the hooks further. About thirty seconds after I snipped the last thread, the lightbulb went off and I thought of a much more elegant way to do this with way less exposed stitching, but hey, that's how we learn isn't it? We won't talk about how close my fingers were to the needle for this thing. There's a better way.

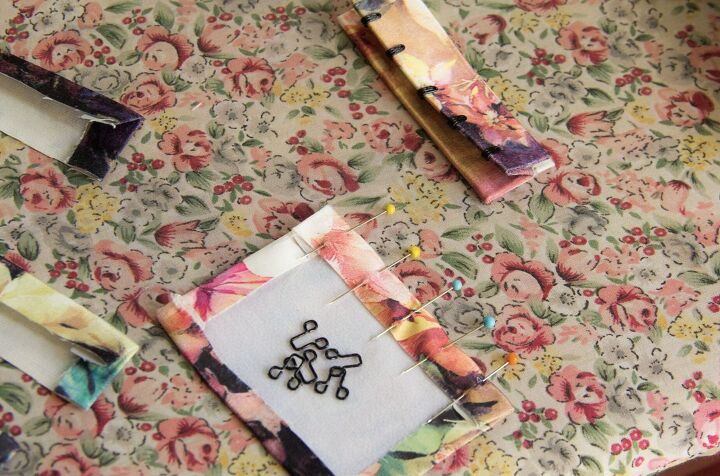
The eye side is composed of a series of little folded strips, attached one by one from what will be the 'loosest' setting on in. These, too, I attached with bar tacks, but I clearly did a bad job because they started coming apart and I've had to hand stitch them again from the back. I don't think I'd recommend machine back-stitching further, because that might get lumpy and itchy on your back, but I think I might experiment with a small dab of thread glue on the inside to hold everything tidily. One could also feasibly not snip between the bar tacks, which would also eliminate the problem.
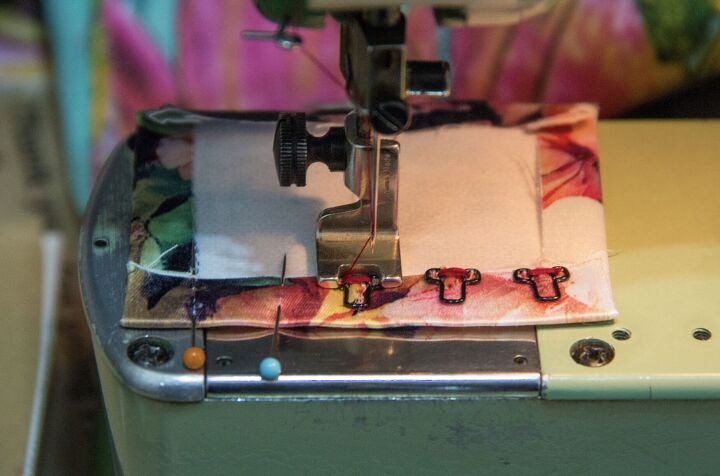
After the bar tacks, I stitched a row in the crease of the fabric overlay piece and folded it back. My machine didn't have any issues sewing over the hooks or eyes- I suppose it's the same principal as sewing over pins which I do not recommend - but it won't be lethal to your machine if you stitch slowly and listen when it tells you it doesn't want to do the thing.

Ying of the Tailor Made Shop has this post featuring a bra she made with a self-fabric clasp from silk charmeuse. It was the only other instance of a DIY hook and eye I could find in the blogosphere (Shout at me in the comments if you've found another one!)
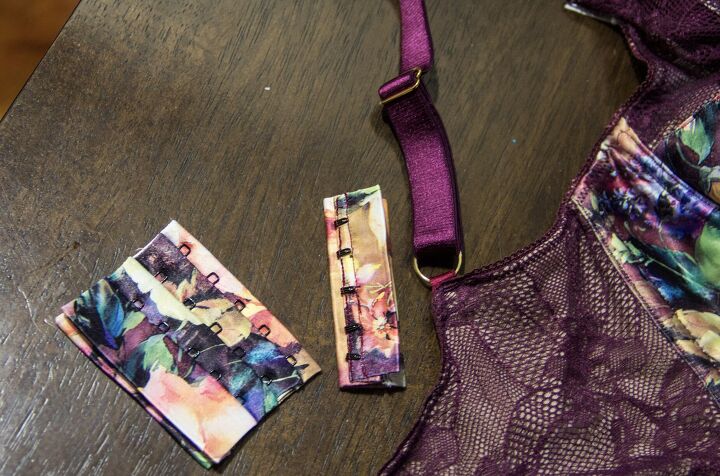
I attached the clasps to the band by stitching the outsides wrong sides together, and then caught the back side in the ditch to seal the deal. Much cleaner than a zig zag - and by all my tugging and pulling I'd say just as strong so far. I also mattress stitched the top and bottom edges together to neaten things up. Next time, I'll investigate a way to sew the edges and flip it inside out, but for the moment I remain skeptical of the possibility of this thing. I almost like my way better.
I attached the underbust elastic in a somewhat unconventional way as well: Instead of stitching, folding under, and stitching again, I folded and pressed my fabric, and stitched the elastic on all in one go (jumping the boning). I've also left it free so technically it could fold down, but it's stiff enough that it doesn't seem to want to.
The lace at the center front is a clever workaround for my pesky sternum. I cut the lace a bit higher because I wanted it to be wider, and then hand stitched the two edges together in the middle above the top edge of the cradle. The underwires clear my sternum, but the bra is still a little higher cut with more lace showing! Sneaky. Also, no bow on this one 'cause I didn't want to hide how nice the center front looks ;)
And now, the fit! And the part where I try my very best to impress upon you how thrilled I am about this bra. First, I was clearly wrong about achieving lift with my first bras. By some miracle, this thing fits brilliantly. There's not a hint of the dreaded muffin boob, everything feels very contained, and it's not even remotely uncomfortable. And perhaps most importantly, it makes my boobs look bangin'. Am I allowed to say that? Have I crossed the delicate line of talking about my lingerie in public from 'a bit odd' into 'delete-your-search-history creepy'? I don't care. The ladies look great. I've been grinning all day. I made this happen out of a pile of elastic and fabric in two afternoons. Me, and a sewing machine from the 60's set up on a box in the corner of the kitchen. You'd think I'd be over this feeling, sewing as long as I have been, but nope. I feel like I'm holding the secrets of the universe. Like the answer to The Question is 42 plus one handmade floral satin bustier. This is the third time, and I am charmed.

My word, I do love the strapping. I may be a DDD but I wouldn't consider the wide strapping or elastics to be a requirement for my size. (to be honest, DIY lingerie is one way to completely lose respect for traditional sizing. I've got no idea what 'size' this thing is, just that it fits me.) However not required they are though, they're amazing. The underbust elastic is great for finishing, and it keeps the boning from potential poke-age, while keeping everything snug and in place. The straps don't hold much weight at all - their highest function is to keep the lace topped cups from sagging, but they're beautiful and the width both looks and feels amazing. I'm totally sold.
Next time, I think I'd like to go up an underwire size, and grade out my cup curve a teensy bit at the sides. There's just a very, very slight wrinkling right at the underarm edge of the cradle that I think this will fix. I also need to pull the underarm curve out by about 3/4", but that's a personal preference thing to add coverage, not fit related. It's also something I definitely meant to do here and totally forgot about. In other news, I am totally sold on this style of cup. I drafted it from my powerbar cup style, and I'm not sure if it was the seaming change or the ensuing adjustments, but the shape of this cup is much more appealing to me (I did it mostly because of my fabric choice, but the fit change is bonus!)
There's a bit of a ledge across the apex of the boob where the lace connects to the floral, because of the change in thickness with the foam in the lower half. I was really worried this would make the bra unwearable with a big obvious line cutting through the center of my boobs, but by some miracle it doesn't look at all weird under any of the shirts I've tried it with. Regardless, it's still a thing to address the next time I make a similar style.
This is my third bra, for those of you keeping track, and I have had one constant fitting issue on all three. Do you remember? The first time, I pinned the fault on being too flippant with my seam allowances. On the second, I was still unsure due to other factors influencing fit. Number three here has solidified any doubts, though. Rightie is definitely smaller than Leftie, and I've been fitting for Leftie (It's easier to pin across the chest...). From some angles, you can sort of see a small wrinkle on the outside of the right cup, which disappears when I stick an extra layer of foam padding inside. Definitely smaller, although only slightly. Next time, I need to decide whether I'm going to cut the right cup smaller, or incorporate an extra layer of foam more permanently. (what if it fluctuates? Could things even out next month? Is it the muscular result of how I carry my bag? If it does change, do I need to make duplicates to accommodate one boob over the other? Am I overthinking this?)
Honestly, it's incredibly hard to tell the difference, and it's not like Rightie's trying to make an escape every time I bend over, so we're probably good. There's only so many times I can walk up to Jon in my signature bra testing t-shirt and say 'do my boobs look different to you?' (it usually elicits the same response that you'd imagine getting back from 'does this ___ make me look fat?' which is a nervous glance and an "I don't know how you want me to answer that question.")
I'm not entirely sure what the solution is - which is perhaps compounded by the fact that I'm not entirely sure what I'd be trying to achieve, solving a problem that nobody else can even see, and I can't actually feel. Thoughts?
Here's the diggity down low on supplies:
-1/4m Floral stretch satin (used 1/3 of it), 1/4m both beige powernet and cup lining (used 1/3ish), 1m 19mm strapping (used all), gold findings, 1m 19mm underbust elastic (used half), 1m picot elastic (used all), 1/2m lace (used all), and 2m hand dyed channeling (used all but scraps) from Lynda at Elle Joan's - there's plenty of all the fabrics leftover for another one! I'm going with navy lace and elastics.
-1m boning from Spotlight (used nearly all - I figured buying simple extruded plastic was probably safe, but the channeling it came in was 12 kinds of awful so be warned. It went straight into the trash) - In addition, there's some iron on interfacing in the clasp that I believe originally came from here. Also I've got pasties on to cover them nips in the pictures, and I found those at Spotlight. (Don't talk to me about the patriarchy.)
-2 bra strap extenders from Geoff's Emporium in Mt Eden. If anyone knows where I can buy bra specific loose hook and eyes at a 3:1 ratio, let me know! Taking those suckers apart took ages, although it was definitely educational.
Have I done it? Have I impressed upon you the glory of this moment? Thrilled? Chuffed? Enamored? My biggest problem is that I can't wear Just This out in public so that everyone can see how clever I am. I guess I'll have to settle for posting headless photos of my boobs on the internet. I think my favorite part might be that it's just as beautiful on the inside as it is on the outside, and the fit is icing on the cake.
Some housekeeping from around the internets: Have you guys seen Madalynne's new patterns? I've definitely got some lace envy after reading about them, but she drafts for smaller boobs than mine. So pretty though! Also pretty, is Ashley from Craft Sanctuary's newest bra. I found her blog last week and was so pleased to find how delicate she made her bra, when she's similar to my size! She's definitely inspired me to get my hands on some bra tulle in the future.
My next big Bra Accomplishments are going to include a partial band, mastering straplessness, and fitting a bra for someone else's boobs. Also I have some clothes to sew as well...at some point.
The author may collect a small share of sales from the links on this page.


Comments
Join the conversation