How To Sew A Patch Pocket: The Wavy Cardigan Sewing Tutorial
So. You've read ALL about the velvet Wavy Cardigan, and you love love love it, right? Or maybe you're just a pocket connoisseur and are hoping the garment construction sewing technique we are covering in this post is going to be how to sew a patch pocket?
Well my friend.. You are in luck. Because the garment construction sewing technique that we are covering in this post IS going to be how to sew a patch pocket.
Patch pockets are literally THE easiest pocket out there to sew.
They can be added to ANYTHING.
Like, not even kidding. Patch pockets can be added to coats, shirts, dresses, skirts.. Anything.


Not only are patch pockets useful for carrying things that you need easily on a consistent basis (think: phone, wallet, metro card) but they can also withstand wear and tear much better than inseam pockets do.
Because inseam pockets are sewn into a seam line, the point at which the pocket meets the seam is a point of weakness.
With hands going in and out of the pockets constantly, that point of weakness can come apart.
(A totally easy repair to do though, BTW.)
But with a patch pocket, there isn't really a point of weakness in which the pocket is attached to the garment. This is certainly a bonus when deciding to add a patch pocket to a design for both practicality and functionality.
And they are even easier to sew than the inseam pocket that we covered last month with the Ashby Coat.
But first.. What IS a patch pocket?

Garment construction sewing technique: How to sew a patch pocket

Oh, pockets.
Is there anyone out there who doesn't love a good pocket?
Before we go into the details on what a patch pocket actually is, you should know that there are a few different types of pockets out there. The four main categories of pockets are the following:
- Patch Pocket: A pocket that is stitched directly to the surface of the garment. (This is the pocket that is on the Wavy Cardigan!)
- Inseam Pocket: A pocket that is sewn into the side seam or styled seam of a garment. (Like on the Ashby Coat from last month.)
- Front Hip Pocket: A curved pocket on the front of pants and skirts. (Think: Jeans.)
- Inside Set-In Pocket: A pocket that is sewn into a slashed opening on the garment, and closed with a single or double welt. (Think: A pocket on the backside of fancy dress pants.)
The pocket that we are going into detail on with this tutorial is the patch pocket.

Patch pockets can literally be attached anywhere on a garment, and can be any size you desire.
I think the most common type of patch pocket is typically on men's button downs, along the upper right hand side. (I think men probably put pens and phones there? Not entirely sure why, but they do.)
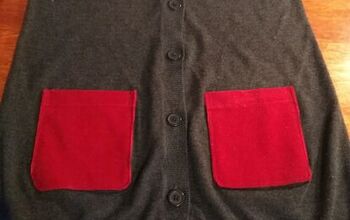
With the Wavy Cardigan, I went BIG with the pockets.
I have a coat that I would wear all the time when I was living in NYC, and it had similar giant pockets along the front of the garment. I seriously LOVED those pockets. And I still do, obvi.
So. Ready to learn how to make your own patch pockets?
Garment construction sewing technique: How to sew a patch pocket, step 1
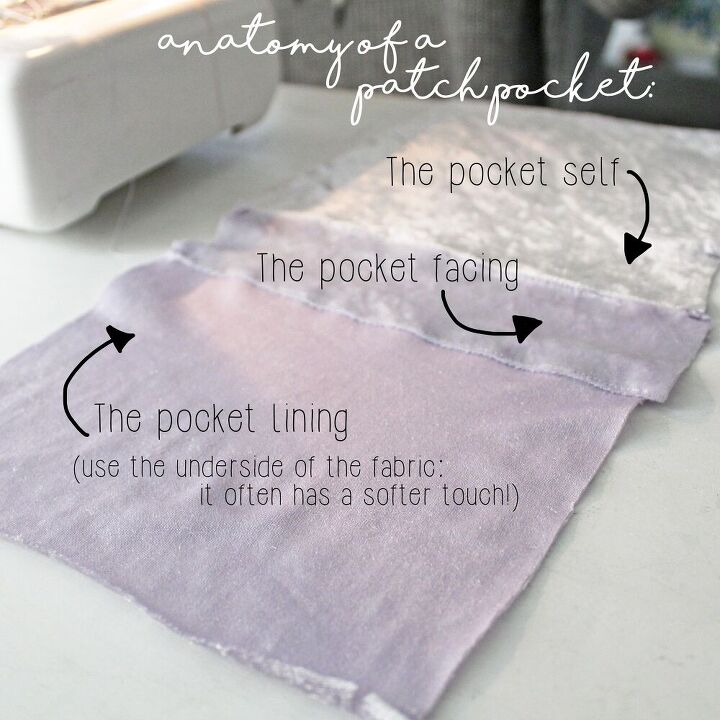
There are three pattern pieces in a patch pocket:
- The pocket self: This is what you see from the outside of the garment. I used the same velvet as the rest of the cardigan.
- The pocket facing: This is sewn along the top inside of the pocket, to help keep the pocket's shape. I used the same velvet as the self of the cardigan.
- The pocket lining: This is the bulk of the inside of the pocket, attached to the facing. I flipped the velvet inside out for this piece, since it's a bit softer on the hand when it's laying inside the pocket.
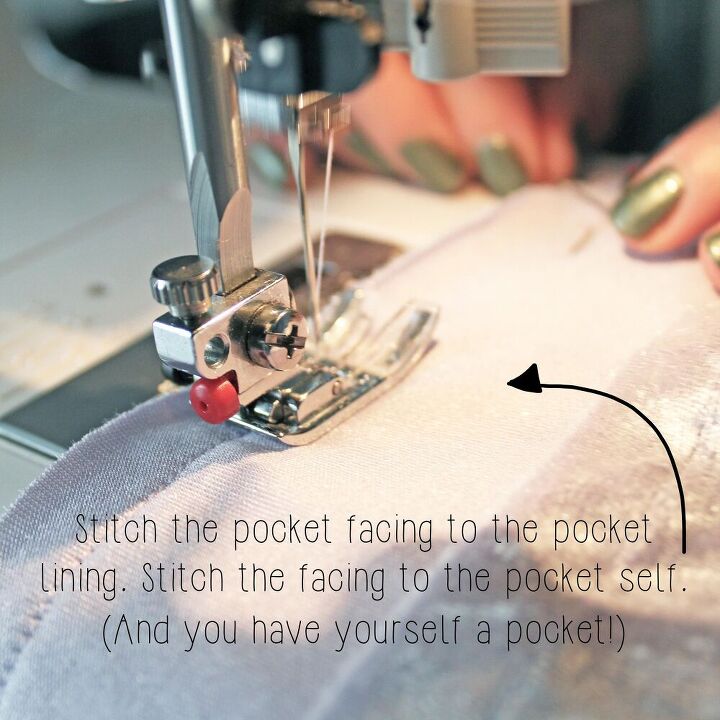
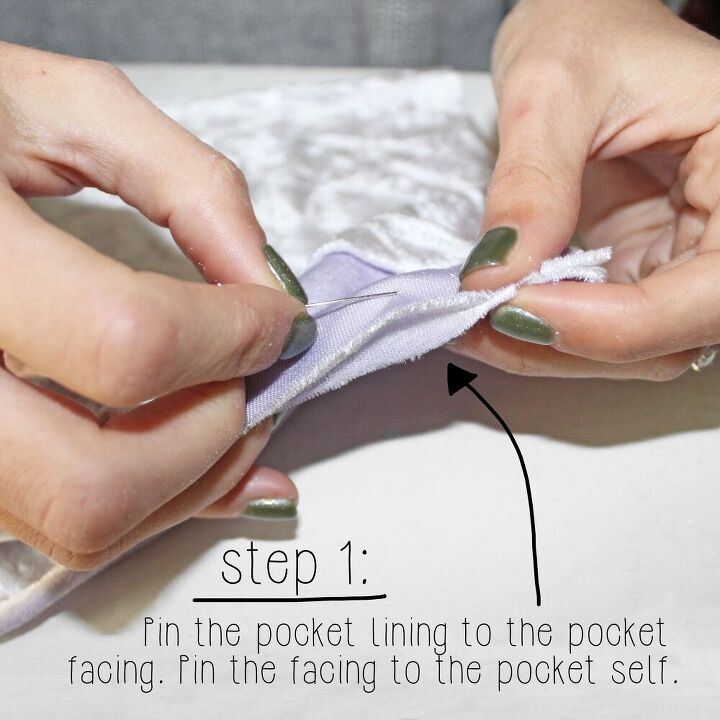
First of all, pin and stitch the pocket lining to the pocket facing. Once that is attached, pin and stitch the top of the pocket facing to the pocket self.
(Remember: Pin and stitch right side to right side. The right side of the garment is the side that everyone sees. AKA: The brushed velvet.)
Garment construction sewing technique: How to sew a patch pocket, step 2
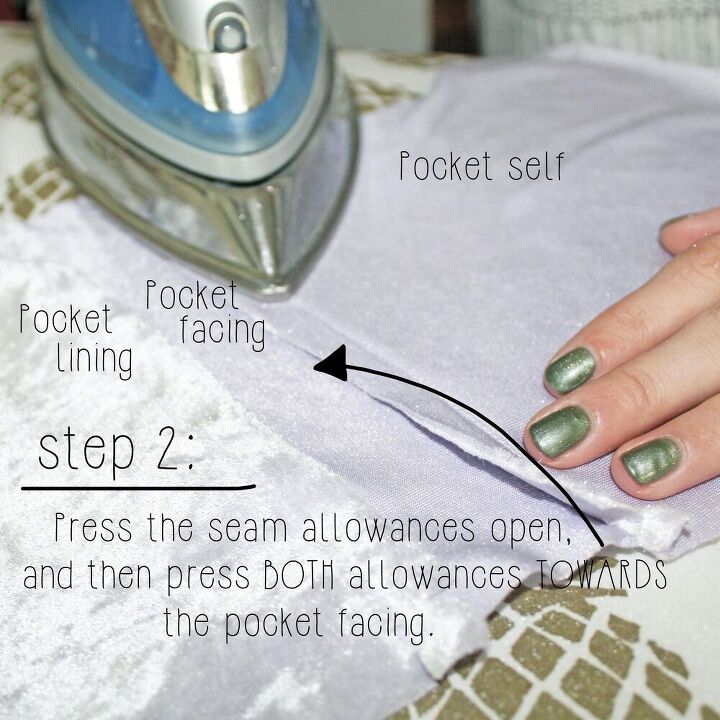
At this point, all three pocket pieces should be attached to one another. From left to right: Pocket self, pocket facing, pocket lining.
Press open the seam allowances, so that they lay flat. Once the seams are pressed open, press them to one side, towards the pocket facing. (Make sure to do this for BOTH seam allowances.)
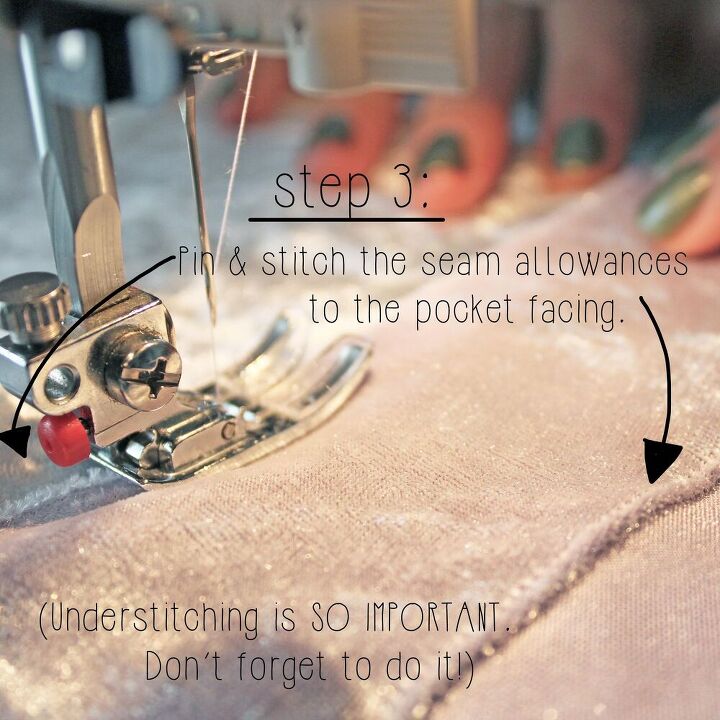
Garment construction sewing technique: How to sew a patch pocket, step 3
Once the seam allowances of the pocket are pressed, it's time to under stitch both seams. Pin the seam allowance of the self/facing seam down to the pocket facing. Pin the seam allowance of the facing/lining seam up to the pocket facing.
After pinning, stitch the seam allowances to the facing. Under stitching is SUCH an easy step, and ensures that the pocket holds its shape and doesn't roll towards the front of the garment. It makes me so sad when I see a pocket that isn't under stitched.. It looks so sad and unprofessional.
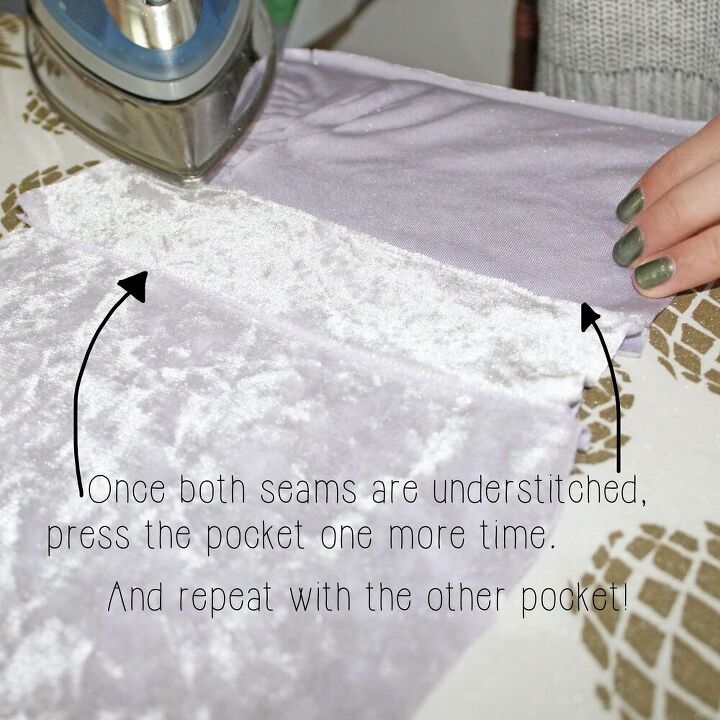
Just do it. Press the seams one more time, once you are finished.
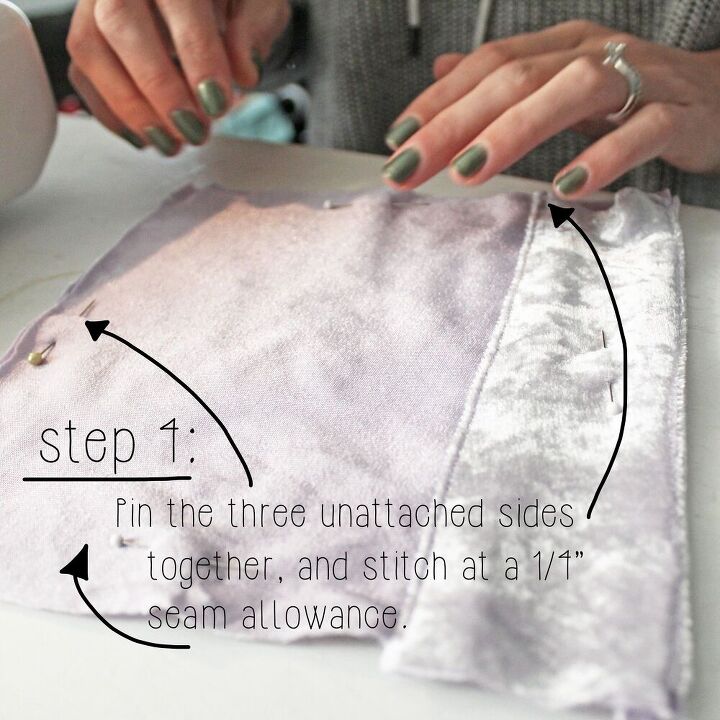
Garment construction sewing technique: How to sew a patch pocket, step 4
Fold the pocket together, back side to back side. You should have a rectangle at this point.
Pin the three unattached sides together, and stitch together at a 1/4" seam allowance. This ensures that the pocket will stay together in one piece, and there will be no holes or tears.

Garment construction sewing technique: How to sew a patch pocket, step 5
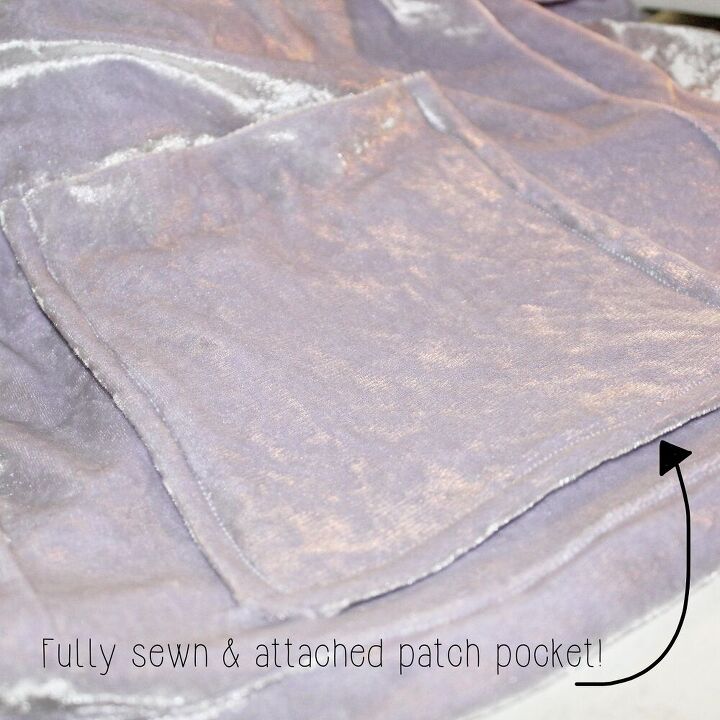
At this point, you should have your pocket! The pocket is in one piece, in the shape of a rectangle.
Along the three raw edges of the pocket, serge the edges closed. This doesn't HAVE to be done with a serger, but I highly recommend it.
NOTE: Some sewing machine do have serger-like stitches, which will also work perfectly fine.
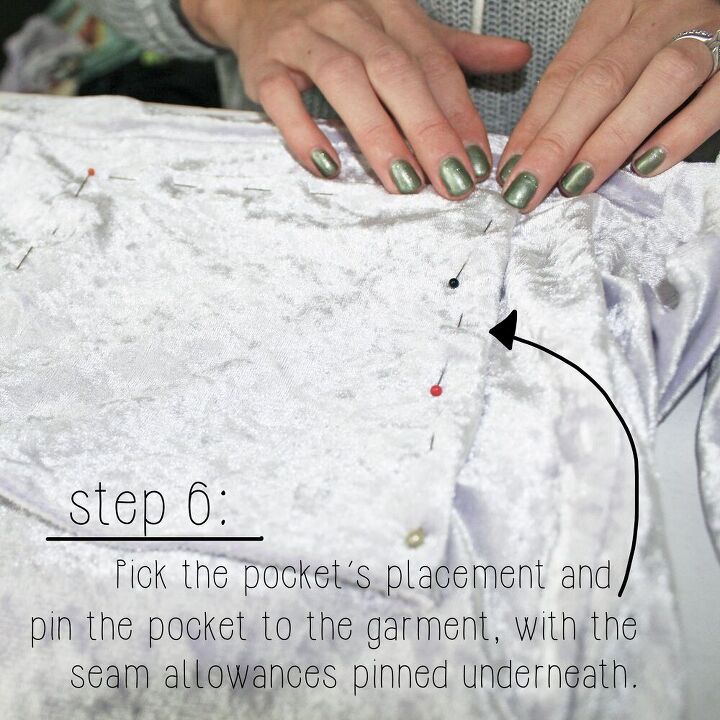
Garment construction sewing technique: How to sew a patch pocket, step 6
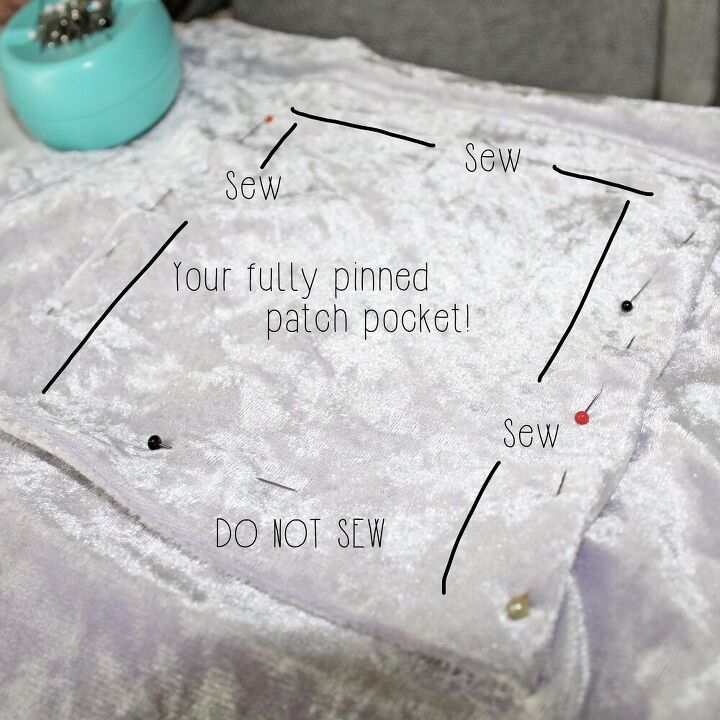
Now it's time to attach your pocket to the garment. Pick the placement where you'd like your pocket, and pin the three sides of the pocket to the garment.
Make sure to pin the seam allowances under the pocket, so that there are no raw edges along the outside of the garment.
Furthermore, make sure the placement is accurate and straight. If you are attaching multiple pockets, pin both and ensure they have symmetrical placement.
Garment construction sewing technique: How to sew a patch pocket, step 7
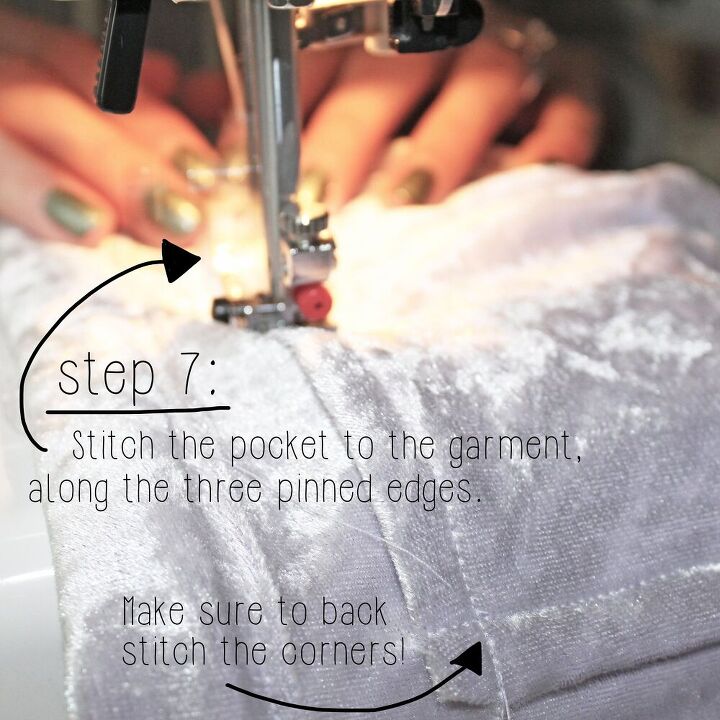
Stitch the pocket to the garment. Literally, just stitch over the pocket along the three folded edges.
I would stitch it at 1/4", to ensure that you stitch your seam allowance to the garment self. Make sure to back stitch along the corners, to ensure your pocket stays nice and strong.
Garment construction sewing technique: How to sew a patch pocket, step 8
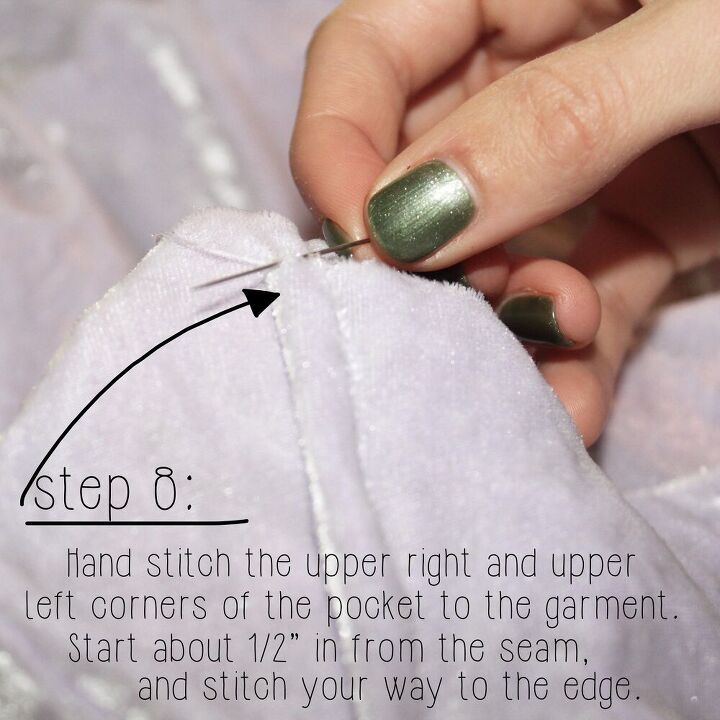
And finally, this last step will with the wear and tear of your pocket. Hand stitch along the upper right and upper left hand corners of the pocket, from the edge to about 1/2" inside the seam line.
This is the area in which there is the most wear and tear of a patch pocket, so this additional hand stitching just helps to hold its shape over time. And that's it!
You've got a beautiful patch pocket.

This tutorial can seriously be used for ANY type of project that you may want to add a patch pocket to. You can add it to coats, dresses, skirts.. Literally anything.
So I kind of hope that you will go pocket crazy and start adding them to everything in your life that is missing pockets.
It's such an easy tutorial, and such an easy project.. Certainly an excellent place to start experimenting with sewing if you've got the itch but don't know where to start.
Are there any pieces at home that you want to add patch pockets to? I'd love to see what you're working on!
(PS.. Don't forget to grab your printable worksheet, the perfect sewing companion!)
The author may collect a small share of sales from the links on this page.


Comments
Join the conversation