Custom Painting Tutorial: DIY an Awesome Galaxy Jacket

I discovered this cool Japanese brand that has teddy jackets with some sort of print.
At first, I thought it was printed on, but the description said they were hand-painted! I couldn’t stop thinking if they could create art on a teddy jacket, I can too.
Fur is probably the only fabric I haven’t tried to paint on, so I have to try it. In this tutorial, we’re making a DIY jacket with a galaxy painting. Let’s get started.
Tools and materials:
- Masking tape
- Fabric paints
- Fabric marker
- Paintbrushes
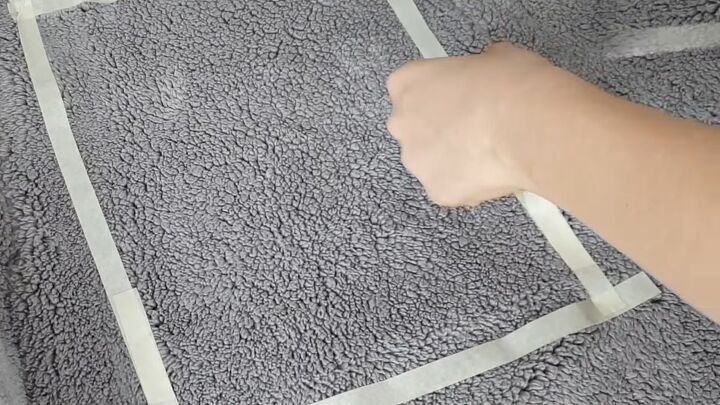
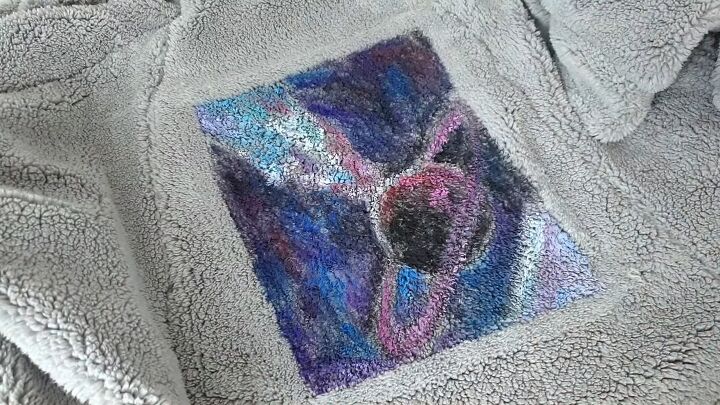
1. Use masking tape to create a rectangular shape
This Japanese brand creates such rectangular artwork on the jackets, so I’m using masking tape on the jacket to recreate that.
The only problem with masking is that it’s hard to remove from fur, so I hope it won’t pull out threads while removing it.
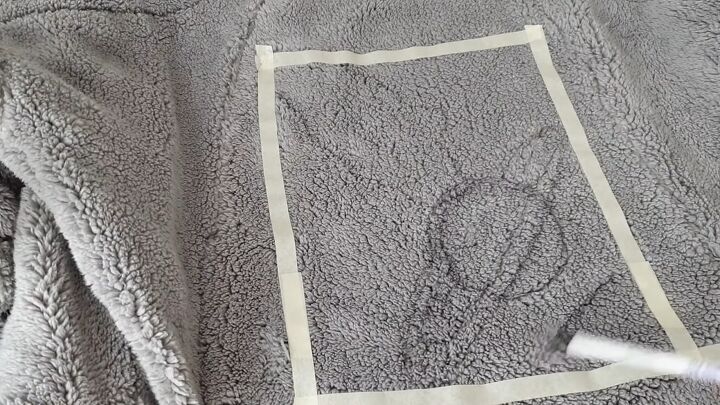
2. Sketch the design
The other problem is sketching with chalk doesn’t work and transfer paper doesn’t either, so you’ll have to draw free hand using a fabric marker.
As the design is a simple galaxy, it’s not a big problem.
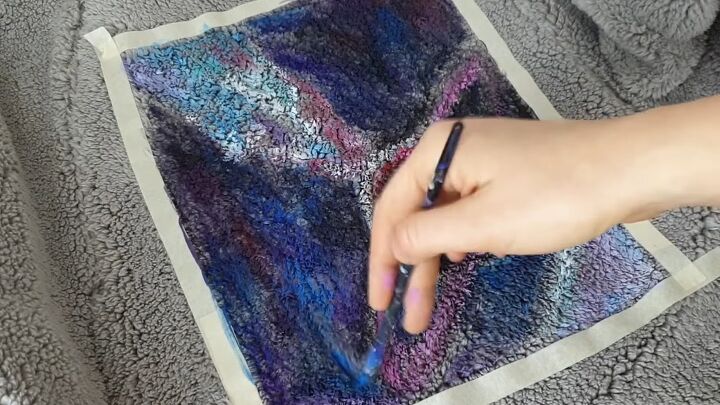
3. Paint the first layer on the jacket
Use fabric paints that are suitable for synthetic fabrics, because it’s fur.
The right technique, in my opinion, is to rub the paint into the fibers and add more water than usual, at least for the first layer to paint not only the tips of the fur but the roots as well.
This will connect the fabric paint with the fibers to make your artwork more durable. It will also connect your artwork with the jacket so it won’t look like a shield of paint on top of fur, but like it’s a part of the clothing, so it will look more organic.
I found that it’s not hard painting on fur in comparison to a knitted sweater, but it’s so weird. It’s hard to create thin, clear lines on fur but we’ll be able to create more details with the second layer.
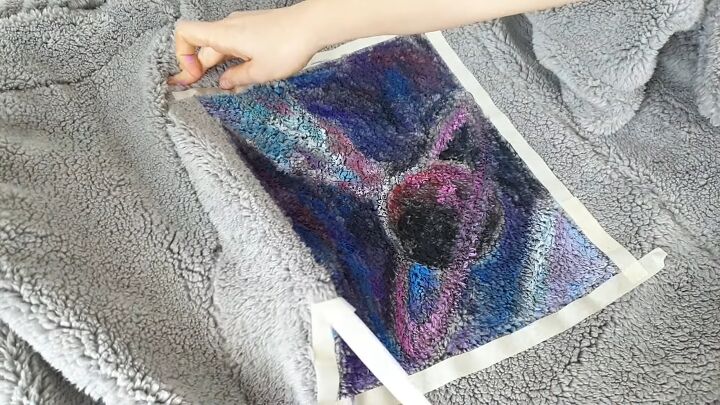
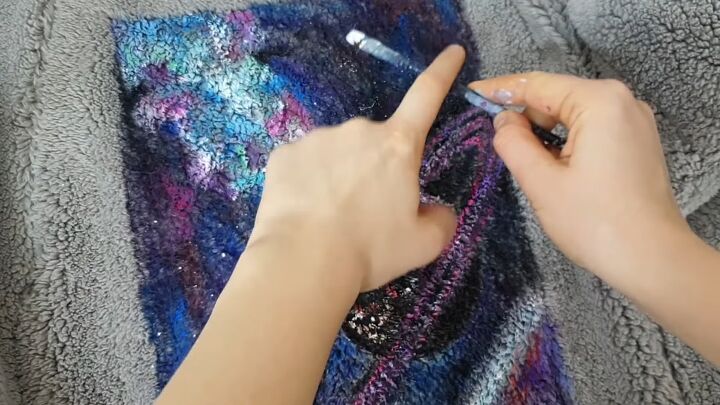
You can remove the masking tape after you fill in enough of the painting.
Don’t keep it on too long in case it is harder to remove, or it destroys the fur.
4. Let it dry
Once you’ve finished the first layer, let it dry for a couple of hours since you used a lot of water. You can also use a hairdryer.
It took about four hours to dry for me and the fabric stiffened, but not too much, and kept the softness of the teddy jacket.
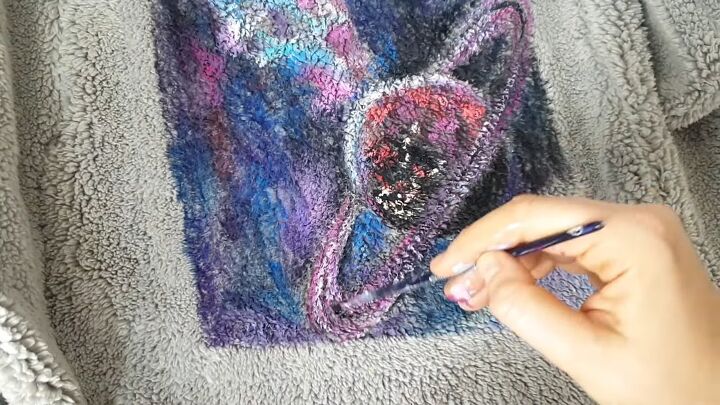
5. Paint details on the second layer
You won’t be able to create it as detailed as you could on other fabrics, but you can still make it a bit more detailed and beautiful.
Use the splattering paint technique to add stars.
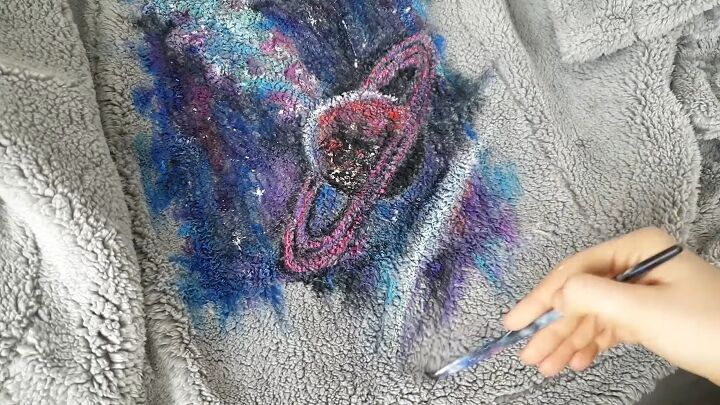
6. Paint over the borders (optional)
Whenever I try to create rectangular artwork, I just don’t like it. Now I want to ruin the rectangular space, the borders, and perfect angles, and just let it be free because space should be free!
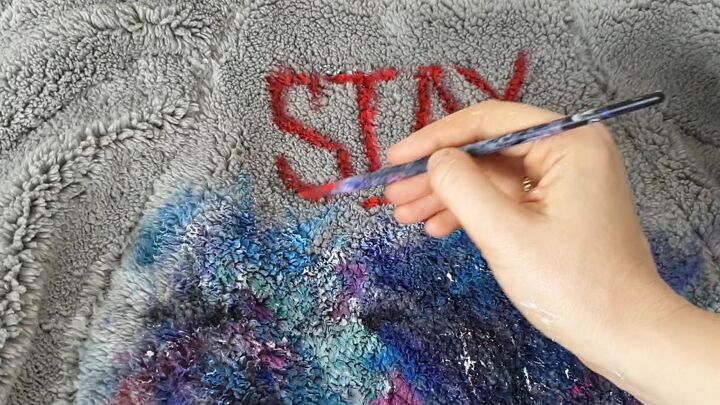
7. Add lettering
Lettering can turn simple artwork into something so cool and meaningful.
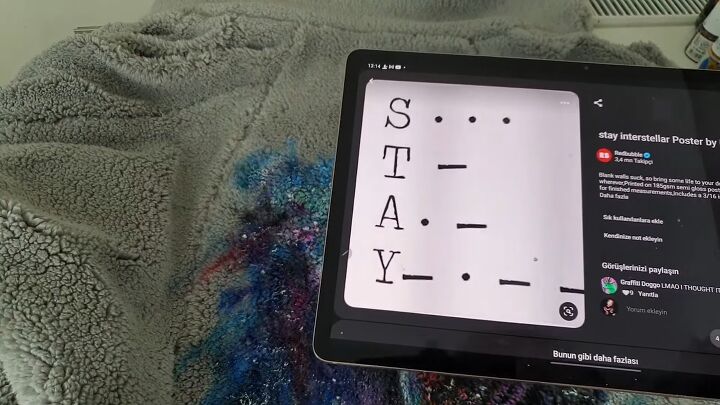
I’m using a reference from the movie Interstellar. Sketch it out with a fabric marker and then the fabric paint to paint it in.
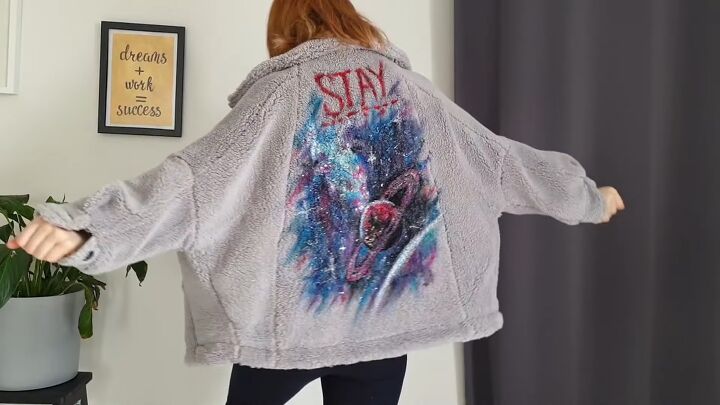
DIY hand painted jacket
I’m blown away by the results of this hand-painted jacket! Let me know what you think of the final results down below!
If you enjoyed this tutorial, check out my post on how to Create an Awesome 80s Denim Jacket.
The author may collect a small share of sales from the links on this page.


Comments
Join the conversation
Very cool. The hand painting on fur looks so unique. I especially like how you feathered the paint on the edges. Gives it more of the hand painted look as opposed to it looking like mass produced stamping. I like the galaxy. Truly would love to be that artistic. Very nice!
BTW… Try using painters tape instead of masking tape. I don’t think it would pull as much when being removed.