This Pretty DIY Backless Dress Was Made From An Old Maxi Skirt

For today’s thrift flip, I’m going to show you how I turned a maxi skirt I got at the thrift store into a DIY backless dress. I’ve gotten a lot of requests to make a tutorial for this dress, and here it is! Let’s get started!
Tools and materials:
- XL maxi skirt or dress
- Lining fabric
- Elastic band
- Scissors
- Measuring tape
- Fabric chalk
- Pins
- Loop turner (or safety pin)
- Sewing machine
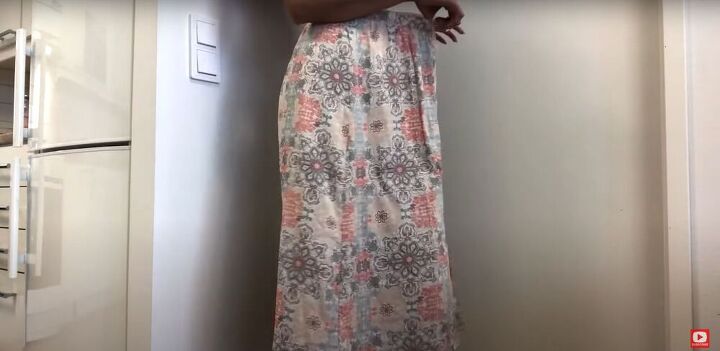
This is the maxi skirt I turned into a DIY backless dress.
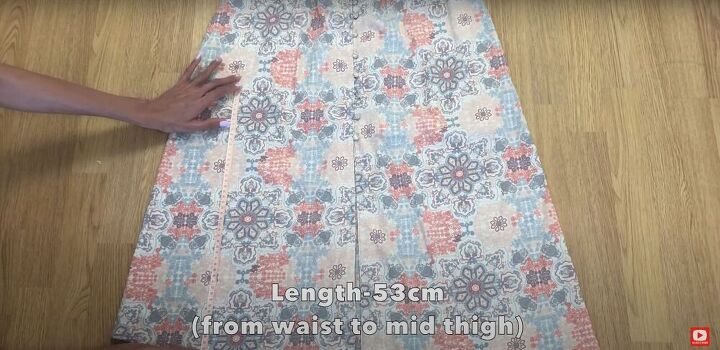
1. Measure
I measured from my waist until where I wanted the hem of the dress to land, which was mid-thigh. I measured that length from the bottom of the skirt made a line to mark it, and cut across the skirt at that point.
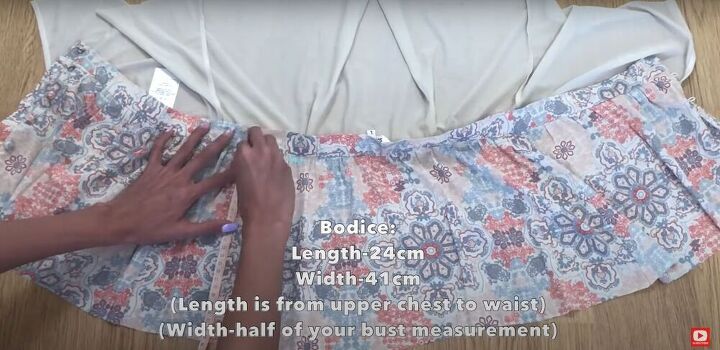
To figure out the size of the bodice, I used the measurement from my upper chest to my waist for the length and half my bust measurement for the width. I marked and cut out a rectangle with those measurements from the remaining fabric.
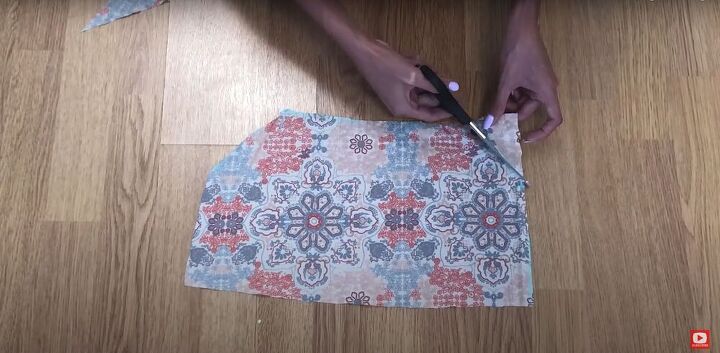
2. Mark and cut the pattern
Next, I made a mark on the top edge of the rectangle, 7 centimeters (2.75 inches) from each corner, and another mark on each side edge at 9 centimeters (3.5 inches) from the top corners.
Then, I connected the two marks on each side with a diagonal line and cut the two top corners along those lines.
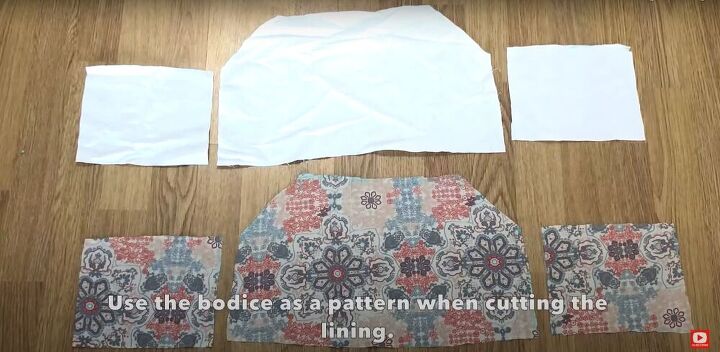
3. Cut out the fabric pieces
I cut two more rectangles, each with a length equal to the side edges of the bodice, and a width of 18 centimeters (7 inches). You may want to make the width of your pattern bigger or smaller, depending on how open you want the back of your dress to be.
Once I was done cutting my main fabric, I used the pieces as a guide to cut identical pieces for my lining. If you have enough fabric, you can use the same fabric for the lining as you use for the dress.
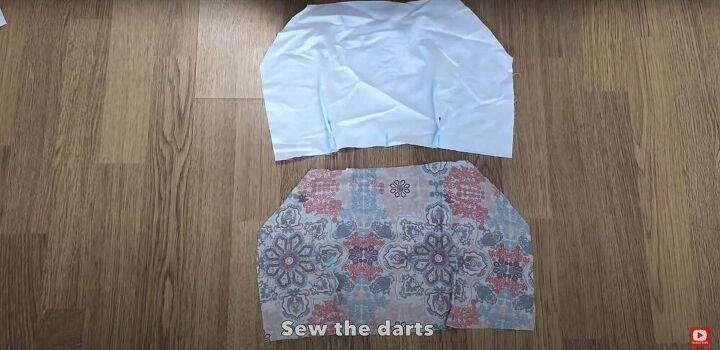
4. Mark, pin, and sew darts
Next, I made darts on both the bodice and the bodice lining. For instructions on how to measure and mark darts, see the video from 2:13-3:02.
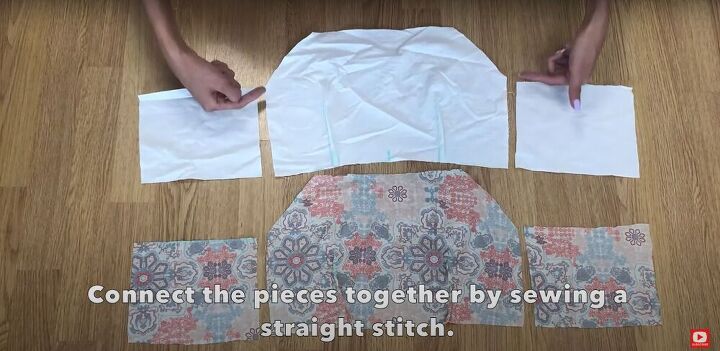
5. Sew the fabric pieces together
I pinned the fabric pieces together at the side seams and sewed, for both the main fabric and the lining. Make sure you are sewing with the right sides together.
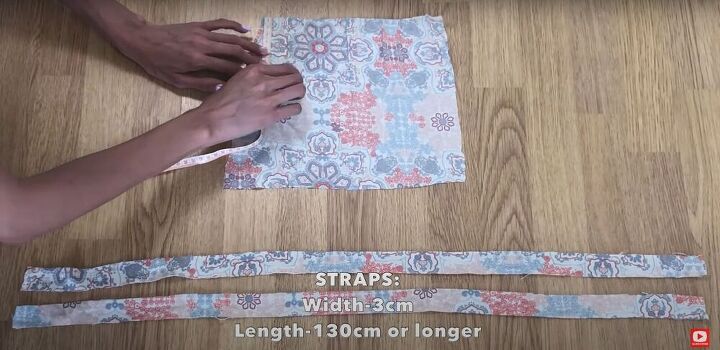
6. Cut strips for the straps
Next, I cut strips of fabric for the straps. Each strip was 3 centimeters (1.18 inches) wide and at least 130 centimeters (51.2 inches) long. I needed to cut multiple strips and connect them together to reach that length.
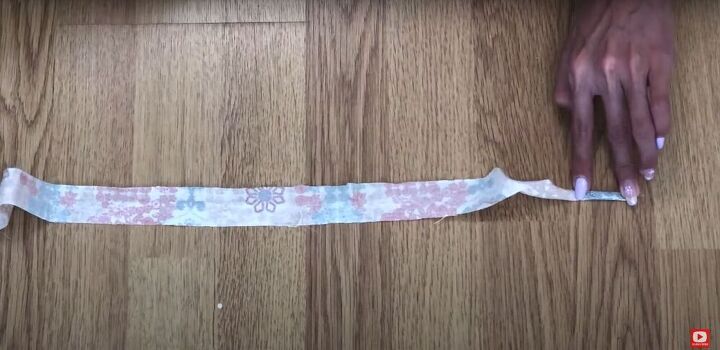
7. Fold and sew the straps
I folded the edges of each strip towards the center by about 1 centimeter (0.4 inches), folded it in half lengthwise to hide the raw edges, and sewed it down.
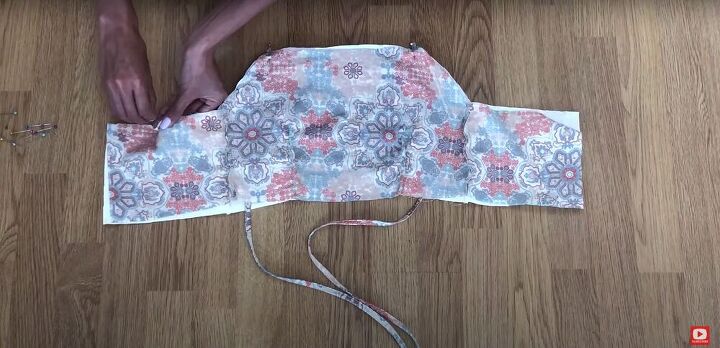
8. Attach the straps
To attach the straps, I sandwiched them between the right sides of the lining and the main fabric and pinned one end of each strap in each corner.
Then, I pinned down the entire top edge, gathered the rest of the straps between the layers, and pinned down the bottom edge, as well. I sewed along both the top and bottom edges, leaving the side edges open.
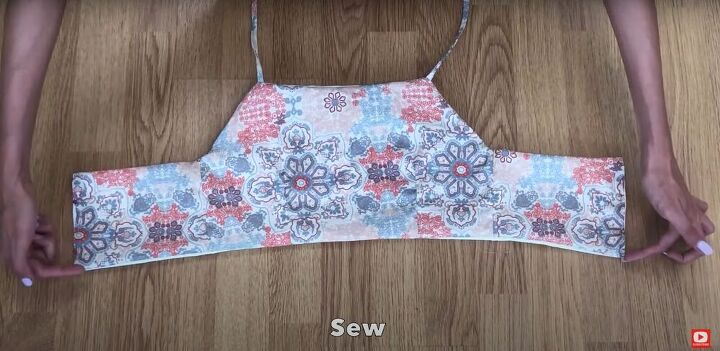
9. Sew the fabric inwards
Next, I turned the fabric right side out. On the side edges, I folded the fabric inward by about 1 centimeter (0.4 inches), pinned it in place, and sewed.
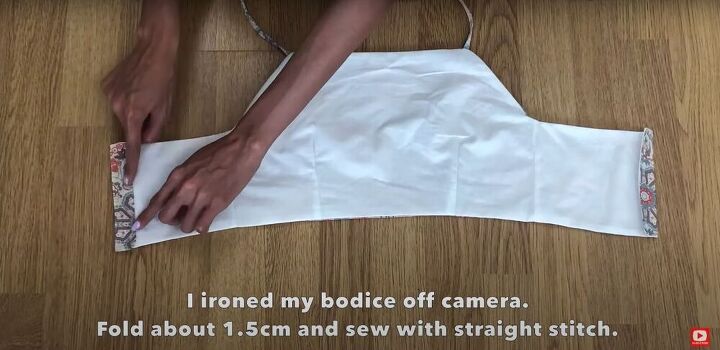
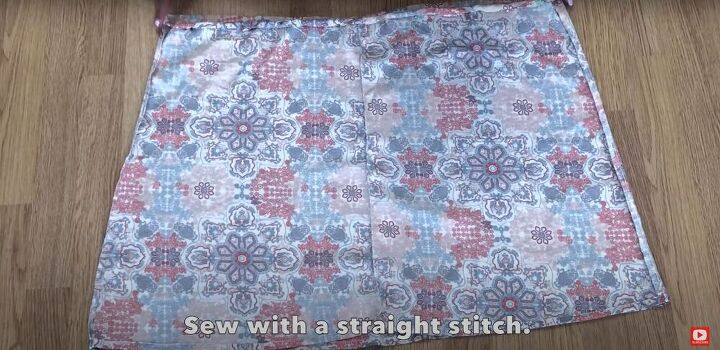
10. Press, fold, and sew the edges
After sewing down the side seams, I ironed the bodice flat. Then, I folded each side edge by about 1.5 centimeters (0.6 inches) and sewed them down with a straight stitch.
11. Make the skirt
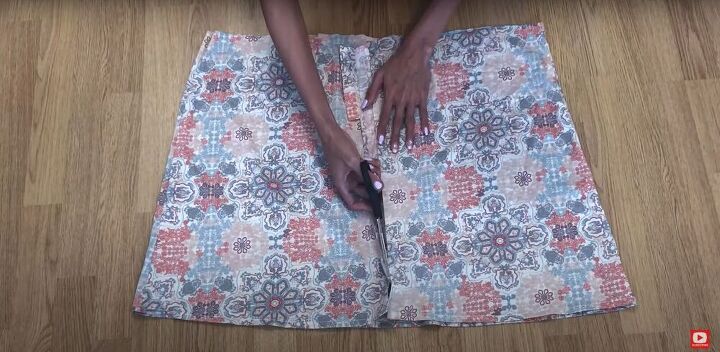
Moving onto the bottom half of the dress, I first cut off the button and buttonhole panels of the skirt, then sewed the raw edges together. If the skirt or dress you’re using doesn’t have buttons down the front, you can skip this step.
12. Create the elastic tunnel
On the back side of the bottom half of the dress, I folded the top edge over by 0.5 centimeters (0.2 inches) and then again by 1 centimeter (0.4 inches) to create a tunnel for the elastic band. Then, I pinned the folded edge in place and sewed it down.
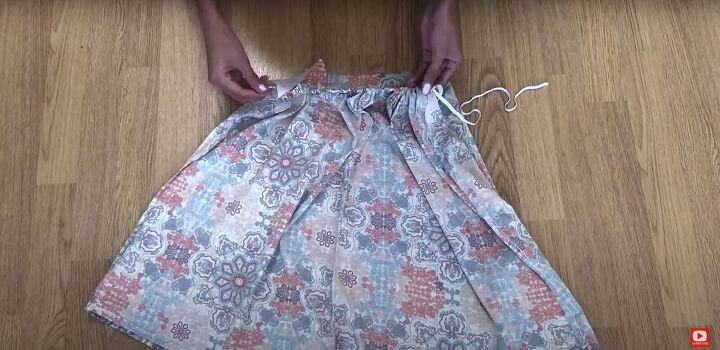
13. Insert the elastic
I cut a piece of elastic that was half my waist measurement and used a loop turner to pull it through the tunnel on the back of the skirt. If you don’t have a loop turner, you can attach a safety pin to the end of the elastic to guide it through the tunnel.
14. Sew the elastic
Once the elastic was pulled through the tunnel, I pinned the ends of the elastic in place on either side and sewed it down.
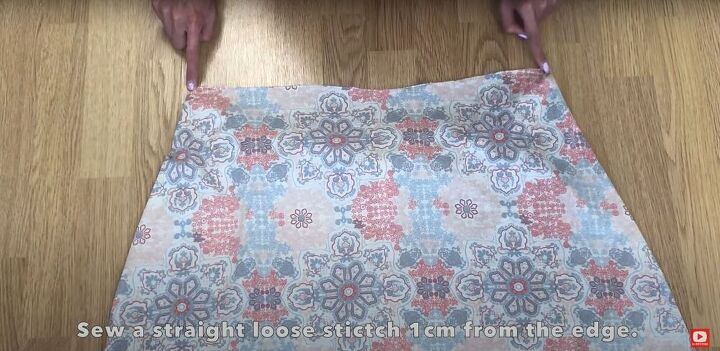
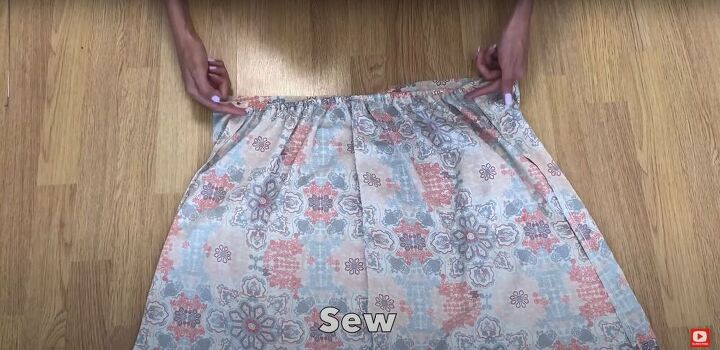
15. Zigzag and gather
On the front side of the skirt, I ran a zigzag stitch across the top edge to prevent fraying. Then, I ran a basting stitch across the top of the skirt, about a centimeter (0.4 inches) from the top edge, and pulled the threads on either end to create gathers along the front of the skirt.
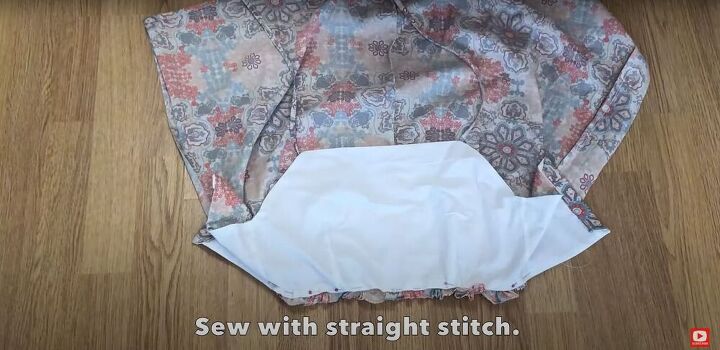
16. Attach the bodice to the skirt
I pinned the bottom edge of the bodice to the top front edge of the skirt, making sure the gathers were distributed evenly as I pinned, and sewed them together.

17. Insert the straps
Finally, I used the loop turner to pull the straps through the tunnels on the back of the dress. Once that was done, my dress was complete!

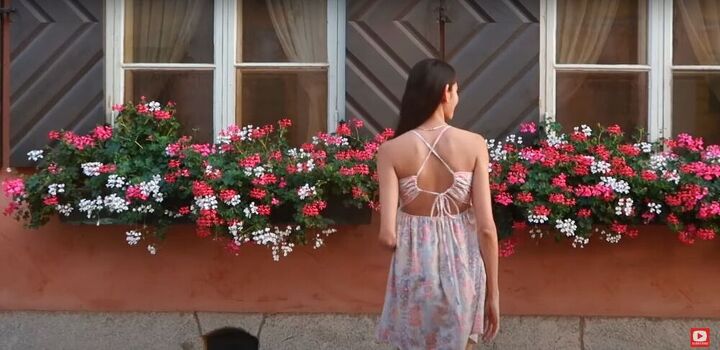
DIY backless dress tutorial
I really love how this DIY backless dress turned out. If you enjoyed this tutorial on how to sew a backless dress, let me know! And if you use this tutorial to make a summer dress like this of your own, I would love to see the results.
The author may collect a small share of sales from the links on this page.


Comments
Join the conversation