How to Hydro Dip Shoes With Spray Paint - Super Fun & Easy Tutorial

Today, I'm going to show you how to hydro dip shoes with spray paint. Sound fun? That's because it is! Plus, it's so easy to do and the effects are awesome.
What is hydro dipping?
The hydro dipping paint technique also called water transfer printing, it a way of creating and transferring designs using water. You apply paint to water, then dip the item of clothing or object you want to decorate into the water, and the design transfers in a swirly, fluid pattern.
For this tutorial, I'll be demonstrating hydro dipping with canvas shoes. Let's get started!
Upstyle Recommends!
Tools and materials:
- White canvas shoes
- Painter's tape
- Blade
- Bucket
- Box
- Gloves
- Primer
- Spray paints (assorted colors)
- Topcoat spray paint
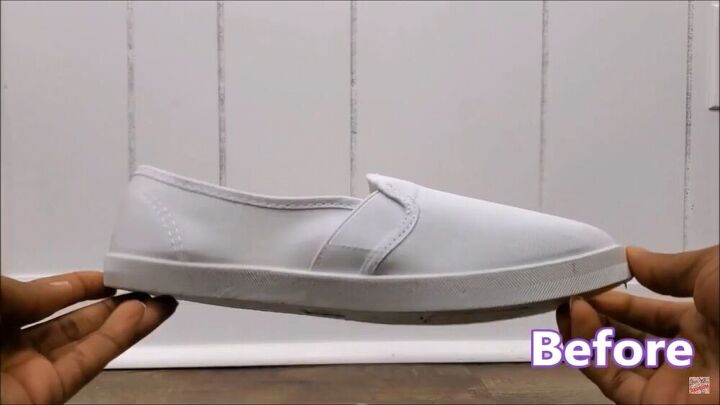
These are the plain white canvas shoes I'll be hydro dipping!
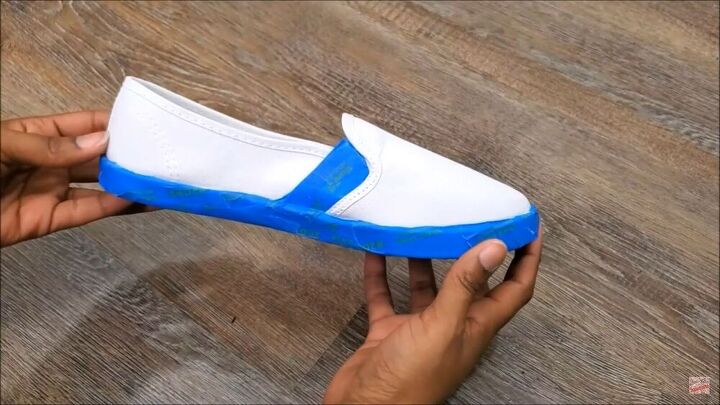
1. Tape the soles and sides
Use painter's tape to tape off the areas that you don't want to get colored. In this case, I went around the perimeter of the bottom of the shoe, the sole itself, the bands on the side, and taped accordingly.
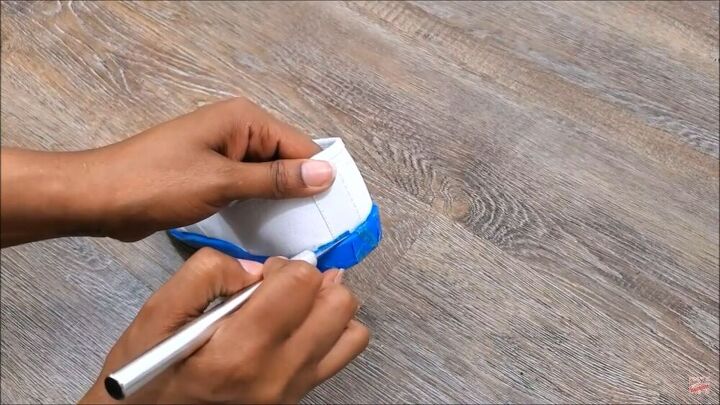
Clean up the edges of the shoe with a blade, cutting away at any tape that overlaps onto the surface of the fabric. This will give the shoe a neater look.
2. Prep shoes with a primer (optional)
Put your shoe in a box and prep your shoes with a primer. This step is optional, but I noticed afterward that the primer made my shoe design more textured.
A primer will guarantee that the paint will stick. After you have sprayed the shoes, let the primer dry.
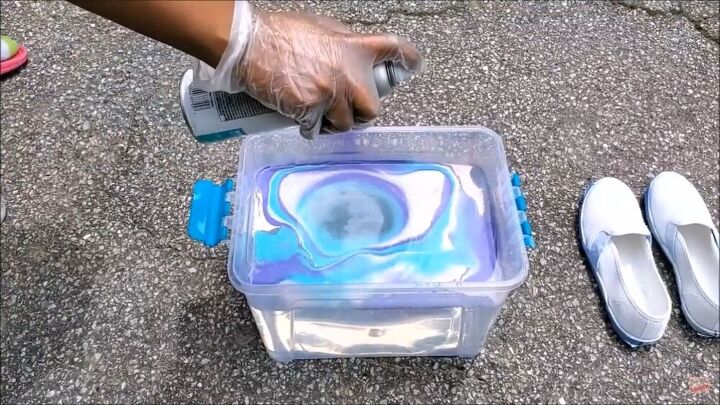
3. Create the hydro dip with spray paint
Fill your bucket with water, but not too deep. Next, spray your spray paint colors onto the surface of the water. I used teal, purple, and bubblegum pink.
I went back and forth with the colors, creating an interesting design with layers of paint.
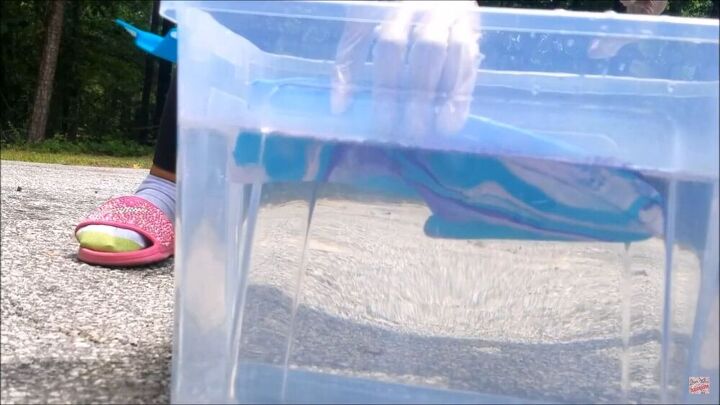
4. Hydro dip the shoes
Wearing gloves, dip your canvas shoe at a slight angle, and do so slowly. There’s no rush. Once the shoe is completely submerged, dip your hand in the water and push away any of the excess paint.
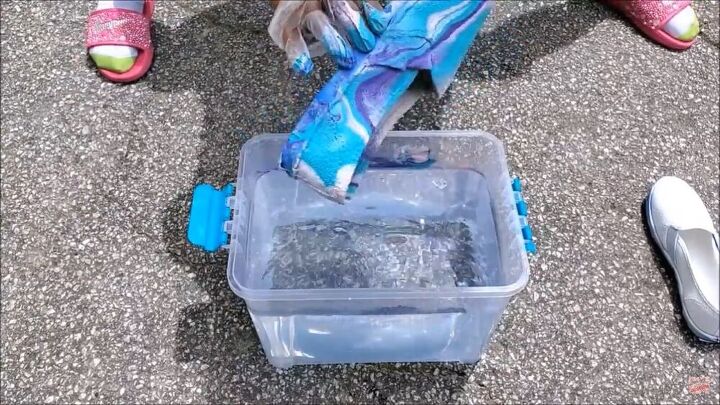
When you lift your shoe, take it out slowly. Repeat steps 3 and 4 for the other shoe.
Sunlight is the best way to dry your shoes. Leave them out to dry as they are soaking wet.
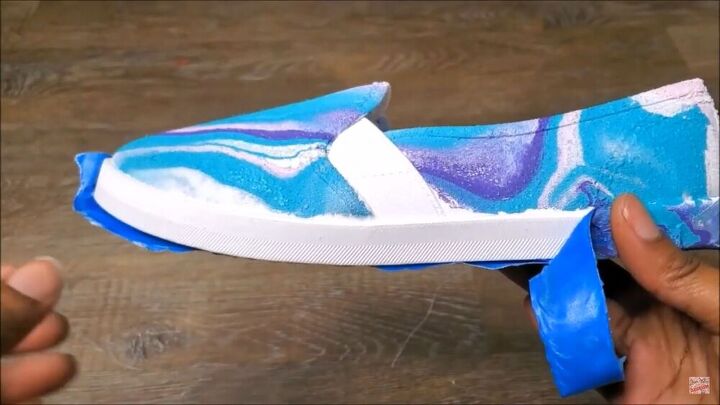
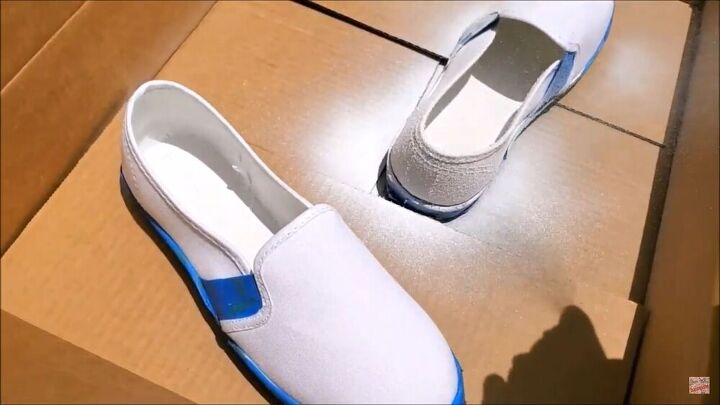
5. Peel off the tape
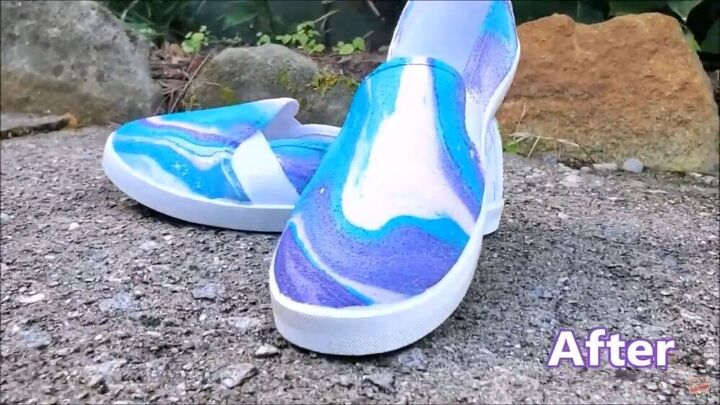
Once the shoes are completely dry, peel off the tape and reveal your masterpiece! As you can see, the tape really worked well.
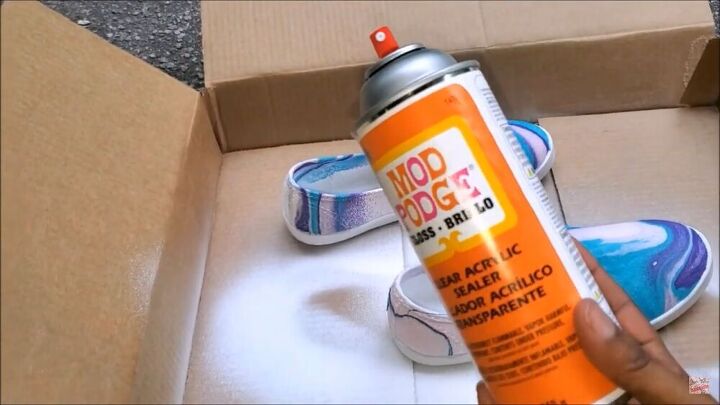
6. Spray a protective coat
You are not done, there’s one more step! You need to seal your shoes with a top coat to lock in the design. Let it dry and do a second coat.
How to hydro dip shoes with spray paint tutorial
There you have it - easy DIY hydro dip shoes! When you hydro dip with spray paint, you know that the design you create is truly unique. I can promise you that no one else in the world has this exact style!
These shoes turned out great and I’d love to do more; it’s kind of addictive! How do you like them? What colors will you be hydro dipping? Let me know in the comment section below.
The author may collect a small share of sales from the links on this page.


Comments
Join the conversation
These shoes are gorgeous! Would this work on white running shoes with vinyl accents that have yellowed with age?
The shoes are simply beautiful. This has inspired me to do the same thing.