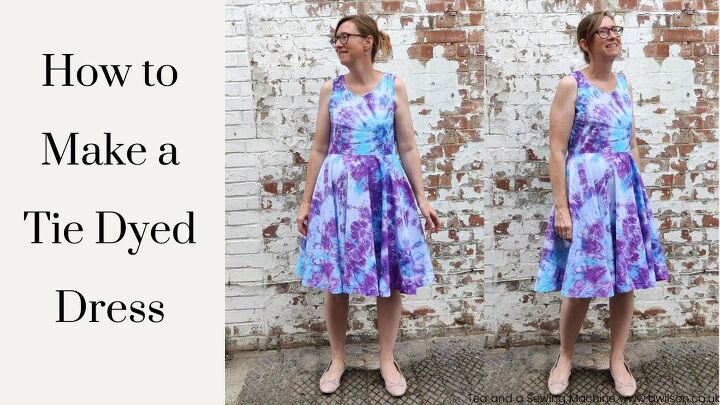
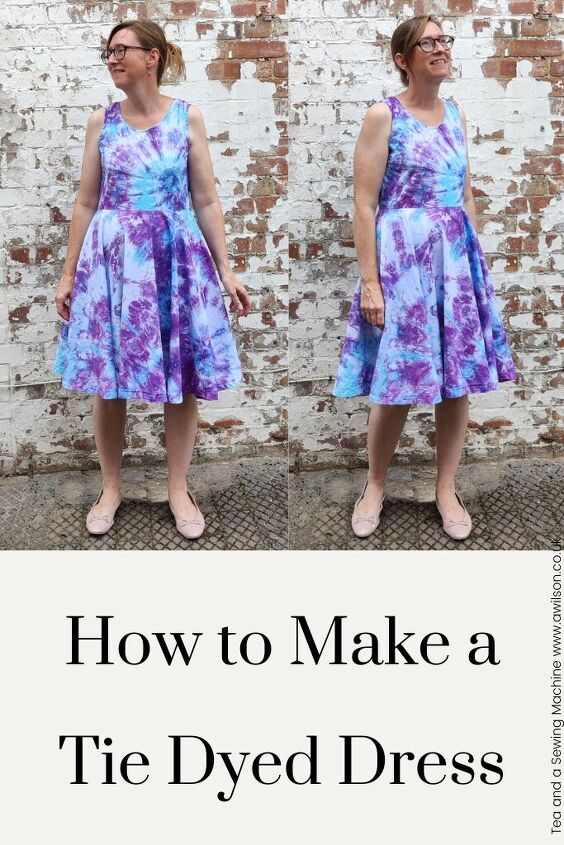
How to Make a DIY Tie Dyed Dress
This post contains affiliate links.
One of my youngest boy’s favourite things to do at the moment is to make tie dyed t shirts, and it’s easy to see why. As well as looking fabulous, at 9 years old he’s experiencing what those who are makers feel every time we wear clothes that we’ve made ourselves. He’s wearing something totally unique that he made himself, with colours he chose and with a design that is the result of his own little boy hands.
He now has 10 tie dyed t shirts, and although I have been on hand to help, he pretty much does it on his own.
The last but one batch he made were blue and purple, and I loved the colours so much I decided I wanted to have a go myself!
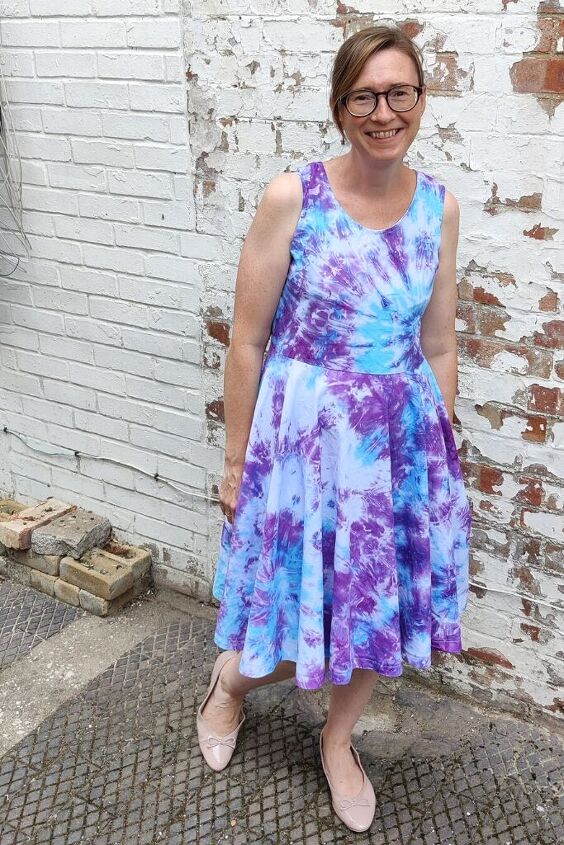
I’m not a big wearer of t shirts but I do like my summer dresses. So I decided to see if I could make a tie dyed dress instead.
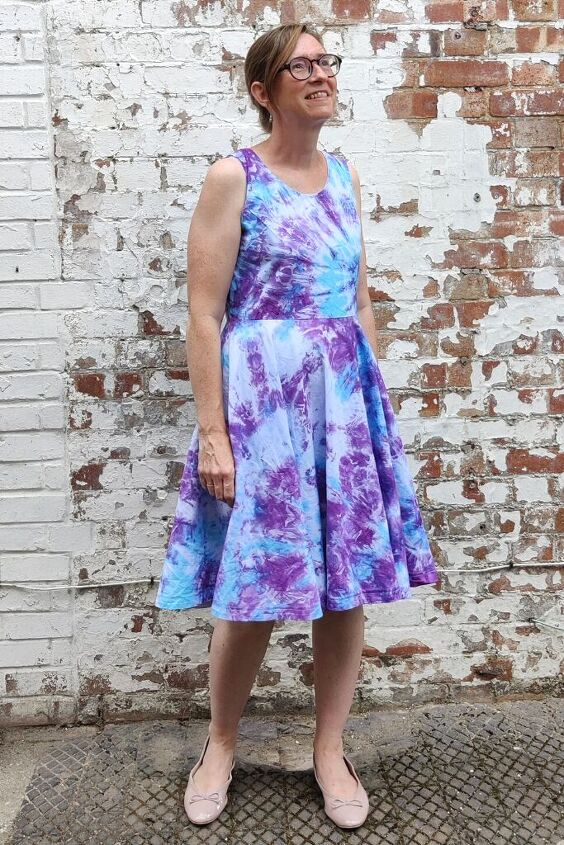
Here are the results, and I would say that it definitely worked!
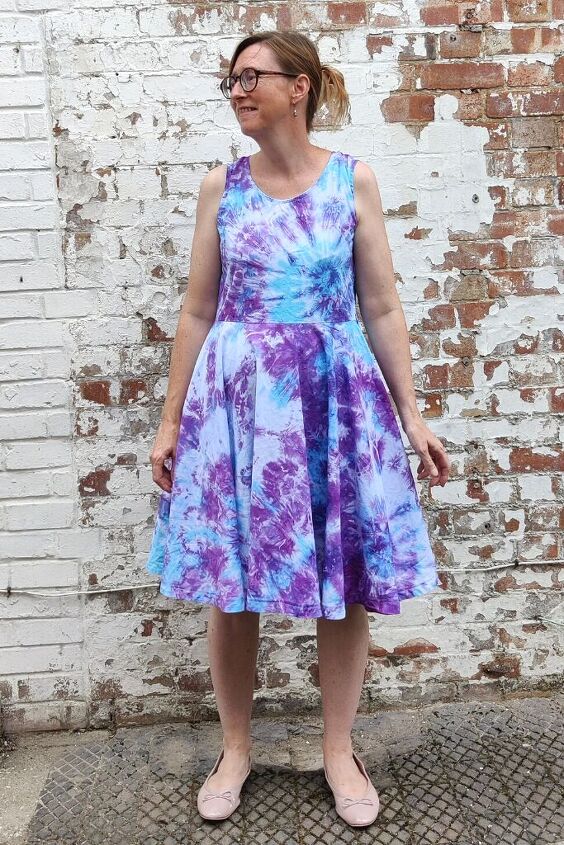
As a project it was a lot of fun. Part of the fun is the unpredictability. You never know exactly what you’ll end up with until you take the elastic bands off. I love looking at the different patterns that have emerged. Sometimes doing something where you can’t entirely control the outcome makes for the best results!
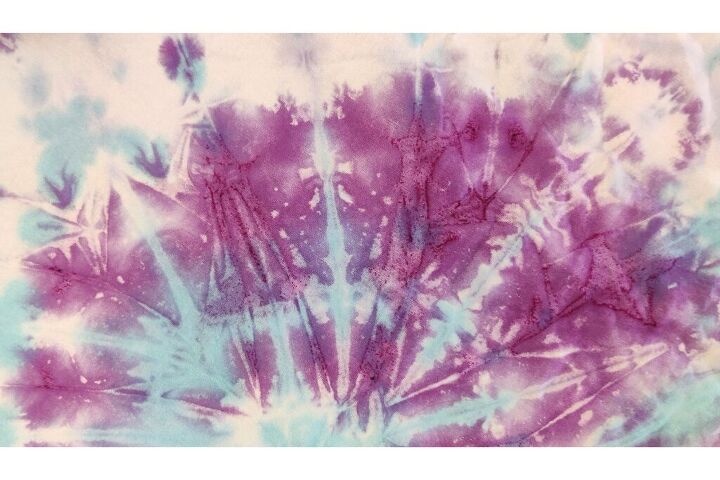
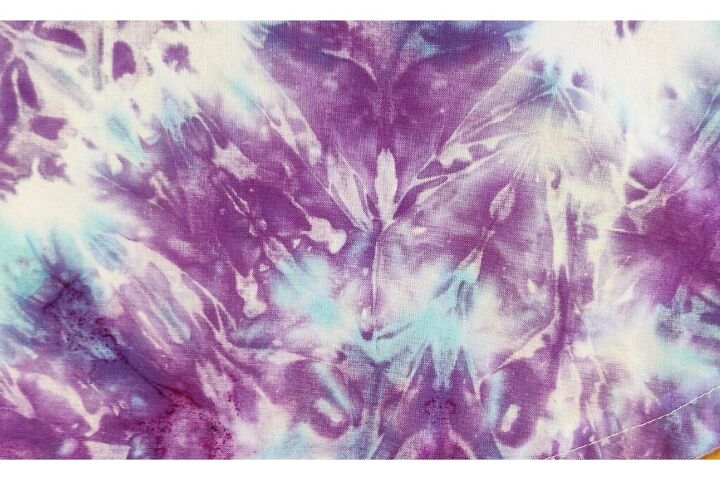
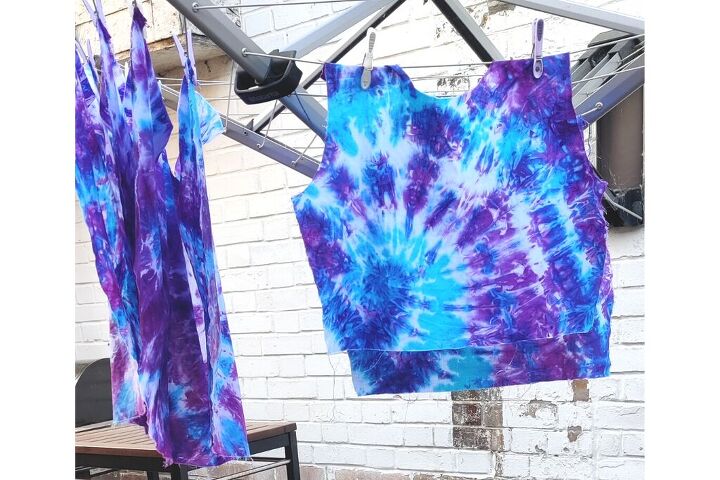
I love the transparent qualities of the patterns. Here are a couple of the spirals.
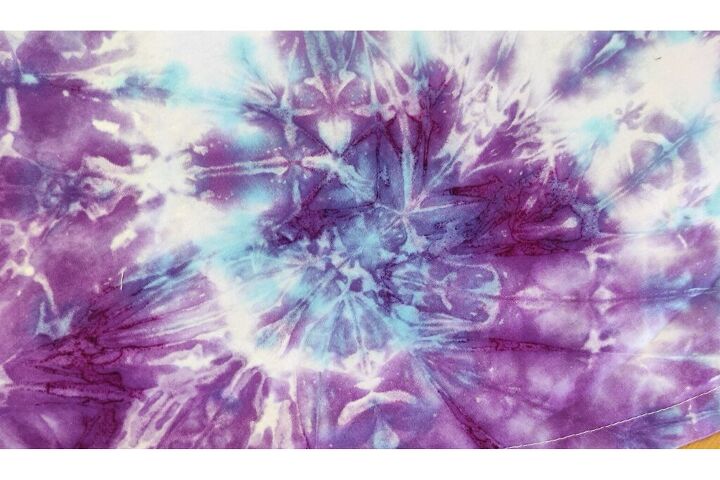
Some of the patterns look like flowers.
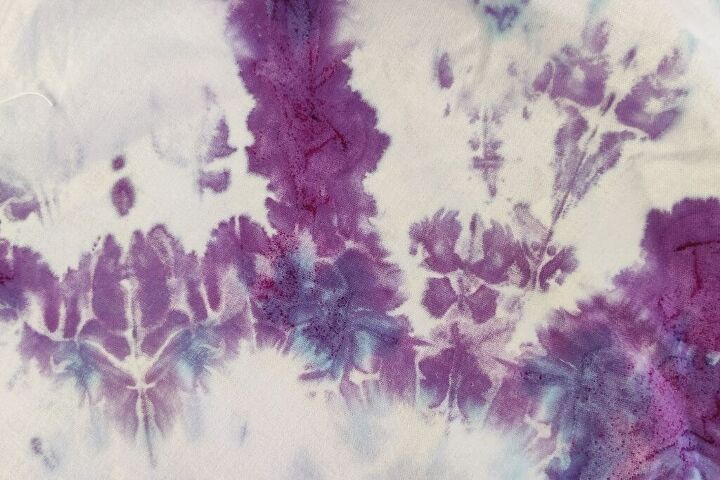
A couple more of my favourites…
This is how I made my DIY tie dyed dress.
How to Make a DIY Tie Dyed Dress
You Will Need
A favourite dress pattern. I used my cherry blossom dress as I’ve made a few of these now and I know where I am with it. It’s quite easy and only 4 pieces, and I enjoy wearing them, so that was several wins before I’d even started! The clearest instructions are the ones from the sewalong. Or you might have a pattern in mind.
White cotton fabric. Check the pattern to see how much you’ll need . The fabric I used was 150 cm wide, and 3 m was enough to make the cherry blossom dress (I’m a UK size 14).
It’s important that the fabric is 100% cotton, as synthetic fibres are notoriously difficult to dye. By way of an example, I spilt coffee down myself while wearing an ice hockey shirt. It was a couple of days before I could wash it so the stain had dried, but it came out in the wash first time with no stain treatments. Obviously this is good news if you spill coffee on yourself, but not so great if you are actually trying to dye something!
Remember to wash the fabric first as there might be chemicals on it that could affect the dyeing process, and it might shrink a bit in the wash.
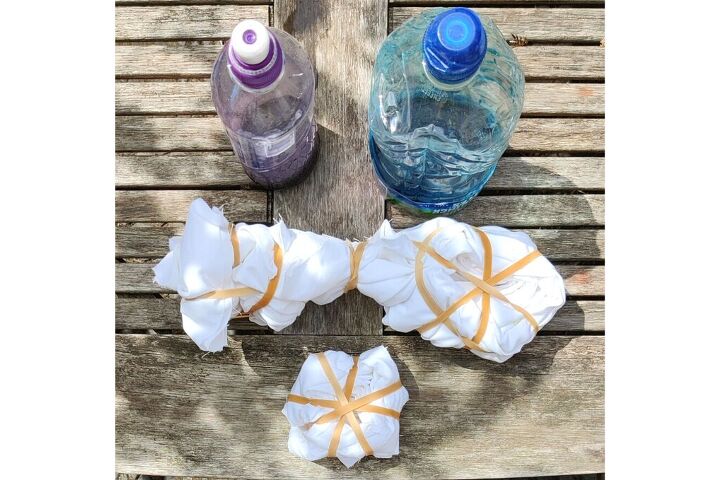
Fabric dye. I used Dylon hand dye in Paradise Blue and Deep Violet. There are plenty of colours to choose from. I would suggest 2 or 3, or even just 1. If you find yourself with decision paralysis, colours that often work well together are ones either next to each other on the colour wheel (like blue and purple), or opposite (like blue and orange).
Salt. This is necessary for the dying process. Standard table salt is fine.
Elastic bands. They are more for holding the scrunched and twisted fabric in place than for resisting the dye. I used chunky ones because that’s what I had.
Plastic drinks bottles with sports caps. You’ll need one for each colour.
Water. I put some in a jug and took the whole operation outside!
A bowl and a rack. A washing up bowl and a cooling tray (that you’d use for baking) are ideal.
I’d also recommend wearing an apron, and putting something down on the table before you start. Rubber gloves are a good idea if you have some. I didn’t and I had Smurf hands for a week afterwards!
Before You Start
Wash your fabric. It’s a good thing to do anyway in case it shrinks, but even more so if you’re going to dye it. There might be chemicals in the fabric that could affect how well the dye takes, so give it a quick wash in the washing machine before you start.
Before Dyeing
Cut out your dress pieces. Obviously the usual advice also applies here: check your measurements before cutting out, mark notches, check the seam allowance, mark front/ back, left/ right, top/ bottom as necessary.
You might prefer to make the dress up first, but I felt the dyeing would be easier with smaller pieces.
Preparing the Fabric For Dyeing
Now we’re onto the fun part! Your fabric will need to be damp.
You might find it helpful to watch this video. It’s the first of 4 videos and they are the ones Cosmo and I used.
Spend a few minutes thinking about how you want the finished dress to look. Like I’ve said, it’s unpredictable, but you can decide whether you want spirals or a random pattern, and whereabouts on the dress you’d like them to be.
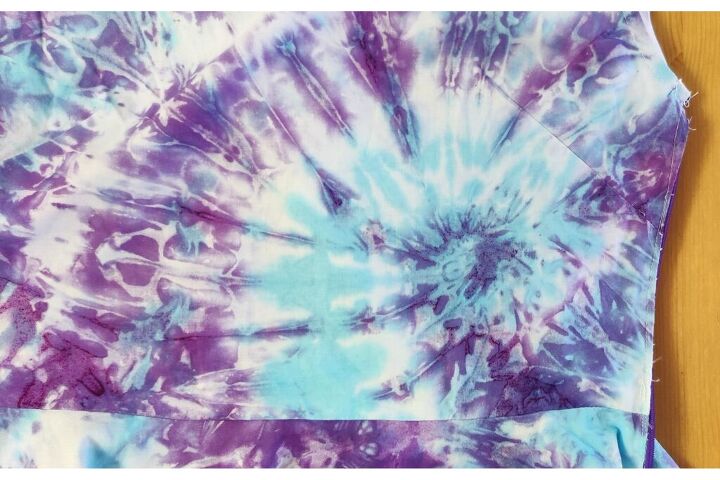
I wanted a spiral on the bottom left of the bodice front, with a larger spiral to the right of the bottom of the skirt and a smaller one on the left. I did both the bodice pieces together and both the skirt pieces together.
To make a spiral, grab a section of fabric and start twisting. The more you twist, the bigger the spiral will be. When you’ve done twisting, stretch some elastic bands round the fabric to hold it in place.
To get a random pattern, scrunch the fabric up and then put elastic bands round the scrunches.
For stripes, stretch your fabric out, then squish the fabric into a sausage and put the elastic bands round it.
The man in the videos shows how to do this step.
Getting the Dyes Ready
Checking the instructions on the back of the packet is always a good idea, but if you are using Dylon dyes, the process is slightly different to what they suggest on the packet.
Pour the contents of the sachets into the drinks bottles, with one bottle for each colour. It might be helpful to make a paper funnel, especially if your hands are not too steady.
To each bottle, add 2 tablespoons of salt.
Fill each bottle with water, then pop the lids on. Make sure the caps are closed!
Give the bottles a good shake. The dye granules need to be dissolved in the water.
Dying the Dress Pieces
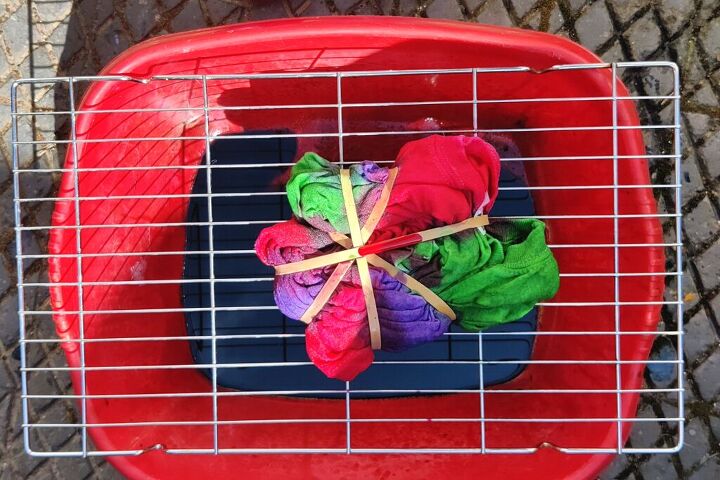
Place the rack over the bowl and pop the pieces you want to dye onto the rack.
Splosh the dye onto the fabric. Unless you want the bits in the middle to stay white, you’ll need to use a fair bit of dye to get it to soak right through.
Turn the pieces over and splosh more dye on the other side.
I forgot to take photos, so here is one of a t shirt being dyed.
It’s impossible to do it wrong! You’ll get results that are beautifully unique every time, even if it’s not what you were expecting.
Put the dyed pieces in a plastic bag. When I was checking the internet for how long I should leave them for, it was anything from half an hour to overnight. However on the packet, the specified length of time is an hour.
In the end I left them for longer, because I had to fit rinsing out my dress bits round tedious things like making dinner.
Rinsing
Once time is up, you can rinse out the dye.
Keeping the elastic bands on, rinse in cold water until the water runs clear.
Then you can take the elastic bands off. This is the best bit because you get to see how it’s turned out!
Rinse again in cold water until the water runs clear.
Now fill the sink with warm water and add a little bit of washing powder. Give it a quick wash in the sink.
At this point, instead of rinsing it by hand again, I threw it in the washing machine and put it on a rinse and a spin.
You might have concerns about washing other things afterwards, but I did and it was fine. If you’re worried, you could put the machine on a cycle with nothing in it before doing any more laundry.
And Now…
… You can make the dress up according to the instructions, then wear your DIY tie dyed dress and feel happy!
The author may collect a small share of sales from the links on this page.


Comments
Join the conversation