Make a Gorgeous Off-the-Shoulder Dress Out of a Button-Down Shirt

I’m all about that upcycle life. Especially when the result is totally different and unexpected. In this tutorial, I’ll show you how to take an ordinary button-down shirt and use it to create a whole new look: an awesome off-the-shoulder dress that is truly one of a kind. I thrifted a $3 men’s button-down shirt for this project, so be sure to keep an eye out for good bargains like that. This dress is super cute and perfect for summer. So grab that shirt and your sewing machine, and follow along.
Tools and Materials:
- Button-down shirt
- Clippers
- Scissors
- Sewing pins
- Nylon elastic thread
- Sewing machine
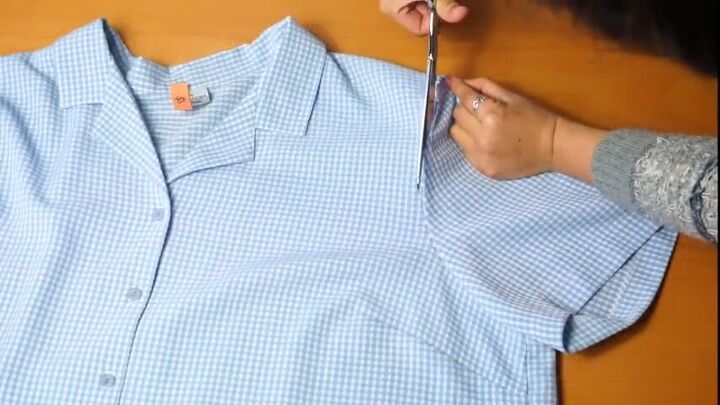
The first thing you need to do is cut off the sleeves on both sides. So take your scissors and just go around the seams. We’re going to use the sleeves later, so put them aside for now.
Use a sewing pin to close the top button, then detach the collar of the shirt. Clippers or seam cutters will be useful in speeding up this process.
Once you’ve detached your collar, take your shirt and fold it in half lengthwise. Then take your scissors and cut off the top of the shirt followed by the side seams. This will leave you with two square pieces once you unfold the shirt.
Using a nylon elastic thread, you’re going to sew continuous horizontal lines into the back part of your shirt, starting at the top, and working your way all the way down to the hip area of the dress.
Take the sleeves that you cut off at the beginning and put them together so that they are facing the same direction. Then take your scissors and cut off the tops and sides so that you’re left with squares.
Take the side of the shirt that you cut off earlier and fold it in half lengthwise. Then line it up next to the squares you just cut out of your sleeves. Now cut the side fabric into another square, using the sleeve squares as guidance for the width.
Put together the larger and smaller squares and overlock them to create your sleeves. Then you’re going to sew a 1 cm seam allowance to hide the overlocking. You’re going to do this on both the top and bottom edges of the sleeve, and I recommend using nylon elastic thread for this.
Take your dress and sew down the side seams, removing your pins as you go. You’ll be doing this on both sides with a 1 cm seam allowance. After you've done that, overlock the seams so that all the raw edges are sealed off. Do this on both sides.
Fold down the top seam and sew with a 1 cm seam allowance to close over all the overlocked edges. I recommend using a nylon elastic thread for this so that the top can be stretchier and easier to put on. Then sew the bottom of the hem with a 3.5 cm seam allowance. For the bottom hem use regular thread.
Once you’ve finished sewing closed your seams, you’re going to add your sleeves into place by sewing across at 5 cm on both sides.
Take the collar that you removed earlier and fold it over 1 cm from the ends. Then sew that closed so that there are no open seams.
Feed the sewn collar through the hole at the top of the shirt and tie it into a double knot, creating a bowtie look.
And we’re done! Guys, I love this dress! It’s so adorable and super flattering, too! I love the elastic look on top and the more flowy look on the bottom. The off-the-shoulder look along with the bowtie really brings it all together. I’m so satisfied with how this project turned out, and I would absolutely love to see your versions! So drop them in the comments and let me know how you enjoyed this project!
Enjoyed the project?
Suggested materials:
- Button-down shirt
- Clippers
- Sicssors
- Sewing pins
- Nylon elastic thread
- Sewing machine
The author may collect a small share of sales from the links on this page.


Comments
Join the conversation
Wow! What a great idea looks like a perfect fit too. Thanks for sharing!
Awesome!!! I Love It!!!