How to Put a Spin on a Classic Manicure Using a Fun French Tip Hack

Today, I’m going to be showing you how to put a spin on a classic manicure with this fun French tip hack. If you’ve been looking for a tutorial on how to do a good french tip, look no further. Let’s get started!
Tools and materials:
- Base coat
- Glossy or matte top coat
- Colored gel polish
- Aluminum foil
- Nail art brush
- UV lamp
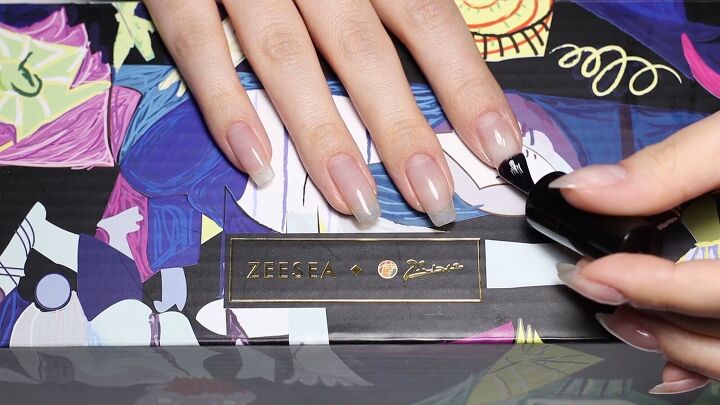
1. Apply a base coat
Make sure that your nails are oil and moisture-free and then apply a thin layer of the base coat. Cure for 30 seconds under a UV LED lamp.
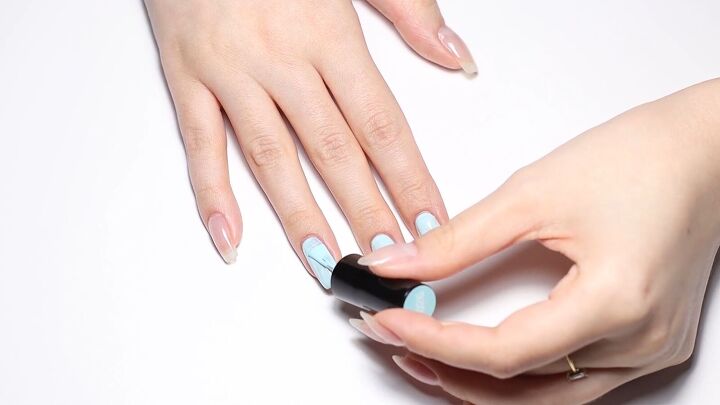
2. Apply a layer of colored polish
Apply an even layer of your nail polish that’s your main color and covers your entire nail. Then cure for 30 seconds under a UV LED lamp.
At this point, your nails will be sticky and that’s completely normal. They’re supposed to be tacky after every coat, as this helps stick the layers together.
This nail polish is also a gel polish, so it is slightly self-leveling, which means it creates an even surface without any brush marks so your nails are perfectly smooth and have a flawless look.
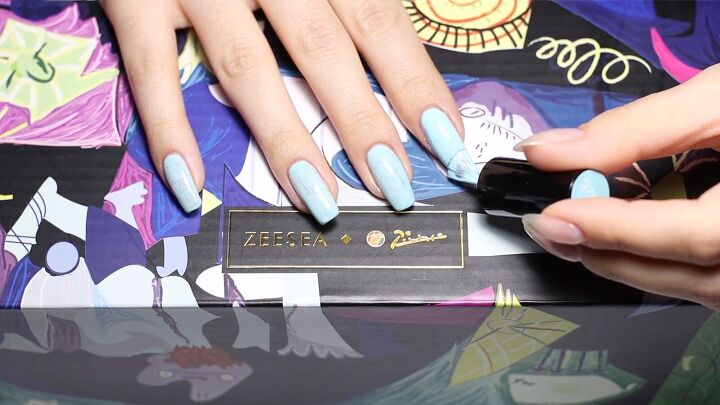
3. Apply a second layer of colored polish
After initial curing, apply the same color of nail polish over your nails again. This can help clear up any patchy spots. Then cure for 30 seconds under a UV lamp.
Remember that curing time can vary depending on the power and type of light you’re using, so always be sure to check your results before adding a new layer of polish.
Apply very thin and even coats. Avoid applying uneven coats and flooding the cuticle or sides of the nails.
Applying gel polish with thick coats can lead to air bubbles forming as it will take a lot longer for the gel polish to cure. That’s why I’m using two even coats to apply our base color and get the desired pigmentation.
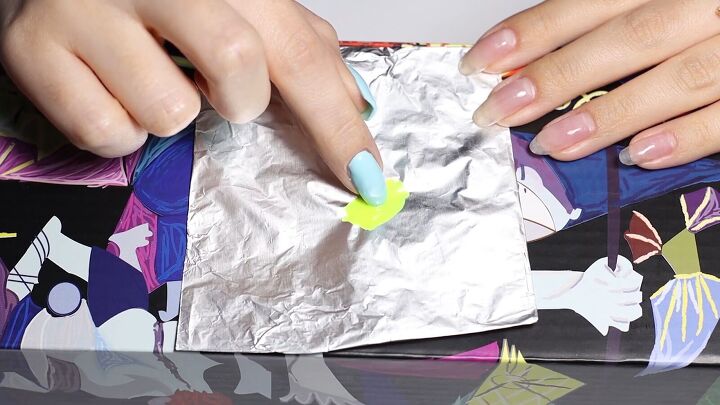
4. Create the French tip
Apply your second color of gel polish onto a surface - I’m using aluminum foil. Dip each nail into the color to create a thin, French line. Move your nail around as needed to get the desired shape.
This French tip hack works best on a square-shaped nail.
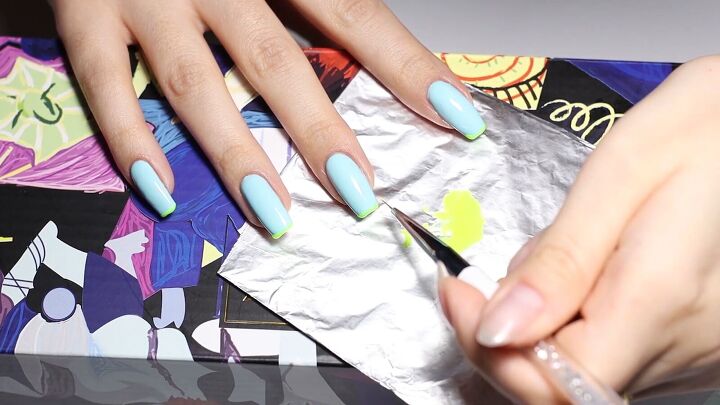
You can perfect the lines with a nail art brush. Once the lines are how you want them, cure for 30 seconds under a UV LED lamp.
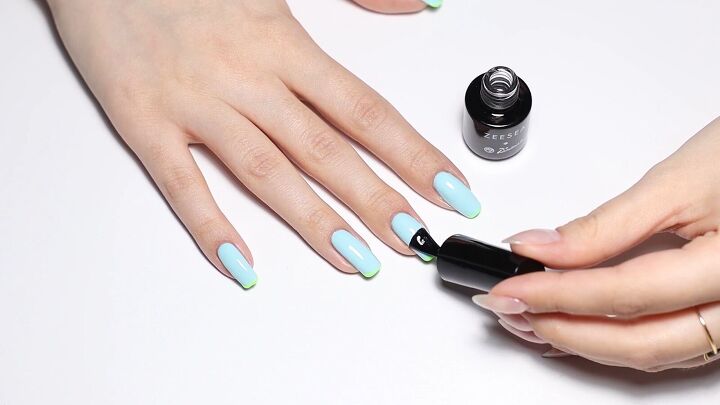
5. Apply a top coat
After curing, apply a glossy top coat. This time cure for 60 seconds under a UV LED lamp.
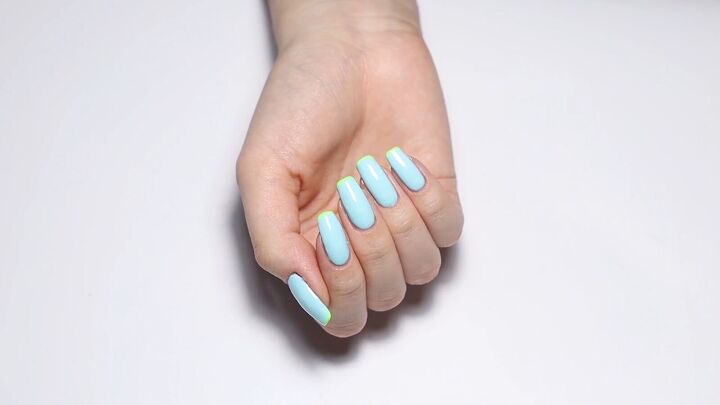
Here’s the finished French tip nail art!
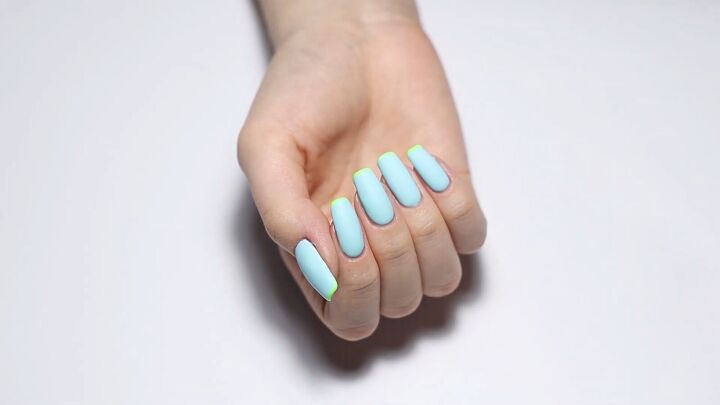
Here’s what they look like with a matte top coat.
French tip hack tutorial
Now you know how to do French tips at home quickly and easily. If you do this French tip hack correctly, these nails can last up 3 weeks. Let me know down below if you prefer the matte or glossy version.
Products used:
ZEESEA Picasso Art Collection Gel Polish
The author may collect a small share of sales from the links on this page.


Comments
Join the conversation
I will try this .
I don't understand what tin foil has to do with it but when you can use anything?