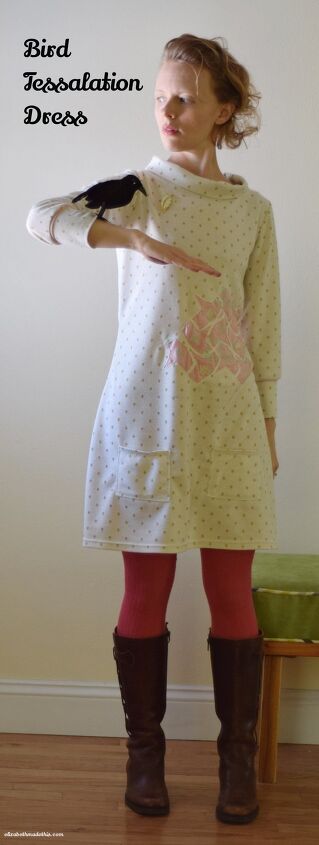
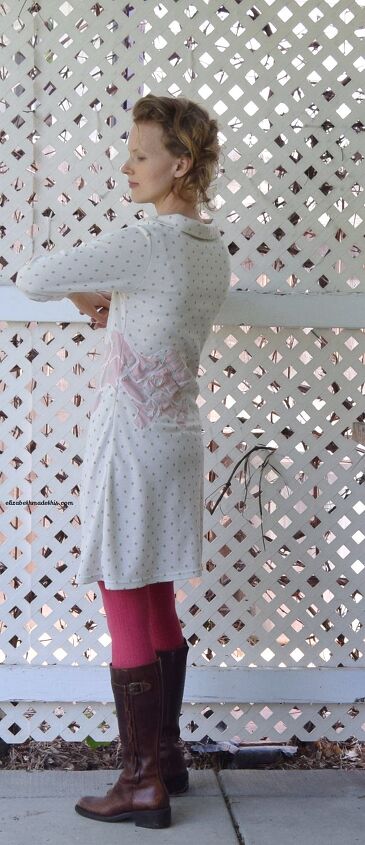
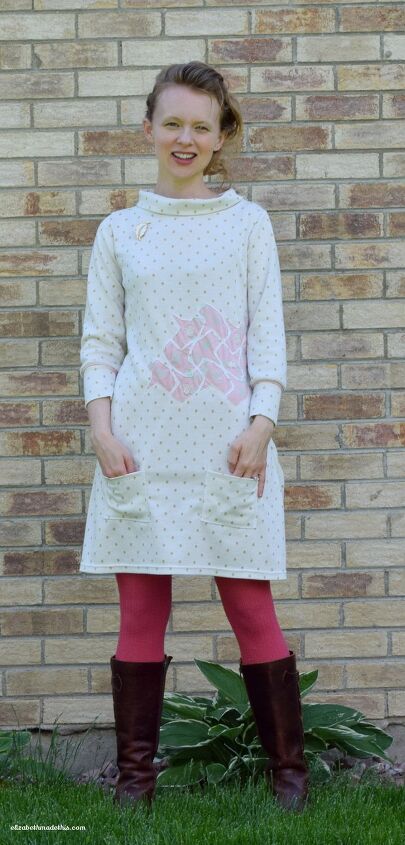
Bird Tessalation Dress
Have you completed a sewing dare? How has it gone? Did you learn anything new?
My sewing dare is done! Gillian dared me to take on incorporating reverse applique into one of my garments. I present to you my:
Bird Tessalation Dress
I knew right away that I wanted to do something with Tilly and the Button’s Coco Dress. I bought the pattern in December and really meant to get around to it all winter, but was never really got around to it. I even had this lovely gold polka dot ponte fabric ready to go, but it just didn’t seem very interesting. At the end of the day, it just seemed like it was going to be a neutral dress with no pizazz. I really wanted to do this pattern justice, so I began to think of ways to add something to the polka dots.
I missed the boat with the Monthly Stitch Collective’s Put a Bird On It Theme last month, which I lamented as I saw Andie’s very fun bomber jacket. I decided to make up for my latent creativity by putting a bird on my Coco in some way.
In thinking about birds, I got stuck thinking about the work of M.C. Escher, namely this tessalation:
M.C. Escher, Two Birds, 1938
The last time I explored tessalations was in the self portrait I did in my 8th grade art class.
I backed it with a tessalation which I now think of as a cross between a ninja star and ponies. Nothing like a pony ninja starred background to go with the classic junior high eyebrow raise.
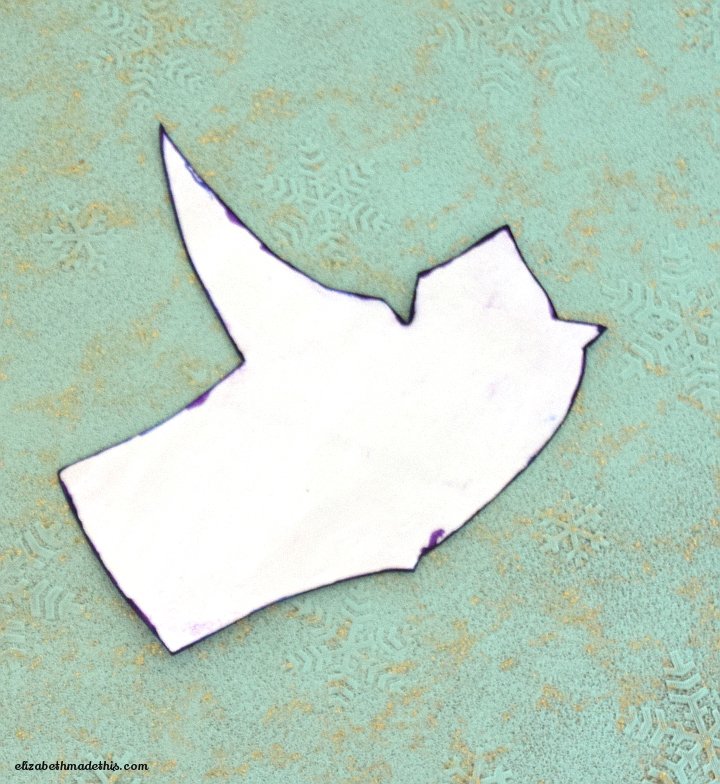
I quickly made up a bird tessalation piece with a post it and sketched it out on paper before experimenting with it on a scrap of my dress fabric. I backed the sample with some peachy pink jersey, then traced the tessalation with a washable marker.
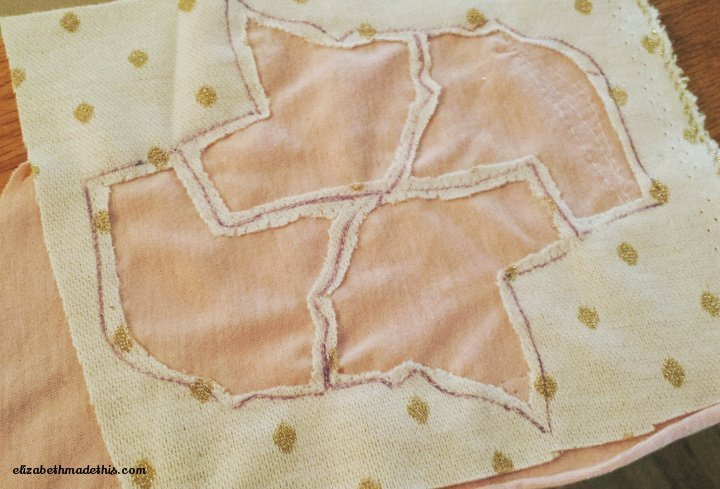
After stitching around my tessalation lines, I cut out the interior of each bird, leaving a scant 1/4″ around each stitched line. To keep everything flat, I stitched back over the cut borders as close to each edge as I could.
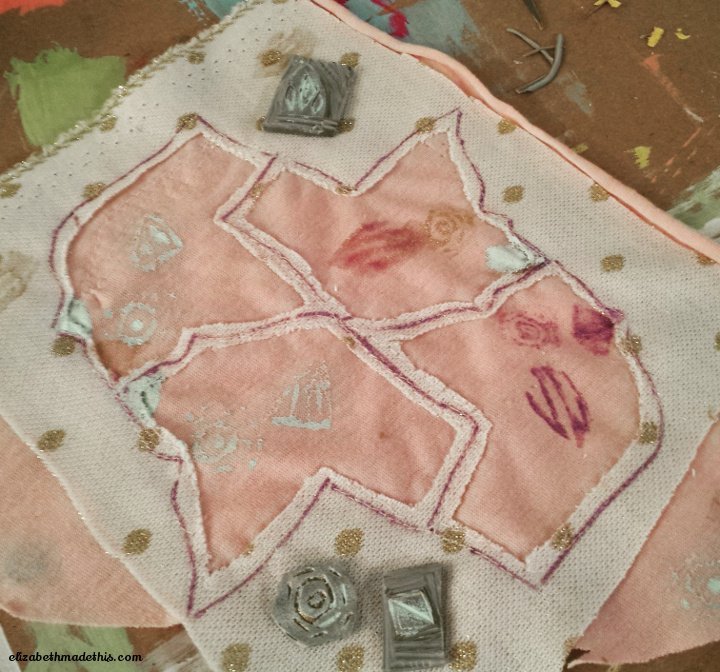
I carved some lino stamps and balsa stamps to print some extra details to make the birds more birdlike, but I couldn’t get a clear impression on the soft jersey without using a marker (I had no fabric marker on hand), so I chose to handpaint the bird details when the time came.
The Coco came together very quickly. It’s a very simple pattern, perfect for a beginner and a fantastic canvas for lots of creativity. Other than the tessalation panel, I added a band of faux piping between the sleeves and the cuffs just for the hey of it. If I hadn’t gone through the applique process, a finished Coco would take about 30 minutes of sewing time. As it was, I made the dress up completely, leaving the left side seam only basted since I knew I wanted to wrap the tessalation panel from front to back.
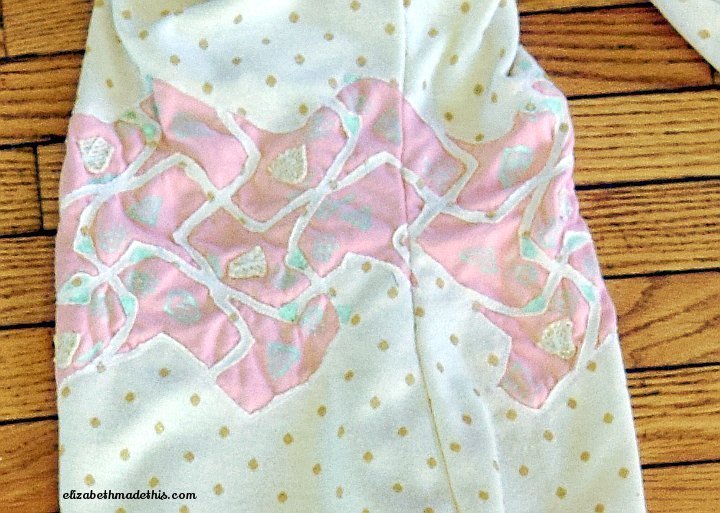
Then I traced out my birds and unpicked the basted seam so that I could work on the panel in the flat. I went through the same process as I did with my sample, but I added a layer of lightweight mesh knit under the jersey. On my sample, I noticed that the jersey kept getting sucked down into my machine when I was going back and stitching the cut edges. The mesh kept that from happening and it adds a little more opacity that would be lost by cutting away the polka dot fabric. I’ve backed applique with mesh before on knits to good effect on this Lace Cuff Tee.
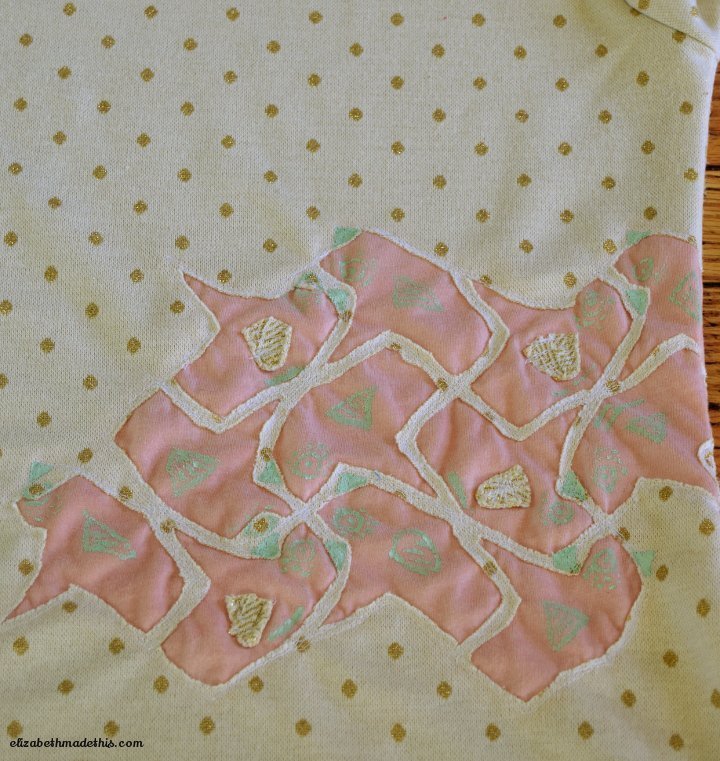
When everything was stitched, cut, and restitched, I hand painted bird details with some screenprint ink. I gave wings to some of the birds made from the selvage of the knit which had a crosshatch pattern on it that looked a little feathery.
After the paint had dried, I set about matching the bird details across the side seam, which took some effort. I’m pleased with how it worked out, and I’m glad to see that the birds fly cohesively as a flock from front to back.
From start to finish, this was a fun sew. I really really enjoy adding details to patterns not only to “make them my own,” but because I like trying out different techniques and seeing just what I can do with the materials that I have around me.
I’m loving this Coco, and the birds, though perhaps I’ll avoid Bodega Bay.
My Coco review is here.
The author may collect a small share of sales from the links on this page.


Comments
Join the conversation