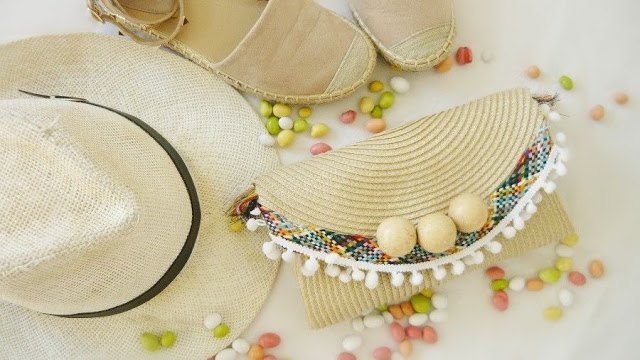
DIY Placemat Summer Straw Clutch Bag
3 Materials
$10
1 Hour
Easy
Todays DIY is one of the best ideas out there! Yes, you heard me! Maybe Even The Best! Why, you`ll ask? Because we are making a beautiful summer straw clutch / bag (you can made it with or without the strap)! This DIY is easy, quick and oh - so cheap because it`s made out of the ordinary placement from your kitchen!! Basically, if you already have the placement and some cute fringes and trimmings, it`s free!
What you need:
- straw placemat,
- glue gun or needle and thread,
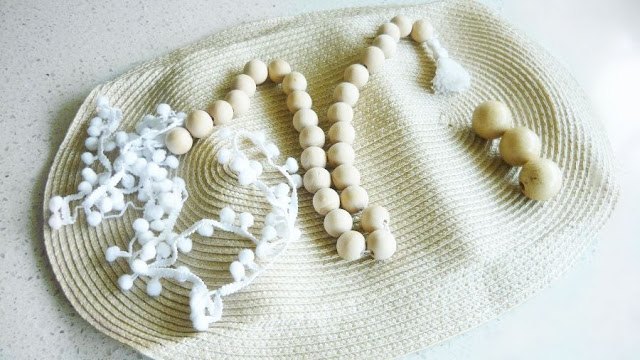
- wooden beads,
- fringes and trimmings.
Instructions:
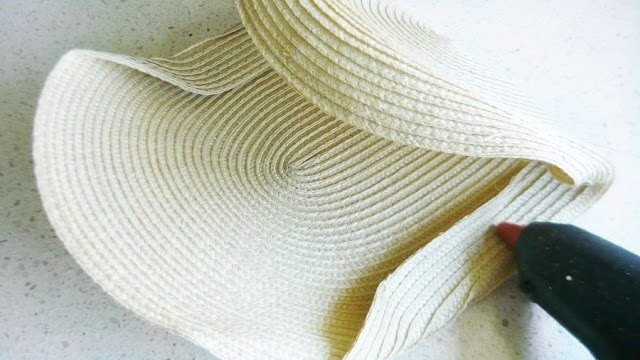
1.Fold in the sides of the placemat and clip down with clothes pins or bull clips.
2. Squeeze a good amount of hot glue in the lower part of left and right corners or saw with a heavy duty thread. I decide to saw mine, just because I think this will make my clutch sturdier.
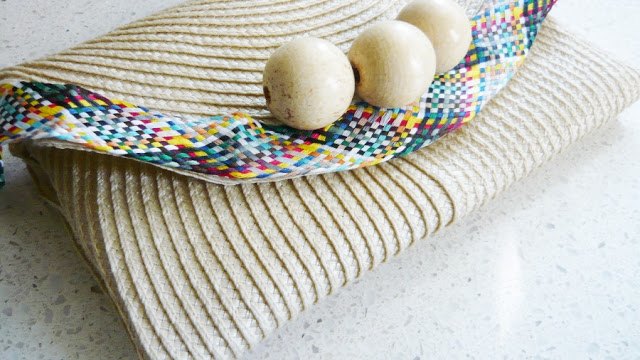
3. When both sides are glued down (or sawn), fold up the bottom of the placemat as shown;
For the compleat tutorial and
What you need:
- straw placemat,
- glue gun or needle and thread,
- wooden beads,
- fringes and trimmings.
Instructions:
Fold in the sides of the placemat and clip down with clothes pins or bull clips.
Squeeze a good amount of hot glue in the lower part of left and right corners or saw with a heavy duty thread. I decide to saw mine, just because I think this will make my clutch sturdier.
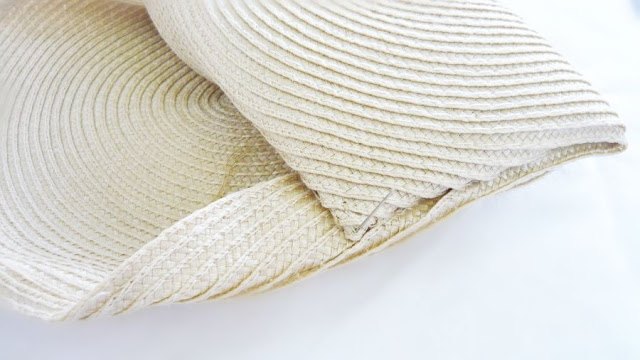
When both sides are glued down (or sawn), fold up the bottom of the placemat as shown;
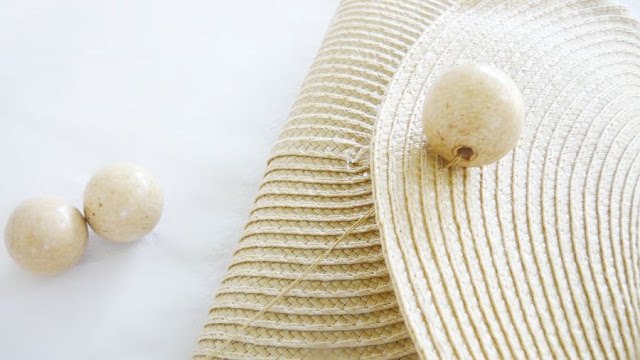
Saw the wooden beads on the top flap - first the center one, then left and right one;
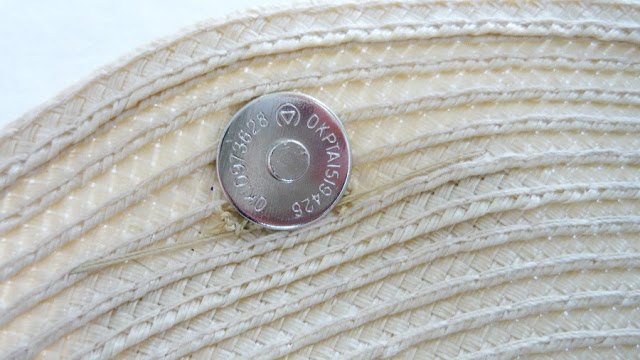
Add the magnetic snaps and secure then into place. You just need to push the clasp portion of the snap through the placemat and pinch them into place. Tip: To easily find the right spot for the lower part of snap, add it on the upper part, close the flap, mark the spot and push it in place.
Now on the fun part - decorating. Use your cute fringes and trimmings to dress up your bag. I hot glued colorful on top, white with a pom poms underneath the top flap and added another on top.
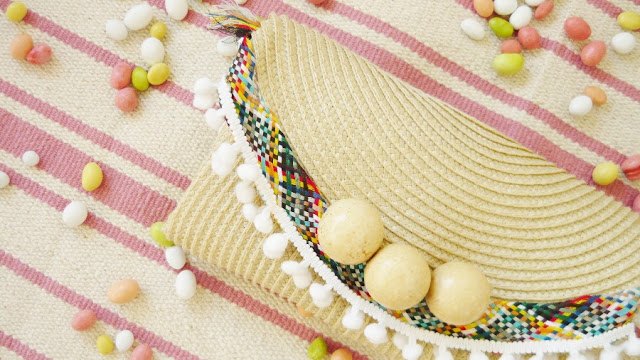
And that`s it! Your beautiful, unique summer straw clutch bag is finished. Now you can style it with your favorite hat, shoes and clothing. For more photos and details, visit the blog!
Resources for this project:


Any price and availability information displayed on [relevant Amazon Site(s), as applicable] at the time of purchase will apply to the purchase of this product.
Hometalk may collect a small share of sales from the links on this page.More info
The author may collect a small share of sales from the links on this page.

Want more details about this and other fashion and style ideas? Check out more here!


Comments
Join the conversation
Wonderful project! We did something similar that were all the DIY rage in the 70's. I bet I still have one in a box in the garage. What's old is new again. Your clutch turned out beautifully! Thinking I might make one again. Thanks for sharing!
Love the idea. I think you mean sew.