DIY Wedding Guest Dress
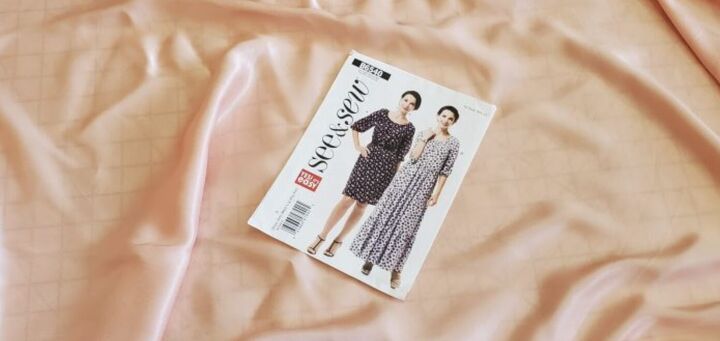
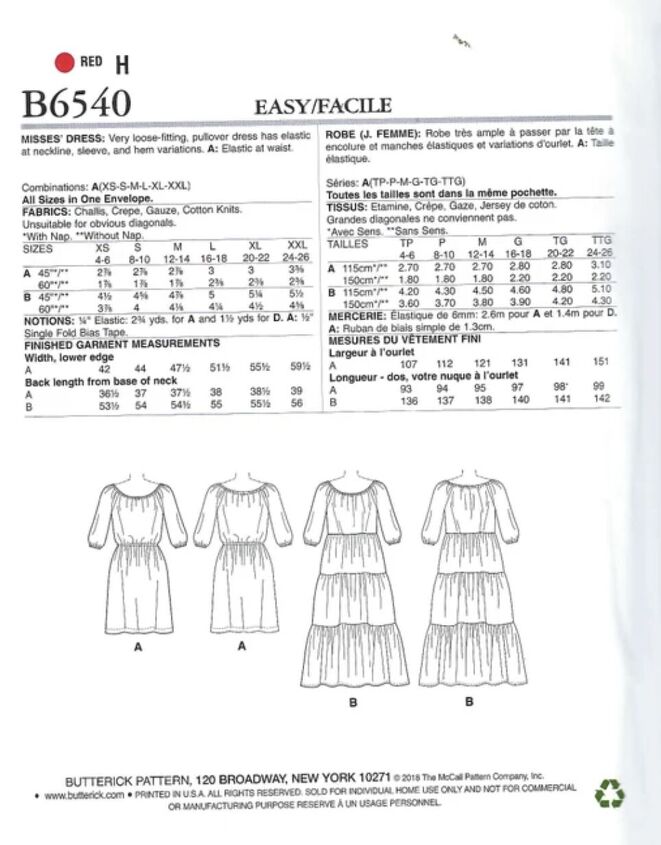
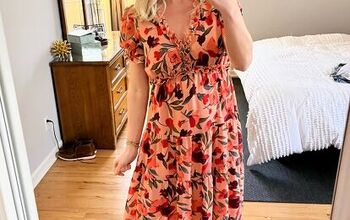
Wedding and special event season is here for sure! After a long hiatus from “dressing up,” however, my wardrobe needed some help! When online and thrift shopping let me down, I was determined to SEW my own dress for an upcoming family wedding reception! (Think I’m crazy?!) I decided to keep things simple by starting with an easy pattern for a simple peasant dress I’ve made before. Of course, I immediately complicated the whole process by choosing a difficult fabric to work with… Lol! The good news is that I did indeed finish my dress in time for the reception! I even found the perfect thrifted and gifted accessories to make the finished look totally budget-friendly!! Here is the pattern and fabric I started with!
The beautiful weather really made the day!!
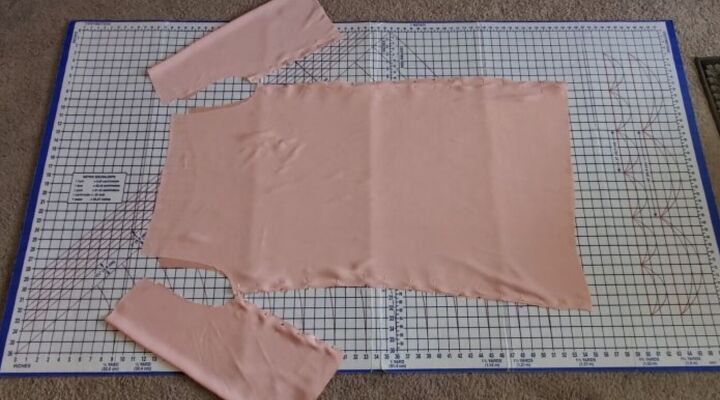
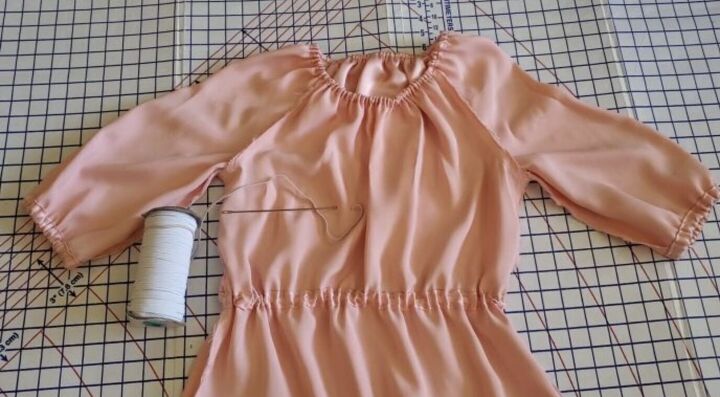
I purchased the peach-colored, satiny material as a remnant. (I believe it’s polyester?) I had never worked with shiny fabric like this, and I anticipated that it could pose a challenge… Well, turns out I was right! lol! The fabric was slippery and drapey. While it didn’t stretch, it certainly didn’t stay where I wanted it! After cutting the pieces out, I realized that the front and back bodice pieces were not symmetrical!! I tried to trim the pieces to fix the most obvious issues… I also cut out some thin (somewhat uneven) strips of fabric to make the elastic casings at the neck and waist. (I could have used bias tape for this, but I was afraid that would be too stiff with the light fabric.) Even this first step of cutting out the fabric was challenging- yikes!

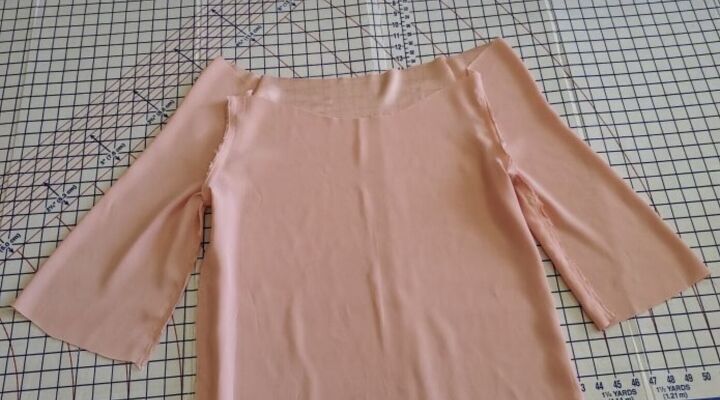
I then pinned the sleeves into tubes and pinned the front of the dress to the back of the dress. (Pins did NOT like to stay in this fabric, btw!) My sewing machine didn’t particularly like the fabric either… I had serious issues with skipped stitches, which I think was partially due to a dull needle and tension problems. (I have SO much to learn… ) But once I switched to a sharper, thin needle, the skipped stitched were reduced.
Sleeves are attached! To keep the super frayable fabric in check, I did a zigzag stitch over all the raw edges as a kind of fake serging. It didn’t look pretty, but it mostly did the job.
With this pattern, I like adding bias tape around the neckline to make a casing for the elastic. (The pattern directs you to roll a narrow tube from the dress fabric, which I think makes the under-arm seam too high.) This process is normally straightforward, but not so with this fabric! Each step took at least twice as long as it has in the past. (Uh boy) I was thankful for the bais tape clips which helped hold the homemade bias tape to the dress. Sewing was a slow process, but we finally got the tube sewn and elastic inserted! (Don’t worry- I show all these steps in detail in the video!) For the sleeves, I simply rolled a wide hem at the cuff and inserted elastic.

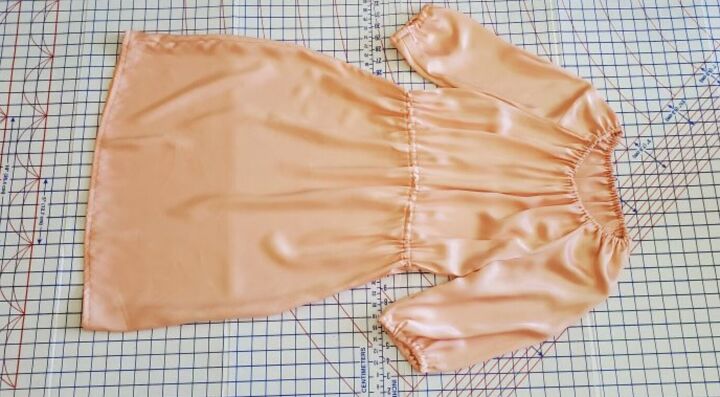
Next came the fuuuun process of adding a piece of bias tape around the waist to make a casing for the elastic there. I eventually gave up trying to make this waistband perfectly straight, as it just wasn’t happening. I did, however, discover a helpful tool for this job- a cutting board! I put the board inside the dress at the waistline to give me something to pin against!

After pinning, sewing, and elastic inserting, we had a waistband at last. The final, terrifying job was attempted to even up the hem before sewing it. Thank the Lord, I finally got an even-ish hem before making the dress too short…. Phew!
And finally, the dress was complete! I definitely had to put away my perfectionism for this project, but in the end, I was relieved to see a finished dress! 🙂 (Just don’t look too closely at the seams! lol)
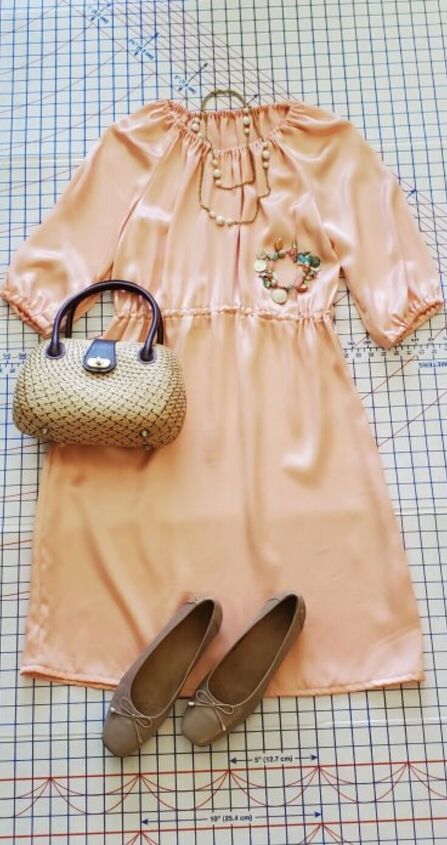
I then raided my closet for a thrifted purse, vintage necklace, and gifted bracelet to bring the outfit together! My sale-priced Clarks shoes kept the gold theme going. (My aunt later loaned me a cool, vintage belt which was just right!)
Admittedly, this dress was a pain in the booty to make, but I felt really good wearing the results! You can catch the whole adventure in this video! 🙂

BIG THANKS to my family for loaning me their photography skills, their backyard, an orchid for my hair, the perfect belt, AND their boat! Congrats to L and A! 🙂 Love to all you guys, and thanks for a great day!!!
The author may collect a small share of sales from the links on this page.


Comments
Join the conversation
Great job