How to Sew Women's Winter Dress (with Lining) LUCKY YOU

This pattern was on my mind for some time and only recently I finally got a chance to construct it. For today I’ve prepared a pattern for women's winter dress and related photo instructions. You can also use this pattern to sew a classic version of the dress: How to sew women’s autumn dress LUCKY YOU. Today’s article is about the version with lining. You can choose different materials to sew different types of dresses.
The pattern
You can get this pattern for women’s dress here:
The pattern for women’s dress LUCKY YOU
Recommended material
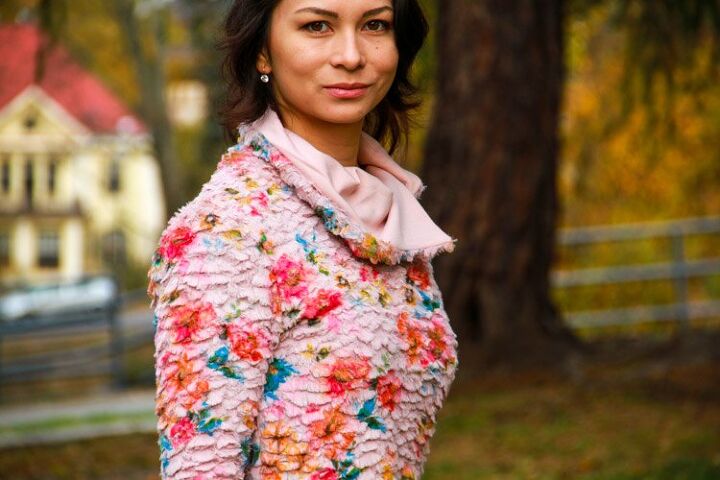
I bought my beautiful faux fur fabric at Dumlatek.cz:
- Faux fur with floral motif
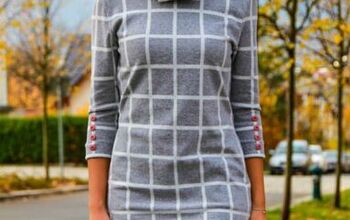
- Thinner sweater knit – checkered
This pattern is designed for elastic fabrics of medium thickness. You can use:
- elastic fleece
- suede knits (Nicky velour)
- sweater knits
- elastic laid in knit (make sure it really is elastic - some combed laid-in knits aren’t)
- monochromatic laid-in knit s
- laid-in knits with prints
- elastic faux fur (it’s a good idea to ask sellers if the fabric is elastic or not when shopping online - sometimes you won’t be able to find out based on description and composition alone)
- it’s also possible to use warmkeeper (alpenfleece)
You will also need fabric for the lining. You can use elastic or thin knit. It depends on whether you want to make your dress warmer (use knit) or just give it a nice inner layer (use lining fabric).
You can (but you do not have to) put buttons in the collar. I’ve used four 2 cm (3/4") wide buttons. Sleeves can be decorated with smaller buttons (purely decorative). I recommend using eight 1.5 cm (5/8") wide buttons.
You can also add thinner shoulder pads to your dress (a great idea if you are sewing with stiffer fabrics).
You will also need a one-sided fusible facing to reinforce the collar and pockets. I didn’t use shoulder pads, because my faux fur is quite heavy (so it does not protrude over my shoulders) and I did not want the dress to look too formal. Quite the opposite.
Sewing instructions
Pattern layout
Primary fabric:
- 1x front piece (cut on the fold)
- 1x back piece (cut on the fold)
- 2x sleeve piece (I recommend adding 1 cm (0.4") to both sides of the top fabric sleeve in the bottom hem area so that there is enough space for the lining.)
- 1x bottom collar
- 2x pocket piece with an opening (pockets optional)
My tip:
I like to use 4 whole pocket pieces (not 2 whole and 2 with openings). This way I can sew the pocket piece to the front piece and cut out the pocket openings (from the pocket piece and front piece) at the same time.
Secondary fabric:
- 2x sleeve cuff
- 1x bottom hem (cut on the fold)
- 1x upper collar
- 2x whole pocket piece (pockets optional)
Lining fabric:
- 1x front bodice piece (cut on the fold)
- 1x back piece (cut on the fold)
- 2x sleeve piece
Sewing
Suggestion:
I used an overlock and a regular sewing machine to sew this dress. But you can get great results with just a regular sewing machine. Here are some tips for you:
Sewing elastic fabrics with a regular sewing machine – 4 steps to success
Torso & Sleeves
Note:
I sewed this dress without pockets because I didn't want to disrupt the beautiful structure of the fabric. Check out my second article about this pattern if you need help with the pockets:
How to sew women’s autumn dress
Start by sewing the shoulder seams and cleaning the seam allowances. Next, you need to pin the sleeves to the open armholes. You might need to easestitch the sleeves a bit. You can use the classic method - done with two long parallel stitches - or the double-threaded needle method. But the difference in circumferences (armhole/sleeve) is small, so you might be able to pin the pieces together without easestitching (depends on the fabric used).
Don’t forget that you need to easestitch the sleeves only around their tops (not in the armpit area) if you decide to easestitch your sleeves.
Sew the sleeves to the torso and clean the seam allowances.
This is what the easestitched sleeve looks like - you can see how it’s shaped nicely around the top.
This is the face side view. I always recommend checking the sleeves right after you sew them. Fixing any mistakes later will involve a lot of unnecessary seam ripping.
Next, pin the side seams and sleeve seams and sew each side of the dress in one go. Work on the lining in the same way.
Now turn the lining face side in and insert it into your dress.
Pieces are now positioned "reverse side to reverse side".
Baste (temporarily stitch) the lining to the dress along the entire bottom hem...
...along the neck opening...
...and along the sleeve hems.
Collar
Now is the time to prepare the collar. Put your collar pieces together (top fabric piece & secondary fabric piece, face side to face side) and sew both shorter sides + one of the longer sides.
You are going to need to think a bit about this step when using some kind of “directional fabric” (directional print, pronounced grain, or faux fur in my case). The collar will eventually end up “upside-down” and you need to take this into account. The top fabric piece (bottom collar) is easy - just follow the directionality of the dress.
The secondary fabric piece (upper collar) now needs to be rotated 180° (its direction will be opposite to that of the top fabric piece) so that its print isn't upside down after you finally roll your collar over.
Cut off corners of the seam allowances near the already sewed longer side and turn the collar on the face side.
You can topstitch the collar if you want to. If you are going to do this, do not topstitch the last 2 centimeters (3/4") of the shorter sides.
I don’t recommend topstitching hairy fabrics like mine - hairs will get awkwardly tangled under the stitches.
Take your dress and mark the point where would you like your collar to cross itself. You can position this point in the middle of the dress or somewhere else. Avoid placing the crossing point too close to the centerline if you are going for the asymmetric layout. It might look like an error and not an intention. I’ve placed this point 15 centimeters (6") from the left shoulder seam.
Stat pining the bottom collar to the dress from the crossing point. Pin towards the left shoulder first...
...and continue along the entire circumference. Pin both layers of the collar (not just the bottom collar) on the first 5 centimeters (2") so you can pin the other end of the collar over this place.
Do not pin the last 2-3 centimeters (3/4 - 1 1/8") of the bottom collar at the other end.
Now sew the collar to the dress.
Don’t sew through the upper collar and the last 2 centimeters (3/4") of the bottom collar.
Take out the temporary stitching from the neck opening.
Fold 1 cm (0.4") of the cutting edge of the upper collar to the reverse side.
And pin the upper collar to the seam.
Also, fold 1 cm (0.4") of the loose corner and fold it over the upper collar.
You are going to sew the upper collar by hand. Use classic polyester thread. I recommend coating this thread with beeswax to prevent tangling. I also recommend double-threading the needle. You can get the beeswax in haberdasheries various arts & craft stores..
Use small flexible stitches to sew in the upper collar. You can use a back stitch, for example. I like the pearl stitch very much and I use it, for example, to sew the lining of luxury pieces. Sew through about 0.7 cm (0.28") of the lining, push the needle out and catch few threads of the upper collar at the same time and pull the thread through.
Start the next stitch where the thread exits the lining and continue around the entire neck opening.
This type of stitch is very strong and nearly invisible at the same time.
Sleeve cuffs & Bottom hem
Now you just need to sew the cuffs and bottom hem of the dress. You can use ready-made hem knits or some kind of very elastic knit for the cuffs. I’ve used Ponte Roma fabric leftovers from my other project.
Take care to sew the cuffs correctly - they are deliberately long, and you might be tempted to sew them shorter and wider, but you don’t want that.
Fold (roll) the cuffs in half (face side out).
Pin them to the sleeves (face side to face side) and sew them in. Pull out the temporary stitching.
Now sew the bottom hem of the dress. You are again sewing through the top fabric, lining, and hem at the same time. Don’t forget to pull out the stitching again.
Your dress is ready! Do you like it? If you have a moment, leave a comment about how you liked the pattern for this (sweatshirt)dress and today's sewing instructions below the article.
Have a nice day, Peťa
You can get this pattern for women’s dress here:
Don't forget to share your joy with others!
Do you like this article? If so, share it with your friends and tell me about it in the comments section below. I will be glad for any feedback! ♥
Enjoyed the project?
The author may collect a small share of sales from the links on this page.


Comments
Join the conversation