Shirr Delight: A Pale Yellow Summer Maxi
I love a shirred maxi dress and have owned several Ready To Wear versions, but nothing compares to making your own.

Creating the pattern for this shirred dress is not difficult but I have hesitated because trying to figure out the exact measurements seemed daunting. Then I found this shirred dress; EK Patterns took all of the guess work out of it. Once I found this sustainably sourced shear poly-blend vintage fabric I had everything I needed to create the perfect summer dress.

The pattern itself is a series of scaled rectangles. The pattern offers 3 variations: a midi shirred dress, a maxi dress and a maxi dress with a ruffle. I cut my bodice panel based on bustline measurements then added 10 cm to the length. I cut out the same size for the ruffle adding 5 cm to this length to keep it proportional. As the yellow fabric I was using for the bodice was very shear I cut two bodice pieces from a cotton shirting as well.
Before I started shirring I stitched a small roll hem on both the top and bottom of the cotton bodice pieces which provides a finished edge for the lining. I also created a roll hem at the top of the bodice pieces in the poly blend as well.
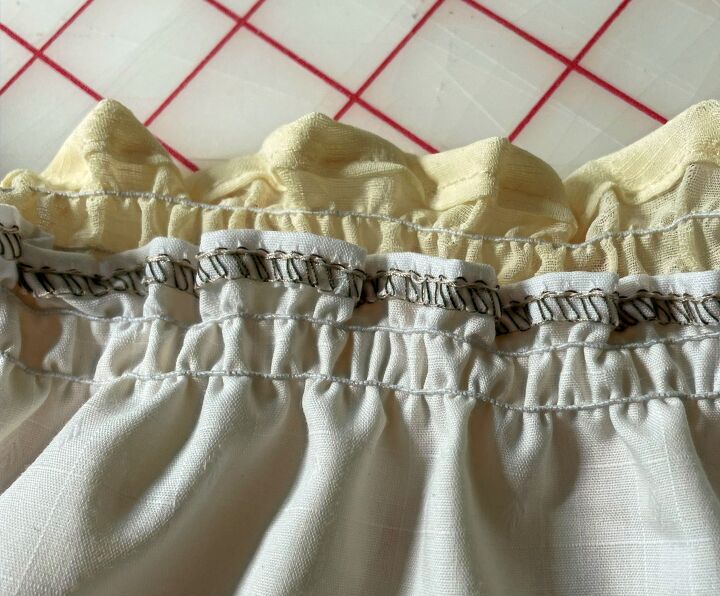
I stitched a row of shirring on the shear yellow fabric and used this as a guideline to pin the cotton lining to the bodice. I lined up the top of the cotton roll hem just below the shirring line, stretching the shirred fabric as I pinned the cotton lining in place. Don't be afraid to use lots of pins to secure it. Once the lining was pinned in place I started adding lines of shirring through both layers. Work slowly and unpin the cotton fabric as you stitch your first row. Once the first row is complete, simply add your shirring lines through both fabrics, stretching them out together and keeping them flat. This method worked really well and allowed me to shirr the entire front and back bodice with shirring lines that were stitched 1 cm apart.
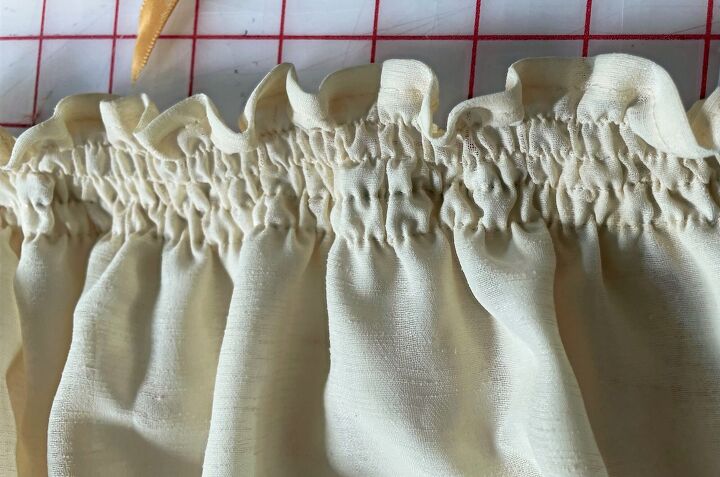
The pattern called for 13 rows of shirring, I doubled that. Based on my bust size and my stature I prefer to have a longer piece of shirring so that it ends well under my bustline and helps the dress to lie flatter across the midriff. Shirring is something that takes time, but it once you experiment with the tension on your machine so that you are creating evenly gathered stitches that aren't pulling or uneven, it is a fun technique to use. With this dress design you are using rectangular pieces, if you are using a pattern where the pattern pieces need to be cut and shaped make sure to shirr a piece of fabric first, then cut out the pattern piece from the shirred fabric. This will guarantee that you are using a more exactly sized pattern piece.

Once I had both the front and back bodice pieces shirred I added the side pockets to the left side of the dress.. I wanted the pocket to lie inside the lining so that it wouldn't be visible so I treated the dress fabric and the lining as one. The pocket piece was cut from the shear fabric only to keep it light weight. Once the two pocket pieces were attached I sewed up the side seam on the left hand side only. stitching around the pocket. I stitched the fabric and lining together into the side seam from the top of the dress to 3 inches below the pocket. AT that point, I pulled the lining to the side and only stitched the shear fabric, stitching the lining together on its own. This allowed the lining to hang more freely from the pocket down to the hemline. With he left side complete I wrapped the dress around my midriff and marked where the right hand side side seam needed to be. I ended up cutting away about 4" of shirring for a good fit. Once the dress was sized I added the right hand side pockets and stitched the side seams the same way as the other size. This technique worked really well and I am really pleased with the fit of the dress itself and the pockets. I stitched the side seams of the ruffle together and overlocked both the top and bottom to prevent too much fraying as I gathered it. When I attached the ruffle I stitched it only to the bodice of the dress allowing the lining to hang freely.

I am really pleased with how the dress has turned out. I took some risks with shirring the lining to the bodice and it worked out very well. I have already worn it several times and it has been fun to accessorize it in different ways, especially with some of my vintage accessories. It is a great layering piece under a jean jacket or a lightweight button up blouse tied at the waist. There are always lots of options and combined with the gorgeous flow of this dress you will always feel decadent and lovely.

To me, a shirred dress is a summer wardrobe staple that can be made in many fabrics and in many lengths. Enjoy the process as much as you enjoy wearing the dress.
After all.... there is Sew Much To Design,
Happy Shirring
Lou Sheffer
The author may collect a small share of sales from the links on this page.


Comments
Join the conversation