Create a Glam Eye Makeup Look Using This Easy "V" Technique

I’m going to show you an easy method for a glam eye makeup look. We’re going to make an outer V, inner V, and highlight the middle to create the most beautiful eyeshadow look.
This V technique creates a stunning look and you don’t even need a brush to blend.
Best brow defining pencil!
Tools and materials:
- Brow defining pencil
- Concealer
- 3 colors of cream eye shadow
- Gel eyeliner
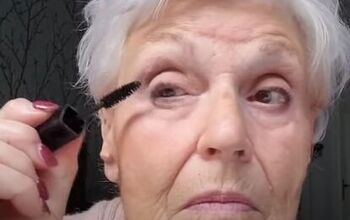
- Mascara
- Eyelash curler
- Lipstick
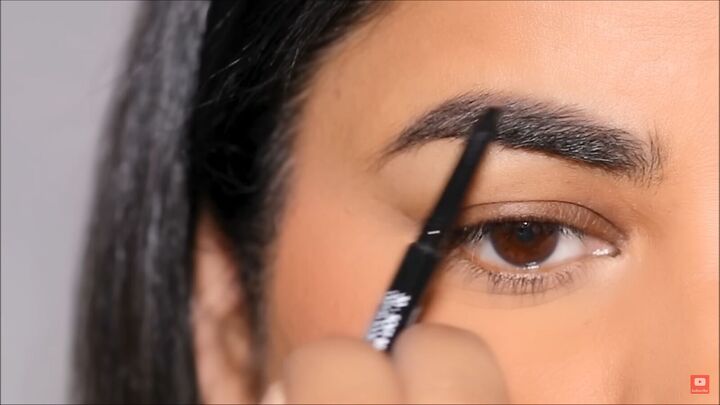
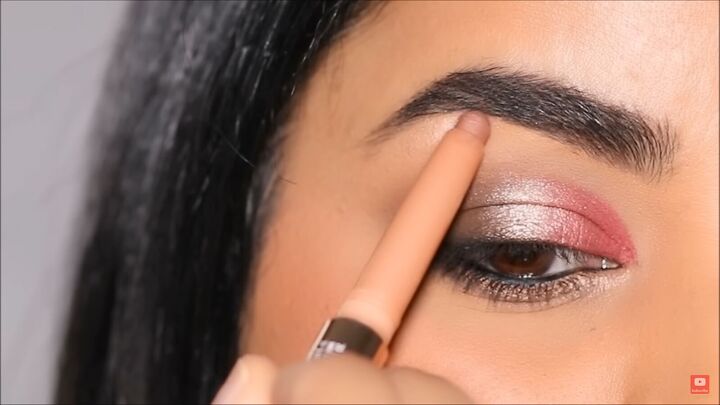
1. Start with the brow
Use a brow defining pencil. I’m using medium brown. You should use whatever color is right for you.
You only need to draw in the sparse areas. Start with the top portion on your brow and once you’re done you can brush the hair upwards.
I love brow pencils that have a micro tip. That makes it very easy to draw hair-like strokes that look very natural.
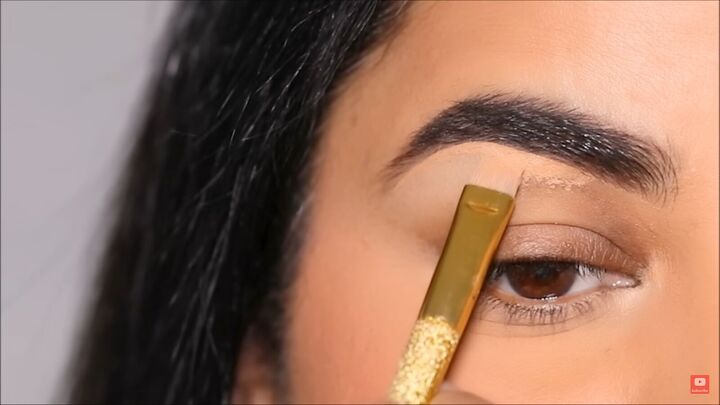
2. Clean up
To clean up underneath the brow use any kind of concealer you have. I am using a liquid concealer and brushing it on.
You’re not going to need to apply the concealer to your lid. I’m not applying anything to my lid because I’m going to be using cream eyeshadows.
I have found when you are using cream eyeshadows directly on your bare lid, they blend out better and they stay longer.
If you don’t have cream eyeshadow you can follow the same technique with press powder eye shadows as well.
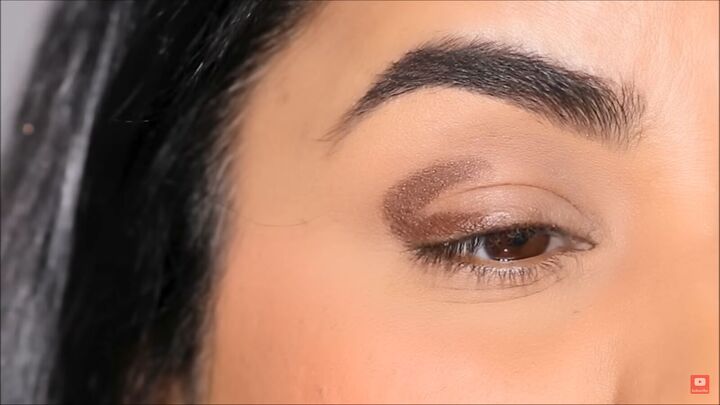
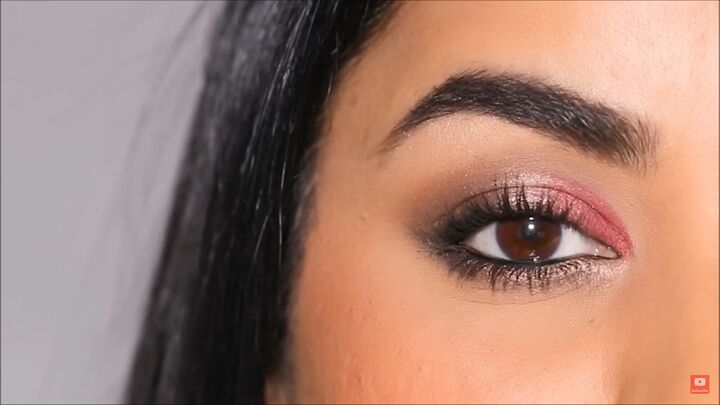
3. Draw an outer V
I’m going to use a brown eyeshadow to create the outer V.
Just draw a V in the outer corner of your eye using one color of your choice.
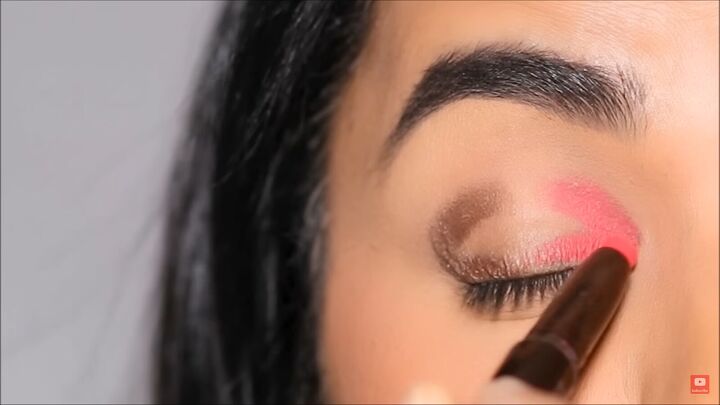
4. Draw the inner V
I’m using a magenta shade, but again, pick out whichever color you like and draw a V in the inner corner of your eye.
You can use the same eyeshadow in the outer and inner corner or use a different color. Use any color combination of your choice.
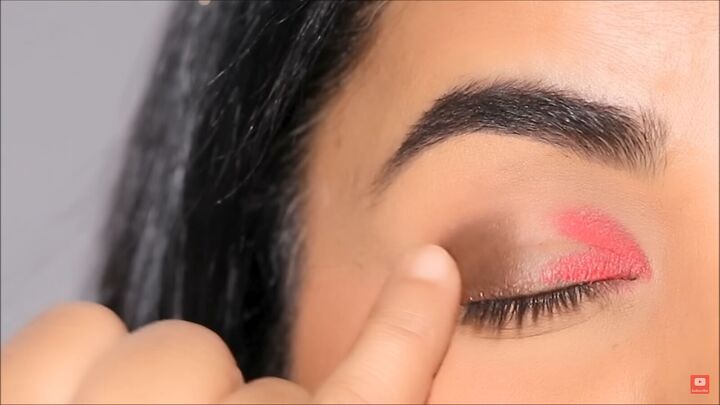
5. Blend
Now start blending with your finger, or a brush. Blend by pushing the eyeshadow towards the lid and the outer corner.
Soften the edges as well. Blend the inner corner as well towards the lid and the inner corner but this time don’t blend out the edges. That way it will look like a soft cut crease.
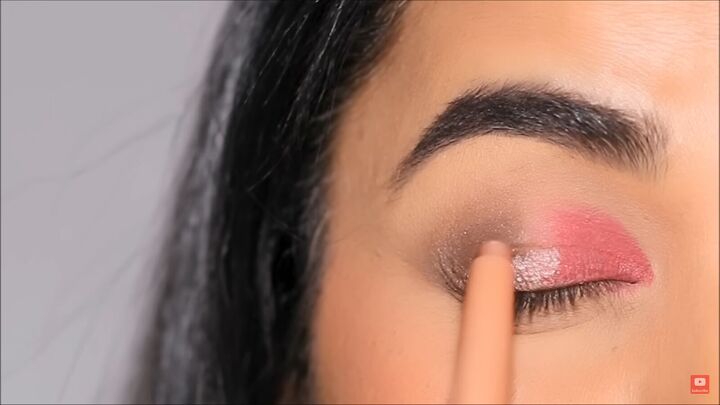
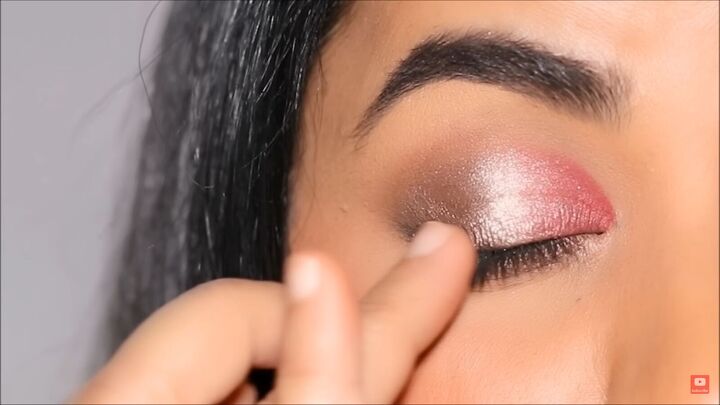
6. Add the highlight
For the gap in the center of the lid, you’re going to add a pop of highlight.
Apply it right to the center of the lid and blend it out with your finger or a brush.

How stunning does that look? You can apply a coat of mascara and be done, or you can finish up however you prefer.
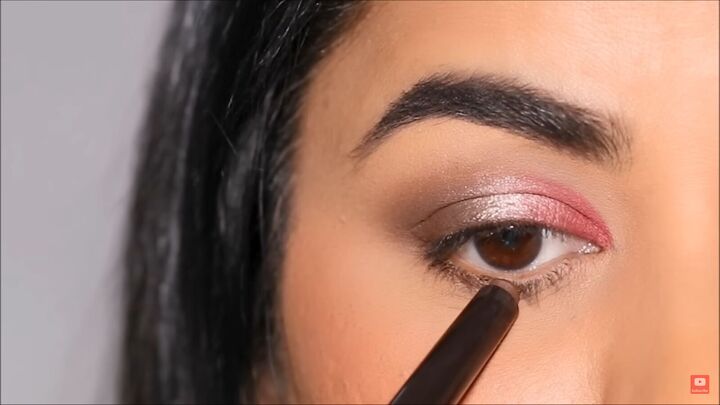
7. Additional liners and highlights
I’m applying some brown eyeliner to my lower lash line and smoking it out with my finger.
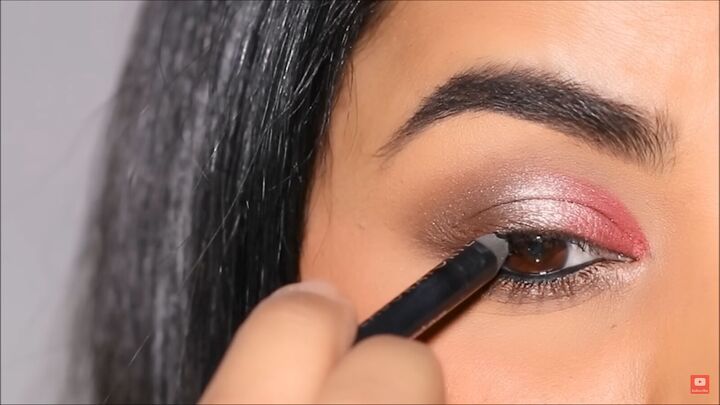
Then I’m using some gel coal eyeliner in my water line.
I’m also adding a light, sparkly color eyeliner to my lower lash line in the inner corner to create a beautiful highlight.
I also used the coal eyeliner very lightly in the outer corner of my lash line and smoked it out so it looks like a smoky ring.
Use the light sparkly eyeliner again to highlight the brow bones.
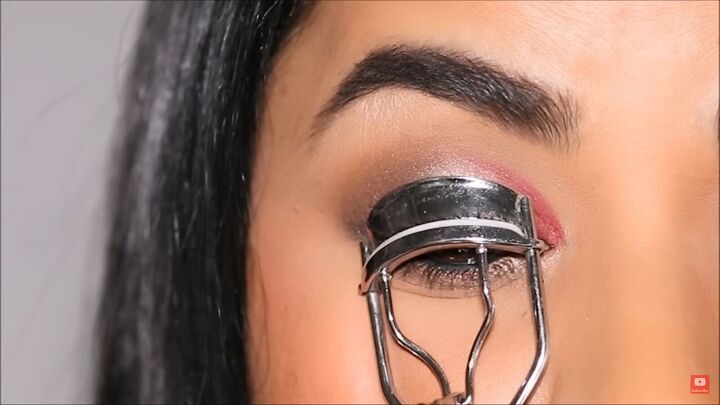
8. Finishing touches
Finish up by curling your lashes and add some mascara.

You can also add some lipstick. I’m using a color called charred rose.
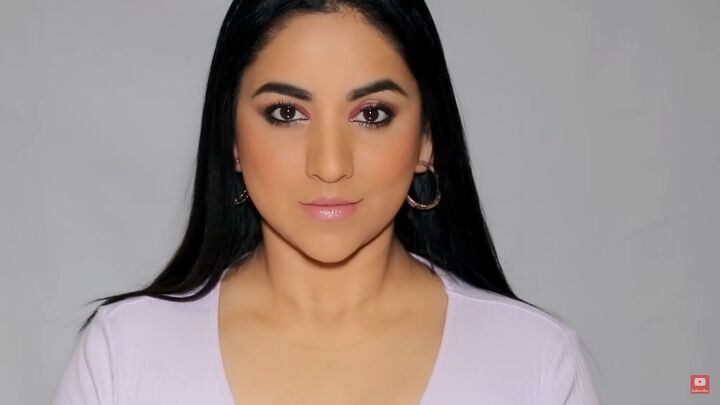
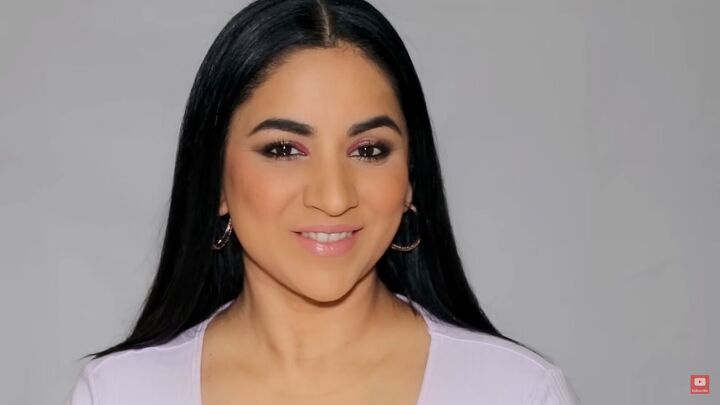
Glam eye makeup look
Here is the finished look. Would you try the V technique? Let me know in the comments section.
I absolutely love the way this turns out every single time. I’ve tried this with so many different combinations and they all look fantastic. I hope you enjoyed this tutorial!
For more makeup content, check out my post on 10 Super Easy Concealer Hacks for Flawless Makeup.
Products used:
- Make Up For Ever Aqua Resist Eyebrow Definer Pencil (medium brown) https://go.magik.ly/ml/1omna/
- MILANI Conceal + Perfect Longwear Concealer (warm beige) https://go.magik.ly/ml/1nq4o/
- Laura Mercier Caviar Stick Eye Colour (cocoa) https://go.magik.ly/ml/14kfw/
- Laura Mercier Caviar Stick Eye Colour (magenta) https://go.magik.ly/ml/14kfw/
- Laura Mercier Caviar Stick Eye Colour (wild rose) https://go.magik.ly/ml/14kfw/
- HAUS LABORATORIES by Lady Gaga: EYE-DENTIFY GEL KOHL EYELINER https://amzn.to/3TiwDsh
- ciate wonderwand mascara https://go.magik.ly/ml/1omnk/
- Tarte™ Maracuja Juicy Lip (Rose) https://go.magik.ly/ml/1omnm/
The author may collect a small share of sales from the links on this page.


Comments
Join the conversation
Thank you so much for you're hooded eye piece's I'm over 40 and just now getting to it LOL.. ty
You are so cute! Thanks for the tips.