Fun Fruit Keychains - Try This Hama Bead Idea!
Keep the kids entertained with this easy to make set of Fruit Keychains. What a fun Hama bead idea! Follow the pattern to make a Watermelon, Pineapple, Strawberry or Kiwi Fruit charm, which also make great gifts.
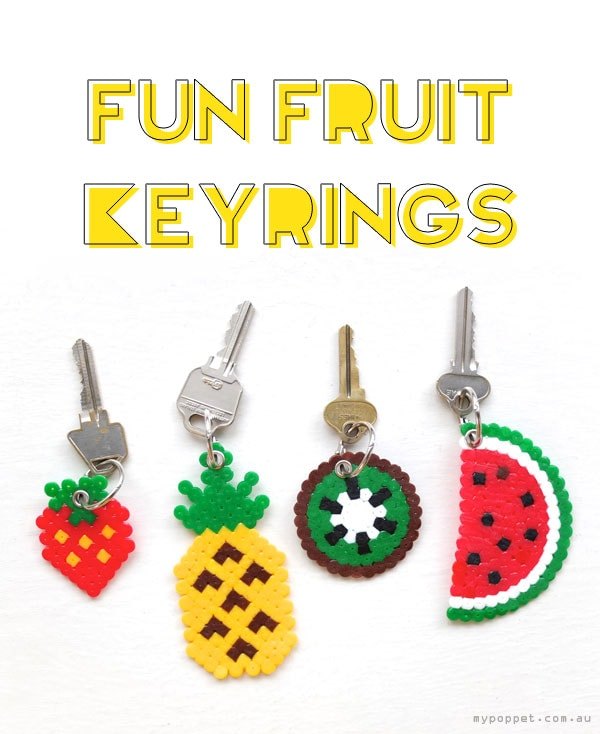
In the spirit of embracing all things summer I’ve designed these Fun Fruit Keyrings from Hama/Perler beads, they are easy to make, and make great stocking fillers and Kris Kringle (Secret Santa) gifts.
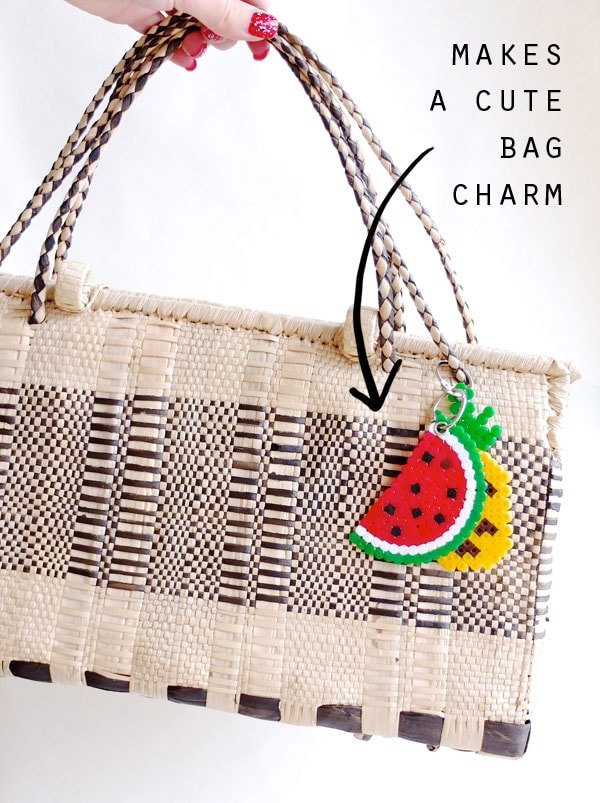
Use them as keyrings, or cute handbag charms. If you are embracing a summertime Christmas theme, why not add a hanging loop instead and use them as tree decorations.
I’ve included the patterns below, if your kids are old enough to play with beads, this would be a fun activity to do together, just make sure you do the ironing.
What are Hama beads?
I’m glad you asked.
Generically known as ‘fuse beads’, Hama Beads is the brand name of small colored plastic beads shaped like tubes.
The beads are placed one by one on a pegboard in assorted designs to make a picture, and then ironed until the beads melt are fused together. Other brands include Perler Beads and Pyssla beads (from IKEA). They are available at most craft stores, online and toy stores.
Hama beads tend to have a lower melting point than Perler beads, but as a general rule, you can mix and match brands of beads without problems.
You may also enjoy these Hama bead project ideas and patterns:
How to make Hama Bead Fruit Keychains
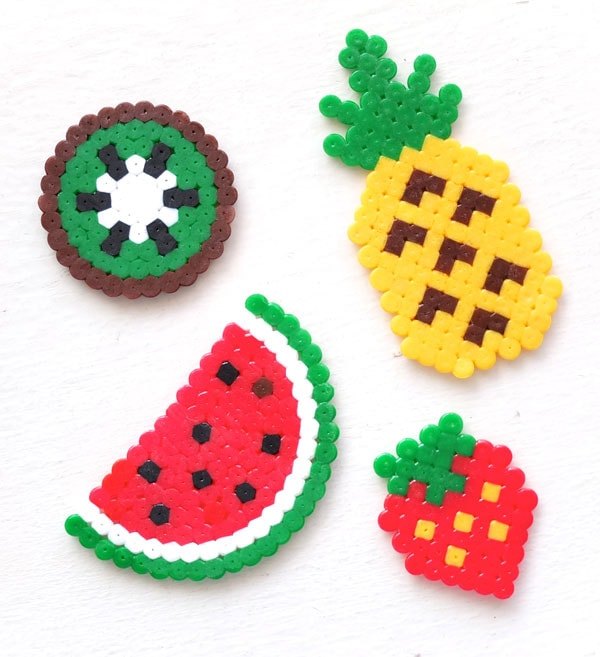
Looking for cute Hama bead ideas? Make these fun fruit key chains with my easy to follow patterns – I’ve got four fun Hama bead designs with a fruity twist – pineapple, watermelon, strawberry and kiwi fruit.
Make your favorite fruit bead designs by following the pattern and simply iron to fuse the beads permanently.
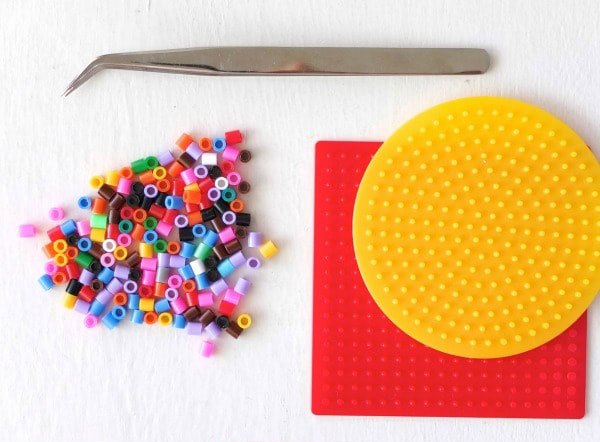
You will need:
- Hama (or Perler) beads in assorted colours including green, yellow, red, brown, white, black
- Square Hama pegboard (for strawberry and pineapple)
- Round Hama pegboard (for watermelon and kiwi)
- Tweezers (optional but useful)
- Silicone baking paper (ironing paper)
- Iron
- Heat proof surface
- Heavy book
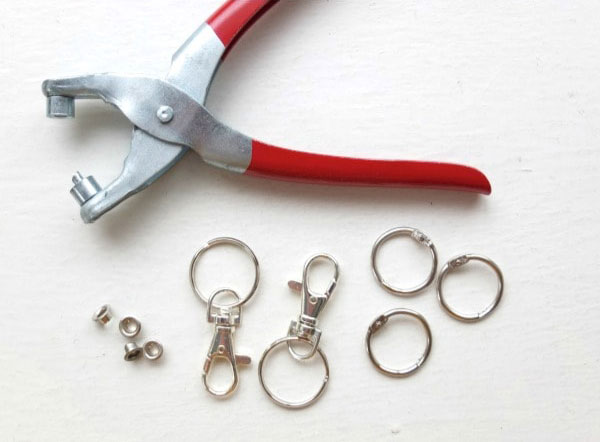
- Keyring findings/metal rings
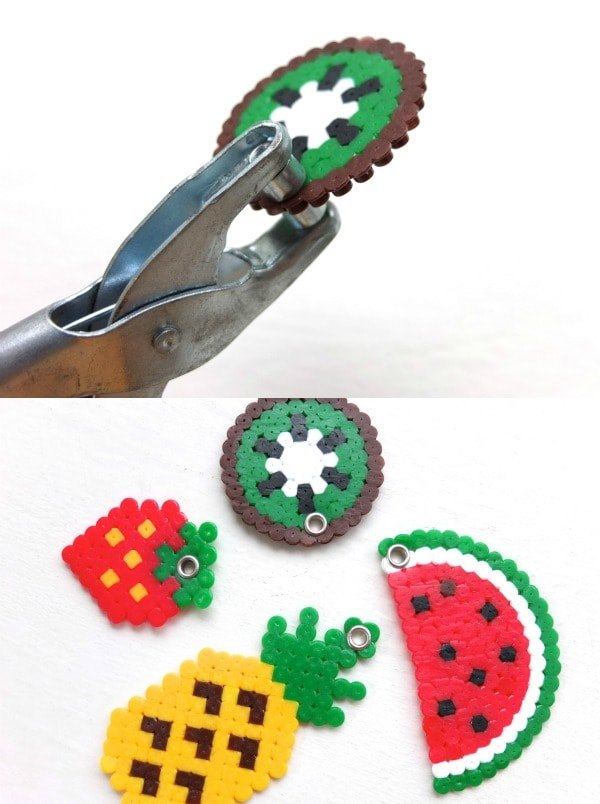
- Eyelet tool (or punch and hammer) and metal eyelets
How to:
1. Following the fruit pattern layouts (scroll down), place your beads, one by one onto the peg board. Tweezers help.
2. Place your non-stick ironing paper over your design. Apply the iron (no steam) for just a few seconds using smooth movements until the beads start to fuse, make sure the iron doesn’t touch the pegboard.
3. Leave your bead design to cool for a short time, then carefully remove it from the pegboard. Once you have removed the design from the board, the beads will be fused together on one side, flip the design and on a heat proof flat surface, iron the other side with the paper. This post has step by step pictures.
4. While still warm, place a heavy book on top of the fruit shapes to avoid the edges curling up as they cool.
5. With your eyelet tool, punch a hole in your fruit shapes, insert and affix the eyelet as per manufacturers instructions. You may need to cut away a little bit of the plastic to accommodate the eyelet.
(Some eyelets come with a punch that requires you to hammer them in, follow packet instructions for correct use.)
6. Thread your keyring or keychain through the eyelet.
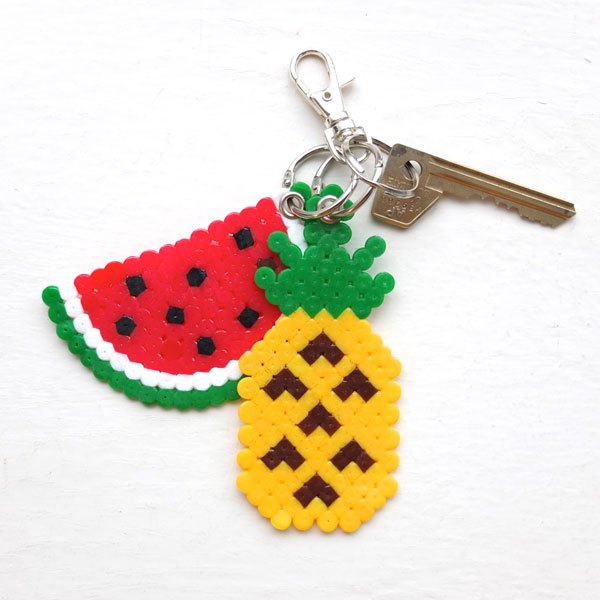
All done! Add your keys and your are set.
Hang your fruit keychain on your favourite summer tote bag to accessorize your accessory!
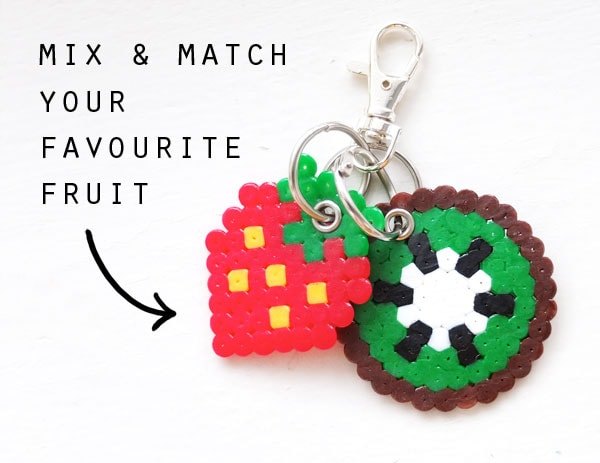
Mix and match your favourite fruits together to make a fruit salad keyring!
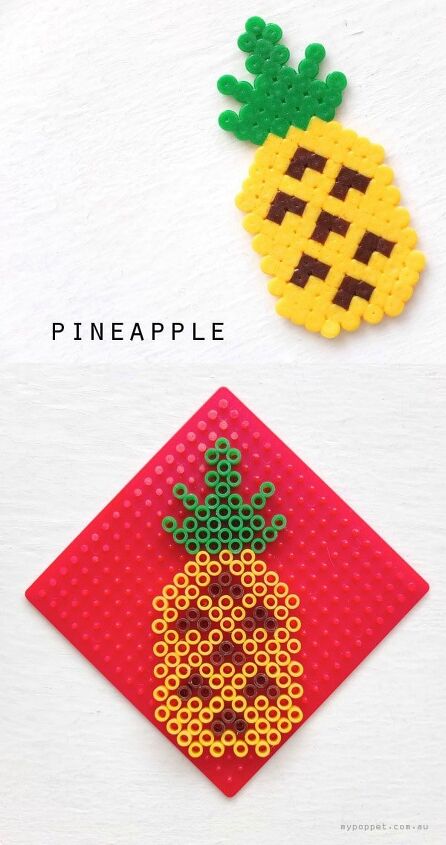
Hama bead Pineapple designYou will need:
- Yellow, Green & Brown Perler or Hama Beads
- Square Peg Board
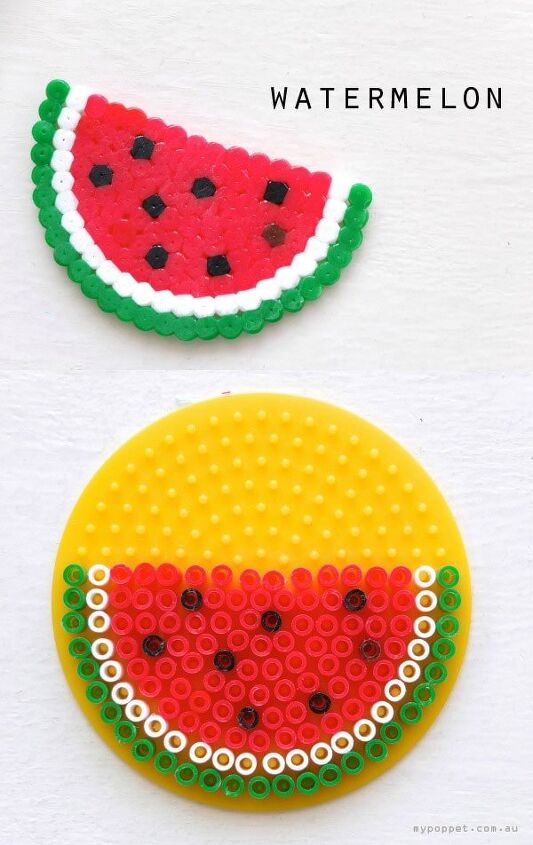
Hama bead Watermelon designYou will need:
- Red, White, Green & Black Perler or Hama Beads
- Circle Peg Board
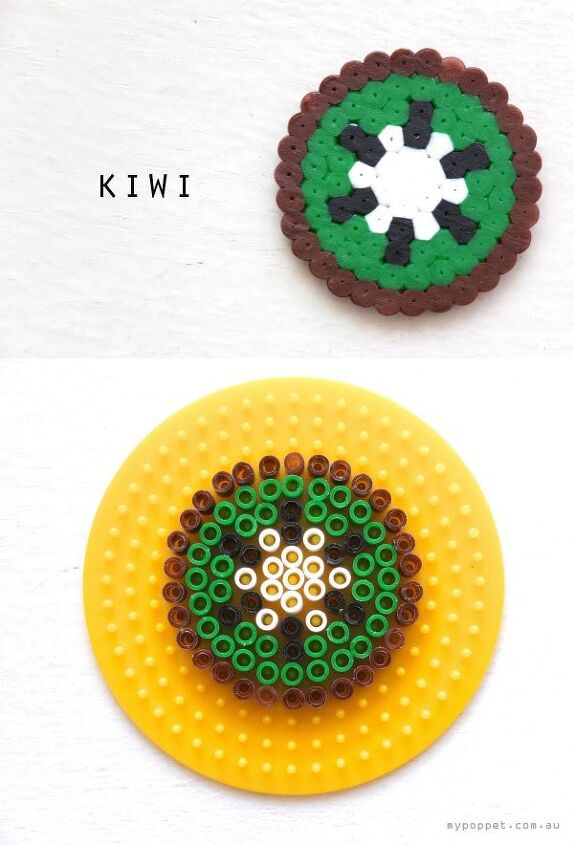
Hama bead Kiwi Fruit designYou will need:
- White, Brown, Green & Black Perler or Hama Beads
- Circle Peg Board
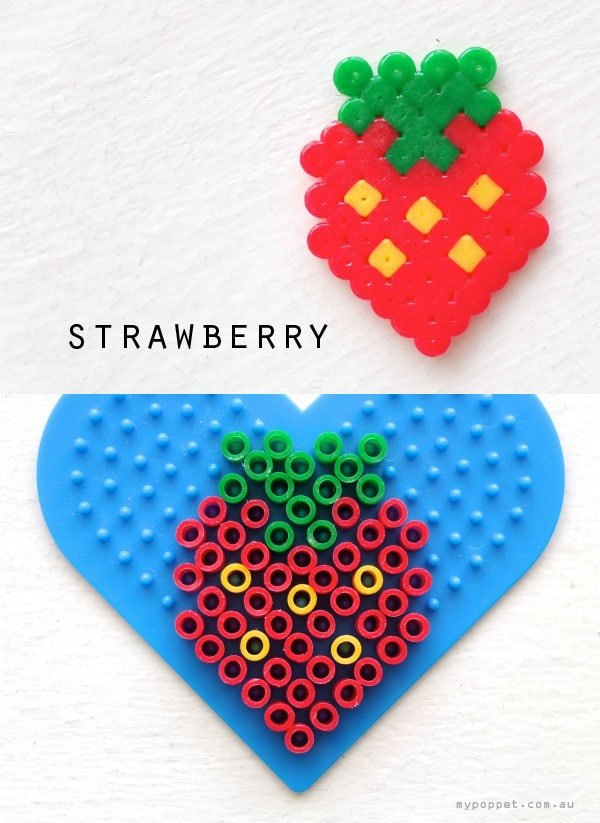
Hama bead Strawberry designYou will need:
- Red, Yellow & Green Perler or Hama Beads
- Square or Heart Pegboard
(I’ve used a heart shaped pegboard here for colour contrast only, the strawberry pattern can be made on a square pegboard)
Hope you enjoy making your Hama bead fruit keychains and bag charms.
The author may collect a small share of sales from the links on this page.


Comments
Join the conversation
Cancel. Stop