Customize Old Jeans With No-Sew DIY Appliques
Disclosure: Some of the links below are affiliate links, meaning, at no additional cost to you, I will earn a commission if you click through and make a purchase.
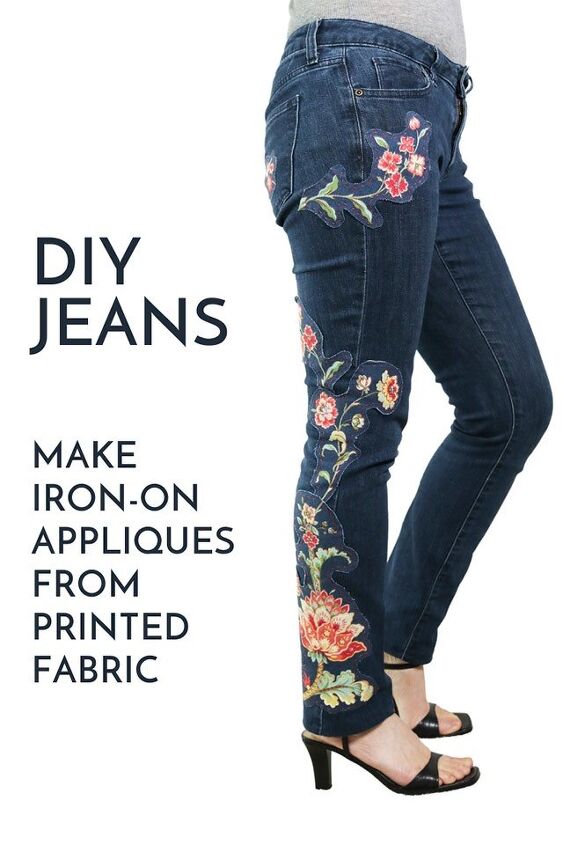
I love, love, love the embellished jeans trend from the ’90s and was happy to see it revived last year. Most of the time, I avoid disposable fashion trends because I prefer classic styles, but I do make some exceptions. Instead of buying a new jeans, I customized an old pair with DIY appliques and patches.
In this post, I’ll show you how to make no-sew DIY appliques and patches made from fabric cut-outs fused with HeatnBond fusible.
Or you can watch this video instead . . .
Materials
- Old pair of jeans
- Printed fabric for embellishments
- HeatnBond Lite (if you want to add stitching like I did) or HeatnBond UltraHold (if you want no sew)
- Embroidery floss – optional if you want to add hand stitching
A note about HeatnBond – yes, these links are affiliate links, but I’ve sewed many successful projects with this brand, like my prom dress to bomber jacket refashion. No disrespect to Pelon, but their double-sided fusible doesn’t even come close to HeatnBond in terms of adhesion and quality. HeatnBond is easy to apply, holds up well in washing and sticks securely to any kind of fabric.
There are 2 versions of HeatnBond fusible I recommend for this project. First, there’s HeatnBond Lite that’s designed for topstitching. It’s a paper-backed, double-sided iron-on adhesive that doesn’t gum up needles.
Then there’s HeatnBond Ultrahold in the red package that’s designed for no-sew appliques, which means it’s thicker and stronger than Lite. Good luck trying to sew through it. In a past project, I got the 2 fusibles mixed up and almost wore a hole in my finger trying to hand sew through the Ultrahold version.
Step 1: Prewash your printed fabric
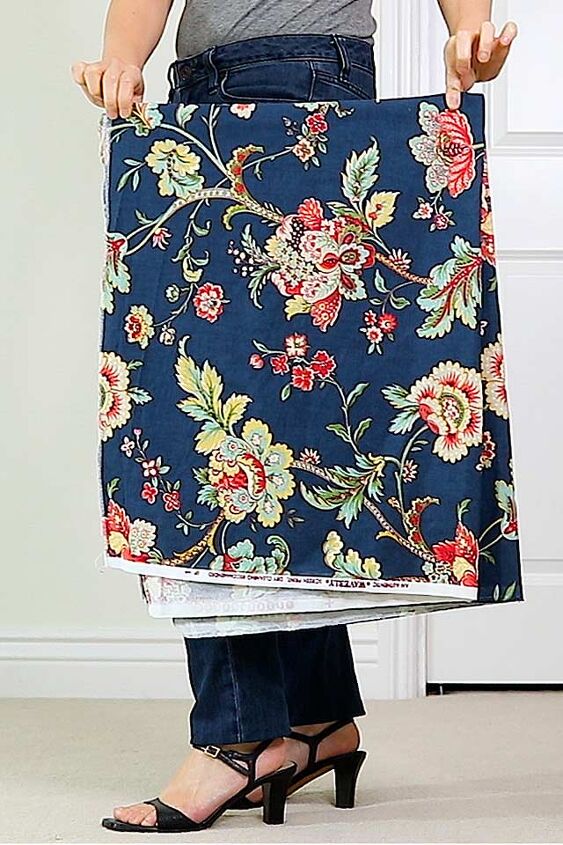
I bought half a yard of this lovely crewel upholstery fabric at Joann’s. There were many flowers of different sizes to play with, and I thought it would be fun to pair a traditional print with modern jeans. Wash and dry this fabric the same way you would the final garment.
Step 2: Iron the adhesive to the back of the printed fabric
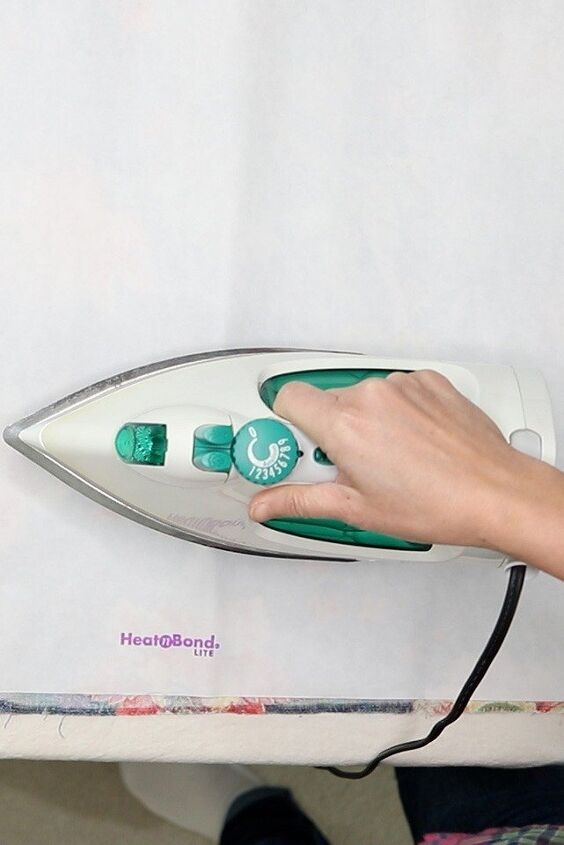
Lay the HeatnBond adhesive on the back of the fabric paper side up. Iron according to the instructions – place and hold a dry iron with medium heat on the paper liner for 2 seconds. Repeat until the entire surface is bonded. I used HeatnBond lite because I will be topstitching with embroidery floss. If you want no-sew appliques, use HeatnBond Ultrahold.
DO NOT RUSH THIS PROCESS. You really want to melt the adhesive into the fabric, otherwise, your applique will peel off (yes, I am speaking from experience). To be safe, I ironed twice because I’m paranoid that way.
Step 3: Cut out and arrange a bunch of flowers on the jeans

In terms of design, I had a vague idea of flowers climbing up the legs and little blossoms punctuating the back pockets. I cut out a bunch of flowers in different sizes and placed them in an arrangement I liked with the biggest flowers at the bottom.
Step 4: Iron the flowers in place
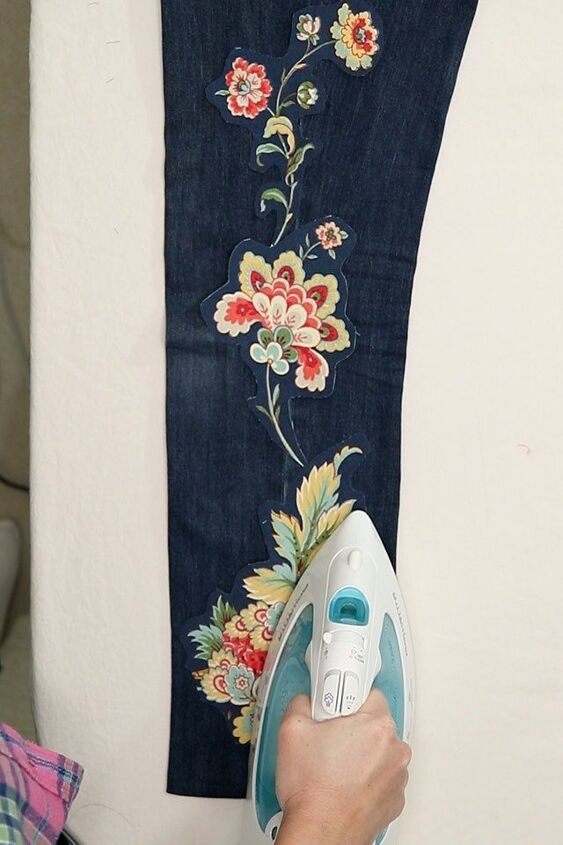
Remove the paper backing from the flowers. It’s easier to do if you score the paper with scissors or a pin. Iron in place.
DO NOT RUSH THIS PROCESS. I don’t mean to yell, but I don’t want you to make the same mistakes I did and have peeling appliques. Iron it twice to needed.
Step 5: Stitch the appliques with embroidery floss (optional)

To make the appliques pop, I topstitched the flowers with 3 strands of red embroidery floss. You can skip this step if you used HeatnBond Ultrahold.
Final thoughts
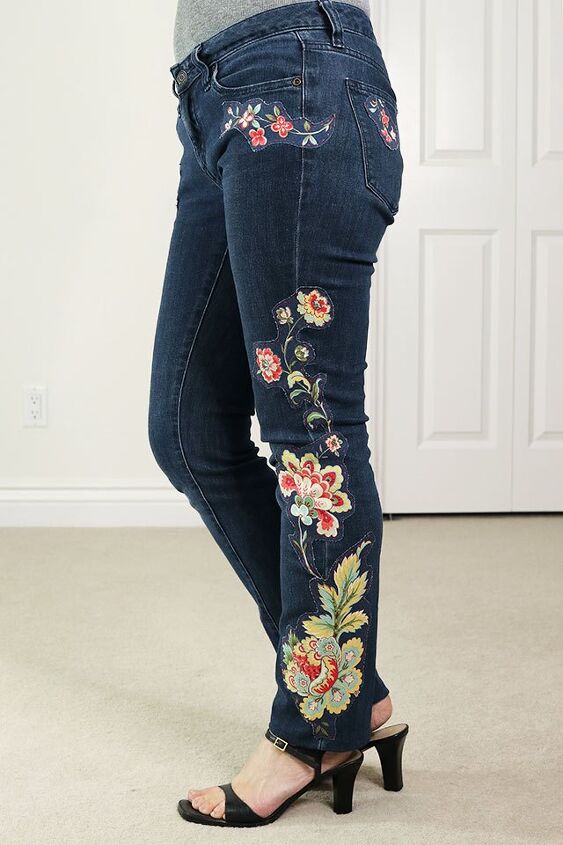
I had so much fun customizing these old jeans! The hardest part of this project was deciding which flowers to use and how to arrange them. You can use these DIY appliques on anything – jackets, bags, tops – it’s up to you. In less than 1 hour, I was parading the jeans around the house and got the big thumbs up from my family.
How to fray jeans
The author may collect a small share of sales from the links on this page.


Comments
Join the conversation
Cute idea! And so much less expensive than the pricey jeans which don’t look as good.
Great idea, will sure try it. thanks alot