Denim Refashion to Wide Legged 90's Jeans!

I recently made some Cargo Joggers from a wide, straight leg pants pattern called the Largo Cargos. I love them so much that I thought I would make more pants with the same pattern. This time I was going to refashion my husband’s old jeans to help me recreat some jeans I had in the 90’s.
Leg Prisons….
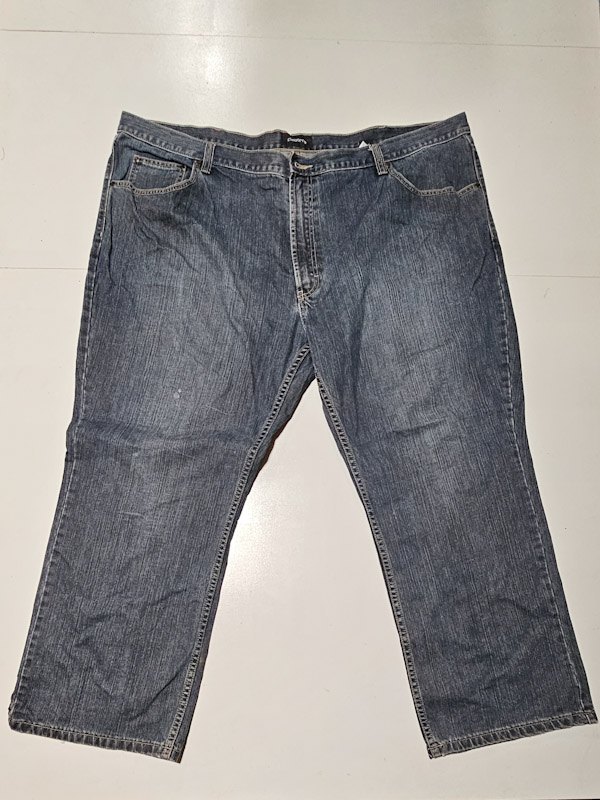
I often call jeans “leg Prisons.” I rarley wear them as I just don’t like how restrictive and hot they are. I thought I would try making some jeans with my husband’s old jeans to see if I would like them. Below you will see my husband’s jeans. My husband handed them off to me probably 3 years ago and said I could do whatever I wanted with them. Well, I don’t like jeans but good denim is expensive so I hung onto them until I had the perfect project.
Getting Started….
Before I started my project, I checked my pattern next to them to make sure I would have enough fabric. I definitely did. Then I removed the belt loops and waistband with my seam ripper.
Deconstucting and Reconstructing Jeans…
Once the waistband and belt loops were detached, I cut the front and back out one piece at a time. That way I could make sure to cut them the same. I cut out the front then laid it on the other side, matching up the pockets. I did the same with the back matching up the pocket as well as the yoke.
The original jeans had a lot of hardware that was going to be hard to remove and would leave the fabric damaged if I did remove it. So I tried to keep what hardware I could. Below you can see the different pieces I’ll be assembling. It’s nice because I was able to utilize the original front and back pockets as well as the zipper, zipper guard, waistband, coin pocket and possibly the belt loops. I say possibly because I’m still not sure if I want to add the belt loops or not. I don’t ever wear a belt with pants so I don’t see the purpose.
It was fairly easy to assemble the jeans. I just followed the Largo pattern instruction. I did watch a few youtube videos to help me sew the zip fly the correct way. The Largo pattern comes with a really helpful video as well too. I am the type of person that has to see something done a million times before I can feel confident enough to do it. So I found some zip fly videos on YouTube.
Working Through Tricky Parts…
Now, one thing that made this refashion a tad tricky was the back. The pattern has darts on the back but the jeans I was refashioning had a yoke. The seams on the yoke were too thick for me to even try to do a dart. It just would have been too bulky. So I ended up removing some fabric from the middle back, above the yoke and then I removed more fabric from the sides of the waist. Once I felt like it was fitting right I was able to put the waistband on.
Pockets!!!
The pattern has front patch pockets that are sewn to the outside. To keep that kind of patch pocket look I topstitched around the original pants pocket bag. I really like the way it looks. Because this is a refashion, I didn’t have enough fabric to do a cargo pocket. Which was totally fine.
It was also nice because I didn’t have to fiddle with making and then placing back pockets on. I simply left the original ones on. The only problem was, the top stitching on the pockets was lighter than the gold thread I was using on the front. So I decided to do some simple decorative hand stitching around the outside of both back pockets. I used my machine to stitch over the line next to the one I hand stitched. Then I left the decorative stitch in the middle alone. So the thread kind of goes from darker on the outside to lighter inside of the pocket.
I had to remove the coin pocket when I was cutting the pants out because it was in a place that made it hard for me to use it. So I had to remove the rivets and take it off. The fabric was a lot darker underneath where the coin pocket had been removed. I wasn’t sure I was going to put the coin pocket back on, but after I pinned it on I really liked it. Plus it kind of helped to conceal the dark fabric that was left when I moved it from its original spot.
One Last Thing…
The last thing I did was spray bleach the jeans. I really wanted them to look worn and rugged. I had some really rugged jeans in the ‘90’s that I absolutely loved and I thought it would be fun if these had that same vibe. I also wanted to try and blend in some of the darker spots that were left from removing the belt loops and coin pocket. I mixed up two different strengths of bleach in two different spray bottles. Then I alternated spraying the jeans with the different solutions.
Once they were washed and air dried I tried them on. Although I’m not certain I still like the whole rugged jean look like I did in the 90’s, I do like these jeans. Denim is still not my favorite fabric but these jeans fit me soooo good. I think I may actually wear them through the winter.
Styling my 90’s Jeans!
These Largo jeans go with so may things, just like my cargo joggers I made with this same pattern. Here they are with two of my dolman tops: the Melody with a ruffle sleeve hack and the La Bella Donna with a lantern sleeve hack.
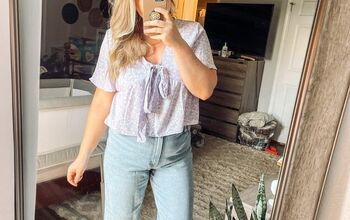
Because they are high waist pants my two crop tops look great with them as well. Here is my Lenox and Alrington tops. My Arlington has a square neck hack.
My favorite Rhapsody top and this super comfy hacked Dockside shirt looks great with these jeans too. I really feel like I could wear nearly every shirt I own with them. Maybe jeans will be something I start wearing again.
Let’s be friends!
If you are looking for a pattern to help you recreate those jeans you love, hopefully this post helps you figure out what will work. Let’s be friends on all the socials! Come follow along on Pinterest, Instagram and Facebook so we can chat about all our sewing projects!
Enjoyed the project?
The author may collect a small share of sales from the links on this page.






Comments
Join the conversation
Wow, that is awesome. I alter clothes all the time, even jeans, but not to this extent. You have given me inspiration. Thanks.