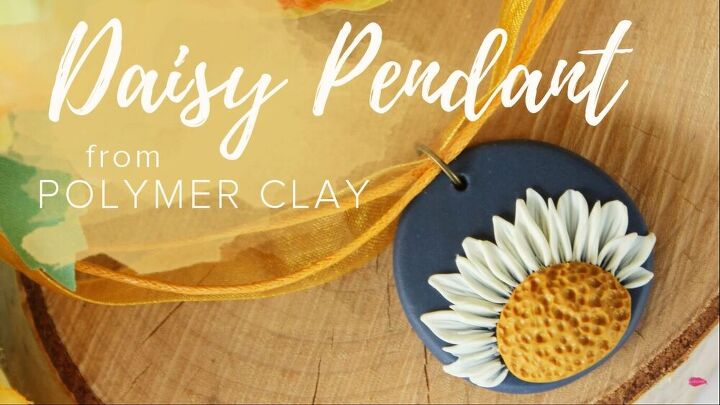
How to Make Polymer Clay Pendants - Adorable Daisy Pendant Tutorial

There’s a lot of hype about polymer clay earrings but you can also make polymer clay pendants too! In this DIY pendant tutorial, I will show you how easy and fun it is to make a daisy pendant.
Inspired by nature, I used a mix of dark and bright colors to make this lovely DIY necklace pendant. Scroll down and get inspired!
Tools and materials:
- Acrylic roller
- Blade
- Slicing tool
- Dotting tools
- 3 Different polymer clay colors
- Shape cutters
- Toothpick
- Needle
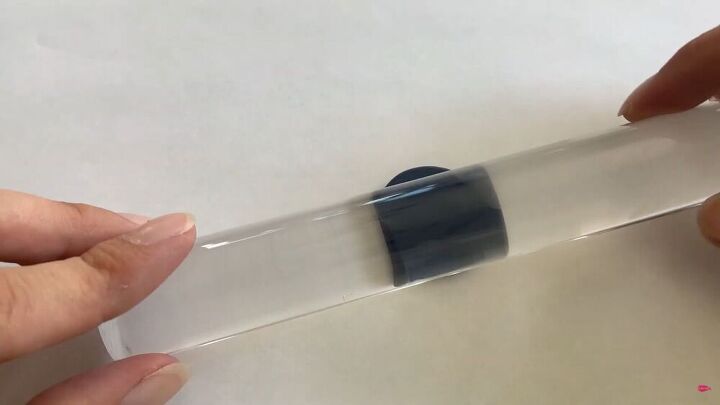
1. Prepare the base for the pendant
To make polymer clay pendants, it’s essential to start with the base. Here, I am using a lovely, rich royal blue color as my base. Roll a ball of clay with an acrylic roller to flatten it evenly and make a circle.
Tip: Be sure to alternate sides as you go along to make the shape even.
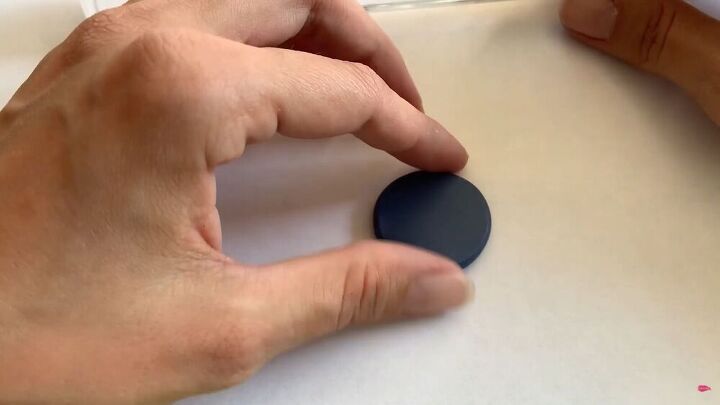
Clean the edges with your fingertips for a smooth finish.
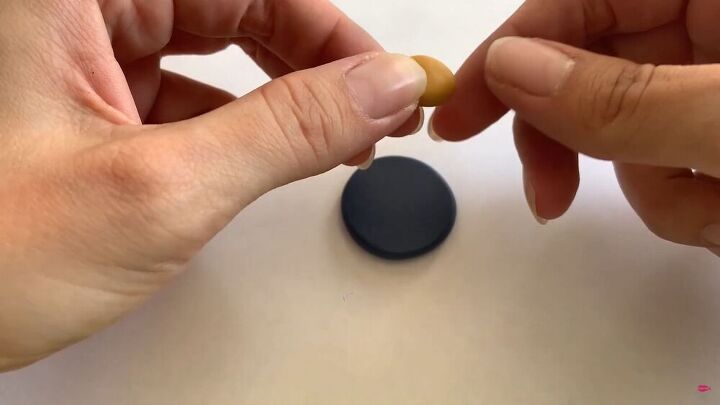
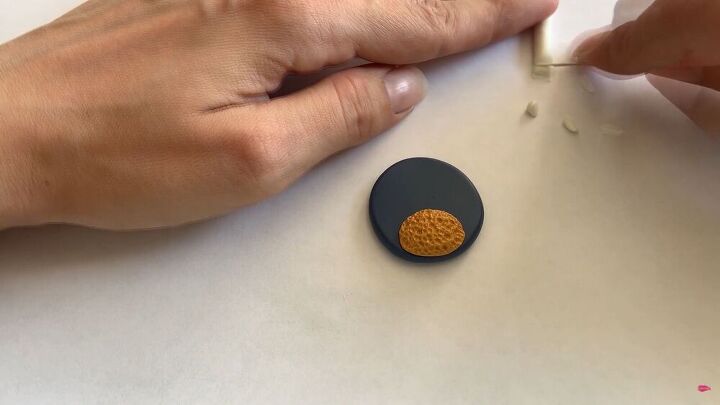
2. Make the center of the daisy
Select a lovely gold color. Cut the polymer clay ball in half. Then, flatten the piece and shape it into an oval.

Place it on the edge of the base, as shown.
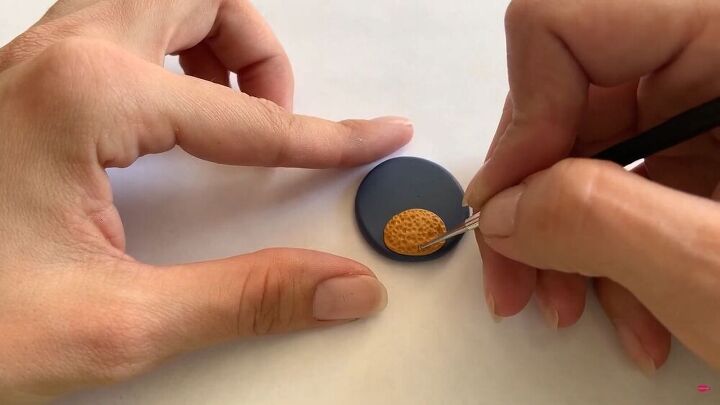
With your dotting tool, gently create small indentations in the gold shape. This will give the flower an amazing 3D effect.
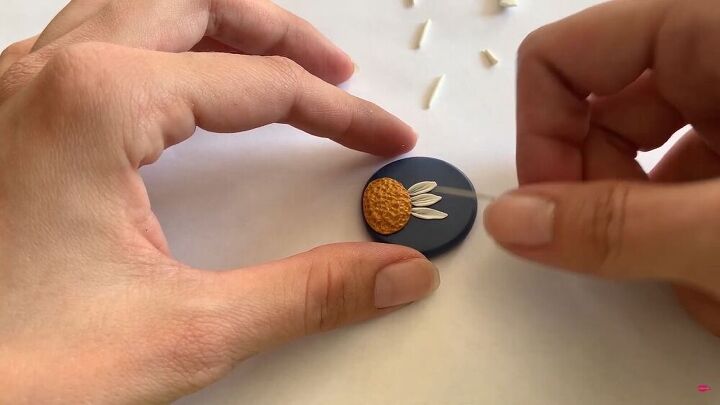
3. Create the daisy petals
Using a white color, roll the polymer clay into a tube and slice off equal pieces, as shown. Here, I used a needle for the slicing, since the pieces are so tiny.
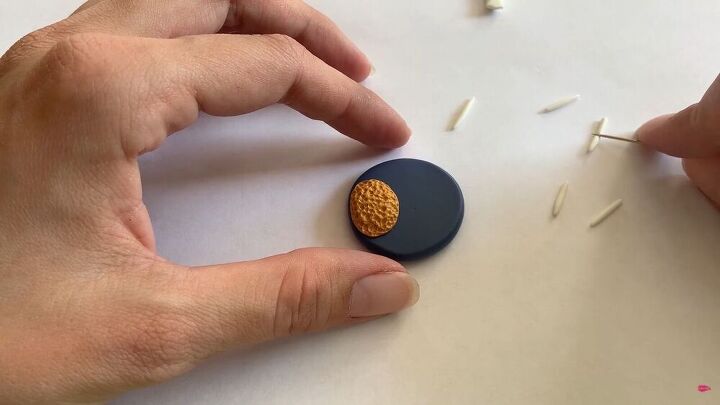
Next, roll each piece into thin tubes and slice them in half, making sure each piece is equal in length.
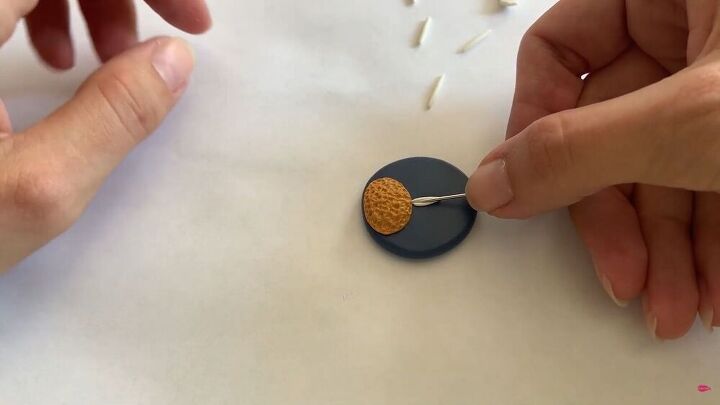
Using your needle, place each clay piece on the base and around the middle part. When you press the petal into the base, make a slight indent in the center, too.
Also, while pressing on the center on the petal, carefully move the clay from the center to the side. This will create stunning 3D effects on each petal. Continue this process until you’ve filled up the petals for the daisy pendant.
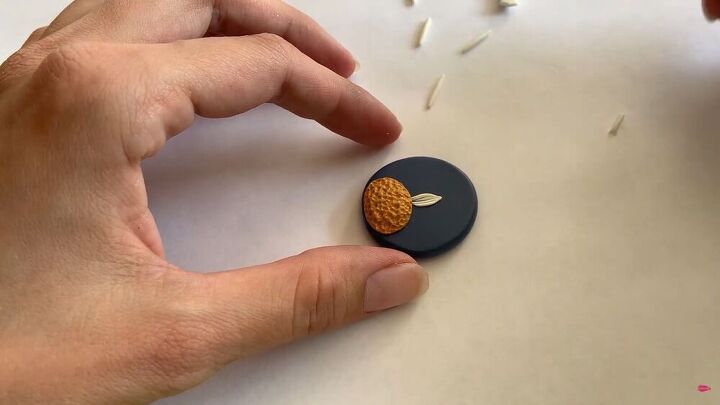
You can elongate some petals to give the DIY pendant some linear dimension.
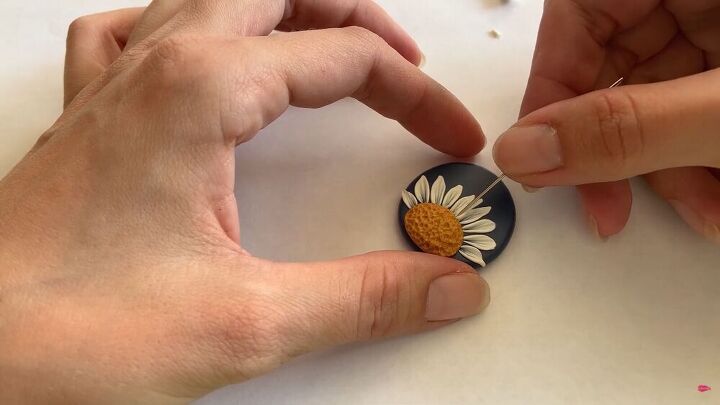
Once you’re done with creating the basic daisy pendant, you can add a second layer of petals on top of the first.
4. Baking the polymer clay
Finally, bake your polymer clay pendant to harden it. Check the instructions on your polymer clay to see at what temperature and for how long you should bake the clay, as it varies.
For this tutorial, I used firmer polymer clay from the brand FIMO, as it's easier to work with to create more intricate designs. I baked the DIY pendant for 30 minutes at 110 degrees Celsius (230 degrees Fahrenheit), as per the instructions.
Tip: Before baking the daisy pendant, pierce a hole in the pendant so that you can loop through a string or cord afterward.
How to make polymer clay pendants tutorial
How stunning is this daisy pendant? I hope this tutorial inspires you to try designing your own polymer clay pendants. Let me know what you think of this DIY daisy pendant in the comments below.
The author may collect a small share of sales from the links on this page.


Comments
Join the conversation
So dang cute! Can't wait to make one